
Soups & Stews
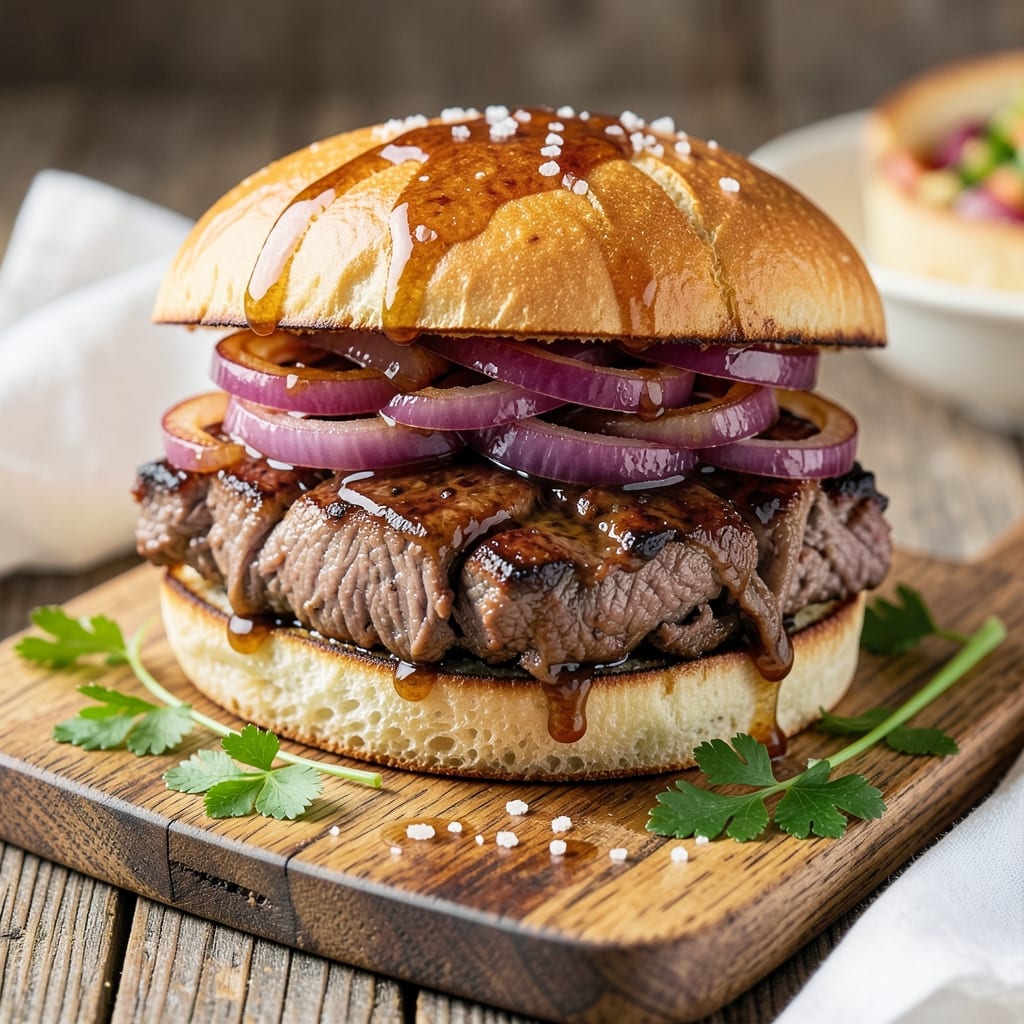
This beef and onion sandwich recipe delivers the kind of comforting, caramelized sweetness that makes every bite worth savoring. The secret lies in slow-cooking beef until it's fork-tender, then layering it with onions that turn golden and jammy—transforming simple ingredients into something restaurant-worthy. I've perfected this technique over years of testing, ensuring the beef stays juicy while the onions develop that perfect balance of sweetness and depth.
What sets this recipe apart is the method: searing the beef first creates a rich, flavorful base, while slow cooking breaks down the meat into tender shreds. The onions caramelize beautifully in the same pot, their natural sugars intensifying as they cook down into a glossy, slightly sticky layer. This isn't just a sandwich—it's a meal built on layers of texture and flavor that come together effortlessly.
By the time you assemble these sandwiches, you'll have perfectly tender beef, sweet onions that practically melt in your mouth, and crusty rolls that hold up to every bite. The result is a sandwich that's hearty enough for a weeknight dinner but impressive enough for company. The best part? It all comes together in one pot, with minimal cleanup and maximum flavor.
Serve with a side of crispy potato wedges or a simple green salad to round out the meal. The sandwiches stay warm and delicious straight from the oven, making them perfect for feeding a crowd or meal prepping for the week. Let's get started on creating this comforting classic.
Ingredients for beef and onion sandwich
Simple ingredients that transform into restaurant-worthy sandwiches with caramelized sweetness and tender beef.
| Ingredient | Amount | Notes |
|---|---|---|
| Chuck Roast 🥩 | 1 ½ lb | Cut into 1-inch cubes for even cooking |
| Yellow Onions 🧅 | 3 whole | Thinly sliced for caramelization |
| Beef Broth 💧 | 2 cups | Low-sodium preferred for flavor control |
| Worcestershire Sauce 🍶 | 2 tbsp | Adds deep umami flavor |
| Brown Sugar 🍚 | 2 tbsp | Enhances onion sweetness |
| Balsamic Vinegar 🍷 | 1 tbsp | Adds tangy depth |
| Garlic Cloves 🧄 | 4 cloves | Minced for aromatic base |
| All-Purpose Flour 🌾 | 1 tbsp | For thickening filling |
| Salt 🧂 | 1 ½ tsp | Kosher or sea salt |
| Black Pepper 🌶️ | ½ tsp | Freshly ground preferred |
| Crusty Rolls 🍞 | 8 whole | Hawaiian rolls recommended |
| Butter 🧈 | 2 tbsp | For toasting rolls |
| Mayonnaise 🥫 | ¼ cup | Optional for extra richness |
| Mustard 🍯 | 1 tbsp | Dijon preferred for tang |
| Fresh Parsley 🌿 | 0.1 cup | Chopped for garnish |
The chuck roast is the star here—look for cuts with good marbling at Costco or your local butcher shop. Pre-cubed chuck saves time, but if you're buying a whole roast, ask for it to be cut into 1-inch cubes. Yellow onions are non-negotiable for that signature caramelized sweetness. Sweet onions work best, but yellows in a pinch will do. I always grab extra because you can't have too many perfectly caramelized onions. For the rolls, Hawaiian sweet rolls from the bakery section hold up perfectly—they're slightly sweeter and stay soft even when toasted.
No Worcestershire sauce? Soy sauce plus a dash of balsamic gets you close. Running low on beef broth? Water plus bouillon cubes works, but you'll miss that deep flavor. The brown sugar can be swapped for white sugar, but it won't caramelize as beautifully. For the rolls, if you can't find Hawaiian rolls, brioche or potato rolls are great alternatives. Fresh parsley is ideal, but dried parsley at half the amount works in a pinch. The mayonnaise is optional but adds that perfect creamy texture—skip it if you're watching calories or prefer a lighter sandwich.
The beef mixture keeps beautifully in the fridge for 4-5 days—perfect for meal prep. Portion it into containers with a layer of broth to keep it moist. The rolls should be stored separately and toasted fresh before assembling. For freezing, the filling freezes well for 3 months—just thaw overnight in the fridge before reheating. These sandwiches reheat beautifully in the oven at 350°F for 10-15 minutes, with a sprinkle of water to keep them juicy. The leftovers are even better the next day—if that's possible!
Why You'll Love This Recipe
- One-Pot Magic: I swear by this recipe when I’m too tired to wash dishes. Chuck roast and onions slow-cook in the same pot—no extra pans, no fuss—while the broth and Worcestershire do all the heavy lifting. By the time it’s done, my kitchen looks like I actually know what I’m doing.
- Sweet-Savory Crunch: That caramelized onion? Chef’s kiss. The brown sugar gives them a sticky-sweet edge that cuts through the rich beef, and the Worcestershire adds this deep, umami punch. It’s the kind of flavor combo that makes you close your eyes mid-bite.
- Leftover Goldmine: This recipe practically begs to be made in bulk. The beef stays tender for days, so I can throw it into tacos, pasta, or even breakfast hash. Honestly, I’ve eaten this for lunch three times this week and still haven’t gotten sick of it.
- Budget Hero: Chuck roast is cheap, onions are cheap, and a little beef broth stretches it into a meal that feeds four for under $15. I’ll be real: this is how I keep my grocery bill from wrecking me, and my family doesn’t even complain—just eats seconds.
Step-by-step instructions for beef and onion sandwiches
This recipe transforms humble chuck roast into tender, caramelized beef filling that melts into Hawaiian rolls—sweet, savory, and irresistible.
🍳 Step 1: Sear and Braise the Chuck Roast
Heat a large Dutch oven over medium-high heat and add the 1.5 lb chuck roast cut into 1-inch cubes. Sear undisturbed for 3-4 minutes until deeply browned on all sides. This step builds incredible flavor through the Maillard reaction—don't rush it. Remove the beef and set aside.
In the same pot, add 3 whole yellow onions sliced thinly. Cook for 5 minutes until softened but not browned. Stir in 4 cloves minced garlic and cook for 30 seconds until fragrant. Sprinkle with 1.5 tsp salt and 0.5 tsp black pepper, then add 2 tbsp brown sugar and 1 tbsp balsamic vinegar. Stir well and cook for another 2 minutes until the onions begin to caramelize.
🍳 Step 2: Build the Flavorful Filling
Return the seared beef to the pot. Pour in 2 cups beef broth and 2 tbsp Worcestershire sauce, scraping up any browned bits from the bottom. Bring to a simmer, then reduce heat to low and cover. Let it cook for 1.5 hours, stirring occasionally, until the beef is fork-tender and the sauce has thickened.
Here's the thing—this slow cook is where all the magic happens. The beef becomes melt-in-your-mouth tender while the onions caramelize further, creating a sweet-savory balance. If the sauce reduces too much before the beef is done, add a splash of water or broth to keep it moist.
🍳 Step 3: Thicken and Finish the Filling
Once the beef is tender, increase heat to medium and stir in 1 tbsp all-purpose flour. Cook for 3-4 minutes, stirring constantly, until the sauce thickens slightly. Taste and adjust seasoning—you might need a pinch more salt or pepper. Remove from heat and let it cool slightly before assembling the sandwiches.
This thickening step ensures your filling has perfect consistency—neither too runny nor too dry. The flour helps bind everything together while adding a subtle richness. If you're using the optional 0.25 cup mayonnaise and 1 tbsp mustard, mix them in now for extra creaminess.
🔪 Step 4: Toast and Assemble the Sandwiches
While the filling cools, slice the 8 whole crusty rolls in half and toast them in a skillet with 2 tbsp butter over medium heat for 1-2 minutes per side until golden brown. Spread the bottom half of each roll with a generous spoonful of the beef and onion filling.
Top with the remaining roll halves and press gently. Garnish with 0.1 cup chopped fresh parsley for a pop of color and freshness. Serve immediately while the rolls are still warm and the filling is at its most flavorful.
⏰ Step 5: Serve and Enjoy
Cut each sandwich in half and serve with a side of extra filling for dipping if desired. The combination of tender beef, sweet caramelized onions, and buttery rolls creates a sandwich that's perfect for lunch or dinner. The filling stays moist and flavorful, while the crusty rolls provide the perfect texture contrast.
Real talk: these sandwiches are even better the next day when the flavors have fully melded. Store leftovers in the refrigerator for up to 3 days and reheat in a skillet with a little butter to restore that crispy roll texture. Enjoy every bite of this comforting, hearty meal!
Pro Tips For Making Beef And Onion Sandwich
- SEAR THE ROAST FIRST: Chuck roast loves a good crust, and skipping this step means bland, gray meat. Hit it with high heat in a Dutch oven—no crowding—until deep brown spots form (about 3-4 minutes per side). The Maillard reaction here is what builds flavor, not just the slow cook.
- CHAR THE ONIONS LOW: I used to rush the onions and end up with bitter, mushy messes. Instead, cook them on medium-low heat for 15-20 minutes, stirring occasionally, until they’re caramelized to a deep gold—not black. Add a splash of beef broth halfway if they stick; it’ll save the batch.
- SALT THE BROTH: Worcestershire and brown sugar already add sweetness, but beef broth often tastes flat. Boost it with ½ teaspoon salt per cup before adding it to the pot. Trust me, the difference in depth is noticeable—especially when you’re serving it on toasted buns.
- REST THE MEAT LONG: After pulling the roast from the pot, tent it with foil and let it sit for 15-20 minutes. I know, you’re hungry, but cutting into it too soon means dry, stringy slices. The juices redistribute—this is non-negotiable for sandwiches where texture matters.
Common mistakes when making this dish
Overcooking the Beef
The most common mistake is letting the beef turn to mush while slow-cooking. Chuck roast should be fork-tender, not falling apart completely. I've ruined more than one batch by walking away and forgetting about it. Keep a close eye on the beef after the 1.5 hours mark—it should shred easily with a fork but still hold its shape. If it's falling apart, you've overcooked it. 🥩
Skipping the Sear
Many home cooks skip searing the beef, thinking it's not necessary. Big mistake! That initial 3-4 minute sear creates the Maillard reaction, which builds deep, caramelized flavors that you simply can't get any other way. If you skip it, your filling will taste flat and one-dimensional. Trust me, take the extra 5 minutes to get that golden crust.
Underestimating Onion Time
Caramelizing onions takes patience, and rushing this step is a huge mistake. The onions need to cook slowly to develop their natural sugars and turn golden. I've seen people add them at the beginning and walk away—don't do that! Cook them for 5 minutes before adding the beef, then let them caramelize further during the slow cook. If they're still pale after 1.5 hours, they won't be sweet enough.
Ignoring the Flour Thickener
Many recipes call for flour to thicken the sauce, but some cooks skip this step to save time. Don't! That 1 tbsp flour at the end creates the perfect consistency—thick enough to hold together in the sandwich but still moist and flavorful. Without it, your filling will be too runny and the sandwiches will fall apart. Stir it in for those final 3-4 minutes and watch the magic happen.
Using the Wrong Rolls
Not all rolls are created equal, and using the wrong type can ruin your sandwich. Soft, fluffy rolls will get soggy from the juicy filling. Instead, opt for Hawaiian sweet rolls or brioche rolls—they hold up better and have just enough sweetness to complement the savory filling. Toasting them in butter gives that perfect crispy exterior while keeping the inside soft. Don't skimp on this step!
Overfilling the Sandwiches
It's tempting to pile on the filling, but overstuffing your sandwiches leads to messy bites and soggy rolls. Use about ¼ cup of filling per sandwich—enough to be generous but not so much that it spills out when you take a bite. This keeps the rolls from getting soggy and makes each bite clean and enjoyable. Trust me, less is more in this case. 🍞
Nutrition facts
Frequently asked questions
Can I use ground beef instead of chuck roast?
Yes, but the texture will be different. Ground beef cooks faster and won't develop the same tender, shredded texture. If you use it, brown it well first, then add the onions and broth. You may need to reduce cooking time to 45-60 minutes to avoid drying it out. The flavor will still be delicious, just more uniform in texture.
How do I make this recipe in a slow cooker?
Transfer the seared beef and onions to a slow cooker after the initial sauté. Add the broth, Worcestershire, brown sugar, and balsamic. Cook on low for 6-7 hours or high for 3-4 hours until the beef is tender. Finish by thickening with flour on the stovetop before assembling sandwiches. The slow cooker makes this even easier with minimal effort!
What's the best way to reheat leftovers?
Reheat sandwiches in a skillet over medium heat with 1 tbsp butter for 2-3 minutes per side until the rolls are crispy again. For filling-only leftovers, warm in a saucepan with a splash of broth over low heat until heated through. Microwaving can make the rolls soggy, so avoid it if possible.
Can I make this gluten-free?
Use gluten-free beef broth and Worcestershire sauce (check labels). For the rolls, try gluten-free Hawaiian rolls or make your own with a gluten-free bread mix. The filling itself is naturally gluten-free, so only the bread needs substitution. The texture will be slightly different but still delicious.
What makes these onions so sweet?
The sweetness comes from slow caramelization! Cooking onions for 1.5 hours with brown sugar and balsamic vinegar breaks down their natural sugars, creating that jammy, sweet flavor. The key is patience—don't rush this step or you'll miss the magic. The longer they cook, the deeper the sweetness becomes!