
Main Courses
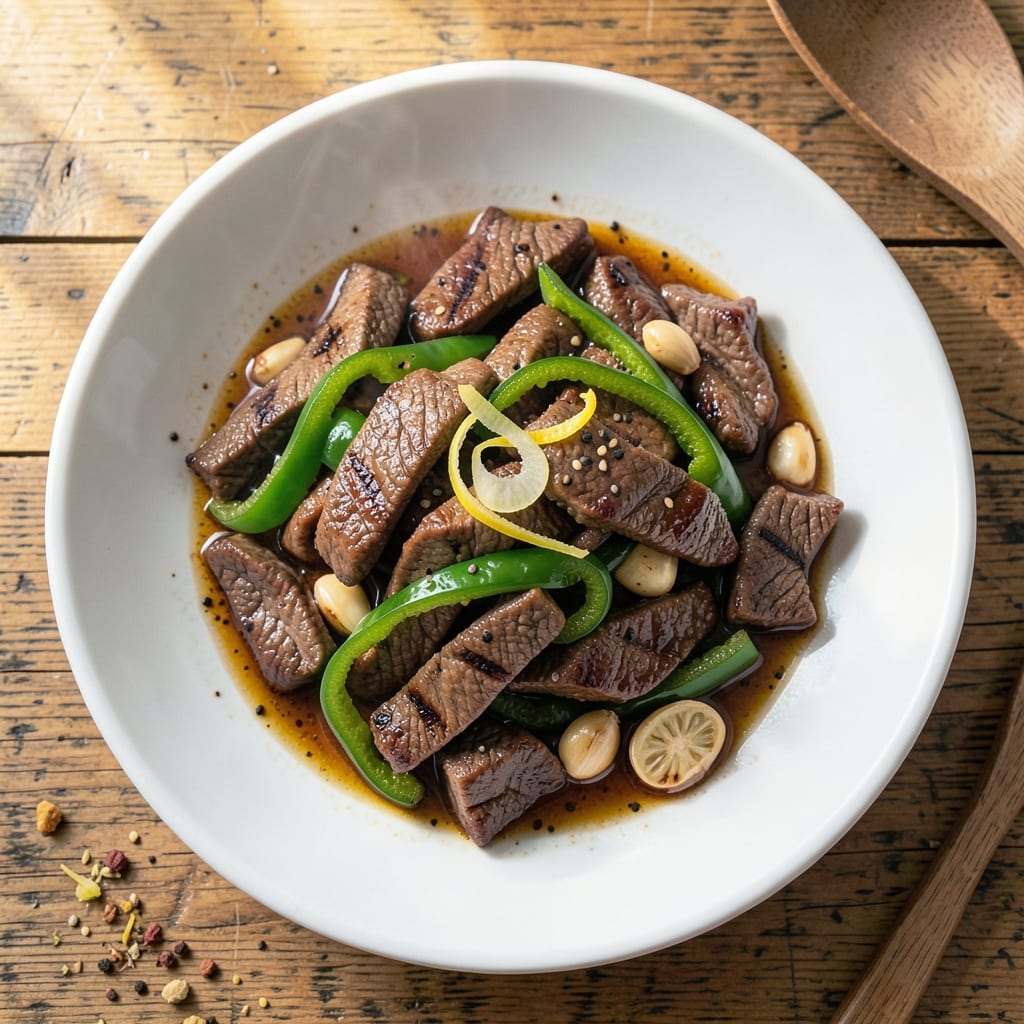
Mastering the perfect beef and green pepper stir fry starts with achieving that coveted wok-hei crispiness—where tender beef meets charred, crunchy peppers in a symphony of textures. This recipe delivers restaurant-quality results with a technique that balances high heat and precise timing, ensuring every bite is packed with flavor and satisfying crunch. The secret lies in proper prep and cooking methods that transform tough beef into melt-in-your-mouth strips while keeping those peppers delightfully crisp.
What sets this stir fry apart is the combination of traditional wok techniques with simple, accessible ingredients you likely already have on hand. We'll focus on achieving that signature crispy texture through quick searing and high-heat cooking, while a well-balanced sauce ties everything together with just the right amount of tang and umami. No fancy equipment needed—just a good skillet and proper technique to replicate that wok-hei effect at home.
The result is a dish that's vibrant, flavorful, and perfectly balanced—tender beef with just the right amount of char, crisp-tender peppers, and a sauce that enhances rather than overpowers. This isn't just another stir fry; it's a technique that transforms simple ingredients into something restaurant-worthy. The aroma alone will have everyone gathering around your kitchen as the sizzling begins.
Whether you're serving this as a weeknight dinner or preparing for a meal with friends, this beef and green pepper stir fry delivers professional results with minimal effort. The beauty of this recipe is its versatility—easily adaptable to different tastes while maintaining that essential crispy texture that makes it unforgettable. Let's get started on creating your perfect stir fry.
Ingredients for beef and green pepper stir fry
Simple ingredients, high-heat technique—this stir fry delivers restaurant-quality wok-hei crispiness at home.
| Ingredient | Amount | Notes |
|---|---|---|
| Flank Steak 🥩 | 1 ½ lb | Thinly sliced against grain |
| Green Bell Peppers 🧅 | 3 whole | Thinly sliced, seeds removed |
| Garlic Cloves 🧄 | 6 cloves | Minced, fresh preferred |
| Fresh Ginger 🌿 | 1 tbsp | Finely grated, peeled |
| Soy Sauce 🍶 | ½ cup | Low-sodium preferred |
| Oyster Sauce 🍶 | 2 tbsp | High-quality brand recommended |
| Sesame Oil 🫒 | 1 tbsp | Toasted, for aroma |
| Honey 🍯 | 1 tbsp | Pure, for balance |
| Rice Vinegar 🍶 | 1 tbsp | White or seasoned |
| Vegetable Oil 🫒 | 3 tbsp | High smoke point preferred |
| Cornstarch 🌾 | 1 tbsp | For tenderizing beef |
| Salt 🧂 | 1 tsp | Kosher or sea salt |
| Black Pepper 🌶️ | ½ tsp | Freshly ground |
| Sesame Seeds 🌾 | 1 tbsp | Toasted, for garnish |
| Fresh Cilantro 🌿 | ¼ cup | Chopped, for garnish |
The flank steak is your foundation—look for well-marbled cuts at Whole Foods or your butcher's counter. Thinly slicing against the grain transforms tough meat into tender strips. Costco often carries pre-sliced versions, but slicing yourself ensures even cooking. Green bell peppers should be firm, vibrant, and free of soft spots—Trader Joe's organic selection works perfectly. Avoid pre-sliced peppers; their texture ruins the crisp-tender finish. Fresh garlic and ginger are non-negotiable here—their aromatic compounds are essential for that signature stir-fry depth.
No flank steak? Sirloin or ribeye work in a pinch, but slice thinner. Pre-sliced peppers? Use only the freshest, smallest slices and pat dry thoroughly. Substitute oyster sauce with 1 tbsp hoisin plus 1 tsp fish sauce (if vegetarian, use soy sauce). The cornstarch marinade is critical—it tenderizes the beef and creates that signature wok-hei sheen. For extra crispiness, toss peppers in 1 tsp cornstarch before cooking. Sesame oil should be toasted—Kadoya brand is my go-to for authentic flavor. If you're short on time, pre-minced garlic from a jar works, but fresh always wins.
This stir fry reheats beautifully—keep it covered in the fridge for up to 3 days, though texture softens slightly. For maximum crispiness, cook fresh and serve immediately. Store sesame seeds and cilantro separately; they lose flavor when refrigerated. The sauce can be prepped ahead and stored for 1 week—just reheat gently before using. Garnish with toasted sesame seeds right before serving to preserve their aroma. Leftovers? Toss with steamed rice for a quick lunch—the flavors only deepen overnight
Why You'll Love This Recipe
- One-Pan Magic: I swear by this recipe when I’m too tired to scrub pots—just slice the peppers, sear the flank steak, and toss everything in one pan. The garlic and ginger caramelize right into the beef, so you don’t even need a separate sauce pan.
- Umami Bomb: That first bite? The soy sauce’s deep savoriness clings to the tender beef while the green peppers stay crisp—like a perfect balance of chewy, salty, and fresh. Honestly, it’s the kind of flavor that makes you pause mid-bite.
- Lunchbox Hero: Between us, this is my go-to for meal prep. Double the batch, store it in containers, and reheat it all week—no sad, soggy leftovers here. The peppers hold their crunch, and the beef stays juicy, even after chilling.
- Budget Powerhouse: Flank steak is lean but packs serious punch, and green peppers are dirt cheap. A single cut of beef stretches across two meals, and the spices cost pennies. It’s the kind of recipe that makes me feel like I’m eating fancy without breaking the bank.
Step-by-step instructions for wok-hei crispy beef with crunchy peppers
Master the wok-hei technique for restaurant-quality beef that stays tender yet develops a crispy crust.
Prepare the Beef with Cornstarch Tenderizer
Begin by slicing the 1.5 lb flank steak thinly against the grain—this ensures tender bites. I like to slice it as evenly as possible, about ⅛-inch thick. Place the sliced beef in a large bowl and add the 1 tbsp cornstarch, 1 tsp salt, and 0.5 tsp black pepper. The cornstarch creates a delicate crust that crisps beautifully while keeping the meat tender.
Using clean hands or tongs, toss the beef gently but thoroughly to coat each piece evenly. Let it sit for 10 minutes at room temperature while you prep the remaining ingredients. This resting period allows the cornstarch to adhere properly and the meat to cook more evenly in the wok.
Prep Vegetables and Aromatics for Maximum Crunch
Slice the 3 whole green bell peppers into thin strips, removing seeds and membranes. The thinner the slices, the more they'll retain their crunch. Finely grate the 1 tbsp fresh ginger and mince the 6 cloves garlic cloves—these aromatics form the flavor foundation of the dish. I prefer to prep these while the beef marinates to keep everything fresh.
In a small bowl, combine the 0.5 cup soy sauce, 2 tbsp oyster sauce, 1 tbsp honey, 1 tbsp rice vinegar, and 1 tbsp sesame oil. This sauce will caramelize beautifully while cooking, creating a glossy, flavorful glaze. Keep this mixture at room temperature until ready to use—cold sauce can dull the flavors when added later.
Create Wok-Hei with High Heat and Proper Oil
Heat a wok or large skillet over high heat until it's smoking slightly. Add 2 tbsp vegetable oil and swirl to coat the surface. The oil should shimmer but not burn. Add half of the beef in a single layer and let it sear undisturbed for 1-2 minutes until the edges turn golden brown and crispy. This is where the wok-hei technique comes into play—high heat creates that signature smoky, charred flavor.
Once the first batch is browned, remove it to a plate and repeat with the remaining beef. Don't overcrowd the pan—this prevents proper browning. The beef should cook in 2 batches to maintain that crispy texture. Set aside the cooked beef while you prep the vegetables.
Stir-Fry Vegetables and Combine with Beef
Add the remaining 1 tbsp vegetable oil to the wok and increase heat to high. Add the sliced green bell peppers and stir-fry for 2-3 minutes until they begin to soften but still retain their vibrant green color and slight crunch. Add the minced garlic and grated ginger, cooking for 30 seconds until fragrant—this prevents them from burning while still releasing their flavors.
Return the beef to the wok along with any accumulated juices from the plate. Pour in the sauce mixture and toss everything together vigorously for 1-2 minutes until the sauce coats the beef and peppers evenly. The vegetables should be tender-crisp with a glossy sheen from the caramelized sauce. Taste and adjust seasoning if needed—this is your chance to balance the flavors before serving.
Finish with Toasted Sesame Seeds and Fresh Cilantro
Transfer the stir-fry to a serving platter and let it rest for 2-3 minutes—this allows the juices to redistribute and the flavors to meld. While it rests, toast the 1 tbsp sesame seeds in a dry skillet over medium heat for 1-2 minutes until golden and fragrant. This adds an extra layer of nutty aroma to the dish.
Garnish the stir-fry with the toasted sesame seeds and 0.25 cup chopped fresh cilantro. The contrast between the crispy beef, tender peppers, and fresh herbs creates a perfect balance of textures and temperatures. Serve immediately while the beef is still crispy and the peppers retain their crunch.
Pro Tips For Making Beef And Green Pepper Stir Fry
- Slice Against the Grain: Flank steak has a stubborn grain—cutting perpendicular to it guarantees tender bites. I learned this the hard way after serving a friend a chewy version that had me cringing. Use a sharp knife and take your time; it’s worth the effort.
- Prep Peppers Like a Pro: Strip the stems, slice into ½-inch strips, and pat them dry with a paper towel before cooking. Wet peppers steam instead of sear, and you’ll end up with mushy, sad strips. A quick towel rub makes all the difference—trust me, I’ve drowned them in oil to no avail.
- Don’t Crowd the Pan: Start with the beef on high heat until it develops a crust—this isn’t the time to rush. Then, push it to the side and add peppers, garlic, and ginger. Overcrowding drops the temperature and turns your stir-fry into a sad, greasy mess. Work in batches if needed.
- Finish with a Splash of Acid: Right before serving, toss in 1 teaspoon of rice vinegar or a squeeze of lime. It cuts through the richness of the soy sauce and brightens the whole dish. I used to skip this, but now it’s non-negotiable—especially if you’re serving it over rice.
Serving suggestions for this dish
Rice Pairings
Steamed jasmine rice is my go-to pairing—its delicate floral aroma complements the stir-fry's bold flavors without overpowering them. Cook 1.5 cups of rice for 4 servings, using a 1:1.25 rice-to-water ratio. For extra flair, sprinkle 1 tsp toasted sesame seeds on top before serving. 🌟
For a heartier option, try brown rice—its nutty texture stands up to the dish's richness. I like to cook it in a rice cooker with ½ cup water per cup of rice for 45 minutes. Serve alongside the stir-fry for a balanced, fiber-rich meal.
Noodle Variations
Swap rice for egg noodles or rice noodles for a quick, satisfying dish. Cook 8 oz dry noodles according to package instructions, then toss them directly in the wok with the stir-fry during the final 1-2 minutes of cooking. This creates a one-pan meal that's perfect for busy weeknights. 🍜
For extra authenticity, use udon noodles and add 1 tbsp mirin to the sauce. The sweetness balances the savory beef beautifully, creating a comforting fusion dish.
Garnish Ideas
Fresh green onions add a bright, crisp contrast—slice ¼ cup into thin rings and sprinkle on top. For a tangy kick, add 1 tbsp rice vinegar drizzled over the dish just before serving. 🌿
For a smoky depth, sprinkle ½ tsp smoked paprika over the stir-fry. This works especially well if you're serving it with cornbread or garlic bread for a Southern-inspired twist.
Dipping Sauces
Serve with a simple soy-ginger dipping sauce—mix 2 tbsp soy sauce, 1 tbsp honey, 1 tsp grated ginger, and ½ tsp sesame oil. This enhances the dish's flavors while adding a sweet-spicy contrast. 🍶
For a creamy option, blend ¼ cup Greek yogurt, 1 tbsp lime juice, ½ tsp garlic powder, and a pinch of salt. This tangy dip cools the palate between bites of spicy stir-fry.
Meal Prep Tips
Store leftovers in an airtight container for up to 3 days—reheat in a skillet over medium heat with 1 tbsp water** to restore crispiness. The sauce may thicken slightly; add a splash of water or soy sauce to loosen it. 💡
For a make-ahead option, prep the sauce and marinade in advance, then cook the stir-fry fresh. This keeps the texture perfect while saving time on busy days. Garnish with fresh cilantro right before serving to keep it vibrant.
Nutrition facts
Frequently asked questions
Why does the recipe call for slicing beef against the grain?
The grain refers to the muscle fibers in the meat. Slicing against it shortens the fibers, making the beef more tender. When cooked properly, this technique transforms tough cuts like flank steak into melt-in-your-mouth strips. If you skip this step, you'll end up with chewy beef instead of the perfect wok-hei texture.
Can I substitute red bell peppers for green in this recipe?
Red bell peppers work beautifully and add a slightly sweeter flavor. For best results, use the same thickness of slices and cook them for about 30 seconds less than green peppers since they tend to soften faster. The color change won't affect the overall dish—just the visual presentation.
What's the best way to achieve that crispy texture without a wok?
Use a heavy-bottomed skillet or cast iron pan over high heat. The key is working in batches—don't overcrowd the pan. A 12-inch cast iron skillet works perfectly for this recipe. Keep the heat high and work quickly to mimic the wok-hei effect, even without a traditional wok.
How do I prevent the beef from getting tough?
Never skip the 10-minute marinade with cornstarch—it's what creates that tenderizing crust. Also, cook the beef in batches over high heat for 1-2 minutes per side only. Overcooking is the #1 cause of tough beef in stir-fries. Use a meat thermometer if needed—beef should reach 145°F internally.
Can I make this recipe in advance?
For best texture, cook fresh and serve immediately, but you can prep components ahead. Store the sauce separately in the fridge for up to 1 week. Assemble the stir-fry just before serving, or store cooked components in an airtight container for 2 days. Reheat gently with a splash of water to restore moisture.