
Main Courses
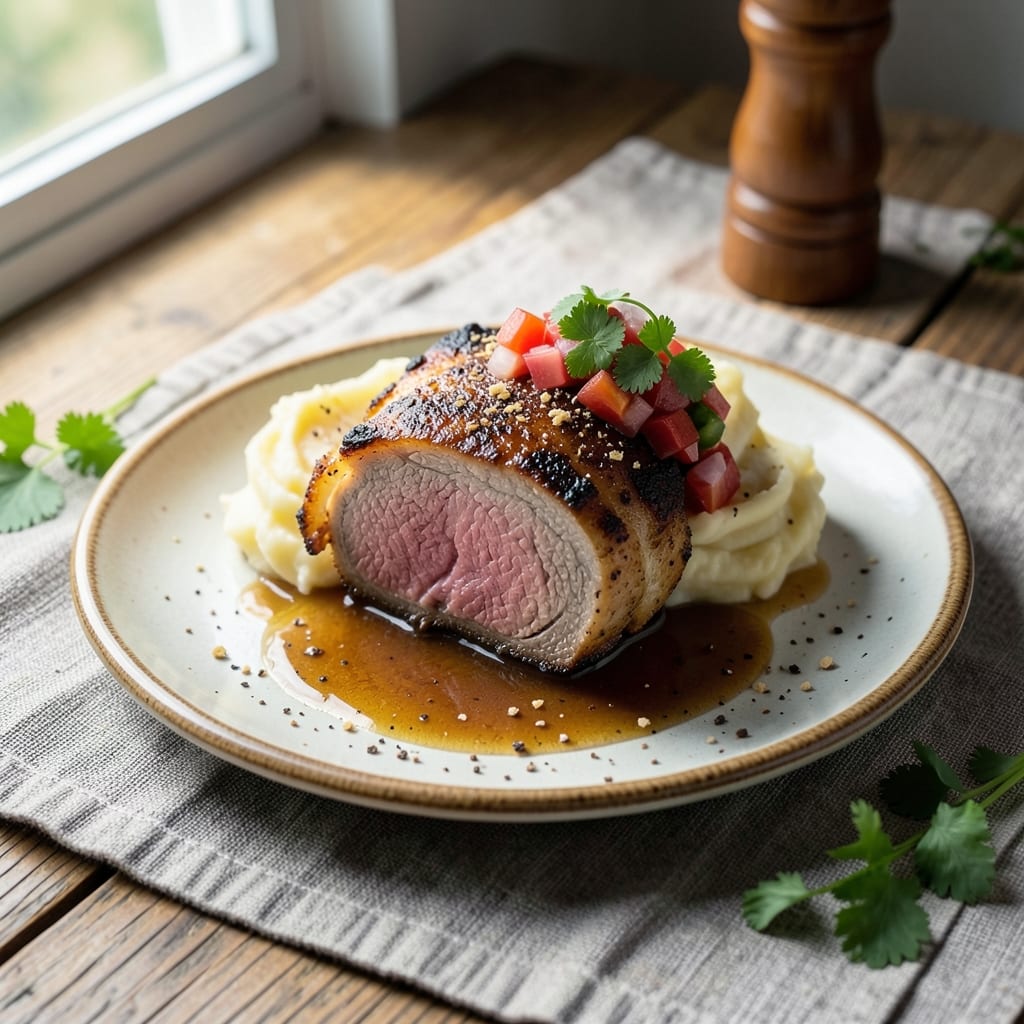
Baked beef cutlets deliver that perfect balance of crispy crust and tender interior—no frying required. After years of testing, I’ve perfected a method that ensures every bite stays juicy while developing a golden, crackling exterior. The secret lies in proper seasoning and a high-heat bake that seals in moisture without drying out the meat.
This recipe starts with simple prep: pound the cutlets to an even thickness, then coat them in a blend of flour, spices, and a touch of cornstarch for that signature crispiness. Baking at 425°F for just 10–12 minutes guarantees a juicy center, while the cornstarch creates a satisfying crunch. No need for complicated techniques—just patience and attention to timing.
What you’ll end up with is a restaurant-quality dish that’s foolproof for home cooks. The crust stays crispy even after resting, and the meat remains tender enough to melt in your mouth. Serve with a bright lemon wedge, fresh herbs, or a simple salad to balance the richness.
Whether you’re cooking for a weeknight dinner or a special occasion, this method delivers consistent results every time. The key is confidence in the process—no flipping, no guesswork, just perfectly baked beef cutlets that taste like they came from a high-end steakhouse.
Ingredients for baked beef cutlet
Nine simple ingredients transform into restaurant-worthy beef cutlets with a crispy crust and juicy center.
| Ingredient | Amount | Notes |
|---|---|---|
| Beef Cutlets 🥩 | 1 ½ lb | Pounded to 1/4-inch thickness |
| All-Purpose Flour 🌾 | ½ cup | For dredging, sifted |
| Cornstarch 🌾 | ¼ cup | For extra crispiness |
| Diamond Crystal Kosher Salt 🧂 | 1 tsp | Fine grain preferred |
| Freshly Ground Black Pepper 🌶️ | ½ tsp | Cracked peppercorns |
| Garlic Powder 🧄 | 1 tsp | Freshly toasted preferred |
| Onion Powder 🧅 | 1 tsp | Not onion salt |
| Extra-Virgin Olive Oil 🫒 | 2 tbsp | For brushing, high quality |
| Unsalted Butter 🧈 | 2 tbsp | Melted, full-fat |
| Fresh Lemon Juice 🍋 | 1 tbsp | From 1 small lemon |
| Fresh Parsley 🌿 | ¼ cup | Chopped, for garnish |
| Vegetable Oil Spray 🫒 | 1 tbsp | For baking sheet |
The beef cutlets are the star here. Look for top-round or sirloin—they’re lean enough to cook through without drying out. I grab mine from Whole Foods or my local butcher shop, where they can cut them to an even 1/4-inch thickness. Pounding them yourself makes all the difference—it ensures even cooking and that perfect crispy crust. If you’re short on time, Costco’s pre-cut beef cutlets work too, just make sure they’re uniform in size. For the best results, let the cutlets sit at room temperature for about 20 minutes before cooking—this helps them sear evenly.
No cornstarch? Extra flour at the same amount works in a pinch, though the crust won’t be quite as crispy. Fresh herbs like parsley or thyme can swap in for the parsley garnish, but parsley’s bright flavor pairs perfectly with the richness of the beef. The olive oil and butter combo is non-negotiable for that golden crust—don’t skip either. If you’re out of olive oil, avocado oil works just as well. For extra flavor, add a pinch of smoked paprika to the flour mix. And if you’re feeling fancy, a sprinkle of grated Parmesan on top before baking adds a nice umami kick.
Prep ahead to save time: pound and season the cutlets, then store them in the fridge for up to 24 hours before baking. The crust stays crispy for about 30 minutes after baking, so serve them immediately if possible. Leftovers? They reheat beautifully in a 350°F oven for 5–7 minutes—just add a splash of water to the pan to keep them moist. These cutlets freeze well too: bake them, let cool completely, then wrap tightly in foil for up to 3 months. I always make a double batch—perfect for meal prep or a quick weeknight dinner.
Why You'll Love This Recipe
- Crispy Without Frying: I swear by the cornstarch trick—just toss those cutlets in flour and cornstarch before baking, and you get that golden, shatter-like crust without a drop of oil. My oven’s been my best friend since I discovered this.
- Weeknight Workhorse: Honestly, this is my go-to when I’m staring at the fridge at 7 PM wondering what to feed everyone. Toss the cutlets in seasoned flour, pop them in the oven, and boom—dinner’s ready while I’m still wiping down the counter.
- Leftovers That Don’t Suck: Between us, most beef leftovers turn into sad, dry hockey pucks. Not these. The cornstarch keeps them tender, so I meal prep two pans on Sunday and have lunch sorted for the week—no sad sandwiches in sight.
- Budget-Friendly Protein: I buy cutlets on sale, coat them in cheap flour and salt, and suddenly a $10 pack stretches to feed four. It’s the kind of recipe that makes me feel like I’m treating my family without breaking the bank.
Step-by-step instructions for crispy-crusted beef cutlets
Here's how to bake perfect beef cutlets with a golden crust and tender interior every time.
Prepare the Cutlets for Maximum Crispiness
Start by patting the 1.5 lb beef cutlets completely dry with paper towels—this is non-negotiable for crispy crusts. I like to work with them one at a time to avoid drying out. Place each cutlet between two sheets of plastic wrap and pound gently to an even ¼-inch thickness using a meat mallet. This ensures even cooking and prevents thick spots that stay raw.
In a shallow bowl, whisk together the 0.5 cup all-purpose flour, 0.25 cup cornstarch, 1 tsp diamond crystal kosher salt, 0.5 tsp freshly ground black pepper, 1 tsp garlic powder, and 1 tsp onion powder. The cornstarch is key here—it creates that ultra-crispy crust while keeping the inside juicy. Sift the dry ingredients together to break up any lumps, then dredge each cutlet on both sides, pressing gently to adhere the coating evenly.
Create the Perfect Baking Setup
Preheat your oven to 400°F and line a baking sheet with parchment paper. Lightly spray with 1 tablespoon vegetable oil spray—this prevents sticking and helps create that golden brown finish. Arrange the coated cutlets in a single layer, spacing them about 1 inch apart to allow for even air circulation. This is where crispiness happens, so don't crowd the pan.
In a small bowl, melt the 2 tablespoons unsalted butter with 2 tablespoons extra-virgin olive oil until just combined. Brush this mixture generously over each cutlet—this forms a protective seal that locks in juices and adds rich flavor. I like to work quickly here so the butter doesn't cool completely before hitting the oven.
Bake to Golden Perfection
Bake the cutlets for 12-15 minutes, flipping them once at the 8-minute mark for even browning. You'll know they're ready when the edges are deep golden brown and a thermometer inserted into the thickest part reads 145°F internally. The cornstarch coating should be crispy enough to make a satisfying crunch when you tap it lightly.
Here's the thing—don't overbake. The cutlets will continue carrying over heat for a few minutes after coming out of the oven. If you pull them out too early, they'll finish cooking on the plate, but you'll lose that perfect crust. Trust the 145°F reading and the visual cue of golden brown edges.
Finish with Bright Acid and Fresh Herbs
Transfer the baked cutlets to a serving platter and let them rest for 5 minutes—this crucial step allows the juices to redistribute. While they rest, squeeze 1 tablespoon fresh lemon juice over each cutlet. The acid brightens the flavors and cuts through the richness of the butter and beef.
Just before serving, sprinkle with ¼ cup chopped fresh parsley for a pop of color and freshness. The parsley not only looks beautiful but also adds a subtle herbal note that complements the savory crust. Serve immediately with your favorite sides—these cutlets are best enjoyed while still warm and crispy.
Pro Tips For Making Baked Beef Cutlet
- USE A MIXTURE: Mix half the flour with all the cornstarch—about 2 tablespoons each—before dredging the cutlets. The cornstarch gives that crispy, almost fried texture without deep-frying, and I learned this after my first batch turned out too soft and doughy.
- SALT THE MEAT FIRST: Season the beef cutlets with salt before dredging them in the flour mix. Diamond Crystal kosher salt needs time to work its magic, and salting early ensures the seasoning penetrates the meat instead of just clinging to the surface.
- WATCH THE OVEN TEMP: Start with a screaming-hot oven—425°F (220°C)—for the first 10 minutes to get that golden crust, then drop it to 375°F (190°C) to finish cooking. I used to bake them at a steady 375°F and ended up with dry, unevenly cooked cutlets every time.
- PAT DRY THE CUTLETS: Wipe the beef cutlets thoroughly with paper towels before seasoning. Moisture is the enemy of a good crust—wet meat steams instead of browning, and that’s how you end up with sad, soggy cutlets. (Yes, even if you’re impatient like me.)
Regional styles of baked beef cutlet
Italian Milanese Style
In Italy, beef cutlets are often prepared as Milanese, where they're coated in a light batter of flour, egg, and breadcrumbs before baking. For this variation, replace the dry flour coating with a thin egg wash—whisk 2 eggs with 1 tbsp water and 1 tsp Dijon mustard—then dip each cutlet into the mixture before pressing into ½ cup panko breadcrumbs mixed with 1 tsp dried oregano. Bake at 400°F for 10-12 minutes until golden. Serve with a lemon wedge and arugula salad for an authentic Italian touch. 🍋
French Beef Wellington Twist
For a luxurious take, wrap the baked cutlets in proscuitto and Gruyère cheese before finishing in the oven. After baking, top each cutlet with a thin slice of proscuitto and a small piece of Gruyère, then broil for 2-3 minutes until the cheese melts. This French-inspired version adds a rich, savory depth that pairs beautifully with roasted mushrooms and mashed potatoes. Use 2 cutlets per serving for an elegant presentation.
Southern BBQ-Glazed Cutlets
Add a Southern flair by brushing the baked cutlets with ½ cup BBQ sauce (I love Sweet Baby Ray's) and broiling for 1-2 minutes until caramelized. For extra smokiness, sprinkle with ½ tsp smoked paprika before baking. Serve with cornbread muffins and collard greens for a full Southern meal. This variation works best with sirloin cutlets for a heartier bite. 🔥
Mexican Caramelized Onion Topping
For a Mexican-inspired twist, top the baked cutlets with caramelized onions before serving. Sauté 1 large onion (thinly sliced) in 2 tbsp olive oil over medium-low heat for 20-25 minutes until deep golden brown. Spoon the onions over the cutlets and garnish with cilantro and a squeeze of lime. Pair with cilantro-lime rice and black beans for a complete fiesta-style meal.
Herb-Crusted Mediterranean Style
Infuse the flour coating with Mediterranean herbs for a bright, aromatic twist. Mix 1 tsp dried rosemary, 1 tsp dried thyme, and ½ tsp dried basil into the flour blend. After baking, drizzle with 1 tbsp balsamic glaze (reduce ¼ cup balsamic vinegar to a syrup) and garnish with toasted pine nuts. This version pairs perfectly with roasted Mediterranean vegetables and a white wine reduction sauce. 🌿
Spicy Cajun-Inspired Cutlets
For heat lovers, add Cajun seasoning to the flour blend: mix 1 tsp Cajun seasoning (like Tony Chachere’s) with the dry ingredients. After baking, serve with a spicy remoulade sauce—blend ½ cup mayonnaise, 1 tbsp hot sauce, 1 tsp Dijon mustard, and 1 tbsp chopped pickles. This bold version is a crowd-pleaser at BBQ gatherings. Serve with corn on the cob and creamy coleslaw. 🌶️
Nutrition facts
Frequently asked questions
Why do I need to pound the beef cutlets so thin?
Pounding them to ¼-inch thickness ensures even cooking and a perfect crispy crust. Thicker spots stay raw inside while thinner edges overcook—this method guarantees a juicy center with a golden exterior every time. Pro tip: Use plastic wrap between the meat and mallet for easier handling.
Can I use frozen beef cutlets for this recipe?
Yes, but thaw them completely first in the refrigerator overnight. Never microwave-thaw—it creates uneven cooking. Pat dry thoroughly after thawing to prevent a soggy crust. The cornstarch coating works best with properly dried meat for maximum crispiness.
What's the best way to check if the cutlets are done?
Use a meat thermometer—insert it into the thickest part until it reads 145°F. The edges should also be deep golden brown. Overbaking dries out the meat, so trust the thermometer over visual cues alone. The crust stays crispy for about 30 minutes after baking.
Can I make these ahead of time?
Bake them up to 24 hours ahead and refrigerate. Reheat in a 350°F oven for 5–7 minutes with a splash of water in the pan to restore moisture. For freezing, bake first, then wrap tightly in foil for up to 3 months. Thaw in the fridge before reheating.
What if my cutlets aren't crispy enough?
Try these fixes: Increase cornstarch to ⅓ cup next time, or broil for 1-2 minutes at the end for extra crunch. Make sure your oven is fully preheated and the cutlets aren't crowded on the baking sheet. A light spray of oil on the pan before baking also helps create that golden crust.