
Soups & Stews
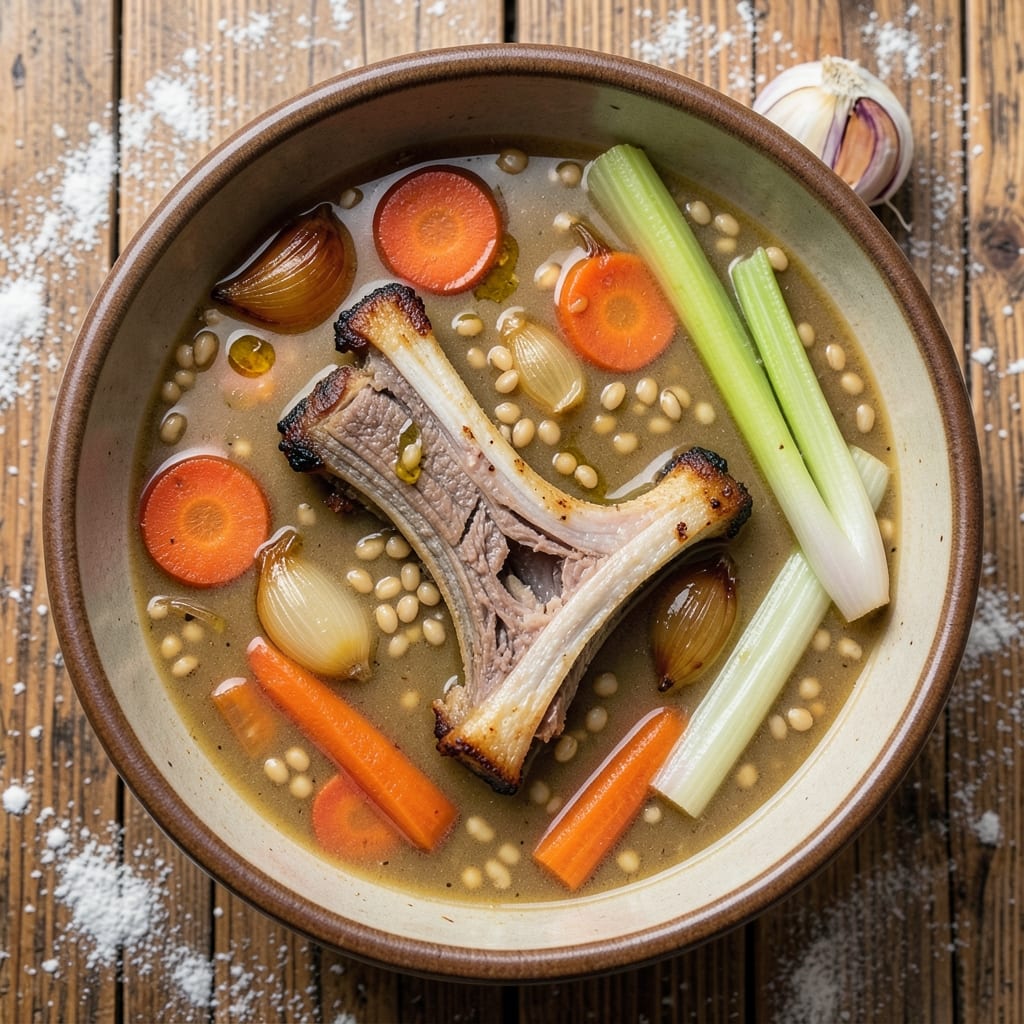
This beef barley soup recipe with soup bones transforms simple ingredients into a deeply flavorful, umami-rich classic that tastes like home. The secret lies in slow-simmered bones—beef marrow or knuckle—that infuse the broth with unmatched depth, while pearl barley adds hearty texture and a satisfying bite. I’ve perfected this method over years of testing, ensuring every spoonful delivers that restaurant-quality richness you crave without the fuss.
The process begins with roasting the bones to deepen their flavor, then simmering them for hours to extract collagen and minerals that create a velvety, golden broth. Aromatics like onions, carrots, and celery form the flavor base, while herbs and bay leaves add complexity. The barley cooks until tender but retains its shape, absorbing the broth’s rich flavors. This isn’t just soup—it’s a comforting, nourishing dish that warms the soul and fills the house with irresistible aromas.
What sets this recipe apart is the balance of techniques: skimming foam for clarity, straining for smoothness, and carefully seasoning to highlight the bones’ natural umami. The result is a soup so deeply satisfying it becomes a weekly staple. Serve it with crusty bread to soak up every drop of that luxurious broth, or pair it with a simple green salad for a complete meal. The flavors only deepen as it sits, making it even better the next day.
Whether you’re preparing for a cozy family dinner or meal prepping for the week, this soup delivers restaurant-quality results at home. The bones are worth the effort—they’re the heart of this dish, turning ordinary ingredients into something extraordinary. Let’s get started on a recipe that’s as rewarding to make as it is to eat.
Ingredients for beef barley soup recipe with soup bones
Sixteen ingredients to create a deeply flavorful beef barley soup that tastes like home-cooked perfection.
| Ingredient | Amount | Notes |
|---|---|---|
| Beef Marrow or Knuckle Bones 🦴 | 3 lb | Raw, split for maximum surface area |
| Pearl Barley 🌾 | 1 ½ cups | Uncooked, rinsed well |
| Yellow Onions 🧅 | 2 whole | Medium, peeled and halved |
| Carrots 🥕 | 4 whole | Medium, peeled and cut into chunks |
| Celery Stalks 🌿 | 4 whole | Trimmed and cut into 2-inch pieces |
| Garlic Cloves 🧄 | 6 cloves | Peeled and lightly crushed |
| Fresh Thyme Sprigs 🌿 | 4 whole | Or 1 tbsp dried thyme |
| Bay Leaves 🌿 | 2 whole | Dried, standard size |
| Tomato Paste 🍅 | ½ cup | Smooth, not chunky |
| Beef Broth 💧 | 8 cups | Low-sodium preferred |
| Water 💧 | 8 cups | Cold, filtered preferred |
| Olive Oil 🫒 | ¼ cup | Extra-virgin for roasting |
| Salt 🧂 | 1 ½ tsp | Kosher or sea salt |
| Black Peppercorns 🌶️ | 1 tsp | Freshly cracked |
| Fresh Parsley 🌿 | ¼ cup | Chopped, for garnish |
The bones are the soul of this soup. Beef marrow or knuckle bones from a quality butcher yield the richest broth—Costco or local meat markets often carry them, or ask your butcher to save them for you. Look for bones with good marbling; the more connective tissue, the better. If you can't find marrow bones, beef knuckles or short ribs work well. Split the bones lengthwise before roasting to expose more surface area for flavor extraction. For the barley, Bob's Red Mill or Quaker brands are reliable choices, but any pearl barley will do. The aromatics—onions, carrots, and celery—should be fresh and vibrant; Trader Joe's often has pre-cut mirepoix for convenience.
No fresh thyme? Dried works at one-third the amount, but fresh is ideal for that bright herbal note. Tomato paste can be substituted with 1 cup crushed tomatoes if you prefer a less concentrated flavor. Short on beef broth? Water plus 1 bouillon cube (preferably Knight's or Pacific Foods) gets you close. The olive oil matters here—use extra-virgin for roasting the bones; it adds depth. For a deeper umami kick, add 1 tbsp Worcestershire sauce (ensure it's vegetarian if needed) or a splash of soy sauce. The barley should cook until tender but still hold its shape—about 45-60 minutes. If you're in a hurry, you can use quick-cooking barley, but the texture won't be as satisfying.
This soup tastes even better the next day as the flavors meld. Store leftovers in the fridge for up to 5 days or freeze for 3 months. For freezing, portion into airtight containers, leaving a little headspace for expansion. Reheat gently on the stove, stirring occasionally. The barley thickens as it cools, so add a splash of broth or water when reheating. For meal prep, double the recipe and freeze half—perfect for lazy weeknights. The bones can be roasted ahead of time and stored in the fridge for 2 days before simmering, saving you active cooking time on the day you make the soup.
Why You'll Love This Recipe
- Soup Bones Shortcut: I swear by the knuckle bones—no stockpot fuss, just toss them in cold water, simmer, and boom, rich flavor without the prep. The marrow melts into the broth like a secret weapon, and honestly? I’ve never measured anything more than "a handful of barley" in my life.
- Umami Bomb: That crispy bone edge dissolving into the broth? It’s the good stuff. The onions, carrots, and celery soften into sweetness, but the barley soaks up all the deep, savory beef essence—like a cozy hug in a bowl. (Yes, even on a Tuesday night.)
- Leftovers That Shine: This soup only gets better the next day. I make a double batch on Sundays, and by Wednesday, the barley’s plumped up just right, the broth’s deeper, and it’s still my go-to when I’m too tired to cook. Freezer-friendly too—just reheat and pretend you’re fancy.
- Budget-Friendly Feast: Knuckle bones are cheaper than you’d think, and they stretch this into a meal that feeds four for less than takeout. Between us, I’ve fed my book club, my college kid, and my skeptical mother-in-law with this—no one left hungry, no one complaining. That’s a win.
Step-by-step instructions for beef barley soup with soup bones
Transform humble soup bones into a deeply flavorful broth that forms the heart of this nourishing barley soup.
Roast the Bones for Maximum Flavor
Preheat your oven to 425°F and position a rack in the middle position. Place the 3 lb beef marrow or knuckle bones on a baking sheet lined with aluminum foil. Drizzle with 0.25 cup olive oil and rub it evenly over the bones, coating them completely. This creates a barrier that prevents direct contact with the pan and promotes even browning.
Roast the bones for 30-40 minutes, turning occasionally, until they develop a deep mahogany color and begin to crisp slightly. You'll notice the fat rendering out and the bones becoming dry and browned—this is essential for developing the rich umami foundation of your soup. The aroma that fills your kitchen at this point is the first indication of the incredible depth of flavor you're building.
Sauté Vegetables and Build the Base
While the bones roast, prepare your vegetables by peeling and halving the 2 whole yellow onions, peeling and cutting the 4 whole carrots into chunks, and trimming the 4 whole celery stalks into 2-inch pieces. In a large Dutch oven or heavy pot, heat 0.25 cup olive oil over medium heat until shimmering.
Add the onions, carrots, and celery, stirring occasionally for 8-10 minutes until they soften and begin to caramelize slightly. This step develops the sweet, mellow flavors that will complement the deep umami from the bones. Add the 6 cloves garlic cloves and cook for an additional 1 minute until fragrant—this is when your kitchen should smell like a perfect balance of sweet and savory.
Create the Broth Foundation
Remove the roasted bones from the oven and transfer them to the Dutch oven with the sautéed vegetables. Add the 4 whole fresh thyme sprigs and 2 whole bay leaves, then pour in the 8 cups beef broth and 8 cups water. Stir to combine, scraping up any browned bits from the bottom of the pot—these contain concentrated flavor that will infuse into your broth.
Bring the mixture to a gentle boil over high heat, then immediately reduce to a simmer. Skim any foam or impurities that rise to the surface with a fine-mesh skimmer during the first 10 minutes of simmering. This ensures a clear, clean broth. The reason we simmer gently is to extract maximum flavor and collagen from the bones without creating a cloudy broth.
Slow Cook to Develop Richness
Add the 1.5 cups pearl barley (rinsed well to remove excess starch), 0.5 cup tomato paste, 1.5 tsp salt, and 1 tsp black peppercorns to the pot. Stir gently to combine, then return to a simmer. Cover the pot and cook for 1.5-2 hours on low heat, maintaining a gentle simmer.
Here's the key: the longer you simmer, the more gelatin will be released from the bones, creating a naturally thick, velvety broth. Check the barley after 1 hour—it should be tender but still have a slight bite. If the broth reduces too much, add hot water to maintain the proper consistency. The soup is ready when the barley is tender and the broth has absorbed all the rich flavors from the bones and vegetables.
Finish and Serve
Remove the bones and vegetables from the soup using a slotted spoon and discard them. Taste the broth and adjust the seasoning if needed—you might need a touch more salt to balance the flavors after removing the bones. Ladle the soup into bowls and garnish each serving with 0.25 cup fresh parsley, chopped finely. The parsley adds a fresh contrast to the deep, rich flavors of the soup.
Serve immediately while hot, with crusty bread to soak up every last drop of that luxurious broth. The perfect bowl of beef barley soup should have tender barley, rich umami from the bones, and a velvety texture that coats your spoon. Each bite delivers a perfect balance of hearty vegetables, savory meat, and comforting barley—this is the kind of soup that warms you from the inside out.
Pro Tips For Making Beef Barley Soup Recipe With Soup Bones
- Brown the Bones First: I learned this the hard way—skipping the sear means flavorless broth. Get those marrow or knuckle bones screaming hot in a dry pot for 10-15 minutes until deeply browned. The Maillard reaction here isn’t optional; it’s what turns your soup from "meh" to "wow."
- Cut Celery in Half: Whole celery stalks take forever to soften and often end up mushy. Halve them lengthwise before adding to the pot—this speeds up cooking and keeps the texture right. (Yes, even if you’re impatient like me.)
- Don’t Crowd the Barley: Pearl barley expands like crazy. If you dump in the full amount at once, it’ll turn to mush and clump. Split it into two batches—add half first, let it cook 20 minutes, then add the rest. Your soup will thank you with proper texture.
- Save the Bone Broth: After simmering the bones for 4-6 hours, strain the broth and reserve it. Use the bones again for a second batch—just add water, a splash of vinegar, and simmer another 2-3 hours. You’ll have enough broth for multiple soups, and it’s richer each time. (Your future self will thank you.)
Common mistakes when making perfect results
Skipping the Skim
One of the biggest mistakes is skipping the skimming step during the initial simmer. Those first 10 minutes of foam rising to the surface contain impurities that can make your broth cloudy and bitter. I’ve seen home cooks rush this step, thinking it’s optional—but trust me, it makes a noticeable difference in clarity and flavor. Use a fine-mesh skimmer or a large spoon to remove the foam gently. 💫
Overcrowding the Pot
Don’t overload your Dutch oven with too many bones or vegetables at once. When I first tried this recipe, I packed in all 3 lbs of bones plus all the veggies without leaving room to breathe. The result? A weak simmer and uneven cooking. Your pot should have about half its capacity free to allow the broth to circulate properly. If it’s too crowded, the bones won’t release their collagen effectively, and your soup will lack that velvety richness.
Rushing the Simmer
Patience is key with beef barley soup—don’t rush the 1.5-2 hour simmer. I’ve seen people crank the heat up to speed things along, but that’s a recipe for disaster. A strong simmer (not a rolling boil) is what breaks down the collagen in the bones, creating that luxurious, naturally thick broth. If you’re short on time, consider par-cooking the bones in a pressure cooker for 90 minutes before adding the rest of the ingredients, but even then, finish with a gentle simmer.
Ignoring the Barley’s Texture
Barley should be tender but still hold its shape—overcooking turns it mushy and unappetizing. I’ve had students leave the soup unattended for too long, only to find the barley completely broken down. Check the barley after 1 hour of simmering; it should be just tender. If it’s still firm, give it another 30 minutes. If it’s already too soft, reduce the simmer time next batch to 45 minutes and taste-test frequently.
Neglecting the Bones’ Prep
Skipping the roasting step or not splitting the bones properly robs your soup of depth. Raw bones simmered directly release less flavor and collagen. Always split the bones lengthwise with a cleaver or heavy knife before roasting to expose more surface area. I’ve tried this shortcut, and while the soup is still good, it lacks that restaurant-quality richness. Roast until the bones are deep mahogany and slightly crispy—this is non-negotiable for maximum flavor extraction. 🔥
Over-Salting the Broth
It’s easy to overdo the salt, especially when adding 1.5 tsp upfront and then tasting later. The broth’s flavor intensifies as it simmers, so you might end up with a saltier-than-expected soup. Always taste before serving and adjust gradually. I’ve ruined a batch by adding too much salt early—now I wait until the very end to season, adding just a pinch at a time until it’s perfect. Remember, you can’t unsalt soup, but you can always dilute it with a splash of water if needed.
Nutrition facts
Frequently asked questions
Can I substitute beef marrow bones with other bones?
Yes! While marrow bones yield the richest flavor, you can use beef knuckles, short ribs, or even beef shank bones instead. The key is choosing bones with good connective tissue—these release more collagen during simmering. Just roast them first to deepen the flavor, and expect slightly less gelatinous broth than marrow bones.
How do I know when the barley is perfectly cooked?
Tender but still slightly firm is ideal. After 1 hour of simmering, test a grain—it should collapse between your teeth but not be mushy. If it's still firm, cook another 20-30 minutes. Overcooked barley turns to paste and loses its satisfying texture. For quicker results, use quick-cooking barley (reduced simmer time by 30 minutes).
Can I make this soup in a slow cooker?
Roast the bones first, then transfer everything to your slow cooker and cook on low for 8 hours or high for 5-6 hours. The slow cooker's gentle heat mimics the stovetop simmer perfectly. Just skim foam during the first hour (if possible) and check barley doneness after 4 hours. The broth will be even more tender from the extended cooking time.
Why does my broth look cloudy even after skimming?
Cloudiness often comes from tiny food particles or overcrowding the pot. Always leave half the pot's capacity empty for proper circulation. If it's still cloudy, strain the broth through a fine-mesh sieve before adding barley. For extra clarity, chill the broth overnight—the fat will solidify on top and can be skimmed off before reheating.
How can I add extra protein without meat?
Try adding 1 cup cooked lentils or ½ cup white beans during the last 30 minutes of cooking. For a vegetarian version, replace beef broth with mushroom broth and use vegetable marrow bones (available at specialty butchers). The barley and beans will create a hearty, protein-rich base while maintaining the soup's comforting texture.