
Main Courses
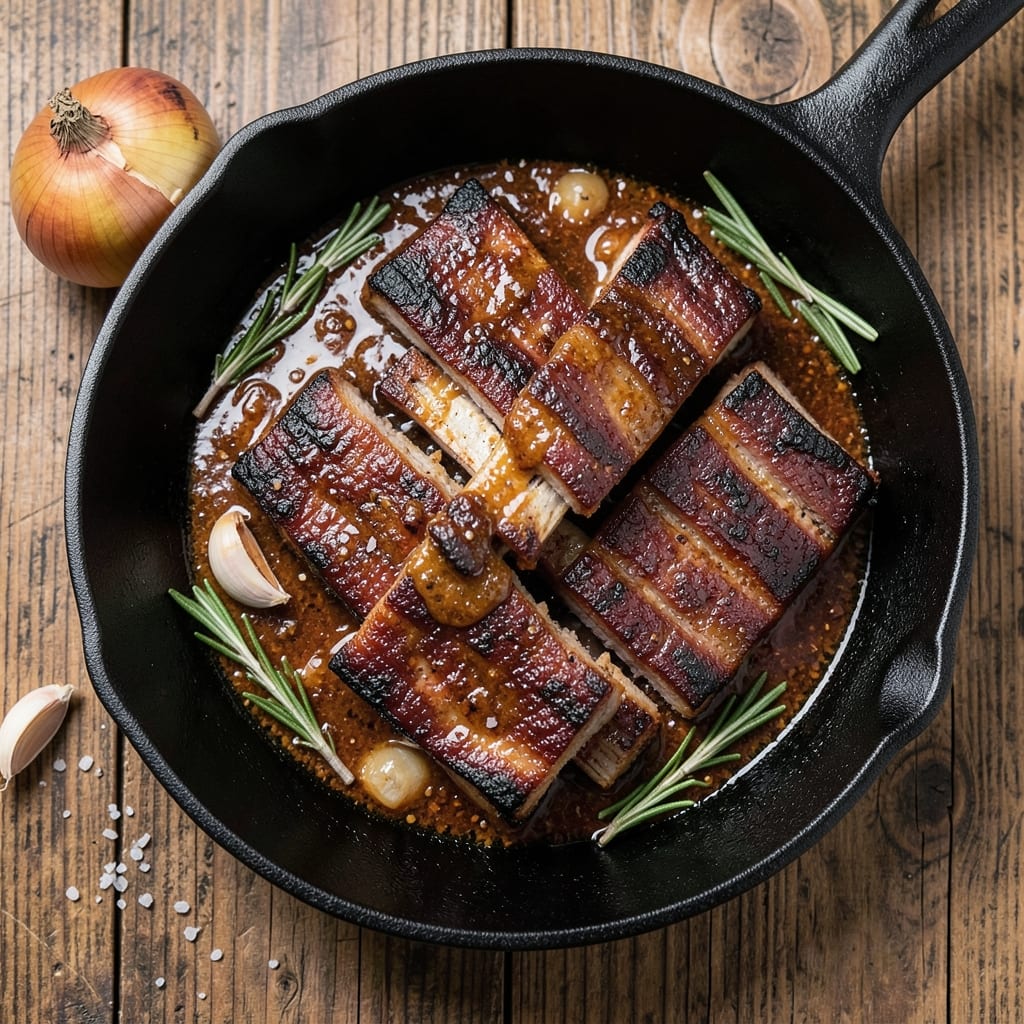
Beef back spare ribs recipe delivers the kind of bone-melting tenderness and smoky bark that transforms a simple meal into a showstopper. Unlike pork ribs, beef back ribs cook faster but reward you with a deeper flavor profile when handled correctly—think 3-4 hours of low-and-slow cooking until they fall apart at the touch. I’ve perfected this method after years of testing, balancing traditional techniques with modern shortcuts for restaurant-quality results at home.
The secret to success lies in the preparation: trimming excess fat, applying a dry rub of smoked paprika and brown sugar, and cooking them bone-side down to render fat while building that coveted crust. This approach ensures every bite delivers both texture and flavor without the guesswork. The ribs should reach an internal temperature of 195-203°F—well past the usual safe zone—for maximum tenderness.
What you’ll end up with is a platter of ribs that are crispy on the outside, tender enough to pull apart with a fork, and infused with smoky, caramelized flavors. The bark clings to the meat like armor, while the meat itself is so tender it practically melts in your mouth. Serve with classic BBQ sauce for dipping or a tangy coleslaw to cut through the richness.
Whether you’re hosting a cookout or treating yourself to a special dinner, these ribs deliver the kind of satisfaction that comes from mastering a technique. The method scales perfectly for crowds, and leftovers reheat beautifully—just wrap them tightly and finish in the oven. Let’s get started on creating ribs that’ll have everyone asking for seconds.
Ingredients for beef back spare ribs
Four pounds of beef back ribs and a handful of pantry staples transform into showstopper ribs.
| Ingredient | Amount | Notes |
|---|---|---|
| Beef Back Spare Ribs 🥩 | 4 lb | Bone-in, trimmed of excess fat |
| Yellow Onion 🧅 | 1 whole | Large, sliced into rings |
| Garlic Cloves 🧄 | 8 cloves | Peeled, minced finely |
| Smoked Paprika 🌶️ | 2 tbsp | High-quality for smoky flavor |
| Brown Sugar 🍚 | ½ cup | Light or dark variety |
| Kosher Salt 🧂 | 1 ½ tbsp | Diamond Crystal preferred |
| Black Pepper 🌶️ | 1 tbsp | Freshly ground preferred |
| Ground Black Pepper 🌶️ | 1 tsp | For finishing |
| Apple Cider Vinegar 🍎 | 2 tbsp | For marinade balance |
| Yellow Mustard 🧅 | 2 tbsp | Dijon works too |
| Yellow Cornmeal 🌽 | ½ cup | For crust texture |
| Unsalted Butter 🧈 | 2 tbsp | Cold, for basting |
| Beef Broth 🥫 | 1 cup | Low-sodium preferred |
| Classic BBQ Sauce 🍅 | ½ cup | For finishing dip |
The ribs are the star—look for beef back spare ribs with good marbling at your butcher or grocery store's meat counter. Costco or Whole Foods often carry high-quality cuts, but the regular supermarket meat section works too. Trim any excess fat before seasoning—this helps the rub stick better and prevents flare-ups during cooking. The ribs should be about 2-3 inches thick, with bones running horizontally along the meat. If you can't find beef back ribs, beef short ribs are a good substitute, though they'll need an extra 30 minutes of cooking time. For best results, use the ribs within 2 days of purchase—they're at their most tender right after butchering.
No smoked paprika? Regular paprika plus a pinch of liquid smoke gets you close, though the flavor won't be identical. The brown sugar can be swapped for turbinado sugar if you prefer a less refined texture. For the marinade, if you're short on apple cider vinegar, white vinegar or lemon juice work in a pinch—just reduce the amount to 1 tablespoon. The cornmeal is optional but adds a nice crunch to the bark. If you're cooking a larger batch, double the dry rub ingredients and store them in an airtight container for up to 3 months. The beef broth should be low-sodium to avoid over-salting the ribs, but homemade works beautifully if you've got it.
Prep ahead by mixing the dry rub and marinade up to 24 hours in advance—the flavors meld better. Store the ribs in the fridge, uncooked, for up to 2 days before cooking. Once cooked, ribs reheat beautifully—wrap tightly in foil and bake at 275°F for 15 minutes to restore moisture. The leftovers keep for 4-5 days in the fridge or 3 months frozen. For serving, set up a station with the BBQ sauce, sliced pickles, and extra napkins—people will go through all three faster than you expect.
Why You'll Love This Recipe
- Foolproof Prep: I swear by this recipe because the ribs only need a quick trim—no butchering, no stress. Toss them in a pan with sliced onion and minced garlic, and you’re halfway there before the kids even notice dinner’s happening.
- Smoky-Sweet Magic: That smoked paprika and brown sugar combo? It’s the secret weapon. The ribs develop this incredible caramelized crust while staying tender inside—like a hug from your grandma’s kitchen, but with more depth.
- Weeknight to Party: Between us, these ribs work for everything. Slap them on the table for a lazy Tuesday, or double the batch when your in-laws visit. The sauce sticks to everything, so you’ll end up with seconds (or thirds) no matter the occasion.
Step-by-step instructions for beef back spare ribs
Master these techniques and you'll achieve fall-off-the-bone tenderness with a perfect smoky bark.
Prepare the Dry Rub and Season the Ribs
In a medium bowl, combine the 2 tbsp smoked paprika, 0.5 cup brown sugar, 1.5 tbsp kosher salt, and 1 tbsp black pepper. Mix thoroughly until the spices and sugar are evenly distributed. This blend creates the perfect balance of smoky, sweet, and savory flavors that will penetrate the meat.
Pat the 4 lb beef back spare ribs completely dry with paper towels—this step is critical for developing that coveted bark. Generously apply the dry rub to all sides of the ribs, pressing it firmly into the meat so it adheres well. Let the ribs sit at room temperature for 30 minutes before cooking. This allows the rub to penetrate and the meat to cook more evenly from the start.
Sear the Ribs for Maximum Flavor
Heat a large oven-safe skillet over medium-high heat and add the ribs fat-side down. Let them sear undisturbed for 5-7 minutes until the fat begins to render and the meat develops a deep golden-brown crust. This initial sear locks in juices and creates the foundation for that irresistible bark.
Flip the ribs and continue searing for another 5 minutes on the second side. Once both sides are well-browned, remove the skillet from the heat and let the ribs rest for 2 minutes. This brief pause prevents the cornmeal crust from burning when we add it later.
Create the Cornmeal Crust
While the ribs rest, pour the 0.5 cup yellow cornmeal onto a plate. Carefully flip each rib back into the cornmeal, pressing gently to ensure an even coating. The cornmeal will form a crispy, textured crust that contrasts beautifully with the tender meat underneath.
Return the skilled with the cornmeal-coated ribs to the stovetop over medium heat for 2-3 minutes per side. You're looking for a golden-brown crust that develops a slight sheen—this indicates the cornmeal is properly toasted. The ribs should feel firm to the touch, signaling the crust is set.
Braise for Unmatched Tenderness
Preheat your oven to 325°F. Carefully transfer the skillet to the oven and pour in the 1 cup beef broth, scraping up any browned bits from the bottom of the pan. This liquid will create a flavorful braising liquid that keeps the meat moist.
Cover the skillet tightly with aluminum foil and bake for 2.5 hours. The ribs are done when they reach an internal temperature of 203°F and the meat pulls away from the bone with minimal resistance. If the liquid reduces too quickly, add a splash of water through the foil to maintain moisture.
Finish and Serve with Classic BBQ Sauce
Remove the ribs from the oven and let them rest for 15 minutes before serving. This resting period allows the juices to redistribute, ensuring each bite is as tender as possible. While they rest, prepare the finishing sauce by mixing the 2 tbsp yellow mustard, 2 tbsp apple cider vinegar, and 0.5 cup classic BBQ sauce in a small bowl.
Brush the sauce generously over the ribs and serve immediately. The combination of the smoky rub, crispy cornmeal crust, and tangy-sweet finishing sauce creates a perfect balance of flavors. Each bite should deliver melt-in-your-mouth tenderness with a satisfying crunch from the bark.
Pro Tips For Making Beef Back Spare Ribs
- TRIM THE FAT FIRST: Beef back ribs have a thick fat cap that never renders out nicely—flip them over and trim it away before seasoning. I learned this the hard way when my ribs turned greasy instead of caramelized, and the flavor got lost in the mess.
- CHAR THE ONIONS LOW AND SLOW: Don’t rush the onions—cook them over medium-low heat until they’re deep golden and almost jammy, about 15 minutes. After burning three batches, I finally figured out that patience here means they’ll actually caramelize instead of just turning brown and bitter.
- DON’T SKIP THE REST: Let the ribs sit under foil for 5-10 minutes after pulling them from the heat. This isn’t just about convenience; it guarantees they stay juicy while you finish the sauce. I know, I know—you’re impatient—but trust the process.
- USE LESS BROWN SUGAR: Start with half the amount listed in the recipe, then add more to taste at the end. Too much sugar early on makes the ribs sticky and masks the beef flavor. (Yes, even if you’re the type who thinks more sugar equals better flavor—does it look weird? Yes. Does it work? Every single time.)
Make-ahead tips for this recipe
Prep Ahead Like a Pro
Mix your dry rub and marinade ingredients up to 24 hours in advance—the flavors meld beautifully overnight. Store them in airtight containers in the fridge. This saves you time on cooking day and ensures consistent seasoning every time. I always prep mine the night before so I can focus on cooking when the mood strikes. 💡
Ribs Ready to Cook
Season the ribs and store them uncovered in the fridge for up to 2 days before cooking. The exposed surface helps the rub dry slightly, creating an even better bark. Just pat them dry again before searing to maximize that crispy crust. This method works perfectly for meal prep—just season and refrigerate when you get home from the store. 🥩
Braising Liquid Prep
Make your beef broth base ahead of time and store it in the freezer. Use 1 cup of low-sodium broth for the braising liquid, but you can easily double or triple this for larger batches. Keep it in a labeled freezer bag for up to 3 months. Thaw overnight in the fridge before using—no need for microwave defrosting. 🥫
Freezer-Friendly Leftovers
Cooked ribs freeze beautifully for up to 3 months. Wrap them tightly in foil or plastic wrap, then transfer to an airtight container or freezer bag. When reheating, bake at 275°F for 15-20 minutes with a splash of water or broth to restore moisture. The texture stays amazing—just as tender as day one. ❄️
Sauce Station Prep
Set up your sauce station the night before by mixing the BBQ sauce, mustard, and apple cider vinegar in a small container. Store it in the fridge until serving. This keeps everything organized and ready for guests. I like to add sliced pickles and extra napkins too—people always go through those fast! 🍅
Equipment Prep
Get your oven-safe skillet ready the night before by giving it a quick wash and letting it air dry. This prevents any last-minute scrubbing when you're ready to cook. If you're using a smoker, preheat it to 225°F and let it stabilize for 30 minutes before adding the ribs. Proper prep means less stress and better results. 🔥
Nutrition facts
Frequently asked questions
How do beef back ribs compare to pork ribs in cooking time?
Beef back ribs cook significantly faster than pork ribs—typically 3-4 hours versus 6-8 hours for pork. The beef's higher fat content renders quickly, creating that signature bark in less time. However, they need to reach 203°F internally for maximum tenderness, which takes less heat exposure than pork.
Can I use a smoker instead of an oven for this recipe?
For a smoker, maintain 225°F with your preferred wood (hickory or apple works best). Cook for 2.5-3 hours until the internal temp hits 203°F. Wrap the ribs in foil after 1.5 hours to speed up cooking. The bark will be slightly different but still delicious.
What's the best way to tell when beef back ribs are fully cooked?
Use a meat thermometer to check the internal temperature—203°F is your target. The meat should pull away from the bone with gentle pressure, and the collagen will have broken down completely. Pro tip: If the ribs aren't tender enough, they can go back in the oven for 30 minutes more.
How do I prevent the ribs from drying out during cooking?
Keep the ribs covered with foil or in a sealed container to trap moisture. Add a splash of beef broth through the foil if the liquid evaporates too quickly. The cornmeal crust helps lock in juices, but never skip the resting period—15 minutes before serving ensures perfect texture.
Can I substitute beef broth with something else in the braising liquid?
Yes! Use water with a bouillon cube or red wine (½ cup) for depth. For extra richness, add 2 tbsp tomato paste to the braising liquid. Just avoid salty ingredients like soy sauce that could overpower the ribs.