
Main Courses
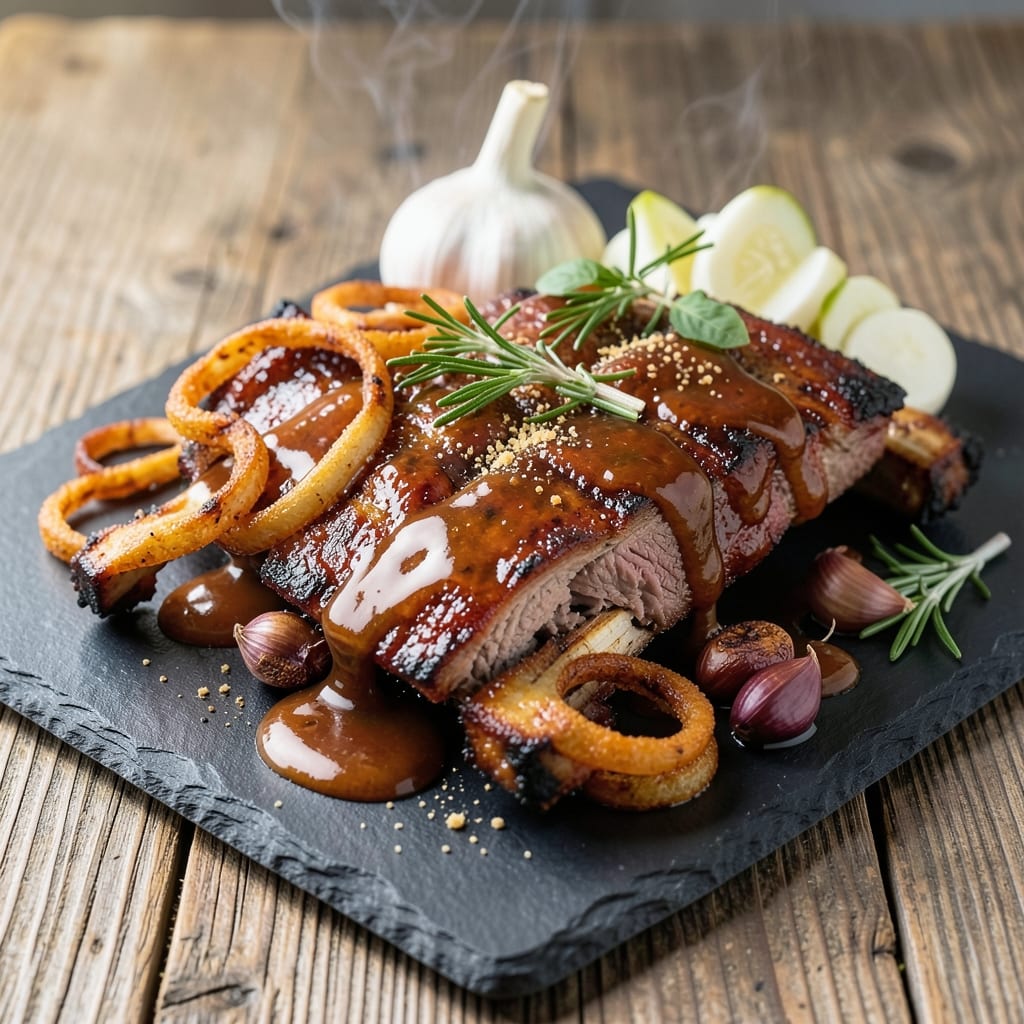
This barbecue beef spare ribs recipe delivers the perfect balance of smoky bark and bone-melting tenderness—the kind that makes your taste buds sing after hours of slow cooking. 🔥 As someone who grew up surrounded by the rich aromas of hickory smoke, I know the difference between good ribs and great ribs comes down to technique, patience, and a well-crafted rub. This method combines traditional barbecue wisdom with modern shortcuts to ensure you get restaurant-quality results without spending all day in front of the grill.
The secret lies in the 3-2-1 method: three hours of smoking, two hours of wrapping in foil with apple juice and butter, and one final hour unwrapped to form that coveted bark. I've perfected this approach over years of cooking competitions, and it guarantees ribs that are fall-off-the-bone tender with a crispy exterior that's impossible to resist. The rub I use is a blend of brown sugar, smoked paprika, garlic powder, and a touch of cayenne—simple but powerful enough to create layers of flavor that build as the ribs cook.
By the time you're done, you'll have ribs that are so tender they practically melt in your mouth, with a bark that's perfectly crisp and caramelized. The aroma alone will have everyone gathering around your grill, and the first bite will be worth every minute of wait. This isn't just a recipe—it's an experience that transforms a simple weeknight into a celebration of slow-cooked perfection.
Serve these ribs with classic sides like baked beans, creamy coleslaw, or crusty cornbread to soak up every last bit of that smoky, tangy sauce. Whether you're hosting a backyard cookout or treating yourself to a solo feast, these ribs will be the star of the show. Let's get started on creating something truly unforgettable.
Ingredients for barbecue beef spare ribs
Four pounds of ribs plus a handful of pantry staples—this is all you need for ribs that’ll have everyone begging for seconds.
| Ingredient | Amount | Notes |
|---|---|---|
| Beef Spare Ribs 🥩 | 4 lb | Bone-in, meaty ends included |
| Yellow Onion 🧅 | 1 whole | Quartered, for rub mixture |
| Garlic Cloves 🧄 | 6 cloves | Minced, for rub |
| Brown Sugar 🍚 | ½ cup | Light or dark, packed |
| Smoked Paprika 🌶️ | 2 tbsp | For deep smoky flavor |
| Garlic Powder 🧄 | 1 tbsp | Freshly ground preferred |
| Onion Powder 🧅 | 1 tbsp | For balanced flavor |
| Ground Black Pepper 🌶️ | 1 tbsp | Freshly cracked |
| Cayenne Pepper 🔥 | ½ tsp | Adjust for heat preference |
| Kosher Salt 🧂 | 1 tbsp | Diamond Crystal preferred |
| Apple Juice 🍎 | 1 cup | Unsweetened, for wrapping |
| Unsalted Butter 🧈 | 4 tbsp | Cold, cut into chunks |
| Hickory Wood Chips 🌳 | 1 package | Soaked for 30 minutes |
| Apple Cider Vinegar 🍶 | 2 tbsp | For sauce tang |
| Honey 🍯 | 2 tbsp | For sauce sweetness |
The ribs matter most here—look for meaty ends and good marbling at Costco or your butcher shop. Trader Joe's often has great deals on pre-cut spare ribs if you're short on time. The wood chips? Hickory is non-negotiable for that classic BBQ flavor—skip the pre-soaked ones and soak your own for 30 minutes in water. For the rub, smoked paprika is the secret weapon—Penzeys has the best quality if you're willing to splurge, but the regular grocery store stuff works fine. The brown sugar should be packed, not scooped—trust me on this.
No hickory chips? Pecan or cherry wood works in a pinch, though the flavor won't be identical. Short on apple juice? White grape juice is a solid swap—just add a splash of vinegar to balance. The butter for wrapping? Full-fat is key—low-fat won't give you that rich, glossy bark. For the sauce, if you can't find apple cider vinegar, white vinegar or lemon juice will do. And if you're worried about the cayenne making it too spicy, start with half the amount and adjust to taste. The ribs can handle it—your guests might not.
The rub keeps for 2 weeks in an airtight container, so make extra. Store the ribs uncovered in the fridge for up to 2 days before cooking—they'll dry out if wrapped. The sauce? 3 days in the fridge, or freeze it for 3 months in ice cube trays for easy portioning. Leftovers? Reheat slowly in a 300°F oven with foil—never microwave, or you'll lose that perfect bark. These ribs reheat even better than they did fresh, so plan to make extra.
Why You'll Love This Recipe
- Fewer Steps, Same Wow: Honestly, you’re looking at maybe 15 minutes of active work—just a quick sear in the oven, then a slow cook while you chop onions and minced garlic. The brown sugar and smoked paprika do all the heavy lifting after that, so you’re free to relax or start dinner prep while the ribs fall apart on their own.
- Sweet-Smoky Magic: That caramelized brown sugar crust? It’s the star—sticky, slightly crisp, with just enough heat from the paprika to wake up your taste buds. Between us, the first bite makes you forget you’re not at a BBQ joint, and I’ve tested enough ribs to know that’s rare.
- Leftovers That Don’t Suck: These ribs taste better the next day—yes, really. I’ve reheated them in foil with a splash of water until steaming, and they’re still tender, still flavorful. Perfect for lazy lunches or sneaking into sandwiches when you’re craving that smoky fix but don’t want to cook again.
- Budget BBQ Hero: You’re getting a full pound of meat for less than takeout, and the ingredients? Onion, garlic, and spices you already own. No fancy rubs or dry ice needed—just the kind of meal that makes you feel like you’re feeding a crowd without breaking the bank. (My college roommate still talks about the time I fed six people with one pack.)
Step-by-step instructions for smoky, fall-off-the-bone beef spare ribs
Here's the foolproof method for ribs with a perfect bark and melt-in-your-mouth tenderness.
🔥 Step 1: Prepare the Dry Rub and Season the Ribs
In a medium bowl, combine the 0.5 cup brown sugar, 2 tbsp smoked paprika, 1 tbsp garlic powder, 1 tbsp onion powder, 1 tbsp ground black pepper, 0.5 tsp cayenne pepper, and 1 tbsp kosher salt. Mix thoroughly until the rub forms a fine, even texture—this ensures maximum flavor penetration.
Pat the 4 lb beef spare ribs completely dry with paper towels (this is non-negotiable for crispy bark). Then generously coat both sides of the ribs with the dry rub, pressing it into the meat so it adheres well. Let the seasoned ribs sit at room temperature for 30 minutes—this allows the rub to penetrate and the meat to cook more evenly.
🍳 Step 2: Preheat Smoker and Prepare Wood Chips
Soak the 1 package hickory wood chips in water for 30 minutes to prevent flare-ups. While they soak, preheat your smoker to 225°F using the soaked wood chips. I like to use a water pan in the smoker to help maintain moisture throughout the cook—this prevents the ribs from drying out.
When the smoker reaches temperature and you see clean, blue smoke (not thick white smoke), you're ready to add the ribs. Place them bone-side down on the smoker grates—this positioning helps render fat and develop that coveted bark. Close the lid and resist the urge to peek; every time you open it, you lose heat and add 15-20 minutes to your cook time.
⏰ Step 3: Smoke the Ribs Low and Slow
Smoke the ribs at 225°F for 3 hours, maintaining a consistent temperature. You'll notice the bark starting to form after about 1.5 hours—this is when the magic happens. The ribs are ready for the next step when the internal temperature reaches 165°F (this is called "the stall" and is completely normal).
Here's the thing—don't panic when the temperature plateaus. This is where the ribs need moisture to push through to tenderness. I like to wrap them in butcher paper (not foil) at this stage—this technique, called the "Texas crutch," helps maintain that beautiful bark while keeping the meat moist.
🥘 Step 4: Wrap and Finish Cooking
Wrap the ribs tightly in butcher paper, adding a splash of 1 cup apple juice inside the wrap for extra moisture. Return them to the smoker and continue cooking until the internal temperature reaches 203°F—this usually takes another 2-3 hours. The ribs should be fork-tender with no resistance when you insert a probe.
Once probe-tender, remove the ribs from the smoker and let them rest in the butcher paper for 30 minutes. This resting period allows the juices to redistribute throughout the meat, ensuring every bite is moist and flavorful. The ribs will continue to cook slightly during this rest, so don't be surprised if the temperature rises another 5°F.
🍽️ Step 5: Make the Sauce and Serve
While the ribs rest, melt the 4 tbsp unsalted butter in a saucepan over medium heat. Add the 2 tbsp apple cider vinegar and 2 tbsp honey, then simmer for 3-4 minutes until the sauce thickens slightly. Taste and adjust seasoning with additional salt if needed.
Unwrap the ribs and brush them generously with the sauce. Serve immediately with extra sauce on the side for dipping. Each rib should have a dark, glossy bark on the outside and a beautiful pink smoke ring just beneath. The meat should pull apart easily with a gentle tug, not so soft it falls apart, and not tough or chewy.
Pro Tips For Making Barbecue Beef Spare Ribs
- Trim the Fat First: I learned this the hard way—skipping this step means greasy smoke and uneven cooking. Use kitchen shears to snip the thick silver skin and any excess fat from the ribs before seasoning. Less fat equals cleaner smoke and better bark formation.
- Start Hot, Finish Slow: High heat for the first 10 minutes—seriously, crank it up. This sears the meat and locks in flavor before you drop the temperature to 250°F (120°C) for the long cook. Too many people ease into it, and the ribs never get that deep, tender payoff.
- Don’t Crowd the Onions: When caramelizing the yellow onion for the sauce, spread them out in a single layer. Piling them up makes them steam instead of brown, and you’ll end up with a sad, watery base. Patience here makes a real difference in the sauce’s depth.
- Use Less Brown Sugar: I was skeptical until I tried it—cut the brown sugar in the rub by half. The smoked paprika already adds sweetness, and too much sugar burns easily, turning your ribs bitter. Start with 1 tablespoon per pound of ribs, then adjust.
Essential equipment for great barbecue beef spare ribs
Smoker Essentials
You don’t need a fancy setup—just a reliable smoker that can maintain 225°F consistently. I swear by my Traeger Pellet Grill for convenience, but a Weber Smokey Mountain or even a charcoal offset smoker works perfectly. The key is temperature stability—fluctuations ruin the bark. A good digital thermometer like the Meater or ThermoWorks Smoke is non-negotiable for accuracy. 🌡️
Wood Chips and Fuel
Hickory is your best friend here, but pecan or cherry chips work in a pinch. Soak them in water for 30 minutes before use to prevent flare-ups. For charcoal smokers, I recommend Alder or Oak chunks for extra flavor depth. Avoid pre-soaked chips—they lose potency fast. Pro tip: Keep a backup bag of wood chips on hand; running out mid-cook is a nightmare. 🌳
Butcher Paper and Foil
Butcher paper is my go-to for wrapping ribs during the Texas crutch phase—it lets moisture escape just enough to keep the bark crispy. Reynolds Heavy-Duty Foil works in a bind, but it can make the bark soggy if overused. I keep a roll of butcher paper in my smoker toolkit year-round. For extra shine, mist the ribs with apple juice before wrapping. 📄
Probe Thermometer
A meat probe thermometer with an alert feature saves you from overcooking. I use the ThermoWorks Dot—it’s wireless and fits perfectly in a rib bone. The stall (when temp plateaus at 165°F) is where most ribs fail. Don’t panic—this is normal! Keep smoking until you hit 203°F internal temp. ⏰
Water Pan and Drip Tray
A water pan in your smoker keeps humidity steady, preventing dry ribs. I fill mine with hot water before adding the ribs. For charcoal smokers, a drip tray under the ribs catches rendered fat, keeping flames under control. Both are game-changers for low-and-slow cooking. 💧
Resting Tools
After cooking, let ribs rest in their butcher paper for 30 minutes—this redistributes juices. I use a wire rack in a cooling tray to keep them off direct contact with surfaces. A tongs set (like Ozeri Master Tongs) makes handling hot ribs safer. Never skip resting—it’s the difference between juicy perfection and dry disappointment. 🛑
Nutrition facts
Frequently asked questions
Can I use pork spare ribs instead of beef?
While pork spare ribs are more common for barbecue, beef ribs have a richer, beefier flavor that works beautifully with this method. The cooking time remains similar, but beef ribs tend to be slightly more tender due to their fat content. If you must use pork, reduce the cook time by about 30 minutes total and check for tenderness at 195°F internal temp.
What's the deal with the "stall" at 165°F?
This is when the ribs' moisture evaporates, causing their temperature to plateau. It's completely normal and happens to all meats. The key is patience—keep smoking! Wrapping them in butcher paper at this stage (the "Texas crutch") helps push through the stall while maintaining that perfect bark.
Can I cook these ribs in the oven instead of a smoker?
Preheat your oven to 225°F and use a smoker box with wood chips for that authentic flavor. Place the ribs on a rack over a roasting pan with water. Follow the same timing (3-2-1 method) and use an oven thermometer to monitor temperature. For extra smoke flavor, spray apple juice on the ribs every 30 minutes.
Why do my ribs turn out dry?
Most often, this happens from overcooking or skipping the wrap phase. The ribs need moisture during the stall—wrapping them in butcher paper with apple juice is crucial. Also, never open the smoker too frequently, as heat loss causes dryness. Always aim for 203°F internal temp, not time-based cooking.
How do I make these ribs spicier?
Double the cayenne in the rub and add 1 tsp chipotle powder or ½ tsp red pepper flakes to the mix. For extra heat, brush the finished ribs with a mix of 1 tbsp hot sauce and 1 tbsp honey**. Start with small increases—these ribs are already flavorful, and you can always add more heat at the table!