
Main Courses
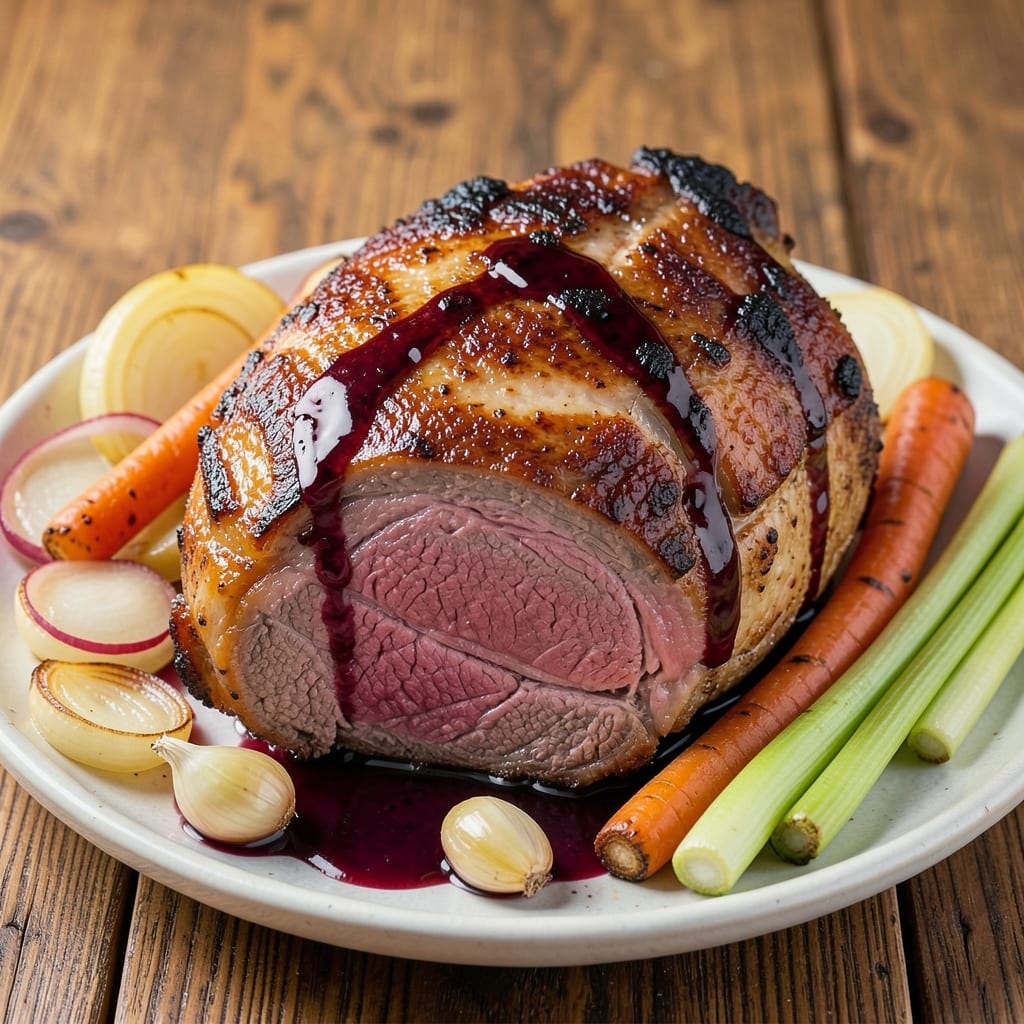
This beef back rump roast recipe transforms a tough cut into melt-in-your-mouth perfection through slow braising and caramelization. The secret lies in proper preparation—trimming excess fat, creating a flavorful crust, and monitoring internal temperatures to achieve juicy results every time. Professional chefs rely on this technique to elevate simple ingredients into restaurant-quality meals.
What sets this method apart is the balance of tenderness and depth achieved through low-and-slow cooking. The roast develops a rich, caramelized exterior while remaining moist inside, thanks to precise temperature control and resting periods. This approach requires patience but delivers results that impress even the most discerning palates—ideal for special occasions or when you want to showcase your cooking skills.
The final product features a perfect crust with layers of savory flavor, making it versatile enough for holiday feasts or weeknight dinners. Pair with classic sides like roasted vegetables or mashed potatoes to complete the meal. The key to success is attention to detail during preparation and cooking, ensuring every bite delivers that sought-after tenderness.
This recipe delivers professional-quality results at home with straightforward techniques. Whether you're cooking for a crowd or treating yourself to a special meal, the slow-braised method guarantees a roast that's impossible to resist. Let's get started on creating this showstopping centerpiece.
Ingredients for beef back rump roast
Sixteen essential ingredients transform a tough cut into restaurant-quality beef back rump roast.
| Ingredient | Amount | Notes |
|---|---|---|
| Beef Back Rump Roast 🥩 | 4 lb | Center-cut, trimmed of excess fat |
| Yellow Onions 🧅 | 2 whole | Medium, peeled and quartered |
| Carrots 🥕 | 4 whole | Medium, peeled and halved lengthwise |
| Celery Stalks 🌿 | 4 whole | Trimmed, cut into 2-inch pieces |
| Garlic Cloves 🧄 | 6 cloves | Peeled, smashed for deeper flavor |
| Dry Red Wine 🍷 | 1 ½ cups | Bold Cabernet Sauvignon preferred |
| Beef Broth 💧 | 2 cups | Low-sodium, homemade or quality store-bought |
| Tomato Paste 🍅 | 2 tbsp | Smooth, not chunky |
| Olive Oil 🫒 | ¼ cup | Extra-virgin, for searing |
| Fresh Thyme 🌿 | ¼ cup | Leaves only, stems removed |
| Fresh Rosemary 🌿 | ⅛ cup | Needles only, finely chopped |
| Kosher Salt 🧂 | 1 ½ tbsp | Diamond Crystal preferred |
| Freshly Ground Black Pepper 🌶️ | 1 ½ tsp | Cracked peppercorns preferred |
| Balsamic Vinegar 🍶 | 1 tbsp | Aged 25 years or more for depth |
| Dried Bay Leaves 🍃 | 2 whole | Fresh if available, removed before serving |
The beef back rump roast is the star—center-cut and trimmed for even cooking and optimal flavor. Look for good marbling at your local butcher shop or high-end grocery like Whole Foods, where the meat is typically more tender. A 4-pound roast serves six generously, perfect for a family dinner or small gathering. The key is selecting a piece with visible fat marbling; this ensures moisture during the long braising process. If you're unsure about the cut, ask for the back rump specifically—it's worth the effort for that melt-in-your-mouth texture.
No red wine? Dry sherry or beef broth with a splash of balsamic delivers similar depth. Fresh thyme and rosemary can be swapped for one-third the amount of dried herbs, but fresh is ideal for that vibrant aroma. The tomato paste is non-negotiable—it adds richness and helps build that caramelized crust. If you're using pre-minced garlic, toast it in olive oil for 30 seconds to deepen the flavor. For the vegetables, baby carrots or pre-cut celery stalks save time without sacrificing quality. The balsamic vinegar should be aged; Trader Joe's carries excellent options at a reasonable price.
Prep the vegetables and herbs ahead—they keep well in the fridge for 3-4 days if stored in airtight containers. The roast itself can be trimmed and seasoned a day in advance, then refrigerated uncovered on a wire rack to dry-brine slightly. This enhances the crust formation. Once braised, the roast reheats beautifully—350°F for 20-30 minutes covered with foil, then broiled for 5 minutes to crisp the crust. For leftovers, portion into glass containers with a splash of braising liquid to maintain moisture; it keeps for 4-5 days in the fridge or 3 months frozen.
Why You'll Love This Recipe
- One-Pot Magic: I swear by this recipe because it’s all in one pot—no extra pans, no extra stress. Just slice the onions, carrots, and celery (the classic "holy trinity" combo), toss them with the roast and garlic, and let the oven do the work. Honestly, the only prep I do is chopping, and that’s it.
- Deep, Savory Crust: That back rump roast? It’s got character—tender on the inside with a crust so rich and caramelized from the slow roast, you’ll want to eat it straight off the bone. The onions and carrots soften into sweet, jammy bits that cling to every bite, like a hug in meat form.
- Leftovers That Shine: Between us, this roast is so good the second day, it’s almost better. I’ll slice it thin for sandwiches, shred it into tacos, or just reheat it with a splash of broth for a hearty stew. My freezer’s always stocked with portions because it’s that reliable.
- Budget-Friendly Feast: A whole roast feeds six for under $20, and the veggies stretch it further. I’ll be real: it’s not the fanciest cut, but the flavor? Ridiculously good. Plus, the carrots and celery last forever, so I’m not wasting money on sides I’ll toss out. Win-win.
Step-by-step instructions for slow-braised beef back rump roast
Transform tough beef into melt-in-your-mouth perfection through precise technique and patience.
Sear the Roast for Deep Flavor Foundation
Heat a Dutch oven over medium-high heat until very hot. Add the 0.25 cup olive oil and let it shimmer for 1 minute. Place the 4 lb beef back rump roast fat-side down and sear undisturbed for 8-10 minutes until deeply browned and crispy in spots. Flip and sear the opposite side for another 6-8 minutes.
This high-heat sear creates the Maillard reaction that develops rich, caramelized flavors. I press down gently on the roast during the first minute of each side to prevent curling and ensure even contact with the pan. Remove the roast and set aside on a plate.
Build the Aromatic Base with Vegetables and Wine
In the same Dutch oven, add the 2 whole yellow onions, 4 whole carrots, and 4 whole celery stalks. Cook for 8-10 minutes until the vegetables begin to soften and release their natural juices. Add the 6 cloves garlic cloves and cook for 30 seconds until fragrant.
Deglaze the pan with the 1.5 cups dry red wine, scraping up all the browned bits from the bottom. Let it reduce by half (3-4 minutes) before adding the 2 cups beef broth, 2 tbsp tomato paste, 1.5 tbsp kosher salt, and 1.5 tsp freshly ground black pepper. Stir well to combine all ingredients.
Braise the Roast Until Fork-Tender
Return the roast to the Dutch oven, placing it back in the braising liquid. Add the 0.25 cup fresh thyme, 0.125 cup fresh rosemary, 2 whole dried bay leaves, and 1 tbsp balsamic vinegar. Bring to a gentle simmer, then reduce heat to low to maintain a bare bubble at the surface.
Cover and braise for 3-4 hours until the beef is fork-tender and easily pulls apart. The internal temperature should reach 200-205°F when checked with an instant-read thermometer. I check the roast at the 2.5-hour mark to ensure it's on track for perfect tenderness.
Rest and Serve with Braising Liquid
Remove the roast from the braising liquid and transfer to a cutting board. Tent loosely with foil and let rest for 15-20 minutes before slicing. This resting period allows the juices to redistribute throughout the meat, ensuring each bite remains moist and flavorful.
Skimming the fat from the braising liquid before serving enhances the presentation. I like to reduce the remaining liquid by half on the stovetop to create a rich, concentrated sauce. Serve the sliced beef back rump roast with the reduced braising liquid spooned over the top and the vegetables from the pot.
Pro Tips For Making Beef Back Rump Roast
- SEAR UNTIL BROWN: The back rump roast has a tougher exterior than a ribeye, so don’t rush the sear—get that pan screaming hot and let the meat develop a deep crust. I used to flip too soon, but now I leave it undisturbed for 4-5 minutes per side until the edges darken. That crust locks in flavor and keeps the meat from drying out later.
- TRIM THE FAT SPARINGLY: Back rump roasts often come with a thin fat cap—leave it on. It renders down during cooking, basting the meat naturally. I learned this the hard way after trimming too aggressively and ending up with a drier roast. Just pat it dry first and let the oven do the rest.
- DON’T SKIP THE MIS EN PLACE: Chop your onions, carrots, and celery into even ½-inch pieces before browning them. Uneven veggies mean some burn while others stay raw. I was skeptical until I tried it—now my aromatics cook through perfectly every time, adding depth without bitterness.
- REST BEFORE SLICING: This isn’t the prettiest method, but it’s the tastiest: tent the roast with foil and let it rest for 15-20 minutes after pulling from the oven. I know, I know—you want to cut into it immediately. But slicing too soon turns tender meat to mush, and that’s a crime against Sunday dinner.
Storing and reheating your beef back rump roast
Refrigerator Storage
Store your cooked beef back rump roast in an airtight container with some of the braising liquid to keep it moist. I like using glass Pyrex containers because they allow me to see the contents and reheat directly. Keep the roast refrigerated at 40°F or below for up to 4-5 days. The flavors actually deepen over time as the spices meld together—this is why leftovers often taste even better than the original meal. 💫
Freezer Storage
For longer storage, freeze your roast in quart-sized freezer bags with ½ cup braising liquid per pound. Squeeze out excess air to prevent freezer burn, and label with the date. This roast maintains excellent quality for up to 3 months in the freezer. When ready to eat, thaw overnight in the fridge before reheating for best results. I always portion the meat separately from the vegetables if freezing leftovers.
Oven Reheating
My preferred method for reheating is in the oven because it preserves the texture beautifully. Preheat your oven to 350°F, place the roast in a baking dish with ½ cup fresh braising liquid, and cover tightly with foil. Heat for 20-30 minutes until reaching an internal temperature of 165°F. For extra crispiness, transfer to a broiler for 3-5 minutes before serving. This method keeps the meat juicy while reactivating that caramelized crust. 🔥
Stovetop Reheating
For quicker reheating, use a stovetop approach with a Dutch oven. Add ¼ cup beef broth to the pan and heat over medium-low heat for 10-15 minutes, stirring occasionally. Keep the heat low to prevent the meat from drying out. If the liquid reduces too quickly, add another splash of broth. I find this method works best for smaller portions rather than the whole roast at once.
Microwave Safety
While not ideal for texture, the microwave can work in a pinch. Place the roast in a microwave-safe dish with 2 tablespoons braising liquid, cover with a damp paper towel, and heat on 50% power in 2-minute intervals until reaching 165°F. Stir between intervals to distribute heat evenly. This method is fastest but may result in slightly drier meat compared to oven reheating.
Leftovers Strategy
I always plan for leftovers by portioning the roast into individual servings before storing. This makes reheating easier and prevents overcooking any single portion. The braising liquid can be reduced separately and stored in small jars for quick sauce additions to other meals. For example, I love using it as a base for beef stroganoff or as a flavorful broth for soups. 💡
Nutrition facts
Frequently asked questions
What makes beef back rump roast different from other beef cuts?
Back rump roast comes from the upper hind leg, offering a leaner but flavorful profile compared to fattier cuts like chuck or rib roast. Its moderate fat content ensures juiciness without excessive richness, making it ideal for slow braising. The muscle fibers break down beautifully during low-and-slow cooking, resulting in that signature tender, melt-in-your-mouth texture we love in roasts.
Can I use this recipe with a smaller roast?
Yes! Scale the recipe proportionally—reduce all ingredients by 25% for a 3-pound roast or 50% for 2 pounds. Keep the same braising time but check for doneness at 2 hours for smaller cuts. The key is maintaining the 3:1 liquid-to-meat ratio to prevent drying. Smaller roasts cook faster, so watch closely after the first 2 hours.
Why does the recipe call for such a long braising time?
The 3-4 hour braise is essential to transform tough muscle fibers into tender perfection. Back rump roast benefits from this slow process because its connective tissues break down gradually at low temperatures (around 300°F). This creates that luxurious, fall-apart texture while developing deep, caramelized flavors. Patience pays off—rushing will leave you with dry, chewy meat!
What if I don't have red wine?
No problem! Substitute with 1.5 cups beef broth + 1 tbsp balsamic vinegar for similar depth, or use dry sherry for a slightly sweeter profile. The wine primarily adds acidity and richness, so any liquid with similar characteristics works. Just avoid sweet wines—they'll make the braising liquid cloying rather than balanced.
How can I tell when the roast is perfectly cooked?
Use a meat thermometer to check for 200-205°F internal temperature—this ensures fork-tenderness without overcooking. Alternatively, insert a fork: if it slides in easily and the meat separates slightly, it's done. The braising liquid should also be reduced and slightly thickened by the end. Never rely on color alone—dark brown crusts can form while the interior remains tough!