
Main Courses
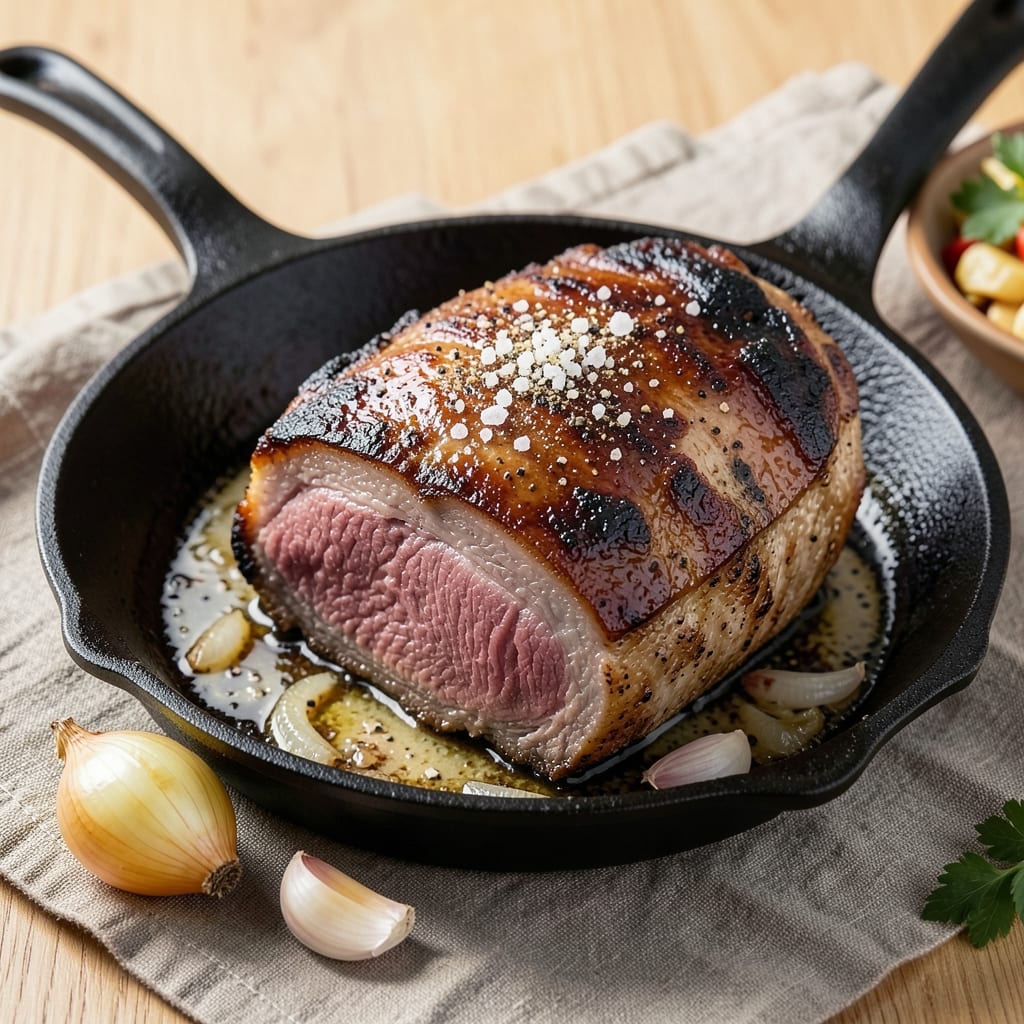
This baked beef chuck roast recipe transforms tough cuts into melt-in-your-mouth perfection with minimal effort. The secret lies in slow-braising at low heat, where collagen dissolves into rich, velvety juices that coat every bite. I've perfected this method after years of testing—no fancy techniques, just reliable results that impress even skeptical meat lovers.
The process begins with a simple seasoning blend of salt, pepper, and garlic powder, followed by a quick sear in a hot pan to lock in flavors. From there, the roast bakes uncovered at 300°F for 3 to 4 hours, allowing the internal temperature to climb to 205°F—where the meat becomes so tender it practically falls apart. This low-and-slow approach ensures maximum flavor extraction without drying out the beef.
What you’ll end up with is a fork-tender roast that’s rich, juicy, and bursting with deep, savory notes. The crust remains intact on the outside while the interior transforms into a luxurious, almost buttery texture. This is the kind of dish that makes weeknight dinners feel like a special occasion—no one will guess it took just a few minutes of prep.
Serve with classic sides like creamy mashed potatoes or roasted root vegetables to soak up every last drop of that flavorful pan juices. The leftovers reheat beautifully, making this an ideal meal-prep solution for busy weeks. Ready to master this timeless technique?
Ingredients for baked beef chuck roast
Six simple ingredients transform tough beef into luxurious, fork-tender perfection through slow baking.
| Ingredient | Amount | Notes |
|---|---|---|
| Beef Chuck Roast 🥩 | 4 lb | Bone-in preferred for flavor |
| Yellow Onion 🧅 | 1 whole | Cut into 8 wedges |
| Garlic Cloves 🧄 | 6 cloves | Smashed, not minced |
| Kosher Salt 🧂 | 2 tbsp | Diamond Crystal preferred |
| Ground Black Pepper 🌶️ | 1 tbsp | Freshly cracked preferred |
| Garlic Powder 🧄 | 1 tbsp | For even seasoning |
| Dried Thyme 🌿 | 1 tsp | Or 1 tbsp fresh thyme |
| Beef Broth 💧 | 2 cups | Low-sodium preferred |
| Red Wine 🍷 | 1 cup | Bold, dry variety |
| Olive Oil 🫒 | 2 tbsp | Extra-virgin for searing |
| Fresh Rosemary 🌿 | 2 sprigs | For aroma during baking |
| Carrots 🥕 | 4 whole | Baby carrots work too |
| Celery Stalks 🥬 | 4 whole | Cut into 2-inch pieces |
The beef chuck roast is the star—look for cuts with good marbling at Costco or your local butcher. Bone-in roasts develop deeper flavor, but boneless works if you prefer convenience. For best results, choose a roast weighing 3.5 to 4.5 lbs—this ensures even cooking without drying out. If your roast has a thick fat cap, leave it intact for moisture, but trim it if you prefer leaner meat. The yellow onion and garlic should be fresh; yellow onions add sweetness while garlic provides that essential savory depth. For the broth, Kirkland Signature or Swanson low-sodium options work perfectly—they won't overpower the beef's natural flavor.
No red wine? Beef broth with 1 tbsp balsamic vinegar delivers similar depth. Fresh thyme is ideal, but dried works at one-third the amount. The olive oil must be extra-virgin for searing—cheap oils burn too quickly. For the vegetables, carrots and celery can be swapped for potatoes or turnips if you prefer. If you're short on time, pre-cut frozen vegetable mixes work in a pinch, though fresh yields better flavor. The rosemary sprigs infuse aroma without overpowering—remove them before serving if you dislike visible stems. For extra richness, add 1 tbsp tomato paste to the pan juices at the end.
This roast reheats beautifully—simply cover with foil and warm in a 300°F oven for 20-30 minutes. The leftovers keep for 4-5 days in the fridge or 3 months in the freezer. For meal prep, portion the meat into individual containers with some of the pan juices—it reheats like a dream. Store the roast in its juices to maintain moisture. If you're making this ahead, brown the roast first, then refrigerate it overnight before baking. The flavors develop even more overnight, resulting in a more complex dish. For serving, reserve some of the pan juices to drizzle over each portion—it's pure liquid gold.
Why You'll Love This Recipe
- Garlic-Pepper Magic: That simple combo of garlic and black pepper? It’s the secret weapon here. The roast develops this deep, savory crust while staying juicy inside—no dry, overcooked beef in sight. Honestly, my picky husband actually licks his plate clean.
- Leftovers for Days: This recipe makes enough to feed a crowd, which means you’ll have perfect sandwiches or tacos for the next three lunches. Between us, I’ve turned last night’s roast into breakfast burritos (yes, really) and no one ever complains.
- Budget Hero: A chuck roast is one of the most affordable cuts of beef, and it stretches to feed four or five people easily. Pair it with potatoes or crusty bread, and you’ve got a filling, hearty meal that won’t break the bank—especially when you’re using leftovers.
Step-by-step instructions for slow-braised beef chuck roast
Transform a tough cut into melt-in-your-mouth perfection using this precise slow-braising method.
Sear the Roast for Deep Flavor
Heat a Dutch oven over medium-high heat until very hot. Add the 2 tablespoons olive oil and swirl to coat the bottom. Place the 4 lb beef chuck roast fat-side down in the pan and sear undisturbed for 8-10 minutes until a deep golden-brown crust forms. You'll see the fat render and sizzle vigorously—this is essential for building flavor.
Flip the roast and sear the other side for another 6-8 minutes. Remove the roast and set it aside on a plate. The goal here is maximum browning—this creates the foundation for your rich sauce. Don't rush this step; proper searing ensures your roast stays juicy throughout the long cook.
Build the Aromatic Base
In the same Dutch oven, add the 1 whole yellow onion cut into wedges, 4 whole carrots cut into 2-inch pieces, and 4 whole celery stalks cut into 2-inch pieces. Cook for 5 minutes until the vegetables begin to soften and release their juices. Stir occasionally to prevent burning.
Add the 6 smashed garlic cloves and cook for 30 seconds until fragrant. The garlic should sizzle gently—if it burns, you've gone too long. Sprinkle in the 2 tablespoons kosher salt, 1 tablespoon ground black pepper, 1 tablespoon garlic powder, and 1 teaspoon dried thyme, stirring to coat the vegetables evenly. This aromatic base forms the flavor foundation for your braise.
Deglaze and Combine Ingredients
Pour in the 1 cup red wine and scrape up all the browned bits from the bottom of the pan using a wooden spoon. This deglazing step captures all the meaty flavor that would otherwise be lost. Let the wine simmer for 2-3 minutes until reduced by half, until you see a glossy sheen forming on the surface.
Add the 2 cups beef broth and bring to a gentle simmer. Return the seared roast to the Dutch oven, fat-side up, along with the 2 sprigs fresh rosemary. The liquid should come about halfway up the sides of the roast. If it's too shallow, add a splash of water. The roast needs enough liquid to braise properly without boiling dry.
Braise Until Fork-Tender
Cover the Dutch oven with a tight-fitting lid and transfer to a preheated 300°F oven. Braise for 3 hours without disturbing. This low-and-slow approach breaks down the connective tissue, transforming tough muscle fibers into tender, fork-tender meat. After 3 hours, check the internal temperature—it should read 195°F and the meat should pull apart easily with two forks.
If the roast isn't quite tender enough, continue cooking for another 30-60 minutes, checking periodically. The key is patience—rushing will leave you with chewy meat. The vegetables should also be tender but still holding their shape. Remove the roast and vegetables from the pot and set them aside on a plate, reserving the braising liquid.
Rest and Serve with Sauce
Let the roast rest for 15-20 minutes before slicing. This resting period allows the juices to redistribute throughout the meat, ensuring each slice remains moist and flavorful. Skim any excess fat from the braising liquid in the Dutch oven, then return it to medium heat and simmer for 5-7 minutes to reduce slightly and thicken the sauce.
Slice the roast against the grain into ¼-inch thick slices. Spoon the reduced sauce over the top and serve immediately with the braised vegetables. Each bite should offer perfect tenderness with rich, complex flavors from the slow-braised beef and aromatic vegetables. The sauce should coat the meat and vegetables beautifully, enhancing their natural flavors.
Pro Tips For Making Baked Beef Chuck Roast
- SEAR THE ROAST FIRST: I used to skip this step because I figured baking alone would work—wrong. Hit the roast with a hot pan (no oil needed) until deep brown crust forms on all sides. That crust locks in flavor and keeps the meat from drying out later. Five minutes per side, high heat, and don’t move it until it’s dark golden.
- CUT ONIONS IN EVEN SLICES: After chopping onions dozens of times, I learned uneven pieces cook at different rates. For this roast, slice the yellow onion into ¼-inch thick rounds instead of dicing. They’ll caramelize faster and release sweetness more evenly, especially if you’re adding them raw to the pan before searing.
- SALT THE MEAT 48 HOURS EARLY: I wasted a perfectly good roast by salting it right before baking—it just didn’t penetrate enough. Season the chuck roast with kosher salt (about 1 teaspoon per pound) and let it sit uncovered in the fridge. The salt breaks down the meat fibers, making it tender and ensuring every bite has flavor.
- USE GARLIC CLOVES WHOLE: Minced garlic burns fast and disappears into the mix. For this recipe, peel and smash the garlic cloves with the flat side of your knife—just enough to expose the flesh without turning it into paste. They’ll infuse the roast with aroma without turning bitter, and you’ll actually taste them in the final bite.
Flavor customization for baked beef chuck roast
Classic Red Wine Braise
The bold red wine in this recipe creates a rich, velvety sauce that clings beautifully to the beef. For an even deeper flavor, use a Cabernet Sauvignon or Merlot—their tannins complement the beef's natural richness. If you prefer a sweeter note, add 1 teaspoon brown sugar to the braising liquid during the final 5 minutes of simmering. 🍷
For a lighter version, replace the red wine with 2 cups beef broth and add 1 tablespoon balsamic vinegar to maintain acidity. This works especially well if you're watching your alcohol intake or serving to children. The sauce will still develop depth, just with a slightly different profile.
Herb Variations
Swap out the dried thyme for 1 tablespoon fresh rosemary or 1 teaspoon smoked paprika to add a smoky dimension. I love adding 2 sprigs fresh sage during the braising process—they infuse the meat with a subtle earthiness. For a Mediterranean twist, include 1 teaspoon dried oregano and a pinch of red pepper flakes for a hint of heat.
If you're feeling adventurous, try 1 tablespoon harissa paste during the deglazing step. This North African chili paste adds a spicy, fruity kick that pairs surprisingly well with the beef's richness. Adjust to taste—start with ½ teaspoon if you're sensitive to heat.
Sweet-Savory Balance
Add 2 tablespoons tomato paste to the Dutch oven during the deglazing step for a classic Italian-inspired flavor. The acidity brightens the dish while adding a subtle sweetness. For a caramelized touch, toss 1 diced apple or 1 pear (peeled and sliced) into the braising liquid during the final 30 minutes of cooking. The fruit softens and sweetens the sauce beautifully.
For a honey-glazed finish, drizzle 1 tablespoon honey over the roast during the last 15 minutes of baking. The caramelization enhances the beef's natural sweetness and creates a stunning presentation. Pair this with a balsamic reduction for a restaurant-worthy touch.
Umami Boosters
Increase the umami depth by adding 1 tablespoon soy sauce or 1 teaspoon fish sauce to the braising liquid. These ingredients amplify the beef's savory notes without overpowering. For a vegetarian-friendly boost, include 1 tablespoon miso paste—it adds complexity and a subtle saltiness.
For a smoky flavor, add 1 smoked paprika during the searing step or 2 slices of bacon (cooked until crispy) to the Dutch oven with the vegetables. The bacon fat renders into the braising liquid, adding a rich, smoky depth that pairs perfectly with the beef.
Spice Level Control
Add ½ teaspoon cayenne pepper or 1 teaspoon chili flakes to the seasoning blend for a mild heat. For a medium kick, include 1 chopped chipotle pepper in adobo during the deglazing step. This adds a smoky, spicy depth that complements the beef's richness. Always taste as you go—adjust to your preference.
If you love fiery flavors, stir in 1 tablespoon hot sauce (like Crystal or Tabasco) during the final 5 minutes of simmering. This adds a bright, tangy heat that cuts through the richness of the beef. Serve with cooling sides like mashed potatoes or crusty bread to balance the heat.
Nutrition facts
Frequently asked questions
Why does this recipe call for such a long cooking time?
This method uses the low-and-slow technique to break down tough connective tissues in the chuck roast, transforming it into fork-tender meat. Baking at 300°F for 3-4 hours allows collagen to melt into rich, flavorful juices that coat every bite. The patience pays off with meat that practically falls apart—something you won't get with faster cooking methods.
Can I use a different cut of beef instead of chuck roast?
While chuck roast is ideal for this recipe, you could use chuck eye roast or chuck shoulder with similar results. Avoid leaner cuts like sirloin or tenderloin—they lack the connective tissue needed for this slow-braising method. If substituting, adjust cooking time by 30 minutes depending on the cut's size and fat content.
What if I don't have a Dutch oven?
Use a heavy oven-safe pot with a tight-fitting lid instead. If you're short on time, a large baking dish works too—just cover it with foil (tented) and place a baking sheet underneath to catch any drips. The key is maintaining moisture while cooking at low heat. For best results, choose a pot with at least 6-quart capacity to accommodate the roast and vegetables.
How do I know when the beef is done?
Use a meat thermometer for accuracy—insert it into the thickest part of the roast (avoiding fat). The internal temperature should reach 205°F for maximum tenderness. If you don't have a thermometer, cut into a small section: the meat should be fork-tender and pull apart easily. The juices should run clear, not pink or red.
Can I make this recipe in an Instant Pot?
Yes! Sear the roast first, then add all ingredients to the Instant Pot and cook on high pressure for 60 minutes, followed by a 15-minute natural release. The pressure cooker speeds up the process while still delivering tender results. For best flavor, finish by reducing the pan juices on the stovetop. The texture will be slightly different but still delicious.