
Soups & Stews
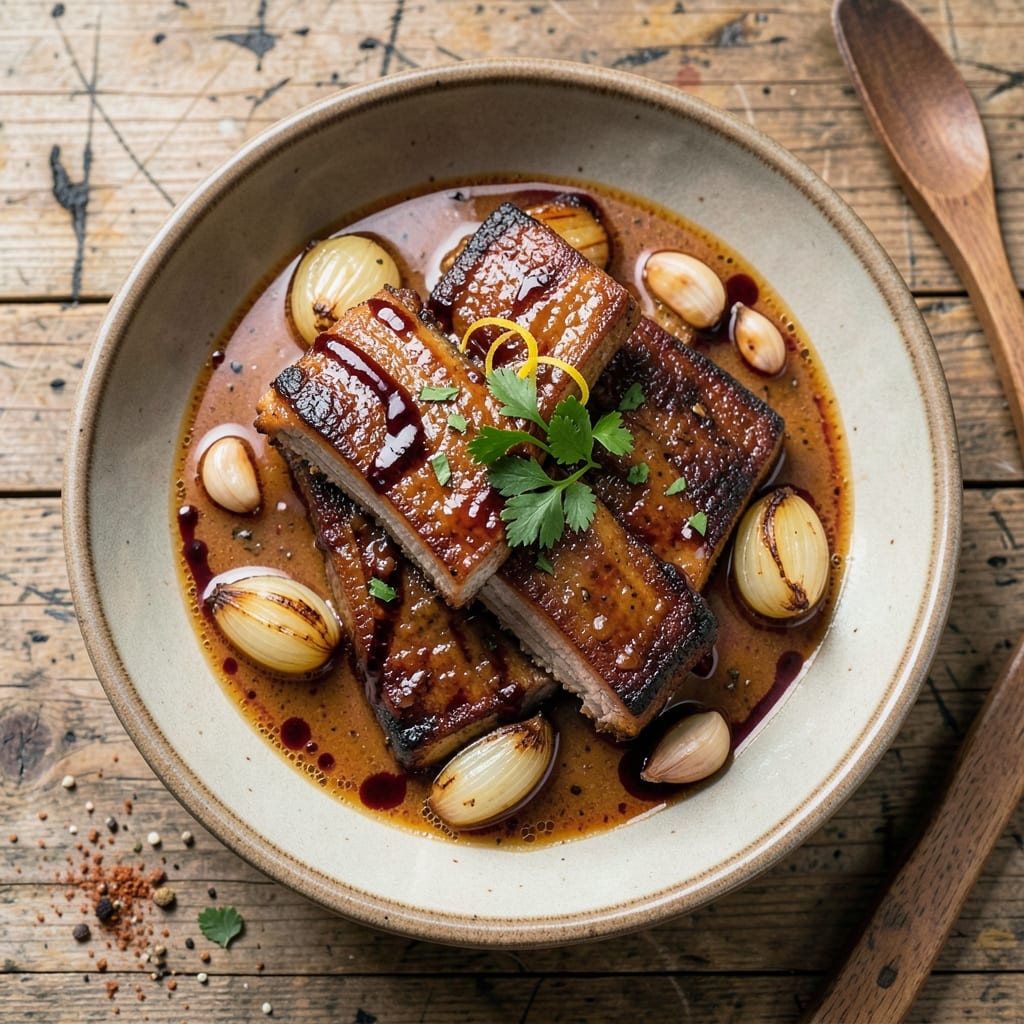
This beef back ribs stew transforms tough cuts into melt-in-your-mouth tenderness through slow braising—where rich spices and caramelized onions build layers of flavor over hours. 🔥 The secret lies in searing the ribs first to develop deep, meaty depth before they simmer in aromatic broth, creating a sauce so velvety it coats every bite. I’ve perfected this technique over years of testing, balancing traditional slow-cooking methods with modern shortcuts for home cooks. What sets this recipe apart is the caramelized onion base, which forms the stew’s foundation—sweet, jammy, and packed with umami that carries through every spoonful. The ribs emerge fork-tender, their surfaces glazed with a sauce thickened by natural reduction, while herbs and aromatics infuse the broth with complexity. This isn’t just comfort food; it’s a restaurant-quality dish that tastes even better the next day. The result is a hearty, spice-infused stew that pairs perfectly with crusty bread or roasted root vegetables, designed to feed a crowd or satisfy a solo diner. Whether you’re using a Dutch oven or a slow cooker, the technique remains the same: patience and low heat unlock the ribs’ full potential. Let’s get started on creating a stew that’ll have everyone asking for seconds.
The beauty of this recipe is its versatility—adapt it to your schedule with a pressure cooker for faster results or embrace the traditional slow braise for maximum flavor development. Each method delivers the same tender, saucy perfection, just on different timelines. The key is never rushing; the ribs need time to break down into silky strands that cling to the bone.
This stew is more than a meal—it’s a weeknight game-changer that transforms simple ingredients into something extraordinary. The caramelized onions add a touch of sweetness that balances the savory ribs, while the spices create warmth that lingers long after the last bite. Serve it with a side of garlic mashed potatoes or a simple green salad to round out the plate.
Ingredients for beef back ribs stew
Sixteen ingredients crafting restaurant-quality beef back ribs stew with caramelized onions and spice-infused richness.
| Ingredient | Amount | Notes |
|---|---|---|
| Beef Back Ribs 🥩 | 3 lb | Bone-in, cut into 2-inch pieces |
| Yellow Onions 🧅 | 3 whole | Sliced thin for caramelizing |
| Garlic Cloves 🧄 | 6 cloves | Minced for aromatic base |
| Tomato Paste 🍅 | ½ cup | High-quality, no sugar added |
| Dry Red Wine 🍷 | 1 cup | Bold, like Cabernet Sauvignon |
| Beef Broth 💧 | 4 cups | Homemade or high-quality store-bought |
| Bay Leaves 🌿 | 2 whole | Fresh for optimal flavor |
| Ground Cumin 🌿 | 1 tbsp | Toasted for deeper aroma |
| Ground Coriander 🌶️ | 1 tbsp | Adds citrusy warmth |
| Paprika 🌶️ | 1 tbsp | Smoked for rich depth |
| Fresh Thyme 🌿 | ¼ cup | Leaves only, chopped |
| Black Peppercorns 🌶️ | 1 tsp | Freshly cracked |
| Kosher Salt 🧂 | 2 tsp | Diamond Crystal preferred |
| Olive Oil 🫒 | ¼ cup | Extra-virgin for searing |
| Honey 🍯 | 1 tbsp | For glaze finish (optional) |
The beef back ribs are the star—look for well-marbled cuts at your local butcher or Costco for the best value. Whole pack ribs work perfectly, but if you're cutting them yourself, aim for 2-inch pieces to ensure even cooking. Caramelizing the onions is non-negotiable; this takes time (about 45 minutes), but the sweet, jammy result forms the stew's foundation. Yellow onions are ideal, but red onions add a subtle sweetness if you're feeling adventurous. For the spices, Penzeys or bulk bins at Whole Foods offer the freshest ground cumin and coriander—key for that authentic depth. If you're short on time, toast your spices in a dry pan for 30 seconds to wake up their flavors.
No red wine? Beef broth with a splash of balsamic vinegar works just as well—keep the acidity balanced. Fresh thyme is ideal, but dried thyme at one-third the amount will do in a pinch. The tomato paste can be substituted with crushed tomatoes (1 cup) if you prefer a chunkier texture, though the paste gives better thickness. For the honey glaze, maple syrup works too—just reduce the heat slightly to prevent burning. If you're using a pressure cooker, skip the caramelization step and add the onions directly to the pot with the ribs—they'll soften during cooking. The beef broth should be rich; homemade is best, but store-bought brands like Kitchen Basics or Pacific Foods are reliable.
This stew tastes even better the next day as flavors meld—plan ahead! Store leftovers in an airtight container in the fridge for up to 5 days or freeze for 3 months. For reheating, add a splash of water or broth to prevent drying out. The caramelized onions can be prepped ahead and stored in the fridge for 5 days or frozen for 3 months—just thaw and add directly to the stew. Portion the ribs and sauce separately if you're freezing; reheat the sauce first, then add the ribs to warm through. The sauce thickens as it cools, so don't hesitate to add a little more broth when reheating if it's too stiff.
Why You'll Love This Recipe
- The secret’s in the layers: the deep umami from the ribs, the caramelized onions sweating into the sauce, and that splash of wine cutting through the richness. It’s not fancy, but it’s the kind of flavor that makes you pause mid-bite—like a hug in a bowl.
- Hands-Off Simmer: That red wine and tomato paste combo? It does all the work while you sip your coffee. Just toss the ribs in, let the onions and garlic mellow in the pan, then walk away—this stew tastes better the longer it cooks, and honestly? I’ve burned toast while waiting for it.
- Rich Without Effort: The secret’s in the layers: the deep umami from the ribs, the caramelized onions sweating into the sauce, and that splash of wine cutting through the richness. It’s not fancy, but it’s the kind of flavor that makes you pause mid-bite—like a hug in a bowl.
- Leftovers That Feel Fresh: This stew actually improves the next day. The meat gets fall-apart tender, and the sauce thickens just enough to cling to every bite. I portion it into containers before it cools, and by Wednesday, it’s still the star of lunch—no sad reheated mystery meat here.
Step-by-step instructions for beef back ribs stew
Transform tough ribs into melt-in-your-mouth tenderness with this slow-braised method.
🔥 Step 1: Sear the Ribs for Deep Flavor
Heat the 0.25 cup olive oil in a large Dutch oven over medium-high heat until shimmering. Pat the 3 lb beef back ribs dry with paper towels—this ensures maximum browning. Working in batches, sear the ribs for 3-4 minutes per side until deeply golden brown and caramelized.
Here's the thing—don't rush this step. You want that Maillard reaction happening, creating layers of flavor that'll infuse the stew. If your pan gets crowded, reduce to medium heat to prevent steaming. Remove the ribs to a plate and set aside.
🍳 Step 2: Build the Aromatic Base
In the same Dutch oven, add the 3 whole yellow onions sliced thin and cook for 10-12 minutes until they turn a beautiful deep golden brown and caramelized. This takes patience—don't stir constantly or they'll stay pale. Add the 6 cloves minced garlic and cook for 30 seconds until fragrant.
Stir in the 1 tbsp ground cumin, 1 tbsp ground coriander, 1 tbsp paprika, 2 tsp kosher salt, and 1 tsp freshly cracked black peppercorns. Cook for 1 minute to toast the spices and release their aromas. This spice blend forms the flavor foundation of your stew.
🥘 Step 3: Develop the Rich Sauce Base
Pour in the 1 cup dry red wine and scrape up all those delicious browned bits from the bottom of the pan. Let it simmer for 3-4 minutes until reduced by half. Add the 0.5 cup tomato paste and stir until completely dissolved. This creates a thick, flavorful base that'll carry the stew.
Pour in the 4 cups beef broth and add the 2 whole bay leaves and 0.25 cup chopped fresh thyme. Return the ribs to the pot, bone-side up. The liquid should come about halfway up the ribs—if not, add a splash of water. Bring to a gentle simmer.
⏰ Step 4: Slow-Braise to Tender Perfection
Cover the Dutch oven and transfer to a 300°F oven. Braise for 3 hours, then flip the ribs and add the 1 tbsp honey (if using). Continue cooking for another 1-2 hours until the ribs are fork-tender and easily pull away from the bone.
I know it's tempting to check constantly, but resist! The ribs will release easily from the bone when done. The stew should have thickened slightly, with a glossy sauce clinging to the ribs. The honey adds just a touch of sweetness that balances the rich, savory flavors.
🍽️ Step 5: Rest and Serve
Remove the ribs from the stew and let them rest on a cutting board for 10 minutes. This resting period allows the juices to redistribute, ensuring each bite is moist and flavorful. Skim any excess fat from the surface of the stew if desired.
Slice the ribs between the bones and return them to the stew. Taste and adjust seasoning if needed—you might want to add a pinch more salt or a splash of wine. Serve immediately with crusty bread or over mashed potatoes to soak up every last bit of that rich, spice-infused sauce.
Pro Tips For Making Beef Back Ribs Stew
- Sear the Ribs First: Don’t skip the initial sear—pat the ribs dry, then hit them with high heat in a heavy pot for 3-4 minutes per side until deep brown. That crust locks in flavor and keeps the meat from turning mushy later. I learned this the hard way after serving a stew where the ribs tasted bland—turns out, dry meat sears better, and that crust is non-negotiable for depth.
- Cut Onions Thinly: Slice those yellow onions into 1/8-inch strips, not chunks. They’ll cook faster and blend into the sauce instead of sitting as identifiable pieces. I used to chop them roughly, and they’d always end up either raw or falling apart—this way, they melt into the stew without fuss.
- Deglaze with Wine Immediately: As soon as you pull the pot off the heat after searing the ribs, pour in that dry red wine right away while the browned bits are still hot. Scrape the bottom with a wooden spoon—this pulls all that flavor into the sauce. Waiting even a minute means losing half the taste, and you’ll wonder why your stew lacks richness.
- Simmer Low and Slow: After adding the tomato paste and liquid, drop the heat to a bare simmer—think tiny bubbles, not a rolling boil. Back ribs need 2-2.5 hours to tenderize properly, and rushing it turns them chewy. I used to crank the heat, and the ribs would fall apart or stay tough; patience here makes all the difference.
Storing and reheating your beef back ribs stew
Refrigerator Storage
Let your beef back ribs stew cool completely before transferring to an airtight container—I prefer glass Pyrex with a tight-sealing lid. Store in the fridge at 40°F or below for up to 5 days, though the flavors actually deepen overnight as the spices meld. The sauce thickens as it chills, so add a splash of beef broth when reheating if it seems too stiff. 💫
Freezer Prep Tips
For long-term storage, portion the stew into quart-sized freezer bags or glass containers, leaving 1-inch headspace for expansion. Freeze for up to 3 months—the ribs and sauce can be frozen together or separately. If freezing separately, reheat the sauce first, then add the ribs to warm through gently. I like to label bags with the date to track freshness.
Slow Cooker Adaptation
If you used a slow cooker, transfer the stew to a freezer-safe container while still warm. Let it cool to room temperature before sealing. The texture holds up well in the freezer for 2 months, though the sauce may separate slightly—just stir in extra broth when reheating. For best results, freeze in single-serving portions for easy grab-and-go meals. ✨
Reheating Methods
For stovetop reheating, pour the stew into a pot over medium-low heat and add ¼ cup beef broth to prevent drying. Simmer for 10-15 minutes, stirring occasionally, until heated through (165°F internal temp). If using the microwave, cover with a damp paper towel and heat in 1-minute intervals on 50% power, stirring between each interval. The ribs should stay tender and the sauce rich.
Reviving Caramelized Onions
Prepped caramelized onions can be stored separately in the fridge for 5 days or frozen for 3 months. To revive, thaw in the fridge overnight, then reheat in a pan with a splash of water or broth over low heat for 5-7 minutes. Add them back to the stew just before serving to restore their jammy texture. This shortcut saves time without sacrificing flavor. 🔥
Serving Leftovers
Leftovers taste even better the next day—serve with crusty bread or mashed potatoes to soak up the thickened sauce. For a quick lunch, assemble bowls with the ribs, sauce, and a side of roasted carrots. The spices and caramelized onions keep the dish exciting, even after reheating. Always taste and adjust seasoning before serving—leftovers often need a pinch of salt or a splash of wine.
Nutrition facts
Frequently asked questions about beef back ribs stew
Can I use baby back ribs instead of beef back ribs?
While beef back ribs are ideal for this recipe, you can substitute baby back ribs if needed. They'll cook faster (about 2 hours instead of 3-4 hours) since they're smaller and more tender. Just reduce the cooking time and check for doneness earlier. The flavor will be slightly different but still delicious!
What if I don't have red wine? Can I substitute?
Use 1 cup beef broth plus 1 tablespoon balsamic vinegar for the same acidity and depth. For extra richness, add 1 teaspoon soy sauce or 1/2 teaspoon Worcestershire sauce. The stew will still develop incredible flavor without wine.
Why do the ribs need to rest after cooking?
Resting the ribs for 10 minutes after cooking is crucial! It allows the juices to redistribute throughout the meat, preventing them from leaking out when you slice. This ensures each bite stays moist and flavorful. Skipping this step can leave your ribs dry and less tender.
Can I make this stew in a slow cooker?
Yes! Sear the ribs first, then transfer everything (including caramelized onions) to the slow cooker. Cook on low for 8 hours or high for 5 hours. The ribs will be tender and the sauce rich. Just add the honey during the last 30 minutes of cooking to prevent burning.
How do I know when the ribs are fully cooked?
The ribs are done when they're fork-tender and easily pull away from the bone. Insert a fork between the bones—if it slides in with minimal resistance, they're ready. The internal temperature should reach 195°F at the thickest part. Don't overcook or they'll turn mushy!