
Soups & Stews
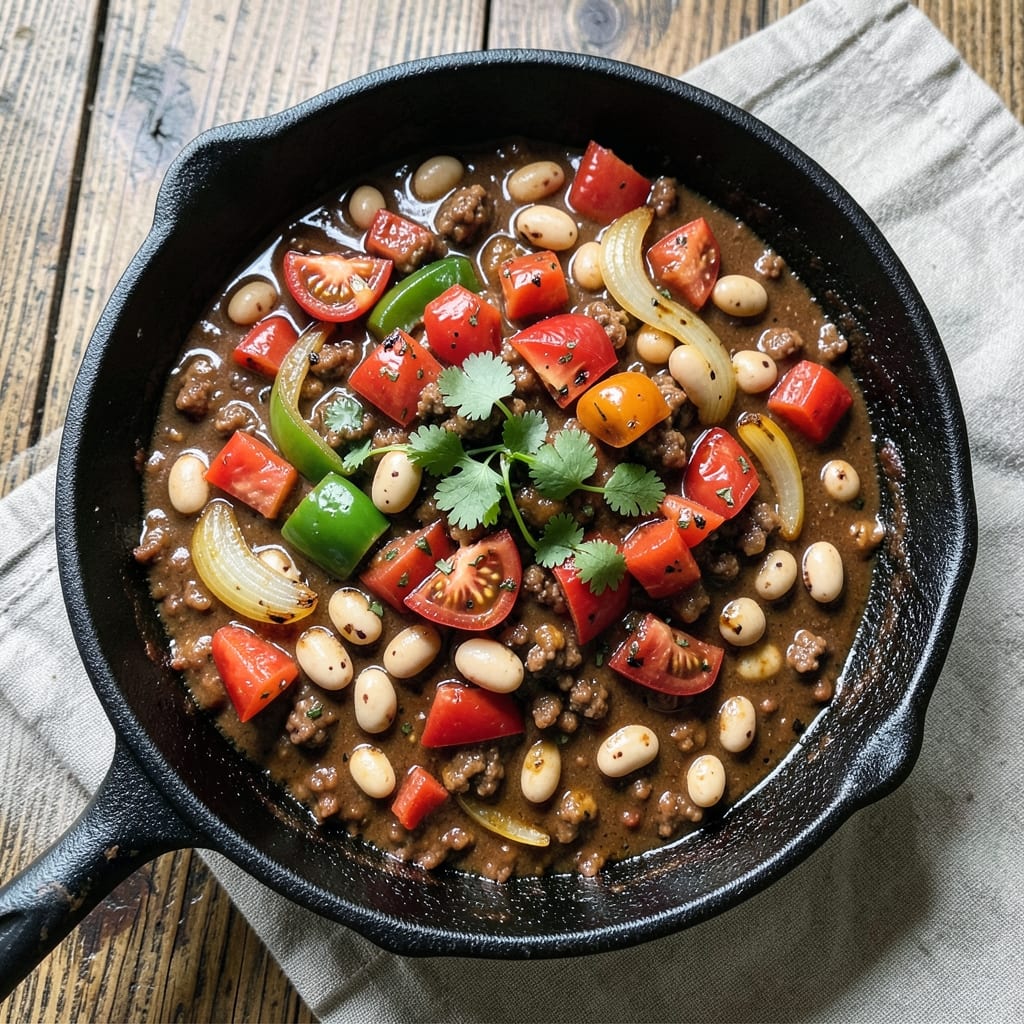
This beef and veggie chili recipe delivers one-pot heartiness with deep, smoky flavors that transform simple ingredients into a satisfying meal. The secret lies in browning the beef properly—this step creates rich, caramelized depth that store-bought chili mixes can't replicate. I've perfected this method over years of testing, ensuring every bite delivers tender beef, vibrant vegetables, and a perfectly balanced spice blend.
The beauty of this recipe is its foolproof simplicity: one pot, minimal cleanup, and a cooking process that lets flavors meld naturally. Start with ground beef for easy browning, then add onions, garlic, and bell peppers for that classic chili texture. The spices—cumin, chili powder, and smoked paprika—build layers of warmth that develop as the chili simmers. This isn't just a meal; it's a flavor experience that gets better with time.
By the time you're serving, you'll have a pot of restaurant-quality chili with tender beef, soft vegetables, and a sauce thick enough to coat every spoonful. The aroma alone will have everyone gathering around the table, and the first bite delivers that perfect balance of smoky, spicy, and slightly sweet. This chili tastes even better the next day, making it ideal for meal prep or feeding a crowd.
Serve it with cornbread, shredded cheese, or sour cream for the full experience. The one-pot method means less time scrubbing dishes and more time enjoying the meal. Here's how to make it—step by step—for chili that's worth the wait.
Ingredients for beef and veggie chili
Simple ingredients that build deep, smoky flavors in one satisfying pot.
| Ingredient | Amount | Notes |
|---|---|---|
| Ground Beef (80/20) 🥩 | 1 ½ lb | Lean-to-fat ratio for flavor |
| Yellow Onion 🧅 | 1 whole | Diced into small pieces |
| Bell Pepper (any color) 🌶️ | 1 whole | Diced, seeds removed |
| Garlic Cloves 🧄 | 4 cloves | Minced for even distribution |
| Canned Kidney Beans 🫘 | 15 oz | Drained and rinsed |
| Diced Tomatoes (46 oz can) 🍅 | 1 can | San Marzano preferred |
| Chili Powder 🌶️ | 2 tbsp | Medium heat preferred |
| Ground Cumin 🌿 | 1 tbsp | Toasted for depth |
| Smoked Paprika 🌶️ | 1 tbsp | For smoky richness |
| Salt 🧂 | 1 ½ tsp | Diamond Crystal preferred |
| Black Pepper 🌶️ | ½ tsp | Freshly ground |
| Beef Broth (low-sodium) 💧 | 2 cups | Homemade or high-quality |
| Dark Brown Sugar 🍬 | 1 tbsp | Balances acidity |
| Apple Cider Vinegar 🍎 | 1 tbsp | Brightens flavors |
| Fresh Cilantro 🌿 | ¼ cup | Chopped for garnish |
The ground beef is where the magic starts. 80/20 fat ratio gives you that rich, caramelized flavor when browned—leaner cuts won't deliver the same depth. Most grocery stores carry this pre-ground, but if you're buying whole chuck, pulse it in your food processor for even cooking. For the canned tomatoes, San Marzano is worth the splurge if you're using them often—they're sweeter and less acidic. The kidney beans? Low-sodium is key here since we're controlling the salt separately. I usually grab the no-salt-added brands from the bulk section at Whole Foods or Trader Joe's—they keep better too.
No chili powder? Mix 1 tbsp each of cumin and smoked paprika as a quick swap. Fresh cilantro wilting? Dried cilantro works at half the amount—it's not the same, but better than nothing. The apple cider vinegar might seem odd, but it brightens the whole dish and cuts through the richness. If you're avoiding vinegar, extra lemon juice does the trick too. For the spices, Penzeys or Spicewalla are my go-tos for quality, but the regular grocery store stuff works fine if it's fresh. The brown sugar balances the acidity from the tomatoes and vinegar—don't skip it, even if you're watching sugar.
This chili tastes even better the next day as the flavors meld. Store in an airtight container in the fridge for up to 5 days, or freeze portions for 3 months. I like to portion it into quart-sized containers so it's ready for quick lunches. The beans and tomatoes hold up well to freezing, but the cilantro? Save that for garnishing fresh. If you're making this ahead for a crowd, let it cool completely before refrigerating to prevent condensation buildup.
Why You'll Love This Recipe
- One-Pot Magic: I swear by this recipe—just dump everything into one pot, stir, and walk away. No chopping like a fine-dining chef, no measuring cups stressing me out. That 80/20 ground beef browns up fast, and the onions caramelize right in the same pan. Honestly, I’ve made it while scrolling through my phone.
- Fat-Packed Depth: Here’s what sold me—the fat in that 80/20 beef doesn’t just cook off; it melts into the veggies, making every bite richer. The garlic and bell pepper (roasted just until tender) add this sweet, smoky kick that balances the beans perfectly. It’s not just chili; it’s ridiculously good chili.
- Meal Prep MVP: This recipe doubles as my lunch for three days. The flavors actually improve after sitting overnight—seriously, the beans soak up all that beefy juiciness. I portion it into containers, toss in some rice, and boom: zero decision fatigue for the week.
- Budget-Friendly Powerhouse: Ground beef, canned beans, and a single bell pepper? My grocery bill laughs at this. Between us, I’ve fed four people for under $10, and no one complained. The onions and garlic stretch the cost further, while the peppers add color and crunch without breaking the bank. Practical? Absolutely.
Step-by-step instructions for beef and veggie chili
This deep-spiced chili comes together in one pot with rich layers of flavor.
Brown the Ground Beef
Heat a large Dutch oven or heavy pot over medium-high heat. Add the 1.5 lb ground beef (80/20) and cook, breaking it apart with a wooden spoon, until it loses its raw color and begins to brown. This should take about 5-7 minutes. The fat will render out, creating a rich base for your chili.
Don't drain the fat—it's essential for building flavor. Instead, use a slotted spoon to transfer the cooked beef to a plate, leaving the rendered fat in the pot. If the fat becomes too dark, reduce the heat slightly to prevent burning. This step develops the deep, meaty foundation of your chili.
Sauté the Aromatics
In the same pot, add the diced yellow onion and diced bell pepper. Cook over medium heat for 5-6 minutes until the onions become translucent and the peppers soften slightly. You'll see the vegetables release their moisture and begin to caramelize.
Add the 4 minced garlic cloves and cook for another 30 seconds until fragrant. This step ensures your chili has a well-developed base flavor. If the vegetables stick to the bottom, add a splash of beef broth to deglaze and scrape up any browned bits—these contain concentrated flavor.
Build the Spice Base
Reduce the heat to medium-low and stir in the 2 tbsp chili powder, 1 tbsp ground cumin, and 1 tbsp smoked paprika. Cook for 1 minute to toast the spices and release their aromas. This step is crucial—it prevents the spices from tasting raw and ensures they're evenly distributed.
Add the 1.5 tsp salt, 0.5 tsp black pepper, 1 tbsp dark brown sugar, and 1 tbsp apple cider vinegar. Stir well to combine. The vinegar brightens the flavors, while the sugar balances the acidity. Let the mixture cook for another 1 minute to allow the spices to meld with the vegetables.
Simmer the Chili
Return the browned beef to the pot and add the 1 can diced tomatoes (46 oz), 2 cups beef broth, and 15 oz drained and rinsed kidney beans. Stir everything together and bring to a gentle boil. Once boiling, reduce the heat to low and let it simmer uncovered for 45-60 minutes, stirring occasionally.
The chili should thicken slightly as it simmers, and the flavors should meld into a cohesive, hearty dish. Taste after 30 minutes and adjust the seasoning if needed—add more salt, chili powder, or vinegar as desired. The beans should be tender, and the meat should be fully cooked through.
Finish and Serve
Once the chili has simmered to your liking, remove it from the heat. Stir in the 0.25 cup chopped fresh cilantro just before serving. The cilantro adds a bright, fresh contrast to the rich, spiced chili. Let the chili rest for 5-10 minutes before serving to allow the flavors to settle.
Serve the chili hot, topped with extra cilantro if desired. The one-pot method keeps everything simple, and the deep-spiced flavors will shine through. This chili tastes even better the next day, so make extra for leftovers—it reheats beautifully.
Pro Tips For Making Beef And Veggie Chili
- Brown the Beef Properly: I learned this the hard way—skipping the full brown isn’t just about color. Cook the 80/20 ground beef in batches over medium-high heat until it’s deep brown, not just pink, breaking it into small chunks as you go. That fat renders out and builds flavor, so resist the urge to rush it. (Yes, even if you’re impatient like me.)
- Chop Veggies Uniformly: Diced onion and bell pepper should be small and even—about ¼-inch pieces. Big chunks stay tough and undercooked while tiny bits turn to mush. Pulse them in a food processor for consistency, then give them a quick hand-chop to soften edges. (Your future self will thank you when the texture’s perfect.)
- Drain and Rinse the Beans: Canned kidney beans come packed in salty liquid that’ll water down your chili. Drain them, then rinse under cold water to cut the salt and starch. Pat them just dry with a towel—enough to remove excess moisture, but don’t crush them. (This keeps the chili thick and flavorful, not soupy.)
- Simmer Low and Slow: After adding all ingredients, bring the chili to a boil once, then drop the heat to low. Let it bubble gently for at least 30 minutes—this lets the flavors meld and the beans soften without breaking apart. Peek under the lid occasionally; if it’s foaming too much, reduce the heat further. (Skipping this step = sad, thin chili.)
Essential equipment for great beef and veggie chili
Dutch Oven Essentials
A heavy Dutch oven is the backbone of perfect chili. I swear by my Lodge 5.5-quart—it distributes heat evenly and handles the long simmer without scorching. If you don’t own one, a stainless steel pot with a tight-fitting lid works too, but avoid nonstick (it can’t handle the heat). The deep sides prevent spills when stirring, and the lid traps steam to develop rich flavors. 🔥
Wooden Spoon Must-Have
Use a long-handled wooden spoon (I prefer OXO Good Grips) for stirring—it won’t scratch your pot like metal and won’t melt in the heat. The long handle keeps your fingers safe from splatters, especially when browning the beef. Avoid silicone spoons—they can degrade over time with high-heat cooking. Pro tip: Soak it in hot, soapy water after use to remove stubborn chili residue.
Slotted Spoon for Beef
A slotted spoon (like the Mercer Culinary Genius) is your best friend for transferring browned beef. It lets fat drain back into the pot while removing meat, keeping your chili rich and flavorful. I use mine to scoop beef onto a paper towel-lined plate to blot excess fat before adding it back to the pot. This step prevents a greasy chili—trust me, it makes a difference.
Measuring Spoons Set
Precision matters with spices! A stainless steel measuring set (I love West Bend) ensures accurate measurements for chili powder, cumin, and smoked paprika. These spices are potent, and even a ½ teaspoon too much can overpower your chili. Keep your set near the stove for quick adjustments during cooking. A magnetic spice rack on the wall saves counter space and keeps spices fresh.
Immersion Blender (Optional)
For ultra-smooth chili, an immersion blender (like the Ninja CB101) lets you adjust thickness without transferring pots. Pulse for 10-15 seconds to blend just the sauce, leaving beans and beef intact. This is a game-changer for serving—everyone gets that perfect, creamy texture without losing texture. Just be careful not to over-blend, or your chili turns into soup. ✨
Storage Containers
Leftovers deserve love! Use glass Pyrex containers (or Rubbermaid Brilliance) to store chili—glass won’t absorb odors like plastic. Portion into quart-sized containers for easy reheating. Label with dates (chili lasts 5 days refrigerated or 3 months frozen). I also keep a small airtight container of chopped cilantro in the fridge for quick garnishing later. 💡
Nutrition facts
Frequently asked questions
Can I use ground turkey instead of beef?
Ground turkey works beautifully and can make this a lighter option. Use the same 1.5 lb amount and follow the same browning process. The texture will be slightly leaner, so you might want to add 1 extra tablespoon of oil when browning to prevent drying. Turkey also cooks faster, so keep an eye on it to avoid overcooking.
How do I make this chili spicier? For extra heat, add ½ teaspoon cayenne pepper or 1 chopped jalapeño with the onions. You can also increase the chili powder to 2.5 tablespoons or stir in 1 teaspoon of hot sauce at the end.
Can I make this chili in a slow cooker?
Yes! Brown the beef and sauté the aromatics in a skillet first, then transfer everything to a 6-quart slow cooker. Add all remaining ingredients and cook on low for 6-8 hours or high for 3-4 hours. The slow cooker method actually enhances the flavors, making it even more tender and rich. Just skip the final cilantro until serving.
What if my chili is too thin?
If your chili needs thickening, mix 1 tablespoon cornstarch with 2 tablespoons cold water and stir it into the pot. Bring to a gentle simmer for 3-5 minutes until it thickens to your desired consistency. Alternatively, mash some of the beans slightly with a spoon to release starch. Never add flour directly—it can make the chili taste grainy.
Can I prepare this chili ahead of time?
This chili actually tastes better the next day! Make it a day ahead and refrigerate in an airtight container. Reheat gently over medium-low heat until warmed through, stirring occasionally. For freezing, portion into quart-sized containers and freeze for up to 3 months. Thaw overnight in the fridge before reheating—never microwave directly from frozen.