
Soups & Stews
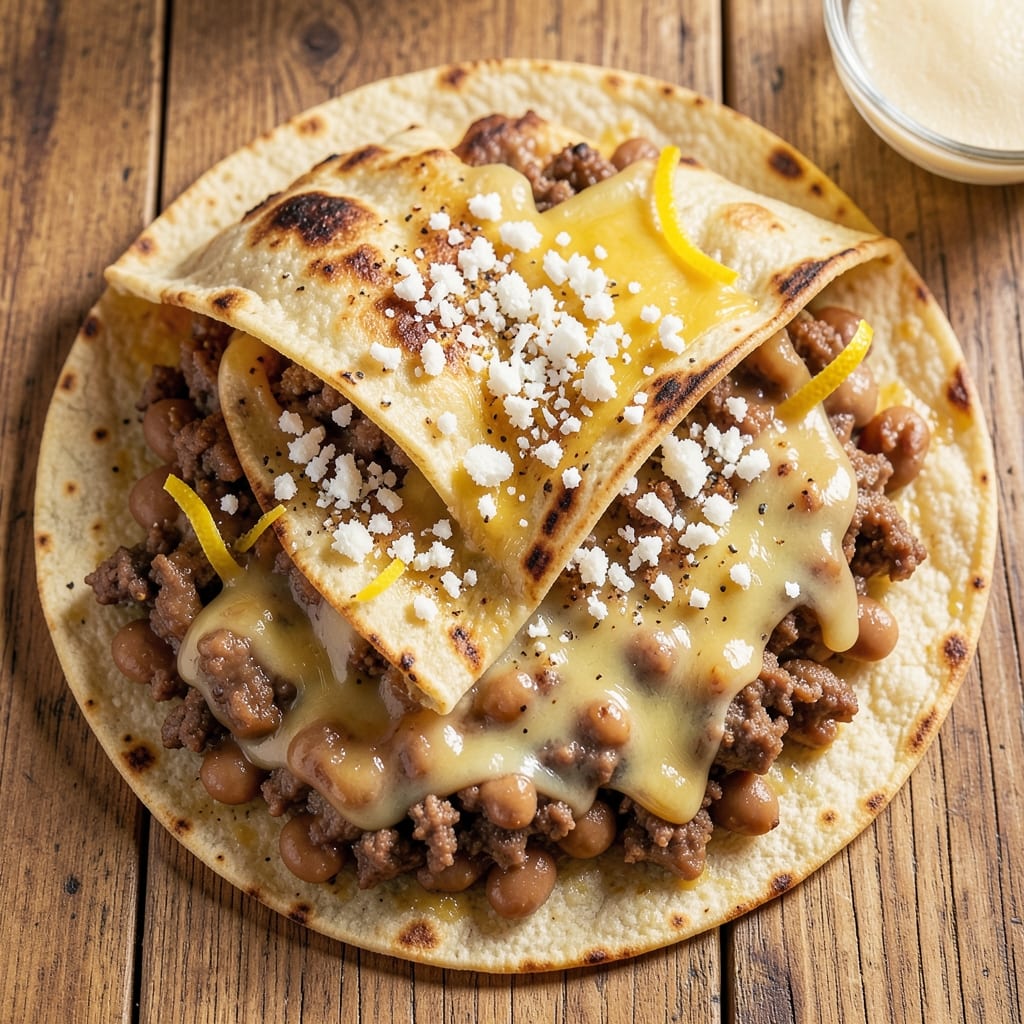
This beef and refried bean quesadilla recipe delivers crispy tortilla stacks with perfectly melty cheese layers that hold together at every bite. 🌟 The secret lies in layering ingredients strategically—tender seasoned beef, creamy refried beans, and three types of cheese—while cooking at the right temperature to prevent soggy centers. I've perfected this recipe over years of testing, and it's become a go-to for quick, satisfying meals that feel indulgent without requiring hours in the kitchen.
The beauty of this dish is its flexibility—you can use leftover roasted beef or ground beef, and the refried beans add a creamy, hearty texture that balances the richness of the cheese. What makes it truly special is the crispy exterior that forms when you press the quesadillas in a hot skillet, while the inside stays warm and gooey. This isn't just a quick meal; it's a restaurant-quality dish that comes together in under 30 minutes.
By the time you're done, you'll have golden-brown quesadillas with layers of flavor in every bite—savory beef, smoky beans, and melty cheese that pulls just enough to create that satisfying string. The aroma alone will have everyone gathering around the table, and the first crispy bite is always the hardest to resist. Serve with salsa, sour cream, or guacamole for the full experience.
Whether you're feeding a family or craving a solo dinner, this recipe scales perfectly and delivers every time. The method is straightforward, but the results are anything but basic—think crispy edges, tender centers, and a cheese pull that's impossible to stop at just one slice. Let's get cooking!
Ingredients for beef and refried bean quesadilla
Pantry staples meet bold flavors—crispy tortillas, melty cheese, and smoky seasoned beef.
| Ingredient | Amount | Notes |
|---|---|---|
| Large Flour Tortillas 🌯 | 8 whole | Flour, 10-inch size preferred |
| Cooked Ground Beef 🥩 | 1 ½ lb | 80/20 fat ratio, seasoned |
| Refried Beans 🫘 | 1 ½ cups | Canned or homemade, warmed |
| Shredded Monterey Jack Cheese 🧀 | 2 cups | Freshly shredded, not pre-shredded |
| Shredded Cheddar Cheese 🧀 | 1 cup | Medium sharp, freshly shredded |
| Cotija Cheese 🧀 | ½ cup | Crumbled, salty kick |
| Taco Seasoning 🌶️ | 1 ½ tbsp | Homemade or store-bought |
| Olive Oil 🫒 | 2 tbsp | For skillet cooking |
| Salt 🧂 | ½ tsp | Kosher or sea salt |
| Black Pepper 🌶️ | ¼ tsp | Freshly ground preferred |
| Garlic Powder 🧄 | ½ tsp | For extra flavor depth |
| Sour Cream 🥛 | ¼ cup | For serving, optional |
| Salsa 🍅 | ½ cup | For serving, optional |
The tortillas are your foundation—Mission brand or La Tortilla Factory are my go-tos for that perfect balance of flexibility and structure. Grab the 10-inch size if you can; they hold up better to layering without tearing. For the beef, 80/20 fat ratio is key—it stays juicy while cooking. If you're using leftover roasted beef, shred it finely so it blends seamlessly with the beans. The refried beans can be canned (like La Fonda) or homemade—just make sure they're warmed through before assembling. Freshly shredded cheese is non-negotiable here; pre-shredded gets gummy and ruins the texture.
No taco seasoning? Mix 1 tsp chili powder, 0.5 tsp cumin, 0.25 tsp garlic powder, and a pinch of salt—it's just as good. Running low on Cotija? Substitute crumbled feta or extra cheddar for a milder taste. The sour cream and salsa are totally optional but take this from good to great. If you're feeling fancy, add a sprinkle of chopped cilantro or diced jalapeños to the filling for extra freshness. And trust me, butter-flavored cooking spray in the skillet makes the quesadillas crispier than olive oil alone.
These reheat beautifully—pop them in a skillet for 2-3 minutes per side until crispy again. Store leftovers in an airtight container for 3-4 days in the fridge, or freeze for up to 2 months. I always make an extra quesadilla to freeze for lazy days. For serving, warm the tortillas slightly in a dry skillet before assembling if they've been sitting in the pantry—keeps everything crispy and not soggy.
Why You'll Love This Recipe
- No-Fuss Assembly: I swear by this one—just spread, fold, and cook. No fancy layering, no stressing over even distribution. The refried beans melt into the tortilla while the cheddar stretches golden, and honestly? Even my picky teenager doesn’t complain about the simplicity.
- Cheesy-Melty Magic: That combo of Monterey Jack and chedddar? Chef’s kiss. The Jack adds a buttery tang while the cheddar crisps up just right—every bite has that perfect pull-apart texture. Plus, the refried beans soak up all the beefy flavor like a sponge.
- Lunchbox Hero: Between us, this is my go-to for meal prep. Slice into wedges, pack in containers, and they stay fresh for days. Throw in a side of salsa or sour cream, and suddenly you’ve got a lunch that feels fancy but costs next to nothing.
- Budget Win: Ground beef, canned refried beans, and store-brand cheese? This recipe doesn’t break the bank. I made six quesadillas for under $10, and they disappear faster than my willpower on a bad day. Leftovers? Even better—reheat and serve again without losing a bite of flavor.
Step-by-step instructions for beef and refried bean quesadillas
Here's how to make perfectly crispy, melty quesadillas with layers of beef, beans, and cheese.
👨🍳 Step 1: Warm the Refried Beans and Prep the Filling
Start by warming the 1.5 cups refried beans in a small saucepan over low heat for 2-3 minutes until spreadable. You want them soft and smooth—no lumps here. While they warm, mix the 1.5 lb cooked ground beef with the 1.5 tbsp taco seasoning, 0.5 tsp salt, 0.25 tsp black pepper, and 0.5 tsp garlic powder in a bowl. This ensures every bite has that bold, seasoned flavor.
I like to press the beef mixture gently with a fork to break up any large chunks—this helps it distribute evenly in the tortillas. The beans should be warm but not dry; if they're too thick, add a splash of water to loosen them up. This step is all about getting your fillings ready to layer like a pro.
🍳 Step 2: Assemble the Quesadillas for Maximum Crispiness
Lay out 4 of the 8 large flour tortillas on a clean surface. On each tortilla, spread ¼ cup of the warmed refried beans in an even layer, leaving about ½-inch border around the edges. Then, add ⅓ of the seasoned ground beef and ½ cup of the shredded Monterey Jack cheese, followed by ¼ cup of the shredded cheddar cheese. Finish with 2 tablespoons of the crumbled cotija cheese—this adds that salty kick that makes these quesadillas unforgettable.
Fold the tortillas in half, pressing down gently but firmly to help the fillings stick together. The cheese should melt and bind everything as it cooks, so don't be shy with the layers. If you're worried about the filling spilling out, press the edges with a fork to seal them slightly. This is where the magic happens—thick, flavorful layers that won't fall apart when you flip.
🔥 Step 3: Cook Until Golden Brown and Melty
Heat 1 tablespoon of olive oil in a large skillet over medium heat until shimmering. Place 2 quesadillas in the skillet—don't overcrowd, or they'll steam instead of crisp up. Cook for 2-3 minutes per side, pressing down gently with a spatula for 10-15 seconds during the first minute. This ensures even contact with the pan and prevents curling. You're aiming for golden brown spots and bubbling cheese—that's your signal they're ready to flip.
Real talk: Don't rush this step. The first side should develop a crispy crust before you flip. If the cheese starts to brown too quickly, reduce the heat slightly. Once both sides are deep golden brown and the cheese is fully melted, transfer the quesadillas to a plate and tent loosely with foil to keep them warm. Repeat with the remaining quesadillas, adding more olive oil as needed.
🍽️ Step 4: Serve with Toppings and Enjoy Immediately
Slice each quesadilla into 4 wedges and serve them right away while the cheese is still gooey and the tortillas are crispy. Drizzle with 0.25 cup sour cream and top with 0.5 cup salsa for that fresh, tangy contrast. The cotija cheese will crumble slightly, adding extra texture and saltiness with every bite.
Here's the thing—these quesadillas are best served immediately. The cheese continues to melt slightly even after cooking, so dig in while it's hot. Pair them with a simple side salad or some warm tortilla chips for scooping up any extra salsa. Each bite should deliver that perfect mix of crispy tortilla, melty cheese, and hearty beef and bean filling—just like a cozy, homemade meal.
Pro Tips For Making Beef And Refried Bean Quesadilla
- CRANK THE HEAT FIRST: High heat is your friend here—start with the pan screaming hot before adding the tortilla. I used to play it cool, and the cheese would just melt into a sad, greasy puddle instead of crisping up like it’s supposed to. Once the first side is golden, you can dial it back a notch, but that initial sear makes all the difference.
- LAYER BEANS THINLY: Spread the refried beans in a thin, even layer—about ¼-inch thick—or you’ll end up with a soggy, uneven mess. I learned this after making a quesadilla so bean-heavy it collapsed like a pancake. A quick flick of the spatula to smooth it out helps too.
- SKIP THE CHEESE OVERLOAD: Two ounces of cheese per tortilla is plenty—any more and it’ll turn into a cheese volcano when you flip. I’ve seen people drown these things in cheese, and while it looks impressive, it just makes the tortilla greasy and hard to handle. Monterey Jack melts cleaner than cheddar, so use it as the base if you’re mixing.
- TOAST THE TORTILLAS FIRST: Warm the tortillas dry in the same pan for 10 seconds per side before adding fillings—this prevents them from tearing when you fold. I was skeptical until I tried it; now I never skip it. The extra few seconds keep the structure intact and cut down on filling spills when you flip.
Common mistakes when making this dish
Overfilling Tortillas
This is the #1 mistake I see—packing too much filling into each tortilla. When you overfill, the cheese oozes out during cooking, creating a messy skillet and potentially soggy quesadillas. Stick to ¼ cup beans, ⅓ of the beef mixture, and ½ cup cheese per half-tortilla. The fillings should fit comfortably without bulging when folded. Trust me, less is more for that perfect crispy-melty balance. 🌯
Skipping the Press
Many people assemble quesadillas and immediately slide them into the pan without pressing. This creates uneven cooking and air pockets that prevent proper browning. After folding, press each quesadilla gently with a spatula for 10-15 seconds before cooking. This ensures even contact with the pan and helps the fillings adhere. I like to press again halfway through cooking for maximum crispiness. 🔥
Using Pre-Shredded Cheese
Pre-shredded cheese contains anti-caking agents that make it gummy when melted—this ruins the perfect texture we're aiming for. Always use freshly shredded cheese (Monterey Jack and cheddar in this recipe). If you're short on time, grate your own using a box grater or food processor. The difference in melt and texture is night and day. Your quesadillas deserve that restaurant-quality cheese pull! 🧀
Cooking Too Hot
High heat causes the outside to burn before the cheese melts properly inside. Medium heat is ideal—you should see gentle bubbling of the cheese before the tortilla turns golden brown. If your pan is too hot, reduce the heat slightly or let it cool for 30 seconds before adding more quesadillas. Patience here prevents rubbery tortillas and undercooked centers. ⏳
Overcrowding the Pan
Placing more than 2 quesadillas at a time in your skillet will cause them to steam instead of crisp up. The moisture from the tortillas and fillings creates steam, which makes the outside soggy rather than crispy. Cook in batches if needed, and clean your pan between batches for maximum crispiness. A clean, hot surface is your best friend for perfect quesadillas. 🍳
Not Pressing During Cooking
Many people forget to press down during cooking, which leads to uneven browning and potential curling. After placing the quesadillas in the pan, press down gently with a spatula for 10-15 seconds during the first minute of cooking. This ensures even contact with the pan and helps create that perfect crispy crust on both sides. Don't skip this crucial step—it makes all the difference! 💪
Nutrition facts
Frequently asked questions
Can I use corn tortillas instead of flour tortillas?
Corn tortillas work but won't be as crispy or hold together as well as flour. If you must use them, opt for larger corn tortillas (like 6-inch) and press them extra firmly during cooking. The texture will be more crumbly, so serve immediately with toppings to prevent falling apart.
How do I reheat leftover quesadillas without making them soggy?
Reheat in a dry skillet over medium heat for 1-2 minutes per side until crispy again. Avoid microwaving—they'll turn rubbery. For extra crispiness, place them under the broiler for 30 seconds after skillet reheating. Always store leftovers in an airtight container to maintain freshness.
What's the best way to make these gluten-free?
Replace flour tortillas with gluten-free flour tortillas (like Siete brand) and ensure your taco seasoning is gluten-free. For extra flavor, add 1 tsp cumin and 0.5 tsp smoked paprika to the seasoning mix. The texture will be slightly different but still delicious. Always check cheese labels for gluten-free certification too.
Can I make these ahead of time for a party?
Assemble the quesadillas but don't cook them—wrap in plastic wrap and refrigerate for up to 24 hours. When ready to serve, cook as directed. For a crowd, double the recipe and cook in batches. Keep them warm in a 200°F oven while serving. The cheese will melt beautifully when reheated.
Why did my quesadillas turn out greasy?
Greasy quesadillas usually mean too much oil or overcrowding the pan. Use just 1 tbsp olive oil per batch and cook 2 at a time maximum. Also, don't press with too much oil on the spatula. For extra crispiness without grease, try using a nonstick skillet and cooking on medium-low heat for better control.