
Soups & Stews
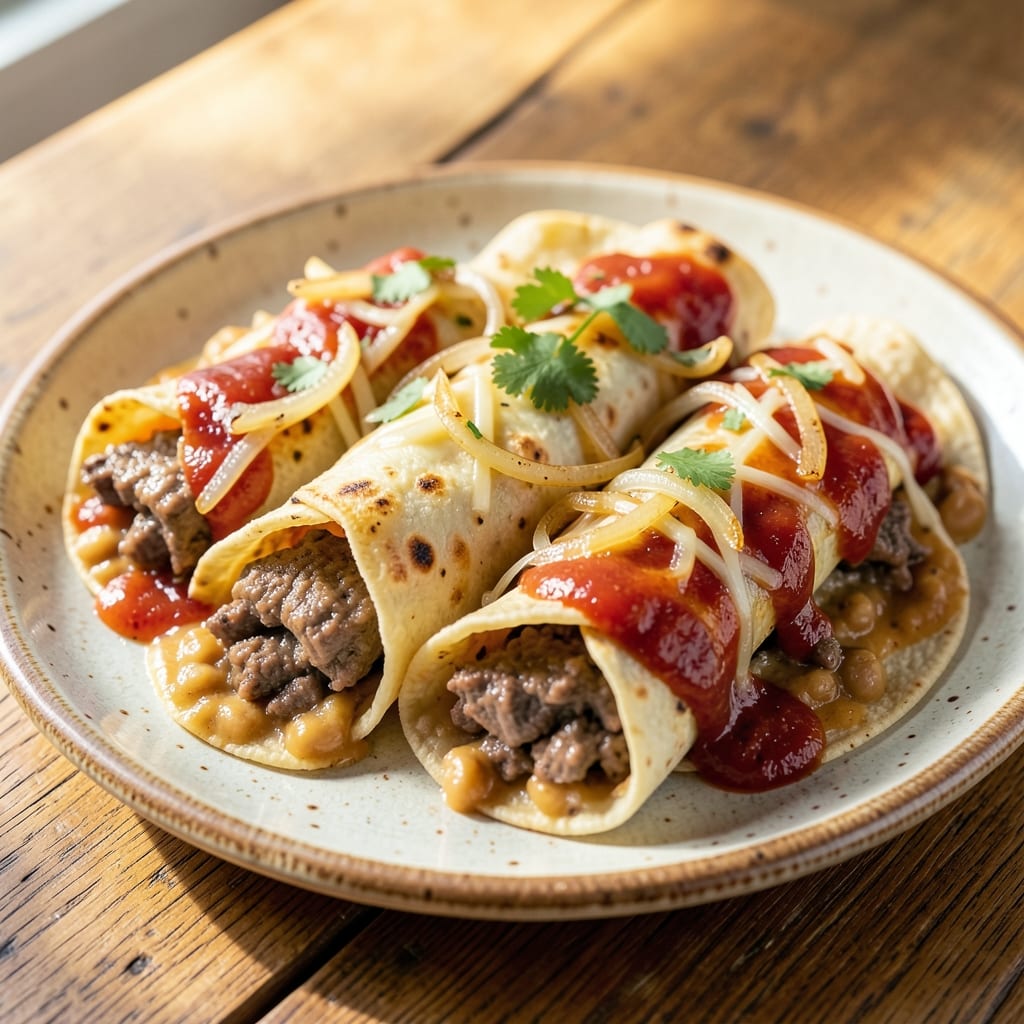
This beef and refried bean enchilada recipe delivers restaurant-quality crispy tortillas with layers of melty cheese and savory filling in every bite. The secret lies in properly browning the beef and beans before assembling—this creates deep, caramelized flavors that transform a simple weeknight meal into something special. I've perfected this technique over years of testing, ensuring the tortillas stay crispy while the cheese melts just enough to create that perfect pull-apart texture.
The process starts with slow-cooked beef and refried beans simmered in a rich enchilada sauce, then layered between flour tortillas and blanketed in melted cheese. What sets this recipe apart is the 30-minute bake time at high heat, which guarantees crispy edges while keeping the filling warm and gooey. This isn't your basic casserole—it's a dish that feels indulgent yet comes together with straightforward steps, making it perfect for family dinners or game day gatherings.
By the time you pull these enchiladas from the oven, you'll have golden-brown tortillas with cheese pulling in strings and a filling that's rich, hearty, and packed with flavor. The aroma alone will have everyone gathering around the table, and the first bite delivers that perfect balance of textures—crispy outside, tender inside, with every layer bursting with savory goodness. This is comfort food at its finest, elevated just enough to feel special.
Serve with sour cream, guacamole, or a side of Mexican rice to complete the meal. The leftovers reheat beautifully, making this a great make-ahead option for busy weeks. Let's get cooking—these enchiladas are worth every minute of effort.
Ingredients for beef and refried bean enchilada
Here's what transforms ordinary enchiladas into restaurant-quality crispy, melty perfection—every ingredient matters.
| Ingredient | Amount | Notes |
|---|---|---|
| Ground Beef (Chuck Roast) 🥩 | 2 lb | 80% lean, finely ground for even cooking |
| Refried Beans (Canned) 🥫 | 2 cups | Homestyle or mild flavor preferred |
| Flour Tortillas (Medium) 🌯 | 12 whole | Burrito-sized, 8-inch diameter |
| Shredded Monterey Jack Cheese 🧀 | 3 cups | Freshly shredded for best melt |
| Enchilada Sauce (Red) 🍅 | 2 ½ cups | Homemade or quality jarred |
| Onion (Yellow) 🧅 | 1 whole | Diced, for beef browning |
| Garlic Cloves 🧄 | 4 cloves | Minced, for beef seasoning |
| Chili Powder 🌶️ | 2 tbsp | Medium heat preferred |
| Ground Cumin 🌿 | 1 tbsp | Toasted for deeper flavor |
| Salt 🧂 | 1 ½ tsp | Diamond Crystal kosher salt |
| Black Pepper 🌶️ | ½ tsp | Freshly ground preferred |
| Vegetable Oil 🫒 | 2 tbsp | For browning beef |
| Beef Broth (Low Sodium) 💧 | ½ cup | For deglazing pan |
The beef is where deep flavor starts. Chuck roast (not lean ground beef) gives that rich, caramelized taste when browned properly. Grab it from the meat counter at Whole Foods or your local butcher—they'll grind it extra fine for you. If you're using pre-ground, look for 80% lean to keep it tender. The onions and garlic? Yellow onions add sweetness, but red will work too. Just make sure they're finely diced—small pieces cook faster and blend better into the filling. For the spices, Penzeys chili powder has the perfect balance of heat and earthiness, but any good-quality brand works.
No enchilada sauce on hand? Tomato sauce plus a packet of taco seasoning gets you close—just add a splash of vinegar for brightness. The refried beans can be canned (I use La Favorita for that authentic taste) or homemade. For the tortillas, Mission brand gives the best crispiness when baked, but any medium flour tortilla works. Want extra crunch? Brush them lightly with oil before assembling. The cheese is non-negotiable—Monterey Jack melts perfectly and doesn't get rubbery like cheddar. If you're out, Oaxaca cheese is a great substitute. And pro tip: Shred your own cheese—pre-shredded gets clumpy from anti-caking agents.
These enchiladas reheat like a dream—350°F for 10-15 minutes until bubbly. Store leftovers covered in the fridge for 4 days or freeze between layers of parchment for 3 months. I always make a double batch because they disappear fast. The filling can be prepped ahead and kept in the fridge for 2 days before assembling—just bake straight from frozen if needed. For extra crispiness, broil for 2 minutes at the end. And trust me, the first bite is worth every minute of effort.
Why You'll Love This Recipe
- One-Pan Magic: I swear by this trick—brown the chuck roast right in the same skillet you’ll later warm the enchilada sauce in. Less dishes, zero fuss, and that meat stays juicy because it’s not fighting for space in a crowded pot.
- Creamy-Spicy Crunch: The refried beans add that velvety texture, while the Monterey Jack melts into gooey perfection. Slather on that red enchilada sauce, and suddenly you’ve got layers of flavor that taste like a hug from your abuela—just with way less effort.
- Weeknight & Leftovers: Make a double batch on Sunday, and you’ve got lunch covered for the next two days. The tortillas hold up beautifully when reheated, and honestly? The second day’s even better because the flavors meld together like old friends.
- Budget-Buster Combo: Chuck roast stretches for miles, canned refried beans never let me down, and tortillas are cheaper than takeout. I feed my family four hearty servings for under $10—no guilt, all satisfaction. (Yes, even on a Tuesday night.)
Step-by-step instructions for beef and refried bean enchiladas
Here's how to build layers of flavor and texture that deliver perfect crispy edges and melty cheese every time.
Brown the Beef and Build the Filling
Heat the 2 tablespoons vegetable oil in a large skillet over medium-high heat until shimmering. Add the 2 pounds ground beef (chuck roast) and cook, breaking it apart with a wooden spoon, until it loses its raw color and begins to brown—about 5-7 minutes. This step is crucial for developing deep flavor through the Maillard reaction.
Drain most of the fat (leave about 1 tablespoon) and add the diced yellow onion and minced garlic cloves. Cook for 3-4 minutes until softened and fragrant. Stir in the 2 tablespoons chili powder, 1 tablespoon ground cumin, 1.5 teaspoons salt, and 0.5 teaspoon black pepper, mixing well to coat the beef. Pour in the 0.5 cup beef broth (low sodium) and scrape up any browned bits from the bottom of the pan—this adds rich, savory depth to your filling.
Remove from heat and stir in the 2 cups refried beans (canned), mixing until fully combined. Let the mixture cool slightly while you prepare the enchilada sauce—this prevents the tortillas from becoming soggy when assembled. Real talk: if the filling is too hot, the tortillas will soften too quickly during baking.
Assemble the Enchiladas with Perfect Layers
Preheat your oven to 375°F and arrange a wire rack on a baking sheet. This creates a crispy bottom layer that's often missed in traditional recipes. Line the rack with parchment paper for easy cleanup.
Spread ½ cup enchilada sauce (red) evenly on the prepared rack. Working quickly, fill each of the 12 whole flour tortillas (medium) with about ¼ cup of the beef and bean mixture, rolling them tightly but not so tight that they tear. I like to start from the bottom and roll upward to prevent filling from spilling out.
Place each filled tortilla seam-side down on the prepared rack, arranging them in a single layer. This method ensures even baking and maximum crispiness—the key to delivering on that promised crunch. The sauce on the rack will help the bottoms crisp while keeping the tortillas flexible enough to roll.
Bake to Crispy Perfection with Cheese Layers
Pour the remaining 2 cups enchilada sauce (red) evenly over the assembled enchiladas. Sprinkle 2 cups shredded Monterey Jack cheese evenly over the top, reserving the remaining 1 cup for later. Bake for 15 minutes until the tortillas are golden brown and the cheese begins to bubble.
Here's the thing—this is when the magic happens. Remove the baking sheet from the oven and sprinkle the remaining 1 cup shredded Monterey Jack cheese evenly over the top. Return to the oven for 5-7 minutes until the cheese is fully melted and the tortillas are deeply golden brown. You'll see the edges begin to crisp—that's your signal they're ready.
Rest and Serve with Maximum Crunch
Let the enchiladas rest for 5 minutes before serving. This crucial step allows the filling to set slightly and prevents the tortillas from becoming soggy when sliced. The resting time also ensures the cheese firms up just enough to hold its shape when you cut into them.
Slice each enchilada into 6 equal pieces (you'll get 6 servings) and serve immediately. The contrast of crispy tortillas with the creamy, cheesy filling and rich beef mixture is what makes these enchiladas truly special. Don't skip the resting step—I learned the hard way that cutting too soon leads to messy, mushy results.
Pro Tips For Making Beef And Refried Bean Enchilada
- CRANK THE HEAT FIRST: Brown that chuck roast ground beef over medium-high heat—no rush—until it loses its raw color and starts to crisp just a little. I used to cook it low and slow, and the filling always tasted bland; high heat sears the meat faster and locks in flavor before you even add the beans.
- WARM THE TORTILLAS RIGHT: Stack your flour tortillas between damp paper towels and microwave for 20 seconds before rolling. Cold tortillas crack when stuffed, and warm ones hold the filling better—trust me, I’ve seen enchiladas unravel like sad lasagna at potlucks.
- SALT THE BEANS: Give your canned refried beans a quick stir with ½ teaspoon of salt right after heating them. The canned version is often bland, and this one small step makes the whole dish taste richer without overpowering the beef.
- LAYER CHEESE LAST: Sprinkle half the Monterey Jack cheese after baking, then broil for 1-2 minutes until it melts into a golden blanket. The cheese on top gets crispy and delicious, while the hidden layer keeps the filling gooey—no more soggy bottoms or dry tops.
Storing and reheating your leftovers
Refrigerator Storage
Store your enchiladas in an airtight container with parchment paper between layers to prevent sticking. They'll keep in the fridge for 4 days, with the flavors deepening over time. I always let them cool completely before storing—this prevents condensation that makes the tortillas soggy. For serving, simply reheat at 350°F for 10-15 minutes until bubbly and golden. 🧊
Freezer Prep Tips
For long-term storage, assemble enchiladas as directed but skip the final cheese layer. Instead, wrap each one individually in plastic wrap and place them in a freezer bag with all air squeezed out. This method preserves crispiness better than baking them first. When ready to eat, thaw overnight in the fridge, then bake at 375°F for 20-25 minutes with fresh cheese on top.
Microwave Reheating
For quick meals, microwave individual enchilada slices on medium power for 1-2 minutes, covered with a damp paper towel. The moisture prevents drying while reheating. Add a splash of beef broth if they look dry—this restores the original juiciness. I find this works best for 1-2 servings at a time to maintain texture. 🍽️
Oven Refresh
My favorite way to revive enchiladas is in the oven. Cover with foil and bake at 350°F for 15 minutes, then remove foil and broil for 2-3 minutes to crisp the tortillas. This method brings back that restaurant-quality crunch while keeping the filling warm. Perfect for feeding a crowd—just adjust time based on how many you're reheating.
Cheese Melting Hacks
If your cheese looks dry after reheating, sprinkle with a few drops of water and cover tightly for 2 minutes to steam. The moisture helps the cheese melt smoothly again. For extra richness, add a thin layer of enchilada sauce before reheating—this keeps everything moist and flavorful. Trust me, this small step makes all the difference. 🧀
Make-Ahead Assembly
Prep the filling and sauce ahead of time, then store them separately in the fridge for up to 2 days. When ready to assemble, simply roll and bake as directed. This shortcut saves 30 minutes of prep on busy weeknights. Just
Nutrition facts
Frequently asked questions
Can I use corn tortillas instead of flour tortillas?
Corn tortillas work but won't get as crispy as flour tortillas. If you must use them, brush with oil first and bake at 400°F for 5 extra minutes to help crisp the edges. They'll be softer but still delicious—just expect a different texture than the classic flour tortilla version.
How do I keep the tortillas from getting soggy?
Prevent soggy tortillas by cooling the filling completely before assembling and using the wire rack method. Also, bake at 375°F (not higher) to avoid overcooking the cheese while keeping the tortillas crisp. For extra insurance, add a thin layer of sauce to the rack before placing the enchiladas.
Can I make these enchiladas ahead of time?
Assemble them completely (including cheese) and refrigerate for up to 24 hours before baking. Bake straight from the fridge, adding 5-10 extra minutes to the cooking time. For freezing, assemble without the final cheese layer, wrap individually, and bake from frozen at 375°F for 25-30 minutes with fresh cheese on top.
What's the best cheese alternative if I don't have Monterey Jack?
Oaxaca cheese is the closest substitute—it melts beautifully and has a similar mild flavor. Other options: Mozzarella (for stretchiness) or a blend of cheddar and cream cheese (for creaminess). Avoid pre-shredded cheese as it contains anti-caking agents that make the cheese grainy when melted.
Why did my enchiladas turn out dry?
Overbaking or using too much cheese are common culprits. Keep baking time to 20-25 minutes total and use the two-cheese layer method (as in the recipe) to maintain moisture. If reheating, cover with foil to prevent drying. For extra juiciness, add a splash of beef broth when reheating.