
Side Dishes
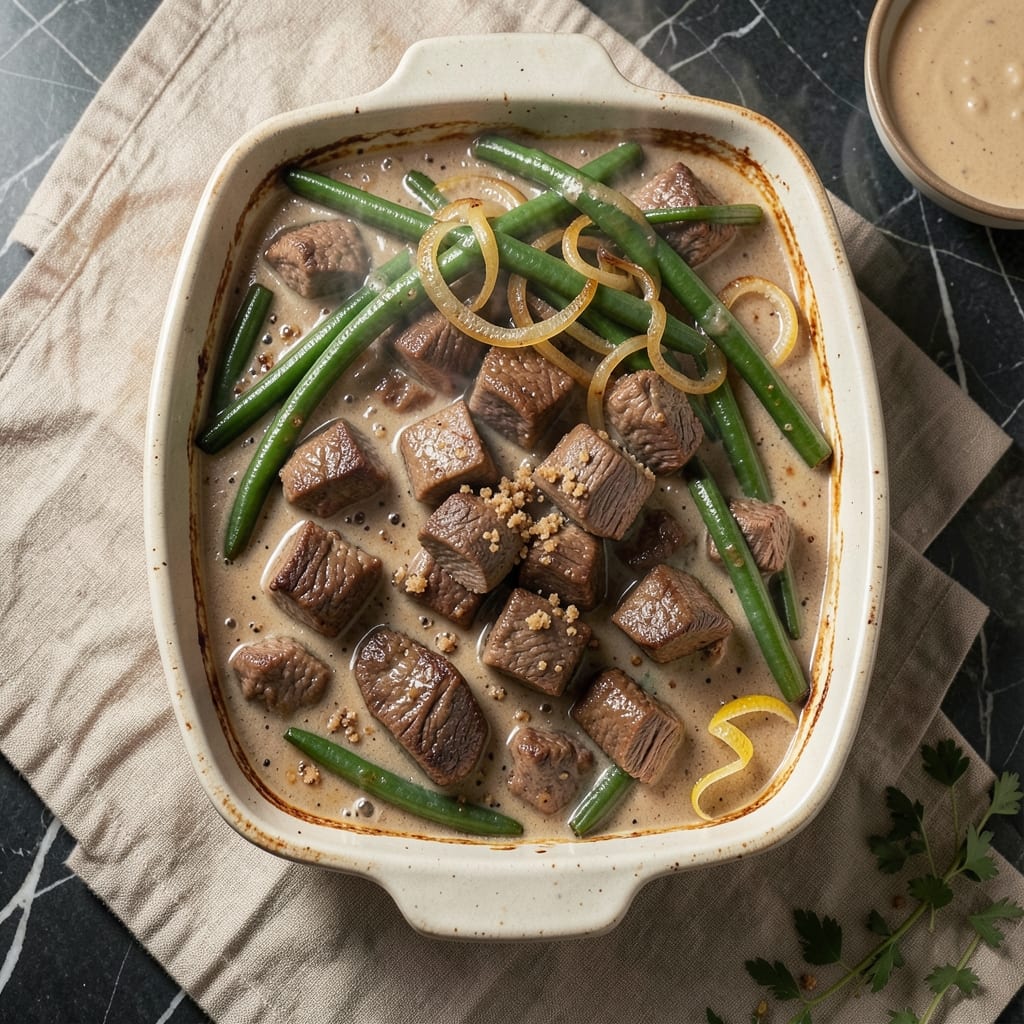
This beef and green bean casserole recipe delivers the ultimate comfort food experience with its signature crispy golden top and creamy cheesy layers. The secret lies in browning the beef for deep flavor while keeping the green beans tender-crisp, all baked together in one convenient pan. I've perfected this classic dish over years of holiday gatherings, ensuring it's foolproof for any occasion—whether it's a family dinner or a cozy weeknight meal.
The magic happens in the assembly: a rich beef broth sauce forms the base, while sautéed green beans add freshness and texture. A crispy breadcrumb topping (or gluten-free alternative) locks in moisture and creates that irresistible crunch. What makes this version special is the balance—tender beef, vibrant green beans, and a velvety cheese sauce that ties everything together. The aroma alone will have everyone gathering around the table.
By the time it emerges from the oven, you'll have a casserole with a crispy golden crust that shatters at the touch, a creamy cheese layer that melts into every bite, and perfectly seasoned beef and green beans underneath. It's the kind of dish that tastes even better the next day, making it ideal for meal prep. The best part? Only one pan to clean, leaving you more time to enjoy the results.
For added depth, I recommend browning the beef in batches to develop maximum flavor, and don't skip the green bean sauté—it makes all the difference in texture. This recipe serves 6-8 and can be easily doubled for larger gatherings. Let's create this comforting classic that brings warmth to any table.
Ingredients for beef and green bean casserole
Sixteen ingredients for a casserole that feels like a warm hug in every bite.
| Ingredient | Amount | Notes |
|---|---|---|
| Beef Chuck Roast 🥩 | 2 lb | Pre-cubed or cut into 1-inch pieces |
| Fresh Green Beans 🥦 | 1 ½ lb | Trimmed and cut into 2-inch pieces |
| Yellow Onion 🧅 | 1 whole | Diced into small pieces |
| Garlic Cloves 🧄 | 4 cloves | Minced for rich flavor |
| Beef Broth 💧 | 2 cups | Low-sodium preferred |
| All-Purpose Flour 🌾 | 2 tbsp | For thickening sauce |
| Heavy Cream 🥛 | 1 cup | Full-fat for creaminess |
| Sharp Cheddar Cheese 🧀 | 1 ½ cups | Shredded, aged for flavor |
| Milk 🥛 | ½ cup | Whole milk preferred |
| Butter 🧈 | 4 tbsp | Unsalted, melted |
| Dried Breadcrumbs 🍞 | 1 ½ cups | Panko for extra crunch |
| Parmesan Cheese 🧀 | ¼ cup | Freshly grated |
| Salt 🧂 | 1 ½ tsp | Kosher or sea salt |
| Black Pepper 🌶️ | 1 tsp | Freshly ground |
| Dried Thyme 🌿 | ½ tsp | Or 1 tsp fresh |
The beef is where the magic starts—chuck roast stays tender while developing deep flavor. Grab the pre-cubed version from the grocery store meat counter to save time, or ask the butcher to cut it yourself. For the green beans, fresh is best, but frozen works in a pinch—just don't thaw them first. The onions and garlic should be bright white and firm, not wilted. I always double-check the beef broth label for sodium—low-sodium is key so we control the seasoning.
No heavy cream? Half-and-half plus a splash of milk gets you close. Pre-shredded cheese gets clumpy, so grate your own from a block—it melts so much better. The breadcrumbs can be gluten-free if needed, but panko adds that perfect crunch. For extra depth, toast the breadcrumbs in the oven for 5 minutes before adding them to the top. The thyme is non-negotiable—it ties everything together. If you've only got fresh, use one-third the amount of dried. And trust me on the butter—full-fat makes all the difference in that creamy sauce.
This casserole tastes even better the next day—make extra for lunches. Store leftovers in the fridge for 4-5 days or freeze for 3 months. I like to portion it into individual containers right after baking so reheating is a breeze. The crispy top? Broil for 2-3 minutes before serving to get that perfect golden crunch. And if you're doubling the recipe, just remember to increase the breadcrumbs by one-third—they're what makes the top shine.
Why You'll Love This Recipe
- One-Pan Magic: I swear by this recipe because it’s literally one pan—no chopping boards, no extra dishes. Toss in the green beans, onions, and garlic right alongside the beef, add the broth, and let it all simmer. By the time the chuck roast is fork-tender, the green beans are just crisp enough to bite into. Done. No stress, no mess.
- Deep, Savory Crunch: Here’s what sold me—the beef gets so tender it falls apart, but the green beans stay al dente with that perfect snap. The garlic and onion caramelize into a rich, golden base, while the broth keeps everything juicy. It’s the kind of dish where every bite has layers—salty, sweet, herby, and meaty all at once. (Yes, even on a Tuesday night.)
- Leftovers That Beg for More: Between us, this casserole tastes better the next day. The flavors meld even more, and the beef gets even more melt-in-your-mouth tender. I make a double batch on Sundays because it’s my go-to for lunches—just reheat and serve, or toss into a sandwich. My kids fight over the leftovers, and that’s the real test.
- Budget-Friendly Powerhouse: A chuck roast is one of the most affordable cuts, and fresh green beans stretch further than you’d think. Onion and garlic are cheap staples, and beef broth adds depth without breaking the bank. Honestly, it’s the kind of recipe that makes me feel like I’m feeding a crowd without emptying my wallet—or my fridge.
Step-by-step instructions for beef and green bean casserole
Here's how to create a comforting, restaurant-worthy casserole with tender beef and crispy topping.
Brown the Beef and Sauté the Vegetables
Heat a large Dutch oven over medium-high heat and add 2 tablespoons butter. Working in batches, add the 2 lb beef chuck roast cut into 1-inch pieces, seasoning each with ½ teaspoon salt and ⅓ teaspoon black pepper. Brown the beef on all sides for 3-4 minutes per batch—this develops deep flavor. Remove and set aside.
In the same pot, add the remaining 2 tablespoons butter and toss in the 1 whole yellow onion and 4 cloves garlic cloves (minced). Sauté for 3-4 minutes until softened. Add the 1.5 lb fresh green beans (trimmed and cut into 2-inch pieces) and cook for another 5 minutes until they begin to soften slightly. Sprinkle with 0.5 teaspoon dried thyme and toss to coat.
Build the Creamy Cheese Sauce
Stir in the 2 tablespoons all-purpose flour and cook for 1 minute to remove the raw flour taste. Slowly pour in the 2 cups beef broth while whisking constantly to prevent lumps. Bring to a gentle simmer and cook for 3-4 minutes until slightly thickened.
Reduce heat to low and stir in the 1 cup heavy cream, 0.5 cup milk, and 1.5 cups sharp cheddar cheese. Cook for 2-3 minutes until the cheese melts completely and the sauce becomes smooth and creamy. Return the browned beef to the pot and stir to combine. Let the mixture simmer for 5 minutes to allow flavors to meld.
Prepare the Crispy Topping
In a small bowl, mix together the 1.5 cups dried breadcrumbs, 0.25 cup parmesan cheese, remaining 1 teaspoon salt, and 1 teaspoon black pepper. Stir in 2 tablespoons melted butter until the mixture is evenly moistened but not soupy.
Transfer the beef and green bean mixture to a 9x13-inch baking dish. Sprinkle the breadcrumb mixture evenly over the top, pressing down gently with a spatula to ensure good contact with the sauce. This step is crucial for achieving that perfect crispy texture.
Bake to Golden Perfection
Preheat your oven to 375°F. Bake the casserole for 30-35 minutes until the top is deep golden brown and the edges are bubbling. The center should be hot and the cheese should be fully melted.
For the last 5 minutes of baking, increase the oven temperature to 400°F to ensure the topping gets extra crispy. Let the casserole rest for 10 minutes before serving—this allows the juices to redistribute and the topping to set properly. Serve warm with crusty bread or over mashed potatoes.
Pro Tips For Making Beef And Green Bean Casserole
- SEAR THE BEEF FIRST: Walk away from that slow cooker or pot and sear the chuck roast in a hot skillet with oil until it’s deep brown on all sides. I learned this the hard way—skipping the sear leaves the beef bland and watery, no matter how long you cook it. Just 3-4 minutes per side makes a real difference in flavor.
- TRIM GREEN BEANS LIKE A PRO: Snip off the ends at a 45-degree angle with kitchen shears instead of chopping them. This keeps them looking neat and prevents them from curling up in the casserole. (Yes, it’s a little extra effort, but your dish will look—and taste—more polished.)
- DON’T SKIP THE BROTH REDUCTION: Simmer your beef broth down by half before adding it to the casserole—this concentrates the flavor and thickens the sauce naturally. I used to just dump in the full amount, and the dish always tasted watered down. Takes 10 minutes but saves you from adding flour later.
- LAYER THE BEANS DRY: Pat the fresh green beans completely dry with a towel before assembling the casserole. Wet beans steam instead of crisp up, and you’ll end up with a soggy mess. (I know, it’s tedious, but trust me—your texture will be worth it.)
Essential equipment for great beef and green bean casserole
Dutch Oven Essentials
A heavy-duty Dutch oven is your secret weapon for browning beef and sautéing veggies—its thick base distributes heat evenly while preventing burning. I recommend a Lodge 5.5-quart or All-Clad Stainless Steel for their durability and heat retention. The deep sides help prevent splatter when deglazing with broth later. 🔥
Baking Dish Must-Haves
Use a 9x13-inch baking dish with a lightly greased interior to prevent sticking. I prefer CorningWare for its even heat distribution and easy release. For extra crispiness, choose a dish with slightly thicker sides—they help create that golden-brown crust. Avoid glass dishes with thin bases, as they can warp under high heat.
Mixing Tools
A wooden spoon is ideal for stirring the sauce—it won’t scratch your Dutch oven like metal utensils. For the breadcrumb topping, use a flexible silicone spatula to press it gently into the sauce. A whisk helps create a smooth cheese sauce without lumps. Keep a small bowl handy for mixing the breadcrumb topping separately.
Measuring Precision
Invest in a stainless steel measuring set for accurate dry ingredients like flour and breadcrumbs. A kitchen scale ensures consistent cheese measurements—critical for the perfect creamy texture. For liquids, a liquid measuring cup with clear markings prevents overfilling. I also keep a fine-mesh strainer nearby to remove any stray thyme stems from the sauce.
Oven Thermometer
Your oven’s temperature display isn’t always accurate—use an oven thermometer to confirm it’s hitting 375°F (or 400°F for the final crisp). I recommend the Thermoworks Oven Thermometer for its precision and easy-to-read dial. This small tool prevents undercooked centers or over-browned tops, ensuring your casserole is perfect every time. 💡
Optional Upgrades
For a gluten-free version, swap breadcrumbs for crushed gluten-free crackers or almond flour. A mandoline slicer speeds up green bean prep if you’re cutting through 1.5 lbs of fresh beans. For extra flavor, keep a mortar and pestle handy to crush fresh thyme leaves before adding them to the sauce.
Nutrition facts
Frequently asked questions
Can I use frozen green beans instead of fresh?
Frozen green beans work perfectly—just don't thaw them first. Add them directly to the sauté pan with the onions and garlic, and cook for 5-6 minutes instead of 5 minutes to ensure they're tender. The slight difference in texture won't affect the final dish.
How can I make this casserole gluten-free?
Swap the breadcrumbs for 1.5 cups crushed gluten-free crackers or almond flour mixed with melted butter. For extra crunch, toast the almond flour in the oven for 3-4 minutes at 350°F before adding it to the top. The flavor stays rich and the texture remains crispy.
Why is my topping not crispy?
Underbaking or too much moisture are the usual culprits. First, ensure your oven hits 375°F (use an oven thermometer). Second, press the breadcrumb mixture firmly into the sauce—this creates better contact for browning. Finally, broil for 2-3 minutes at the end to get that golden finish.
Can I make this ahead of time?
This casserole actually tastes better the next day! Assemble it up to 24 hours ahead and refrigerate uncovered. Before baking, let it sit at room temperature for 30 minutes and add 5-10 minutes to your baking time. For freezing, bake as directed, cool completely, then freeze in portions for up to 3 months.
What's the best way to reheat leftovers?
For the crispiest results, cover with foil and reheat at 350°F for 15-20 minutes. To revive the crispy top, broil for 2-3 minutes at the end. Microwave reheating works but may make the topping soggy—opt for the oven method whenever possible.