
Soups & Stews
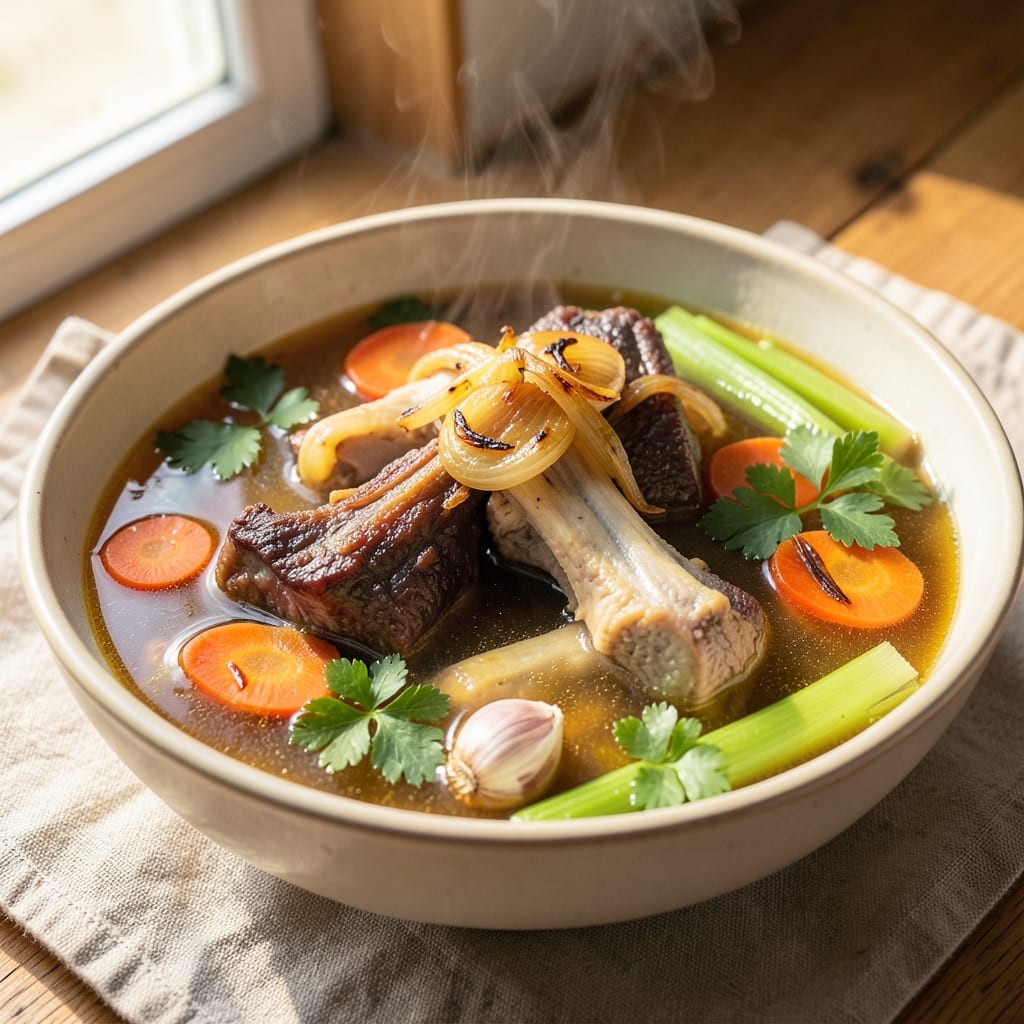
This beef and chicken bone broth recipe transforms raw bones into liquid gold—rich, collagen-packed, and packed with umami depth that elevates every dish. The secret lies in slow simmering, which extracts gelatin and minerals for a broth so versatile it works as a standalone sipper or the base for soups, braises, and even cocktails. I’ve perfected this method over years of testing, balancing traditional patience with modern efficiency for restaurant-quality results at home.
The foundation starts with bones—beef for deep flavor, chicken for brightness—and aromatics like onions, carrots, and celery that build complexity. Roasting the bones first caramelizes their surfaces, intensifying flavor without burning. Meanwhile, apple cider vinegar helps break down collagen faster, ensuring maximum gelatin extraction. This isn’t just broth; it’s a nutrient-dense elixir that turns ordinary meals into extraordinary ones.
What you’ll end up with is a golden, aromatic liquid so rich it coats your spoon and lingers on your palate. Strain it for crystal clarity or leave it cloudy for extra body, then store it in the freezer for up to six months. Use it to braise meats, enrich soups, or even craft a savory cocktail like a Bone Broth Old Fashioned. The possibilities are endless, but the technique is straightforward—just time and attention.
Whether you’re a home cook or a seasoned chef, this broth recipe delivers professional-level depth with minimal effort. The key is patience: let it simmer for 12–24 hours, and you’ll unlock flavors that store-bought versions can’t match. Ready to transform your kitchen’s foundation? Let’s get started.
Ingredients for beef and chicken bone broth
Rich bones, aromatic vegetables, and slow simmering create this deeply flavorful broth foundation.
| Ingredient | Amount | Notes |
|---|---|---|
| Beef Bones 🦴 | 3 lb | Kneecaps and marrow bones preferred |
| Chicken Bones 🍗 | 2 lb | Necks, backs, and wings ideal |
| Yellow Onions 🧅 | 2 whole | Quartered, skin on for color |
| Carrots 🥕 | 3 whole | Large, scrubbed, cut into chunks |
| Celery Stalks 🧄 | 4 whole | Browned for depth of flavor |
| Garlic Cloves 🧄 | 8 cloves | Smashed for maximum aroma |
| Apple Cider Vinegar 🍎 | ¼ cup | For collagen extraction |
| Fresh Rosemary 🌿 | 1 sprig | Woody stems included |
| Fresh Thyme 🌿 | 2 sprigs | Stems tied with twine |
| Bay Leaves 🌿 | 4 whole | High-quality dried preferred |
| Kosher Salt 🧂 | 2 tbsp | Diamond Crystal preferred |
| Black Peppercorns 🌶️ | 1 tbsp | Crushed for texture |
| Water 💧 | 12 cups | Filtered preferred |
The bones are everything here. Look for beef marrow bones and chicken feet at specialty butchers or the meat counter—they yield the most gelatin and collagen. Costco and Whole Foods often carry these, or check with local farms. If you can't find marrow bones, beef knuckle bones work too. The chicken bones should be raw, not cooked—this ensures maximum flavor extraction. For the aromatics, brown the onions, carrots, and celery in the pot before adding bones; this caramelization builds depth. Fresh herbs like rosemary and thyme add complexity, but dried will work in a pinch (use half the amount).
No beef bones? Pork bones or lamb bones work too, though flavor profiles differ. Short on chicken bones? Turkey necks are a great substitute—they're rich and gelatinous. Vinegar is non-negotiable; it helps break down collagen faster. Apple cider vinegar adds subtle sweetness, but white vinegar works too. For the vegetables, don't peel the carrots—the skin adds color and nutrients. If you're in a hurry, pressure cooking for 3 hours cuts simmering time by half, though flavor won't be as deep. The bay leaves should be high-quality dried—cheap ones can turn bitter.
This broth keeps for 6 months in the freezer—portion it into ice cube trays for easy use. In the fridge, it lasts 5-7 days, but flavor peaks after 24 hours. For crystal-clear broth, strain through a fine-mesh sieve; for extra body, leave it cloudy. Label containers with the date and contents—trust me, you'll forget. Use it in everything from braises to cocktails; the possibilities are endless once you've got this rich base.
Why You'll Love This Recipe
- No-Fuss Setup: I swear by this—just toss the bones in a pot, add onions, carrots, and celery (the "holy trinity" veggies), and let the magic happen. No fancy gadgets, no stress.
- Deep Umami Bomb: That combo of beef and chicken bones? It’s like flavor multiplication—rich, savory, and layered with the sweetness of caramelized onions. Honestly, the first sip makes you question why you ever bought store-bought broth.
- Meal Prep MVP: Freeze it in ice cube trays for quick soups, or use it as a base for grain bowls and stir-fries. I keep a batch in the fridge for lazy nights—just dump, heat, and boom, instant flavor.
- Budget Magic: Beef and chicken bones are cheaper than you think, especially if you ask the butcher for the "good stuff" (feet, necks, wings). One pot feeds the family for days, and the leftovers? Even better the next day.
Step-by-step instructions for slow-simmered bone broth
This method extracts maximum flavor and nutrients from your bones—no shortcuts, just deep umami development.
Prepare the Bones and Vegetables
Start by rinsing the 3 lb beef bones and 2 lb chicken bones under cold water to remove any debris. Pat them dry with paper towels—this helps the broth develop a richer color. Place them in a large stockpot or Dutch oven, arranging them in a single layer to ensure even cooking.
Next, quarter the 2 whole yellow onions and cut the 3 whole carrots and 4 whole celery stalks into large chunks. Smash the 8 cloves garlic with the side of your knife to release their oils. Tie the 2 sprigs fresh thyme together with kitchen twine to keep them intact while simmering. Add all these vegetables to the pot with the bones.
Add Aromatics and Acid
Add the 1 sprig fresh rosemary, 4 whole bay leaves, 2 tbsp kosher salt, and 1 tbsp crushed black peppercorns to the pot. The rosemary and thyme will infuse deep herbal notes, while the bay leaves add earthy complexity. Pour in the 0.25 cup apple cider vinegar—this crucial step helps break down collagen and extract maximum flavor from the bones.
Pour in 12 cups water until the bones are completely submerged. If they aren't fully covered, add a bit more water. The liquid should reach at least 1 inch above the bones to ensure even cooking and prevent scorching.
Simmer for Maximum Flavor Extraction
Bring the broth to a gentle boil over medium-high heat, then immediately reduce to a low simmer. This is critical—boiling too vigorously can make the broth cloudy and prevent proper collagen extraction. You'll see small bubbles breaking the surface, but no rolling boil.
Simmer uncovered for 8-12 hours (longer is better for deeper flavor). I recommend starting this in the morning and letting it cook all day. The broth should reduce by about one-third, and the bones will become soft enough to easily pull apart with a fork. Skim off any foam or impurities that rise to the surface during the first hour of cooking.
Strain and Finish
Once the broth has simmered long enough, turn off the heat and let it sit for 10 minutes. This resting period allows any settled particles to sink to the bottom. Line a fine-mesh strainer with cheesecloth or a coffee filter for clearer broth, then carefully strain the liquid into a large bowl or clean containers.
Discard the solids, but save the bones if you plan to make bone marrow or broth again. Taste the broth and adjust seasoning if needed—you might want to add a pinch more salt or a splash of vinegar for brightness. Let it cool to room temperature before refrigerating or freezing for up to 6 months. The longer it sits, the more concentrated and flavorful it becomes.
Pro Tips For Making Beef And Chicken Bone Broth
- Roast Bones First: I learned this the hard way—raw bones take forever to render. Toss them in a 400°F oven for 30-45 minutes until they darken slightly. This caramelizes the surfaces, cutting the cook time by hours and deepening the flavor. (Yes, even if you’re impatient like me.)
- Chop Veggies Large: Tiny diced carrots and celery turn to mush and cloud the broth. Cut them into 2-inch chunks instead—big enough to stay intact but small enough to release flavor. Onions? Peel and halve them, then leave the skin on for extra color and sweetness.
- Simmer, Don’t Boil: A rolling boil wastes broth and scalds the collagen before it can break down. Keep the heat low enough that only tiny bubbles break the surface—like a lazy simmer. If you’re unsure, stick a wooden spoon in: if big bubbles form, you’re boiling.
- Strain Twice: After simmering, line a fine-mesh strainer with cheesecloth or a coffee filter for the first pass—this catches the gritty bits. For the second pass, pour the strained broth through a nut milk bag or clean kitchen towel tied into a pouch. It’s tedious, but the result is crystal clear. (Your future self will thank you.)
Perfect pairings for this recipe
Soup Base Essentials
This broth is the ultimate soup foundation—perfect for pho, ramen, or minestrone. Simmer it with rice noodles, miso paste, and fresh herbs for a quick pho. For ramen, add soft-boiled eggs, mushrooms, and nori strips. I love using it in Italian-style minestrone with white beans, kale, and ditalini pasta. The umami depth elevates any soup from basic to extraordinary. 🥣
Braising Liquid Magic
Transform tough cuts like chuck roast or pork shoulder with this broth as your braising liquid. The collagen-rich base keeps meats tender while infusing them with deep flavor. For a beef short rib braise, use 2 cups of broth with red wine, thyme, and bay leaves. The result? Fall-off-the-bone meat with a velvety sauce. 🍖
Cocktail Innovations
Yes, broth can be a cocktail ingredient! Try a Bone Broth Old Fashioned by mixing 2 oz bourbon, 1 oz broth, ½ oz honey, and a dash of bitters. The umami adds complexity to classic drinks. For a non-alcoholic twist, blend broth with ginger, lime, and mint for a refreshing Golden Elixir. 🍹
Risotto Elevation
Replace stock with this broth for creamy, restaurant-quality risotto. The gelatin content gives it natural body without heavy cream. I use 2 cups broth per cup of Arborio rice, adding it gradually while stirring. Finish with Parmigiano-Reggiano, bone marrow, and crispy prosciutto for a luxurious touch. 🍚
Grain Bowls & Salads
Use cooled broth as a dressing base for grain bowls. Mix with olive oil, lemon juice, and Dijon mustard for a savory vinaigrette. Toss with farro, roasted vegetables, and goat cheese for a hearty salad. The broth’s depth ties all ingredients together beautifully. 🥗
Sauce Thickener
Reduce this broth by half to create a glaze for meats or vegetables. Brush it on grilled chicken, roasted carrots, or even pizza crust before baking. The gelatin helps it cling beautifully, adding richness without extra fat. Perfect for weeknight dinners** when you need flavor fast. 🔥
Nutrition facts
Frequently asked questions
Can I use leftover roasted chicken bones for this recipe?
Roasted bones add incredible depth of flavor compared to raw bones. Just make sure they're completely cooled and free of any seasoning or marinade that could make the broth bitter. For best results, roast them at 400°F for 20-30 minutes before adding to the pot.
How do I know when the broth is done?
Your broth is ready when it's reduced by about one-third and the bones can be easily pulled apart with a fork. The liquid should be rich and slightly gelatinous. For beef-heavy broth, aim for 12-24 hours of simmering, while chicken-dominant versions may be ready in 8-12 hours.
What's the difference between simmering and boiling?
Boiling creates cloudy broth and can make it taste bitter, while simmering gently extracts collagen and flavor. Keep the heat low enough to see just small bubbles breaking the surface—never a rolling boil. This patience is what transforms simple bones into liquid gold.
Can I make this in a slow cooker or Instant Pot?
Yes! For a slow cooker, use the same ingredients and cook on low for 12-16 hours. In an Instant Pot, pressure cook for 2-3 hours (natural release), though flavor won't be as deep. The key is maintaining low heat to preserve gelatin and prevent bitterness.
Why does my broth look cloudy?
Cloudiness comes from tiny fat particles and collagen—it's actually a sign of richness! For clearer broth, strain through cheesecloth or a coffee filter. If you prefer the cloudy version, it has more body and nutrients. Just skim off any foam during the first hour of cooking.