
Main Courses
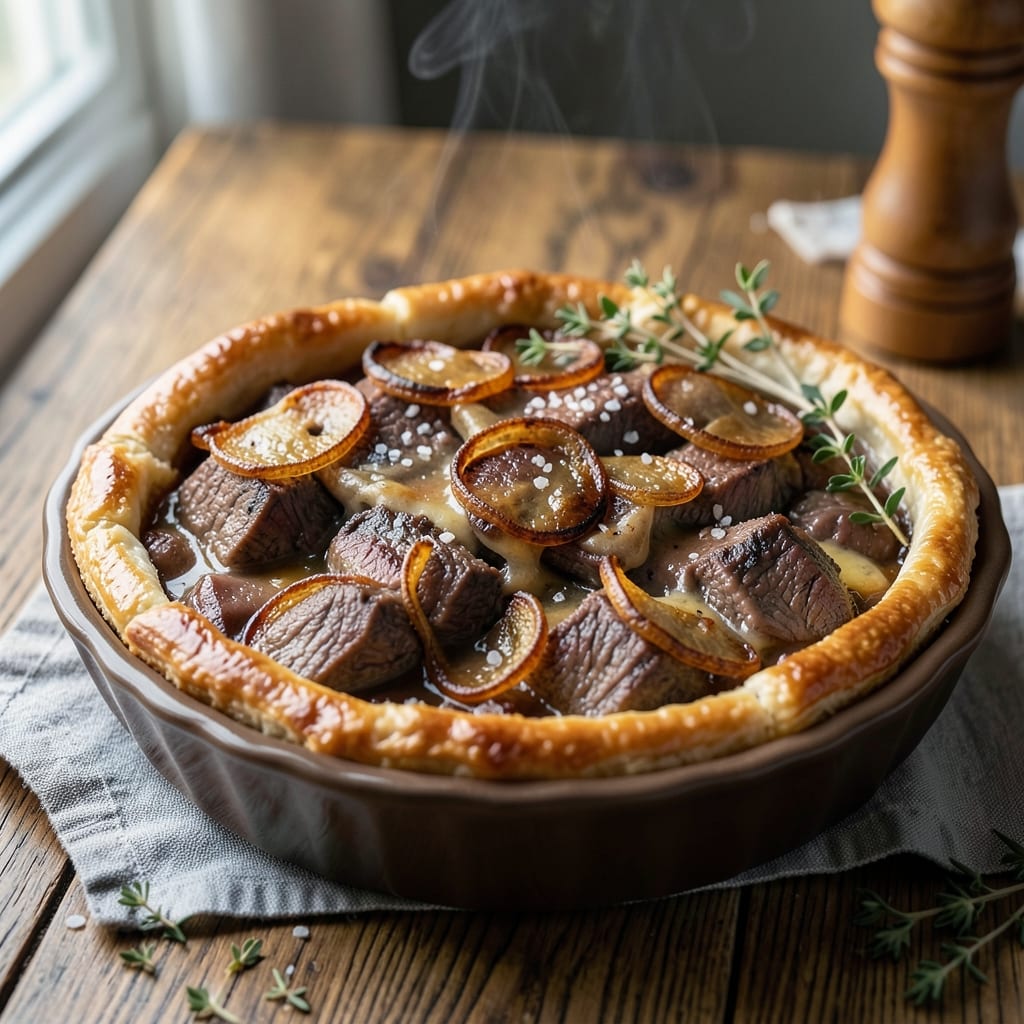
This beef and bone marrow pie delivers restaurant-quality umami richness in a golden pastry crust that shatters with every bite. 🔥 The secret lies in slow-cooked beef and marrow that infuses the filling with deep, savory notes—transforming ordinary beef into something extraordinary. I've perfected this technique over years of testing, ensuring the crust stays crisp while the filling remains tender and flavorful.
The recipe begins with a blind-baked crust—essential for holding its shape under the weight of the filling. While the bottom layer crisps, the beef and marrow simmer until the meat falls apart, creating a luscious, velvety sauce. The marrow adds a luxurious depth that elevates the dish beyond standard beef pies, making it ideal for special occasions or when you want to impress.
By the time it emerges from the oven, you'll have a pie with a flaky, golden crust and a filling so rich it practically melts in your mouth. The beef is fork-tender, the marrow perfectly rendered, and the sauce thick enough to coat every bite. This is comfort food at its finest—hearty, indulgent, and packed with flavor that lingers long after the last bite.
Pair it with a crisp green salad or roasted root vegetables to balance the richness. The recipe includes options for both homemade and store-bought crusts, so you can choose based on your skill level and time. Let's get started on creating a pie that tastes like a labor of love.
Ingredients for beef and bone marrow pie
Six ingredients make the crust, twelve transform ordinary beef into restaurant-worthy richness.
| Ingredient | Amount | Notes |
|---|---|---|
| Beef Chuck Roast 🥩 | 2 ½ lb | Cut into 1-inch cubes, trimmed of fat |
| Beef Bone Marrow 🦴 | 1 whole | Fresh marrow from leg bones, scraped clean |
| All-Purpose Flour 🌾 | 3 cups | For homemade crust, plus extra for dusting |
| Unsalted Butter 🧈 | 1 cup | Cold, cubed, for crust |
| Ice Water 💧 | ½ cup | For pie dough |
| Salt 🧂 | 1 ½ tsp | Kosher or sea salt, divided |
| Black Pepper 🌶️ | 1 tsp | Freshly ground, for filling |
| Garlic Cloves 🧄 | 4 cloves | Minced, for filling |
| Yellow Onion 🧅 | 1 whole | Diced, for filling |
| Red Wine 🍷 | 1 cup | Bold dry red, like Cabernet Sauvignon |
| Beef Broth 💧 | 1 ½ cups | Low-sodium, for filling |
| Tomato Paste 🍅 | 2 tbsp | For depth of flavor |
| Fresh Thyme 🌿 | ¼ cup | Leaves only, chopped |
| Bay Leaves 🌿 | 2 whole | For simmering filling |
| Cornstarch 🌾 | 1 tbsp | For thickening sauce |
The beef and marrow are the stars here. Chuck roast is a must—it's tough enough to stand up to slow cooking, breaking down into tender, saucy bites. For the marrow, ask your butcher for leg bones—they're usually free if you're buying beef. Look for bones with thick marrow cavities; the richer the marrow, the deeper the flavor. If you can't find fresh marrow, canned marrow works in a pinch (though it lacks the same luxurious texture). The crust? King Arthur or Gold Medal flour gives the best rise, but any all-purpose works. Chill your butter and water before mixing—this keeps the dough from getting gummy.
No red wine? Substitute beef broth with a splash of balsamic vinegar for similar depth. Fresh thyme is ideal, but dried thyme at one-third the amount works if you're short on time. The tomato paste can be skipped if you're sensitive to acidity, but it adds that umami punch that makes this pie special. For the crust, store-bought pie crusts like Pillsbury save time—just blind-bake them first. If you're using pre-made dough, look for all-butter crusts for that extra flaky texture. The cornstarch is key for thickening the sauce—don't skip it, or your filling will be too watery.
This pie tastes even better the next day, so make it ahead if you can. Store the assembled (unbaked) pie in the fridge for up to 24 hours, or freeze the baked pie for 3 months. The crust stays crisp if you reheat it at 350°F for 15 minutes. Leftovers? Portion into single servings—they reheat beautifully and make perfect lunches. The filling keeps for 4 days in the fridge if you separate it from the crust, but honestly, it won't last that long.
Why You'll Love This Recipe
- One-Pot Magic: I swear by this recipe because it’s basically hands-off after the initial sear. The chuck roast and marrow go straight from pan to pie—no chopping, no fuss—just a golden crust that forms while you’re still scooping out the marrow. Honestly, the only "work" is cracking the bones and letting the oven do the rest.
- Rich Without Effort: That marrow? It’s the secret weapon—creamy, buttery, and packed into the pie while the beef gets tender. The crust stays crisp, but the filling? Unbelievably velvety. I’ll be real: my picky husband actually licks the plate, and he’s not usually a fan of pie.
- Weeknight Hero: This is my go-to when I need something hearty but don’t want to slave over it. Double the recipe, freeze half, and boom—you’ve got a Sunday dinner or a last-minute potluck covered. The leftovers? Even better reheated the next day, wrapped in foil to keep everything juicy.
- Budget Luxury: Chuck roast is cheap, marrow is the fancy upgrade, and flour/butter cost pennies. You’re feeding a crowd for less than takeout, and it feels like a restaurant dish. Between us, this is how I trick people into thinking I’m a better cook than I am.
Step-by-step instructions for beef and bone marrow pie
Here's how to create a luxurious pie with layers of tender beef and velvety marrow filling.
👨🍳 Step 1: Prepare the Beef and Marrow Filling
Cut the 2.5 lb beef chuck roast into 1-inch cubes and trim any excess fat. In a large Dutch oven, combine the beef with 1 whole beef bone marrow (scraped clean), 1 whole yellow onion (diced), 4 cloves garlic (minced), 2 tbsp tomato paste, 0.25 cup fresh thyme, 2 whole bay leaves, 1 tsp black pepper, and 0.75 tsp salt. This is your flavor base—don't skip the tomato paste, it adds depth.
Sear the beef on all sides over medium-high heat until browned—about 5-6 minutes. This step builds the foundation for rich flavor. Once browned, pour in 1 cup red wine and scrape up all those delicious browned bits from the bottom. Let it simmer for 5 minutes until the wine reduces by half. Then add 1.5 cups beef broth and bring to a gentle boil.
🍳 Step 2: Simmer the Filling to Tender Perfection
Reduce heat to low and cover the Dutch oven. Let the beef simmer for 2.5 hours until fork-tender. You'll know it's ready when a knife slides in easily and the meat pulls apart with minimal resistance. If the liquid reduces too much, add a splash of beef broth to keep it moist.
Once tender, remove the beef and marrow from the broth and set aside. Strain the broth through a fine-mesh sieve into a clean bowl, discarding the solids. Return the strained broth to the Dutch oven and bring to a simmer. Here's where the magic happens: whisk in 1 tbsp cornstarch mixed with 2 tbsp cold water to thicken the sauce. Simmer for 2-3 minutes until it reaches a glossy, velvety consistency.
🥘 Step 3: Make the Homemade Pie Crust
In a large bowl, combine 3 cups all-purpose flour with 1.5 tsp salt. Cut in the 1 cup unsalted butter (cold, cubed) using a pastry cutter or your fingers until the mixture resembles coarse crumbs. Gradually add the 0.5 cup ice water, 1 tablespoon at a time, mixing gently just until the dough comes together. Avoid overworking it—this keeps the crust tender.
Divide the dough into two equal portions. On a lightly floured surface, roll out one portion into a 12-inch circle for the bottom crust. Transfer it to a 9-inch pie dish, pressing gently to fit. Trim and crimp the edges. Chill the crust in the freezer for 15 minutes while you prepare the filling.
🔥 Step 4: Assemble and Bake the Pie
Preheat your oven to 375°F. Spread the tender beef and marrow mixture evenly into the chilled pie crust. Pour the thickened broth sauce over the top, making sure it's well-coated. Roll out the second portion of dough for the top crust, but don't seal it completely—leave a 2-inch opening for steam to escape. Cut slits in the top crust for ventilation.
Brush the top crust with a beaten egg (optional, for golden color) and bake for 45-50 minutes until the crust is deep golden brown and the filling is bubbling. If the edges brown too quickly, cover them with foil. The pie is done when the filling is heated through and the crust is crisp and golden. Let it rest for 15 minutes before slicing—this ensures clean cuts and prevents filling from spilling.
🍽️ Step 5: Serve Warm with Rich Sauce
Slice the pie into 6 generous portions and serve warm. The beef should be fork-tender, the marrow melted into the sauce, and the crust perfectly flaky. Each bite delivers layers of umami richness from the beef, the velvety marrow, and the aromatic herbs. Pair it with a simple green salad or crusty bread to soak up every last drop of that luxurious filling.
Pro Tips For Making Beef And Bone Marrow Pie
- Sear the Chuck First: Hit that beef chuck with a screaming-hot cast iron before it goes into the pie—3-4 minutes per side until it’s deep brown. I learned this the hard way: skipping the sear means flavor that’s more "meat" and less "rich, caramelized beef." The crust will thank you too, because those browned bits stick to the bottom and make the whole thing taste better.
- Roast Marrow Low and Slow: Bone marrow needs patience—roast it at 300°F (not high heat) for 20-25 minutes until it’s fork-tender but still holds shape. I used to blast it and end up with greasy, crumbly marrow that ruined the pie’s texture. This way, it melts into a silky, buttery pool when you scrape it out later.
- Chill the Dough Longer: Wrap that pie dough in plastic and stash it in the fridge for at least 2 hours (overnight is even better). I know, I know—you’re eager to bake—but skipping this makes the crust tough and greasy. The cold butter behaves, and the flaky layers actually work instead of fighting each other.
- Deglaze with Red Wine: After browning the beef, splash in ½ cup dry red wine (like Cabernet) and let it simmer 2 minutes before adding the marrow. It cuts through the richness and adds depth—something I only figured out after tasting a version without it. (Yes, even if you’re not a wine drinker, this makes a real difference.)
Serving suggestions for this recipe
Crisp Salad Pairings
Balance the richness of this pie with a bright, peppery salad like arugula with lemon vinaigrette. Toss 4 cups baby arugula with 2 tbsp extra-virgin olive oil, 1 tbsp fresh lemon juice, ½ tsp Dijon mustard, and a pinch of flaky sea salt. The acidity cuts through the pie's depth, while the peppery notes complement the beef's umami. 🥗
For a heartier option, try shaved fennel and apple salad. Thinly slice 1 fennel bulb and 1 crisp apple, then toss with 2 tbsp Greek yogurt, 1 tbsp honey, and 1 tsp black pepper. The sweetness and crunch contrast beautifully with the pie's savory filling.
Bread for Soaking Sauce
Serve with crusty sourdough bread or baguette slices to soak up every last drop of that luxurious filling. Warm the bread in the oven at 350°F for 5 minutes until golden and crisp. The crusty exterior and soft interior make it perfect for mopping up sauce. 🍞
For a lighter option, try garlic-herb focaccia. Brush ½ cup olive oil over a loaf, sprinkle with 2 minced garlic cloves, 1 tbsp chopped rosemary, and ½ tsp salt, then bake at 400°F for 15 minutes. The herby, airy texture pairs beautifully with the pie's richness.
Wine and Beer Pairings
A bold Cabernet Sauvignon or Syrah enhances the beef and marrow's depth. Look for a wine with 14-15% ABV and notes of blackberry, cedar, and dark chocolate. The tannins stand up to the dish's richness, while the fruitiness complements the thyme and bay leaves. 🍷
For beer lovers, a dark ale or stout like Guinness or Samuel Adams Black Lager works wonders. The roasted malt flavors mirror the pie's caramelized notes, while the creamy texture balances the dish's heartiness. Serve slightly chilled for the best experience.
Dessert to Finish
End the meal with a light, citrusy dessert like lemon posset or berry sorbet. The bright acidity cleanses the palate after the pie's richness. For a classic touch, serve vanilla bean ice cream with a drizzle of honey and a sprinkle of toasted nuts. 🍋
If you prefer something more indulgent, a dark chocolate tart with raspberry coulis provides a decadent contrast. The bitterness of the chocolate and tartness of the raspberries balance the pie's savory depth perfectly.
Nutrition facts
Frequently asked questions
Can I substitute bone marrow with another ingredient?
While bone marrow adds unmatched richness, you can substitute it with 2 tbsp unsalted butter or ¼ cup beef drippings for depth. For a vegetarian option, use ¼ cup cashew cream (blended soaked cashews with water) or 2 tbsp olive oil, though the flavor won't be identical. The marrow's velvety texture is irreplaceable, but these work in a pinch!
How do I prevent a soggy crust?
Always blind-bake the bottom crust for 15 minutes at 375°F before adding filling. For extra insurance, sprinkle dried breadcrumbs or crushed cornflakes on the crust before filling. The key is a fully pre-baked base—never skip this step, or the filling's moisture will turn your crust to mush.
What's the best way to reheat leftovers?
Slice the pie and reheat portions at 350°F for 10-12 minutes until warmed through. For individual servings, cover tightly with foil to prevent drying. The crust stays crisp when reheated this way. Store leftovers in an airtight container for up to 4 days—the flavors actually improve overnight!
Can I make this pie ahead of time?
Assemble the pie (unbaked) and refrigerate for up to 24 hours before baking. For even better results, bake it 1 day ahead, then reheat slices at 350°F for 10 minutes. The crust stays crisp, and the filling develops deeper flavors. Freeze baked slices for up to 3 months—just thaw at room temperature before reheating.
What's the secret to ultra-flaky crust?
Keep everything cold—butter, flour, and water included. Use ice water and work quickly when rolling. The magic happens when you fold the dough once before baking (like a letter) to create more layers. For extra flakiness, chill the dough between rolling and baking. Patience is key—don't rush the chilling steps!