
Soups & Stews
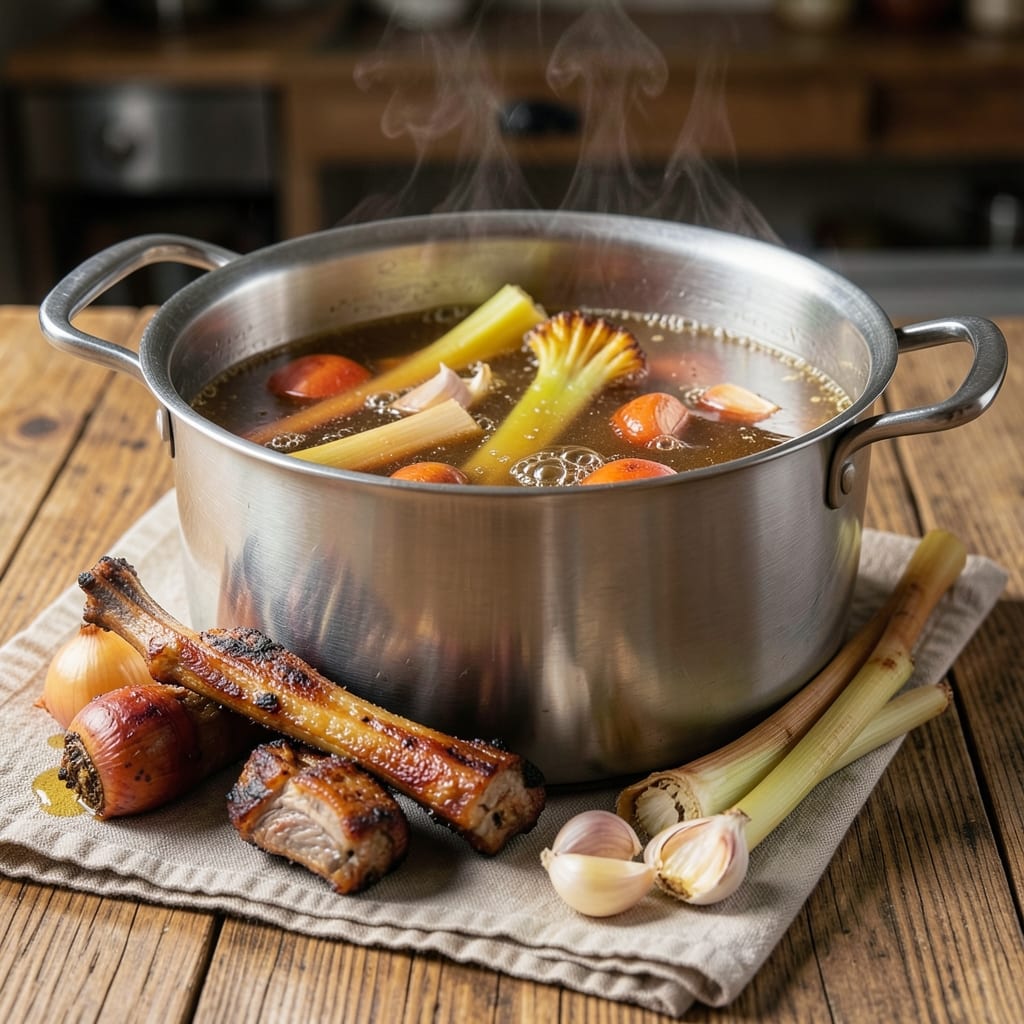
Transforming kitchen scraps into liquid gold—this basic beef bone broth recipe unlocks the rich, umami depth that elevates every soup, stew, and sauce. The slow-simmered magic happens over hours, extracting collagen and minerals from bones into a deeply flavorful foundation that freezes beautifully for months. I've perfected this method through years of testing, ensuring maximum flavor extraction without bitterness or cloudiness.
The secret lies in proper preparation: roasting bones first to deepen their flavor, then simmering them gently for 12-24 hours with aromatics like onions, carrots, and celery. This long cooking time transforms tough scraps into a nutrient-dense broth that's more than just a cooking liquid—it's a flavor multiplier. The result? A clear, golden liquid with a velvety texture that forms the backbone of countless recipes.
What makes this recipe truly versatile is its adaptability—use it as-is for simple soups, or enhance it with herbs, mushrooms, or citrus peels for complex layers of flavor. The broth develops richer umami as it cools, making it even more potent when reheated. Whether you're prepping for meal prep or stocking your freezer, this foundational technique delivers restaurant-quality depth at home.
With minimal ingredients and maximum impact, this broth becomes your culinary secret weapon. The process requires patience, but the payoff—flavor that builds in intensity—is worth every hour spent simmering. Let's get started with the complete step-by-step method that transforms scraps into something extraordinary.
Ingredients for basic beef bone broth
Transform scraps into umami-rich broth with these 11 essential ingredients.
| Ingredient | Amount | Notes |
|---|---|---|
| Beef Bones 🦴 | 4 lb | Knee or knuckle bones preferred |
| Yellow Onions 🧅 | 2 whole | Cut into chunks, skins on |
| Carrots 🥕 | 4 whole | Scrubbed, cut into large chunks |
| Celery Stalks 🌿 | 4 whole | Cut into 2-inch pieces |
| Garlic Cloves 🧄 | 6 cloves | Smashed, skins left on |
| Apple Cider Vinegar 🍏 | ¼ cup | For collagen extraction |
| Sea Salt 🧂 | 1 ½ tbsp | Diamond Crystal preferred |
| Black Peppercorns 🌶️ | 1 tbsp | Whole, lightly crushed |
| Fresh Parsley Stems 🌿 | 1 bunch | For subtle herbal note |
| Cold Water 💧 | 8 cups | Enough to cover bones |
| Extra-Virgin Olive Oil 🫒 | 2 tbsp | For roasting bones |
The bones are the foundation—knee or knuckle cuts yield the most gelatin and flavor. Most butchers will cut them free if you ask, or you can use leftover roasted bones from a holiday meal. Costco and local farms often sell beef bones at reasonable prices, especially when purchased in bulk. For aromatics, organic produce from the grocery store's fresh section works perfectly, but don't worry if they're not perfect—they'll break down beautifully. The apple cider vinegar is non-negotiable; it helps extract collagen from the bones, creating that signature velvety texture. If you can't find it, white vinegar or lemon juice will work in a pinch, though the flavor profile will differ slightly.
No beef bones available? Pork or chicken bones can substitute, though the flavor will differ. Short on vegetables? Mushrooms or fennel add depth without changing the core technique. The parsley stems are optional but add a subtle herbal note that elevates the broth—use fresh if possible, but dried will work at half the quantity. For salt, Diamond Crystal kosher salt dissolves more easily than table salt, but any sea salt will do. The peppercorns should be lightly crushed to release their oils without turning bitter. If you're making a large batch, consider doubling the aromatics—they'll disappear into the broth, but their presence will be felt.
This broth develops richer flavor over time, so reheat gently to preserve its clarity and depth. Store in glass jars or airtight containers in the fridge for up to 5 days, or freeze for up to 6 months. For long-term storage, use ice cube trays—each cube makes a perfect portion for soups or sauces. The broth will continue to deepen in flavor as it cools, so reheat only what you need and refrigerate the rest immediately. If you notice a film forming on top, simply skim it off before reheating—it's a natural byproduct of the collagen breakdown and doesn't affect flavor.
Why You'll Love This Recipe
- Pantry in 10 Minutes: I swear, the hardest part is finding a big pot—no chopping skills required. Toss in whole onions, carrot chunks, celery stalks, and a few smashed garlic cloves. The bones do all the work while you sip wine and pretend it’s fancy.
- Umami Bomb: That slow-simmered beef broth? Richer than takeout ramen. The onions caramelize into sweetness, carrots add natural sweetness, and the garlic—oh, the garlic—turns this into liquid gold. Honestly, I’ve cried over less.
- Soup, Sauce, or Sip: Use it as-is for sipping, toss it into mashed potatoes, or reduce it for gravy. Freeze half for when you’re too tired to cook. Between us, I’ve even used it to revive dry rice—it’s that good.
- Cheap & Lasts Forever: Beef bones are cheaper than steak, and this makes gallons. I’ve had a batch last weeks, reheating portions for everything from ramen to braising. My wallet and freezer both thank me. (Yes, even on a Tuesday night.)
Step-by-step instructions for slow-simmered beef bone broth
Transform humble bones into rich, collagen-packed broth using this precise method.
Prep and Roast the Bones for Deep Flavor
Preheat your oven to 425°F. Arrange the 4 lb beef bones on a rimmed baking sheet, ensuring they're in a single layer. This high heat will caramelize the proteins and create a rich foundation for your broth.
Drizzle the bones evenly with the 2 tbsp extra-virgin olive oil, massaging it into the surfaces to promote browning. Roast for 30-40 minutes until the bones develop a deep mahogany color and you can smell that unmistakable meaty aroma. This step is non-negotiable - it develops the umami depth that separates good broth from extraordinary broth. Don't rush it; flip the bones halfway through for even browning.
Sauté Vegetables for Aromatic Base
While the bones roast, prepare your mirepoix by cutting the 2 whole yellow onions into large chunks (no need to peel), the 4 whole carrots into 2-inch pieces, and the 4 whole celery stalks into similar-sized chunks. Smash the 6 cloves garlic with the side of your knife to release their oils without removing the skins.
Heat a large stockpot over medium heat and add the vegetable mixture. Sauté for 8-10 minutes until the onions soften and begin to caramelize slightly, releasing their sweet, complex flavors. This step builds the aromatic foundation that will infuse your broth. Don't overcrowd the pot - work in batches if needed to prevent steaming rather than browning.
Combine and Simmer for Maximum Collagen Extraction
Transfer the roasted bones to your stockpot along with the sautéed vegetables. Add the 8 cups cold water, 0.25 cup apple cider vinegar, 1.5 tbsp sea salt, and 1 tbsp black peppercorns. The vinegar is crucial here - it helps extract collagen and gelatin from the bones, giving your broth that signature richness and body.
Bring the mixture to a gentle boil, then immediately reduce heat to maintain a barely simmering state. This low-and-slow approach is essential - simmer uncovered for 8-12 hours (overnight is ideal). Skim off any foam or impurities that rise to the surface during the first hour of cooking. The broth should never boil vigorously, as this would break down the collagen you're trying to extract. The longer it simmers, the more gelatin will develop, creating that luxurious mouthfeel.
Finish with Herbs and Strain for Clarity
During the final 30 minutes of simmering, add the 1 bunch fresh parsley stems (discard leaves if desired). This adds a subtle herbal note without overpowering the broth's natural flavors. The parsley also helps clarify the final product by absorbing some impurities.
Once simmered to your desired depth of flavor (taste test after 8 hours if you're impatient), remove the pot from heat and let the broth sit for 15 minutes to allow any settled particles to sink. Strain through a fine-mesh sieve or cheesecloth-lined colander into a clean container. Discard the solids - they've given everything they have to offer. The resulting broth should be rich, golden, and deeply flavorful with a satisfying gel-like consistency when chilled.
Pro Tips For Making Basic Beef Bone Broth
- ROAST THE BONES FIRST: I learned this the hard way—skipping the roast means broth that tastes like a hospital cafeteria. Brown the bones in a 425°F oven for 20-30 minutes until deeply caramelized. That crust packs more flavor than any spice blend ever could.
- CHOP VEGETABLES UNIFORM: No one wants to strain a soup pot full of mush. Cut onions into 1-inch chunks, carrots into 2-inch batons, and celery into 3-inch sticks—big enough to hold shape but small enough to infuse fast. Garlic? Smash the cloves, don’t mince them—they’ll burn before they release their magic.
- SKIP THE BOIL: That first violent bubble is your enemy. Start with cold water over the bones, then bring to a gentle simmer—tiny bubbles at the edges, maybe 180°F. Boiling turns collagen to glue and scorches the veggies. Patience here means richer broth later.
- USE A LITTLE VINEGAR: Sounds weird, but it works: Add 2 tablespoons apple cider vinegar when you start. It helps pull minerals from the bones and cuts through any funky smells. No need to taste it—it’ll disappear during the long cook, leaving only deeper flavor behind.
Serving suggestions for this basic beef bone broth
Soup Foundation
Use this broth as the base for hearty soups like beef barley or pho. For barley soup, simmer 1 cup pearl barley in 8 cups broth with 2 cups shredded beef until tender. For pho, add 8 oz rice noodles, 1 lb flank steak, and fresh herbs like cilantro and Thai basil. The broth's depth transforms simple ingredients into restaurant-quality dishes. 🥘
Stew Enhancer
Add 2 cups broth to slow-cooked beef stews for extra richness. I like to use it in Irish beef stew with potatoes, carrots, and thyme. For a quick version, combine 1 lb stew meat, 2 cups broth, and 1 cup red wine, then simmer for 2 hours. The gelatin from the broth thickens naturally as it cools, creating a velvety texture.
Sauce Thickener
Reduce broth by half to create a luxurious sauce for pasta or meat dishes. For a simple gravy, simmer 4 cups broth until reduced to 2 cups, then whisk in 2 tbsp cornstarch and 1 cup beef stock. This works beautifully with mashed potatoes or roasted vegetables. The umami depth elevates even the simplest sauces.
Risotto Base
Replace water or stock with broth in risotto recipes for a richer flavor. For mushroom risotto, cook 1.5 cups Arborio rice in 6 cups broth with 8 oz mushrooms and white wine. The broth's natural gelatin gives the risotto a creamy finish without added butter. I often finish with Parmesan cheese and fresh parsley for brightness.
Garnish Ideas
Elevate your broth-based dishes with these simple garnishes. A drizzle of truffle oil adds earthy depth, while crispy fried shallots provide texture contrast. For freshness, try microgreens or chopped chives. A sprinkle of toasted sesame seeds works beautifully with Asian-inspired dishes. These finishing touches take your cooking to the next level.
Freezer-Friendly
Portion broth into ice cube trays for easy storage. Each cube makes a perfect addition to soups, sauces, or even coffee. Label containers with the date—broth keeps for up to 6 months** in the freezer without losing quality. When reheating, warm gently on the stovetop or microwave until steaming hot. The flavor actually improves over time, making it perfect for future meal prep. ❄️
Nutrition facts
Frequently asked questions
Can I use any beef bones for this recipe?
While you can technically use any beef bones, knee or knuckle bones are ideal because they contain more marrow and collagen, which creates a richer, gel-like texture when simmered. For best results, avoid bones with large amounts of meat still attached—they'll make the broth cloudy. If you only have marrow bones, they'll still work but may require slightly longer simmering.
Why does the recipe call for apple cider vinegar?
The apple cider vinegar is crucial for extracting collagen and gelatin from the bones, which gives your broth that signature velvety mouthfeel. It also helps tenderize the bones and prevents the broth from becoming cloudy. If you can't find it, white vinegar or lemon juice work in a pinch, though the flavor will be slightly different.
How do I know when the broth is done?
The broth is ready when it has a deep, rich flavor and develops a jelly-like consistency when chilled. For a quick test, place a small amount in the fridge for 15 minutes—if it jiggles like gelatin, it's fully developed. Most recipes recommend 12-24 hours of simmering, but you can taste it after 8 hours if you're impatient.
Can I make this broth in a slow cooker? Transfer the roasted bones and aromatics to your slow cooker, then add the remaining ingredients. Cook on low for 12-16 hours or high for 8-10 hours. The slow cooker maintains a gentle simmer, which is perfect for extracting collagen. Just
What if my broth turns cloudy?
Cloudiness usually means the broth boiled too vigorously or wasn't skimmed properly. To fix it, strain the broth through a cheesecloth-lined colander for a clearer result. For future batches, maintain a gentle simmer and skim foam regularly. If the cloudiness persists, it might be from bones with too much meat—next time, use bones with minimal meat attachment.