
Main Courses
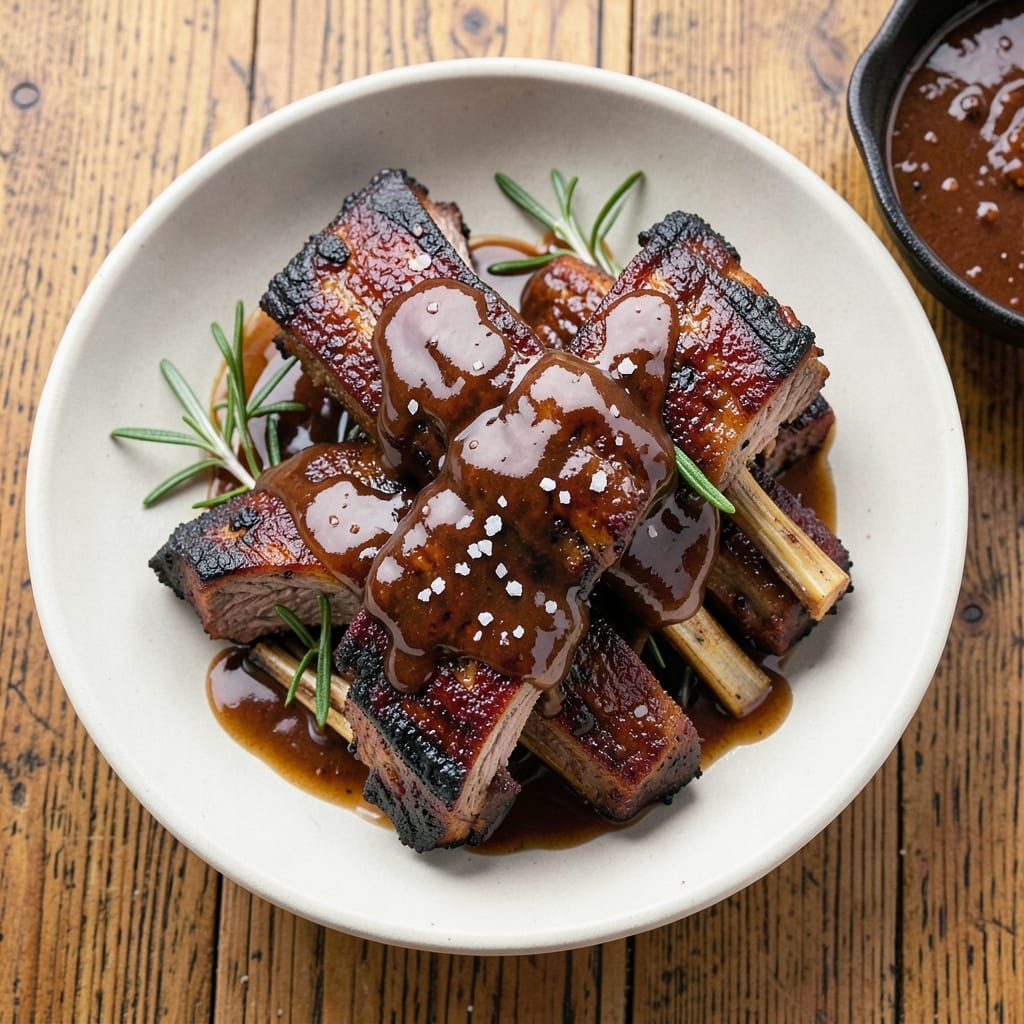
Barbecued beef back ribs deliver that perfect balance of smoky bark and fall-apart tenderness that makes every bite worth the wait. As someone who grew up in a family that treated ribs as a Sunday ritual, I’ve spent years perfecting the 3-2-1 method—where the magic happens at 203°F internal temperature, transforming tough meat into something so tender it melts off the bone. The key? Patience, a well-built rub, and understanding when to wrap those ribs in foil for that final burst of juiciness.
What sets these ribs apart is the combination of a bold, dry rub and the slow-and-low smoke that develops deep flavor without overpowering the meat. I prefer hickory or cherry wood for that classic BBQ aroma, but the method works just as well on a pellet grill or even a well-sealed smoker. The 3-hour cook time might seem long, but it’s what turns tough cuts into restaurant-quality results—no shortcuts, just pure, smoky satisfaction.
By the time you’re done, you’ll have ribs with a crispy, caramelized bark that cracks under pressure, revealing meat so tender it practically falls apart at the touch. The sauce? Optional, but if you choose to use one, it’s all about that sticky, sweet-spicy glaze that clings to every surface. This isn’t just dinner—it’s an experience, the kind that turns weeknights into celebrations.
Pair them with classic sides like creamy coleslaw, buttery cornbread, or a simple baked bean dish to round out the meal. The best part? Leftovers reheat beautifully, making these ribs perfect for meal prep or feeding a crowd. Let’s get started on creating something truly unforgettable.
Ingredients for barbecued beef back ribs
These bold flavors and tender cuts create ribs so smoky and succulent they'll become your new obsession.
| Ingredient | Amount | Notes |
|---|---|---|
| Beef Back Ribs 🥩 | 4 lb | Bone-in, meaty ends included |
| Yellow Mustard 🍯 | ½ cup | For sticky base layer |
| Brown Sugar 🍚 | ½ cup | Light or dark variety |
| Smoked Paprika 🌶️ | 2 tbsp | For deep smoky flavor |
| Chili Powder 🌶️ | 1 ½ tbsp | Medium heat preferred |
| Garlic Powder 🧄 | 1 tbsp | Freshly ground if possible |
| Onion Powder 🧅 | 1 tbsp | For sweet depth |
| Ground Black Pepper 🌶️ | 1 tbsp | Freshly cracked |
| Kosher Salt 🧂 | 1 ½ tbsp | Diamond Crystal preferred |
| Apple Cider Vinegar 🍎 | 2 tbsp | For tangy balance |
| Hickory Wood Chips 🌳 | 1 package | Or cherry wood chips |
| Aluminum Foil 📄 | 1 sheet | Heavy-duty for wrapping |
| Butter 🧈 | ¼ cup | Unsalted, for basting |
| BBQ Sauce 🍅 | ½ cup | Optional, for finishing |
The ribs are the star—look for meaty ends at Costco or your local butcher, where the flavor is richest. Freshly cut ribs have a vibrant pink hue; if they're graying, ask for a newer cut. For the rub, Penzeys or bulk bins at Whole Foods deliver the most potent spices. Don't skimp on the wood chips either—hickory or cherry from Traeger or Cookshack give that authentic BBQ aroma. The mustard acts as a binder for the rub, so grab the yellow kind (not Dijon) for that classic tang. Pro tip: Soak your wood chips in water for 30 minutes before using—keeps them smoldering longer for that consistent smoke.
No smoked paprika? Substitute half the amount with regular paprika plus a pinch of liquid smoke—it's a game-changer. Running low on apple cider vinegar? White vinegar or lemon juice work in a pinch, though the flavor won't be identical. For the BBQ sauce, if you're skipping it, brush on extra butter mixed with a splash of vinegar during the final hour for moisture. The foil wrapping is non-negotiable—it traps steam to break down collagen, turning tough meat into something that falls apart. And if you're short on time? Use a meat thermometer—the ribs are done at 203°F internal temp, not by clock. Trust the probe, not the timer.
Leftovers? Reheat in the oven at 275°F wrapped in foil for 20 minutes—they'll taste even better the next day. Store ribs in the fridge for up to 5 days or freeze for 3 months by wrapping tightly in foil first, then plastic. For serving, I always set up a DIY sauce station with extra BBQ sauce, sliced jalapeños, and chopped cilantro. The ribs reheat beautifully, making them perfect for meal prep—just portion them into containers with a little extra sauce to keep everything moist. And save those bones! Simmer them with water and spices for a quick beef broth.
Why You'll Love This Recipe
- Five-Ingredient Magic: That’s all you need—just ribs, mustard, brown sugar, smoked paprika, and chili powder. Honestly, the pantry staples here make it feel like a restaurant dish without the fuss.
- Sweet-Spicy Crunch: The caramelized brown sugar gives it that sticky, glossy finish, while the chili and smoked paprika add heat that lingers. That crispy bark? Pure satisfaction after just a few hours.
- Tailgate or Tuesday: Between us, these ribs work for game day crowds or a lazy weeknight when you’re craving something hearty. I’ve served them with buns for sandwiches, chopped for tacos, or straight from the bone—no regrets.
- Leftovers That Don’t Suck: The good news? They reheat like a dream—wrap in foil, blast in the oven, and they’re just as tender as day one. And because ribs feed a crowd, you’ll have enough to freeze portions for months. Budget win.
Step-by-step instructions for perfectly smoked beef back ribs
Here's how to transform tough ribs into melt-in-your-mouth perfection with a smoky crust you'll crave.
Prepare the Ribs with a Flavor-Packed Rub
In a medium bowl, combine the 0.5 cup yellow mustard, 0.5 cup brown sugar, 2 tbsp smoked paprika, 1.5 tbsp chili powder, 1 tbsp garlic powder, 1 tbsp onion powder, 1 tbsp ground black pepper, 1.5 tbsp kosher salt, and 2 tbsp apple cider vinegar. Mix until you get a thick, sticky paste - this is your secret weapon for both flavor and moisture retention.
Pat the 4 lb beef back ribs dry with paper towels, then generously coat them with the rub mixture, pressing it into every crevice and bone. The mustard creates a sticky barrier that locks in juices during smoking, while the sugar helps develop that coveted dark bark. Let the ribs sit at room temperature for 30 minutes before smoking - this ensures even cooking from the start.
Set Up Your Smoker for Low-and-Slow Success
Fill your smoker box with the 1 package hickory wood chips and soak them in water for 15 minutes before using. Preheat your smoker to 225°F - this low temperature is crucial for tenderizing the connective tissue without drying out the meat. You'll know you're ready when you see thin blue smoke (not thick white steam) coming from the smoker.
Place the ribs meat-side down on the smoker grates, bone-side up. This positioning allows the ribs to cook more evenly and prevents the meat from shrinking away from the bones. Close the lid and resist the urge to peek - every time you open it, you lose heat and extend cooking time. The ribs will need 2.5 to 3 hours to reach the perfect tenderness, so plan accordingly.
Wrap and Finish for Maximum Tenderness
After 2 hours of smoking, check the internal temperature using a meat thermometer. When it reaches 165°F, it's time for the "Texas crutch" - wrap the ribs tightly in the 1 sheet aluminum foil with 0.25 cup butter spread over the top. The foil creates a steam chamber that helps break down collagen, while the butter adds richness and prevents the bark from becoming too tough.
Return the wrapped ribs to the smoker and continue cooking until the internal temperature reaches 203°F (about 30-45 minutes more). This higher temperature ensures the collagen fully converts to gelatin, creating that signature pull-apart tenderness. The ribs should have a deep mahogany bark on the outside and be fork-tender when pierced.
Rest and Serve with Optional BBQ Sauce
Remove the ribs from the smoker and let them rest for 15 minutes before unwrapping. This resting period allows the juices to redistribute throughout the meat. For extra flavor, brush the ribs with 0.5 cup BBQ sauce during the last 15 minutes of smoking or right before serving.
Slice between the bones to separate the ribs, then serve immediately. Each bite should deliver perfectly balanced flavors - smoky from the hickory, sweet from the brown sugar, tangy from the mustard, and tender enough to pull apart with your fingers. The bark should be crisp enough to stand up to a toothpick but still tender enough to eat. This is where all the magic comes together!
Pro Tips For Making Barbecued Beef Back Ribs
- CRANK THE HEAT FIRST: Start your ribs on the hottest part of the grill—yes, even if they’re beef and not pork. After 20 minutes, they’ll sear and develop that caramelized crust faster, which means less time staring at the smoker later. I learned this the hard way when my first batch turned out soft instead of crispy.
- TRIM THE FAT SPARINGLY: Leave a thin layer of fat on the ribs—it’s flavor insurance. But if you’re using a mix of yellow mustard and brown sugar as a base, skip trimming too much. That fat renders down and keeps the meat juicy, especially when you’re not wrapping them in foil early.
- DON’T DROWN THE DRY RUB: When mixing smoked paprika, chili powder, and brown sugar, resist the urge to add liquid. A damp rub sticks to the ribs like glue, turning your crust into a sticky mess. Pat them dry first, then coat lightly—just enough to cling without sliding off.
- WRAP THEM AT 165°F: Pull the ribs off the heat when they hit 165°F internally, then wrap in foil with a splash of apple cider vinegar (or even more mustard). This isn’t about cooking them through—it’s about relaxing the meat so the final bark forms perfectly. I used to wait until 190°F, and the texture suffered.
Best sauces and condiments for this recipe
Classic BBQ Sauce
For that sticky, sweet-spicy finish, I recommend using a vinegar-based BBQ sauce like Sweet Baby Ray's Original or Sticky Fingers. Brush ½ cup on during the last 15 minutes of smoking—just enough to caramelize slightly without burning. If you prefer a tangier profile, try Frank's RedHot with its bold tomato and vinegar flavors. 🍅
Spicy Mustard Glaze
For heat lovers, mix ¼ cup yellow mustard, 2 tbsp apple cider vinegar, 1 tbsp smoked paprika, and 1 tsp cayenne pepper into a glaze. Brush this on during the final 30 minutes of smoking—it creates a fiery crust that cuts through the richness. I like this variation for Carolina-style ribs. 🌶️
Butter Baste
Skip the sauce entirely and baste the ribs with ¼ cup melted butter mixed with 1 tbsp apple cider vinegar during the last hour. This adds richness without overpowering the smoky flavors. I often do this when serving ribs to guests who prefer a cleaner taste. 🧈
Honey-Garlic Drizzle
For a sweeter finish, combine 2 tbsp honey, 1 tbsp minced garlic, and 1 tbsp soy sauce into a drizzle. Apply this after unwrapping the ribs—it adds a glossy sheen and balances the smokiness beautifully. Perfect for a lighter, more elegant presentation. 🍯
Dry Rub Only
If you're going full purist, skip the sauce entirely and focus on the dry rub. The smoky bark and tender meat should shine on their own. This approach highlights the natural flavors of the beef and the wood smoke. I often do this when I want to emphasize the traditional BBQ experience. 🌳
Post-Smoke Sauce Station
Set up a DIY sauce bar with small bowls of BBQ sauce, sliced jalapeños, chopped cilantro, and hot honey. Let guests customize their ribs—this adds fun and personalization to the meal. I love this approach for parties or family gatherings. 🍽️
Nutrition facts
Frequently asked questions
How do I know when beef back ribs are fully cooked?
Use a meat thermometer to check the internal temperature—203°F is the magic number for tender, fall-apart ribs. The 3-2-1 method (3 hours unwrapped, 2 hours wrapped, 1 hour unwrapped) helps achieve this perfect doneness without drying out the meat.
Can I use a grill instead of a smoker for this recipe?
If you don't have a smoker, use a charcoal grill with indirect heat and wood chips in a foil pouch on the coals. Maintain 225°F by adjusting the vents, and follow the same 3-2-1 timing. For gas grills, use a smoker box or wrap wood chips in foil with holes punched in them.
What's the best way to store leftover ribs?
Let ribs cool completely, then wrap tightly in foil or place in an airtight container. Store in the fridge for up to 5 days or freeze for 3 months. To reheat, wrap in foil and bake at 275°F for 20 minutes—they'll taste even better the second time!
Why did my ribs turn out tough instead of tender? Most likely, they didn't reach the proper internal temperature (203°F) or were cooked too quickly at high heat. The low-and-slow method is key—225°F for 3+ hours breaks down collagen naturally. Also,
Can I use a pellet grill for this recipe?
Pellet grills are perfect for this! Set the temperature to 225°F and use hickory or cherry pellets for authentic flavor. The automatic temperature control makes it easier to maintain consistent heat. Just follow the same 3-2-1 timing, and you'll get restaurant-quality results with minimal effort.