
Main Courses
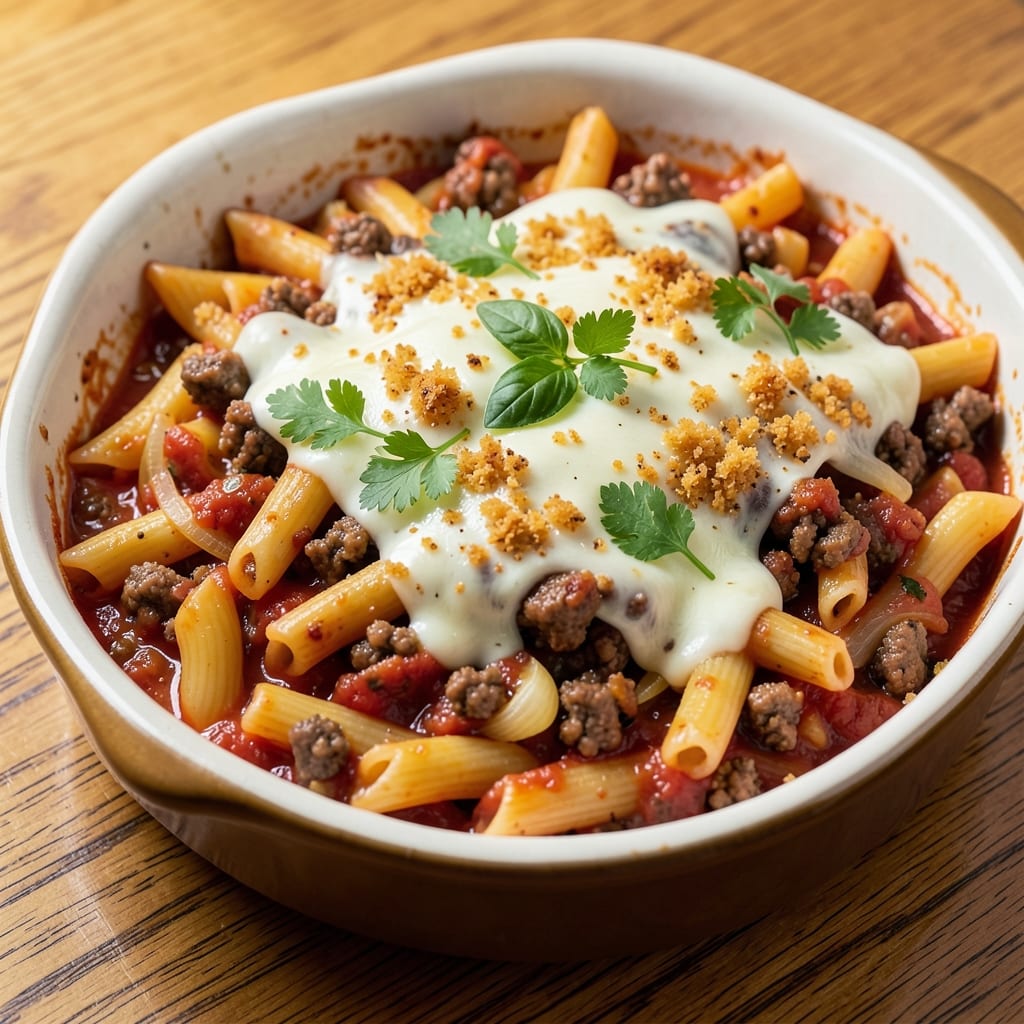
This baked ziti recipe with ground beef and Italian sausage delivers the ultimate comfort food experience—rich, hearty layers of al dente pasta, savory meat, and a golden cheese crust that's impossible to resist. 💛 I developed this version after years of testing, focusing on the perfect balance between tender meat, flavorful sauce, and that crispy cheese topping that makes it restaurant-worthy at home.
The secret to this recipe lies in the meat preparation—browning both ground beef and Italian sausage until deeply caramelized creates layers of flavor that no pre-made sauce can match. We'll combine this with a homemade herby tomato sauce that simmers until thick and aromatic, then layer everything with ziti pasta and melted cheese for that iconic baked ziti texture. Every forkful delivers tender pasta, juicy meat, and melty cheese in perfect harmony.
What makes this recipe truly special is how it comes together—no fancy techniques required, just good ingredients and proper layering. The result is a dish that's hearty enough for a family dinner but impressive enough for company, with that signature crispy cheese crust on top. The aroma alone will have everyone gathering at the table, and the first bite will have them asking for seconds.
Serve with a simple side salad and crusty garlic bread to soak up every last bit of that delicious sauce. This is comfort food at its finest—warm, satisfying, and packed with the kind of flavors that make you want to slow down and savor each bite. Let's get started on creating your perfect baked ziti.
Ingredients for baked ziti recipe with ground beef and italian sausage
These hearty ingredients create the ultimate baked ziti with rich meat layers and golden cheese crust!
| Ingredient | Amount | Notes |
|---|---|---|
| Ziti Pasta 🍝 | 12 oz | Uncooked, medium thickness |
| Ground Beef 🥩 | 1 ½ lb | 80/20 fat ratio preferred |
| Italian Sausage 🌭 | 1 lb | Sweet or spicy, casings removed |
| Yellow Onion 🧅 | 1 whole | Medium size, finely chopped |
| Garlic Cloves 🧄 | 4 cloves | Fresh, minced |
| Canned San Marzano Tomatoes 🍅 | 28 oz | Crushed, high quality |
| Tomato Paste 🍅 | 2 tbsp | Smooth, no sugar added |
| Fresh Basil Leaves 🌿 | ½ cup | Packed, chopped |
| Dried Oregano 🍃 | 1 tsp | Italian blend preferred |
| Ground Black Pepper 🌶️ | ½ tsp | Freshly cracked |
| Kosher Salt 🧂 | 1 ½ tsp | Diamond Crystal preferred |
| Extra-Virgin Olive Oil 🫒 | 2 tbsp | For browning meat |
| Ricotta Cheese 🧀 | 15 oz | Whole milk, room temp |
| Mozzarella Cheese 🧀 | 2 cups | Fresh, shredded |
| Parmesan Cheese 🧀 | ½ cup | Freshly grated |
The meat is where the magic happens. Ground beef with 20% fat stays juicy while browning, and Italian sausage adds that signature Italian flavor. Grab 80/20 beef from the butcher section—it's worth the extra penny. For the sausage, Trader Joe's or Whole Foods have great sweet and spicy options. Don't skip browning the meat—this creates the deep, caramelized flavor that makes homemade sauce taste so much better than jarred. The onions and garlic? Fresh is non-negotiable here—they're the flavor foundation.
No ricotta? Cottage cheese blended smooth works in a pinch (trust me, it's delicious). Short on mozzarella? Provolone shreds add a nice tang. The San Marzano tomatoes are a splurge worth making—Costco or Italian markets carry them canned. For the cheese topping, fresh mozzarella melts better than pre-shredded (which has anti-caking agents). The ricotta should be room temperature when mixing—just take it out 30 minutes before you need it. And if you're feeling fancy, add a handful of spinach to the ricotta mixture for extra color and nutrients.
This dish tastes even better the next day—make extra portions if you can. The ricotta mixture can be prepped ahead and refrigerated for 2 days (cover tightly). For the cheese topping, store any leftovers in an airtight container and reheat covered with foil for 10 minutes at 375°F. Freezes beautifully for up to 3 months—just thaw overnight in the fridge before reheating. The sauce base keeps for 5 days in the fridge if you make it ahead, but honestly, it's worth making fresh for maximum flavor.
Why You'll Love This Recipe
- One-Pan Magic: I swear by this—just brown the meat, toss everything in one dish, and let the oven do the work. No boiling pasta separately, no messy saucepans. That crispy top layer? Pure reward for zero extra effort.
- Flavor Bomb: The combo of Italian sausage and ground beef gives it this rich, meaty depth, while the onions and garlic caramelize into something seriously addictive. Honestly, I’ve tried fancier versions, but this one hits every time—no shortcuts needed.
- Leftover Gold: This dish actually tastes better the next day (yes, really). I make a double batch on Sundays, and by Wednesday, it’s still the star of lunch. The sauce clings to the ziti perfectly, so reheating is a breeze—just cover it and pop it back in the oven.
- Budget-Friendly Feast: Ground beef and sausage stretch way further than you’d think, and ziti’s cheap but satisfying. I feed my whole family (plus my dog’s judgmental stares) for under $15. Not the prettiest, but the taste makes up for it—and my wallet thanks me.
Step-by-step instructions for baked ziti with ground beef and Italian sausage
This layered masterpiece delivers rich tomato sauce, crispy cheese crust, and perfect al dente pasta every time.
🍳 Step 1: Brown the Meat and Sauté Aromatics
Heat a large skillet over medium-high heat and add 2 tablespoons extra-virgin olive oil. Break the 1.5 lb ground beef and 1 lb Italian sausage into the pan, spreading them out evenly. Cook undisturbed for 5-6 minutes until the meat browns deeply and loses its raw color.
Use a wooden spoon to break up the meat as it cooks, but don't overwork it. Once browned, drain most of the fat (leave about 1 tablespoon for flavor) and transfer the meat to a bowl. In the same pan, add the finely chopped yellow onion and cook for 3-4 minutes until softened. Stir in the minced garlic cloves and cook for 30 seconds until fragrant—this builds the flavor foundation for your sauce.
🥘 Step 2: Build the Herby Tomato Sauce
Return the cooked meat to the skillet and stir in the 28 oz crushed San Marzano tomatoes, 2 tablespoons tomato paste, 1 teaspoon dried oregano, 0.5 teaspoon ground black pepper, and 1.5 teaspoons kosher salt. Bring to a gentle simmer and let it cook uncovered for 15-20 minutes until thickened slightly.
Stir in the 0.5 cup chopped fresh basil leaves during the last 5 minutes of cooking. The basil should wilt slightly but still retain some color—this ensures vibrant flavor. Taste and adjust seasoning if needed. Here's the thing—this sauce should be rich but not overly acidic, so if it needs brightening, add a pinch more salt rather than sugar.
👨🍳 Step 3: Cook and Layer the Pasta
While the sauce simmers, cook the 12 oz ziti pasta in a large pot of well-salted boiling water until 1 minute before al dente (about 10-11 minutes for medium thickness). Reserve 1 cup pasta water before draining—this starchy liquid helps create the perfect sauce consistency.
In a large bowl, gently toss the drained pasta with the meat sauce until evenly coated. The pasta should absorb the sauce but still look glossy. In a separate bowl, mix the 15 oz ricotta cheese with 0.5 cup grated Parmesan cheese and 0.25 teaspoon black pepper until just combined—don't overmix or it'll get grainy.
🥘 Step 4: Assemble the Layered Baked Ziti
Preheat your oven to 375°F. Spread half of the pasta mixture in an even layer in a 9x13-inch baking dish. Drop spoonfuls of the ricotta mixture evenly over the pasta, then sprinkle with half of the 2 cups shredded mozzarella cheese. Repeat with another layer of pasta, remaining ricotta, and the rest of the mozzarella.
Here's where the magic happens: cover the dish tightly with aluminum foil and bake for 25 minutes. This initial bake ensures the pasta cooks through without burning the cheese. After 25 minutes, uncover and bake for another 10-15 minutes until the top is deep golden brown and bubbly. The edges should be crispy while the center remains creamy—this is your perfect texture balance.
🔥 Step 5: Rest and Serve with Confidence
Remove from the oven and let the baked ziti rest for 10-15 minutes before serving. This resting period allows the layers to set and makes slicing cleaner. The cheese should be gooey in the center but crispy on top, with al dente pasta strands throughout.
Garnish with extra chopped fresh basil and additional Parmesan cheese if desired. Serve immediately with a simple green salad and crusty bread to soak up every last bit of that rich tomato sauce. The combination of tender meat, herby sauce, and creamy cheese layers makes this baked ziti a true comfort food winner.
Pro Tips For Making Baked Ziti Recipe With Ground Beef And Italian Sausage
- CRANK DOWN THE HEAT: Brown the sausage and beef on medium-high, but once the meat’s mostly cooked, drop it to medium-low for the last 3 minutes. I used to blast it on high until it was done, and the sausage would turn greasy and lose its flavor—now it stays juicy and caramelized, not fried.
- SALT THE PASTA WATER LIKE IT’S THE OCEAN: Ziti needs serious salt in the boiling water—at least 1.5 tablespoons per 4 quarts. I learned this the hard way when my baked ziti tasted bland no matter how much cheese I added. Trust me, the pasta will absorb enough salt to carry the dish.
- DON’T OVERMIX THE SAUCE: After adding the onions and garlic to the meat, stir just enough to break it up—then let it sit. I used to mash everything into a paste, and the sauce ended up thick and gluey. Let the onions soften and the garlic bloom without constant stirring, or you’ll end up with a mushy, one-dimensional base.
- USE HALF THE CHEESE NOW: Sprinkle a layer of mozzarella and Parmesan halfway through baking, right before the final 10 minutes. The cheese on top will melt into a golden crust, but the one underneath keeps the ziti creamy and prevents a dry bottom—yes, even if it means digging through the dish twice.
Make-ahead tips for this baked ziti recipe with ground beef and italian sausage
Prep Ahead Sauce
Make the herby tomato sauce up to 3 days ahead—it actually tastes better after resting! Store it in an airtight container in the fridge. When ready to assemble, just reheat it gently on the stove with a splash of pasta water to restore its silky texture. I like to double the sauce recipe and freeze half for future meals—just thaw overnight in the fridge. 💫
Layer Components Separately
Prevent soggy pasta by assembling the baked ziti layers just before baking. Keep the cooked pasta, meat sauce, ricotta mixture, and cheeses in separate containers. When you're ready to bake, layer them quickly and get straight into the oven. This keeps everything perfectly al dente and prevents the bottom from getting mushy. Trust me, this is the secret to restaurant-quality texture!
Cheese Prep Shortcut
Save time by shredding all your cheese the night before and storing it in a sealed container in the fridge. The cold cheese shreds more evenly and prevents that dreaded clumping during baking. I also like to mix the ricotta with Parmesan ahead of time—just store it covered in the fridge until ready to use. The flavors meld beautifully overnight, creating a richer taste. 🧀
Freezer-Friendly Assembly
For a true make-ahead masterpiece, assemble the entire baked ziti in your baking dish, cover tightly with foil, and freeze it unbaked. When ready to serve, thaw in the fridge overnight, then bake uncovered at 375°F for 45-50 minutes—add 10-15 minutes of uncovered baking time at the end for that golden crust. This method preserves all the flavors perfectly, and the texture stays amazing after freezing.
Portion Control Tips
Divide the baked ziti into individual portions before baking if you're serving a crowd. Use a sharp knife to cut through the foil and separate into 9x9-inch squares. Bake these smaller portions for 15-20 minutes at 375°F after removing from the fridge. This makes serving easier and ensures everyone gets perfectly heated portions with that crispy cheese topping intact. 🍴
Reheating Leftovers
Leftover baked ziti reheats beautifully in the oven. Cover with foil and warm at 350°F for 15-20 minutes until heated through. For microwave reheating, cover with a damp paper towel and heat in 1-minute intervals on medium power, stirring between each interval. The key is gentle heat—this prevents the cheese from turning rubbery and keeps the pasta tender. 🔥
Nutrition facts
Frequently asked questions
Can I substitute Italian sausage with chicken sausage?
Yes, but expect a different flavor profile. Chicken sausage adds a milder taste compared to the rich, spiced notes of Italian sausage. If using chicken sausage, increase the seasoning slightly with 0.25 teaspoon extra oregano and 0.25 teaspoon red pepper flakes to compensate. For best results, use a high-quality chicken sausage with Italian-style seasonings.
How do I prevent the cheese from getting rubbery?
The key is proper cheese prep and baking technique. Always use freshly shredded mozzarella (pre-shredded contains anti-caking agents that cause rubberiness). Keep the oven temperature at 375°F and bake uncovered only after the initial 25 minutes of covered baking. This gradual approach creates a crispy top while keeping the cheese creamy inside.
Can I make this recipe in a smaller baking dish?
For a 9x9-inch dish, reduce the recipe by half (use 6 oz ziti, 0.75 lb ground beef, 0.5 lb sausage, and 1 cup mozzarella). Bake covered for 20 minutes, then uncovered for 10-12 minutes. The smaller surface area means it'll bake faster. For a single serving, use a 6-inch pie dish with 3 oz ziti and 0.33 cup mozzarella, baking for 15 minutes covered and 8-10 minutes uncovered.
What if I don't have ricotta?
Don't worry—you have options! Blend 15 oz cottage cheese with 1 tablespoon heavy cream until smooth for a close substitute. Or mix 1 cup mascarpone cheese with 0.25 cup grated Parmesan for a richer texture. Both work well, though ricotta's lighter texture is ideal. If using cottage cheese, drain it well first to remove excess liquid.
How can I make this dish vegetarian?
Swap the meat for 1 lb mushrooms (cremini or portobello) and 1 lb lentils (cooked). Sauté the mushrooms with garlic and onion until deeply browned, then combine with the tomato sauce. Use the same layering technique, but reduce the baking time by 5 minutes since vegetarian versions tend to stay moister. For extra protein, add 1 cup cooked quinoa to the ricotta mixture. The texture will be hearty and satisfying without the meat!