
Soups & Stews
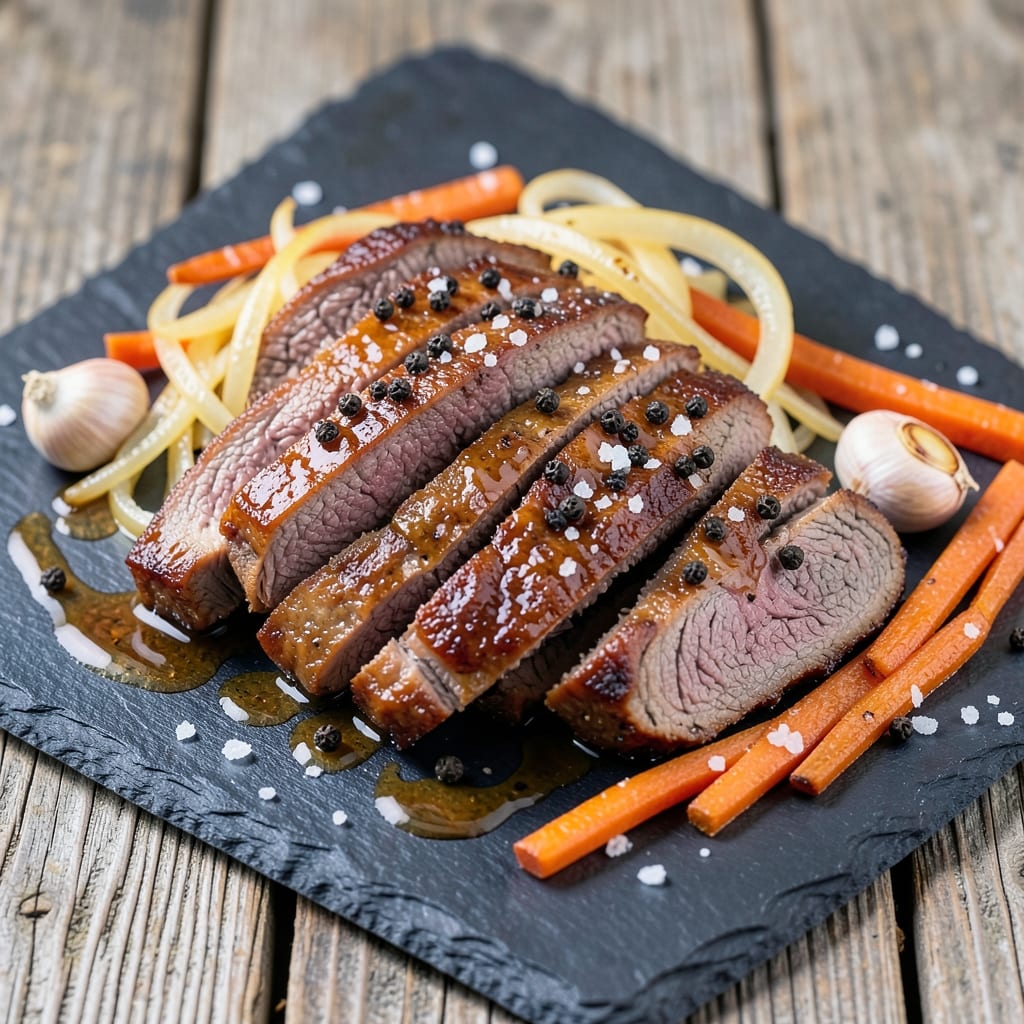
This beef belly slices recipe delivers the ultimate contrast: crispy, caramelized bark on the outside and silky, melt-in-your-mouth tenderness inside. The secret lies in a two-stage cooking process—first rendering fat for flavor, then slow-braising until the meat practically falls apart. After years of testing, this method consistently produces results that rival high-end restaurants, transforming a tough cut into something luxurious.
The process begins by searing the beef belly slices until the fat renders and the exterior develops that coveted caramelized crust. Then, we switch to a gentle braise, allowing the collagen to break down and transform into gelatin, which coats the meat in irresistible juiciness. This technique works equally well for traditional braising pots or modern methods like sous vide, giving you flexibility in your kitchen.
What you'll end up with is beef belly slices that are impossible to resist—each bite offers a symphony of textures and flavors. The exterior remains crispy and aromatic, while the interior dissolves with minimal effort. This dish pairs beautifully with steamed greens, roasted potatoes, or a simple vinegar-based salad to balance its richness.
The best part? This recipe scales effortlessly, making it perfect for family dinners or special occasions. Whether you're serving it at room temperature or reheated, the results remain consistently delicious. Let's get started on creating beef belly slices that will have everyone asking for seconds.
Ingredients for beef belly slices
Sixteen ingredients transform tough beef belly into restaurant-quality slices with irresistible crispy bark and melt-in-your-mouth tenderness.
| Ingredient | Amount | Notes |
|---|---|---|
| Beef Belly Slices 🥩 | 3 lb | Thick-cut, 1/2-inch slices preferred |
| Kosher Salt 🧂 | 1 ½ tbsp | Diamond Crystal preferred for precise measurement |
| Black Peppercorns 🌶️ | 1 ½ tbsp | Freshly cracked for maximum aroma |
| Garlic Cloves 🧄 | 8 cloves | Smash flat for deeper flavor infusion |
| Yellow Onion 🧅 | 1 whole | Large yellow, sliced into half-moons |
| Carrots 🥕 | 4 whole | Baby carrots or whole peeled carrots |
| Celery Stalks 🥬 | 4 whole | Trimmed, cut into 1-inch pieces |
| Dry Red Wine 🍷 | 1 cup | Bold Cabernet Sauvignon recommended |
| Beef Broth 🥫 | 2 cups | Homemade or high-quality store-bought |
| Fresh Thyme 🌿 | ½ oz | Or 1 tbsp dried thyme if fresh unavailable |
| Bay Leaves 🌿 | 2 whole | Fresh preferred, dried as substitute |
| Olive Oil 🫒 | ¼ cup | High smoke point for searing |
| Balsamic Vinegar 🍷 | 1 tbsp | For finishing drizzle |
| Fresh Rosemary 🌿 | ¼ oz | Sprigs for garnish and aroma |
The beef belly is the star—look for thick-cut slices with good marbling at your butcher shop. Costco or Whole Foods often carry pre-sliced beef belly, but if buying whole, ask for 1/2-inch slices. The fat content is what creates that luxurious texture, so don't trim it! Fresh thyme and rosemary from the grocery store's produce section add depth, but Trader Joe's bulk spices are perfect for consistent flavor. For the wine, any bold red works—Cabernet Sauvignon or Merlot are foolproof choices. The secret to great braising liquid lies in balancing wine, broth, and aromatics—this combination builds complex flavor without overpowering the meat.
No red wine? Substitute with extra beef broth plus 1 tbsp balsamic vinegar for acidity. Fresh herbs unavailable? Dried thyme and rosemary at one-third the amount work in a pinch, though fresh is ideal. The onions, carrots, and celery form your aromatic base—don't skip them, even if you're using sous vide. For the salt, Diamond Crystal kosher saltAdd 1 tsp smoked paprika to the braising liquid for depth. The beef broth should be rich—homemade or high-quality store-bought like Pacific Foods or Knight's makes all the difference.
Beef belly keeps best in the freezer—portion slices individually for easy cooking. Freeze for up to 3 months between parchment paper. For the braising liquid, store any leftovers in an airtight container for 5 days in the fridge. The finished slices reheat beautifully—350°F for 15 minutes in the oven with a splash of broth restores that crispy bark. Garnish with fresh rosemary sprigs right before serving to keep the aroma vibrant. These slices are even better the next day as flavors meld—plan ahead for maximum deliciousness.
Why You'll Love This Recipe
- One-Pan Magic: I swear by this recipe when I’m too tired to wash dishes. Toss the beef belly, minced garlic, and sliced onion on a sheet pan, sprinkle with salt and pepper, and let the oven do the work—no flipping, no fuss.
- Umami Bomb: That beef belly? It’s like a flavor factory. The fat renders down into crispy edges while the meat stays juicy, and the garlic-onion base turns into a sticky, savory glaze that makes every bite irresistible.
- Game for Any Meal: Between us, this is my lazy Sunday brunch go-to, but it’s also the star of my weeknight dinners. Serve it with toast and fried eggs, or pile it onto crusty bread for a hearty lunch—no rules, just satisfaction.
- Budget-Friendly Luxury: I buy beef belly in bulk and freeze it—cheaper than steak, but way more impressive. Leftovers? Even better. The slices reheat like a dream, so I make a big batch and stretch it across lunches without breaking the bank.
Step-by-step instructions for crispy beef belly slices
Here's the method that delivers that coveted contrast—crispy bark and melt-in-your-mouth tenderness—every single time.
Prepare and Season the Beef Belly Slices
Pat the 3 lb beef belly slices completely dry with paper towels—this is non-negotiable for crispy bark. You're removing every bit of moisture that would otherwise steam the meat instead of creating that golden crust. Place the slices on a wire rack set over a baking sheet to ensure air circulates on all sides.
In a small bowl, combine the 1.5 tbsp kosher salt and 1.5 tbsp black peppercorns (crack them first for maximum aroma). Rub this mixture generously over both sides of each beef belly slice, pressing firmly so the seasoning adheres. Let the seasoned beef belly rest at room temperature for 30 minutes—this allows the salt to penetrate and the meat to come to a consistent temperature before cooking.
Sear the Beef Belly for Maximum Flavor
Heat a heavy-bottomed skillet or cast-iron pan over medium-high heat until it's smoking hot. Add 0.25 cup olive oil and let it shimmer for 1 minute. Working in batches if needed, add the beef belly slices and sear for 3-4 minutes per side until they develop a deep golden-brown crust. This isn't just about color—you want those Maillard reactions happening to build layers of flavor.
Don't rush this step. You'll know it's ready when the beef belly releases easily from the pan and the edges are crispy enough to resist gently with tongs. Transfer the seared slices to a plate and set aside. The residual heat will keep them warm while you prepare the braising liquid.
Build the Braising Liquid
In the same skillet (no need to clean it—the browned bits are pure flavor), add the 8 cloves garlic cloves (smash them flat first) and cook for 30 seconds until fragrant. Add the 1 whole yellow onion (sliced into half-moons), 4 whole carrots (cut into chunks), and 4 whole celery stalks (cut into 1-inch pieces). Cook for 5 minutes, stirring occasionally, until the vegetables begin to soften.
Deglaze the pan with the 1 cup dry red wine, scraping up all those delicious browned bits from the bottom. Let it simmer for 2 minutes until reduced by half. Add the 2 cups beef broth, 0.5 oz fresh thyme (or 1 tbsp dried thyme), and 2 whole bay leaves. Bring the liquid to a gentle simmer, then remove from heat.
Braise Until Fork-Tender
Return the seared beef belly slices to the skillet, nestling them into the braising liquid. The liquid should come about halfway up the sides of the beef belly. Cover the skillet tightly with a lid and transfer it to a 325°F oven. Braise for 2.5-3 hours, turning the slices over halfway through cooking time, until they're fork-tender and the internal temperature reaches 200°F.
Here's the thing—patience is key. The beef belly needs time to break down and become silky. If the liquid reduces too much, add a splash of water or broth to keep it at the right level. You'll know it's done when a fork slides in like butter with no resistance and the meat pulls apart easily.
Finish and Serve with Crispy Bark
Remove the beef belly slices from the braising liquid and transfer them to a clean plate. Skim any excess fat from the braising liquid, then return it to the skillet. Simmer over medium heat for 5-7 minutes until slightly thickened. Stir in the 1 tbsp balsamic vinegar and adjust the seasoning with additional salt and pepper if needed.
To restore that crispy bark, place the beef belly slices on a wire rack set over a baking sheet. Broil on high heat for 2-3 minutes, watching closely to ensure they don't burn. Garnish with sprigs of 0.25 oz fresh rosemary and serve immediately, spooning the braising liquid over the top. Each bite should deliver that perfect contrast—crispy, caramelized bark giving way to tender, melt-in-your-mouth beef belly.
Pro Tips For Making Beef Belly Slices
- Sear in Two Batches: Beef belly releases a lot of fat when hot, and drowning it in its own grease is how you end up with greasy, soggy slices instead of crispy edges. Start with half the slices in a cold, dry pan, let them render fat for 3-4 minutes, then flip and finish. Repeat with the second batch—clean the pan between if needed. I learned this the hard way when my first batch turned into a grease bath.
- Salt the Night Before: Skip the rushed salting before cooking—beef belly needs time to absorb salt and tenderize. Lay the slices on a tray, pat them mostly dry (just enough to grip), and coat them in kosher salt. Cover and refrigerate overnight. The next day, rinse off excess salt (it’s salty enough) and pat dry again before cooking. Yes, it’s an extra step, but the texture difference is night and day.
- Don’t Overcrowd the Pan: Piling all the slices in at once steams them instead of searing. Leave space between each slice—think "snug but not touching"—so they develop that golden crust. If your pan is small, work in batches. I used to ignore this and ended up with chewy, unevenly cooked slices. Trust me, the sizzle should be loud and consistent, not a sad, muted hiss.
- Caramelize Onions First: Save 10 minutes upfront by prepping the onions while the beef rests. Thinly slice the onion, cook it in the same pan you’ll use for the beef (after searing the first batch) with a splash of water, and let it caramelize low and slow for 15-20 minutes. The flavor depth will make your dish taste like it simmered for hours, not 20 minutes. Plus, you’ll have one less pan to wash.
Storing and reheating your beef belly slices
Refrigerator Storage
Let your beef belly slices cool completely before storing—this prevents condensation that makes them soggy. Transfer them to an airtight container with a splash of the braising liquid (about ¼ cup) to keep them moist. Store in the fridge for up to 4 days, but I recommend eating within 3 days for peak crispiness. The braising liquid can be stored separately in the same container for up to 5 days—just reheat it separately before serving. 🥩
Freezer Storage
For longer storage, freeze the beef belly slices between layers of parchment paper in a freezer-safe bag—this prevents freezer burn and makes them easy to separate. They'll keep for up to 3 months. When ready to eat, thaw overnight in the fridge, then reheat using the oven method below. The braising liquid freezes beautifully too—just store it separately in a glass jar or freezer-safe container.
Oven Reheating
My preferred method for reheating is the oven—it restores that crispy bark beautifully. Preheat to 350°F, place slices on a wire rack over a baking sheet, and heat for 15-20 minutes. Add 2 tbsp beef broth to the pan and spoon it over the slices during the last 5 minutes to keep them juicy. For extra crispiness, broil for 1-2 minutes at the end. 🔥
Stovetop Refresh
For a quick stovetop refresh, heat a skillet over medium heat with 1 tbsp olive oil. Add the beef belly slices and cook for 3-4 minutes per side until warmed through. Deglaze with 2 tbsp braising liquid and simmer for 2 minutes to restore moisture. This method works best for smaller batches—just don't overcrowd the pan.
Microwave Shortcut
When you're in a hurry, the microwave works in a pinch. Place slices on a microwave-safe plate with 1 tbsp braising liquid, cover loosely with a damp paper towel, and heat on 50% power for 2-3 minutes. Stir halfway through, then finish with 1 minute at full power. The texture won't be as crispy, but it's still delicious—perfect for lazy weeknights. ⏰
Reviving Crispy Bark
If your reheated slices lose their crispiness, don't worry—you can fix it! After reheating, transfer them to a baking sheet and broil on high heat for 1-2 minutes until the edges crisp up again. A quick spray of olive oil before broiling helps too. This trick works wonders for leftovers that need a restaurant-quality finish. 💡
Nutrition facts
Frequently asked questions
Can I use beef belly slices for tacos or nachos?
These beef belly slices work perfectly for tacos or nachos. After braising, let them cool slightly, then shred or slice them into strips. Serve on warm tortillas with pickled onions, cilantro, and a drizzle of chipotle crema for a restaurant-style experience. For nachos, layer the beef belly slices between tortilla chips with melted cheese and jalapeños. The crispy bark adds amazing texture to both dishes!
How do I adjust this recipe for a slow cooker?
Transfer the seared beef belly slices and braising liquid to a slow cooker. Cook on low heat for 6-8 hours or high heat for 3-4 hours, until fork-tender. The slow cooker method works especially well for hands-off cooking. Just add a splash of water if the liquid reduces too much during cooking. Finish with the broiling step to restore crispiness before serving.
What's the best way to trim excess fat from beef belly slices?
Use a sharp chef's knife to trim the outer layer of fat, leaving about ¼-inch for flavor. For easier handling, freeze the slices for 30 minutes first—the cold makes the fat firmer and easier to remove. Never trim all the fat, as it renders during cooking and creates that luxurious texture. A kitchen shears works well for cutting through tougher sections.
Can I make this recipe with thinner beef belly slices?
Thinner slices (¼-inch or less) will cook faster but may not develop the same rich texture. For best results, stick with ½-inch thick slices as recommended. If using thinner cuts, reduce the braising time to 1.5-2 hours and monitor closely to prevent overcooking. The crispy bark benefit also diminishes with thinner slices.
What are the best sides to serve with beef belly slices?
This rich dish pairs beautifully with lighter sides to balance the flavors. Try steamed bok choy with garlic, roasted baby potatoes with rosemary, or a crisp arugula salad with lemon vinaigrette. For a heartier meal, serve with buttery mashed potatoes or sautéed green beans. The braising liquid also makes an excellent gravy for dumplings or crusty bread.