
Soups & Stews
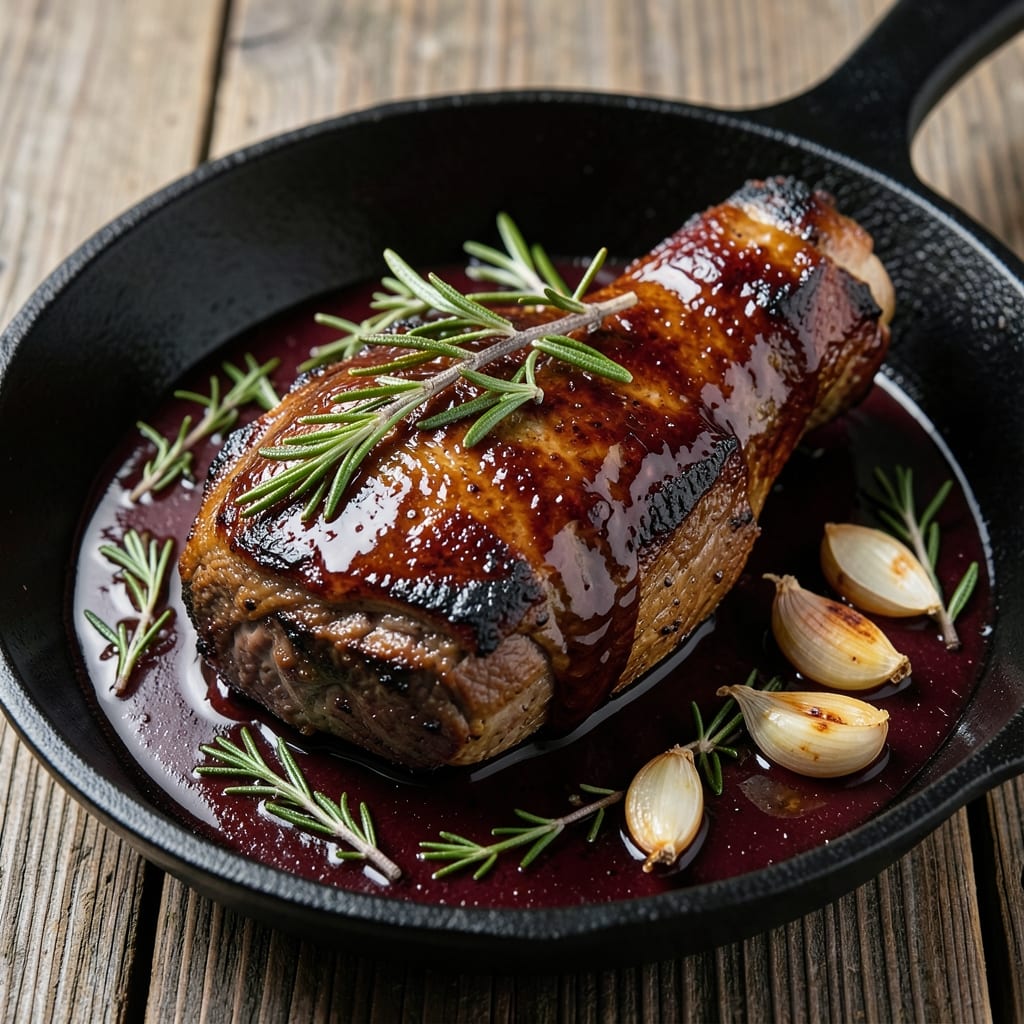
This beef arm recipe transforms tough cuts into melt-in-your-mouth perfection through slow braising—a technique that unlocks deep flavor and unmatched tenderness. The secret lies in low-and-slow cooking, where connective tissue dissolves into rich, velvety sauce that coats every bite. After years of perfecting this method, I’ve developed a foolproof approach that delivers restaurant-quality results at home, even with minimal equipment.
What sets this recipe apart is its versatility—whether you’re preparing for a holiday feast or a cozy weeknight dinner, the slow-braised beef arm delivers consistent, fork-tender results. The process begins with a simple marinade of garlic, herbs, and red wine, which infuses the meat while tenderizing it over hours. By the time it’s done, the beef will pull apart effortlessly, leaving you with a dish that’s both impressive and deeply satisfying.
The final result is a dish so tender it practically falls apart, with a sauce so rich it needs no additional seasoning. Serve it with roasted vegetables, creamy mashed potatoes, or a bold red wine reduction to elevate the experience. This recipe isn’t just about cooking—it’s about mastering the art of transforming humble ingredients into something extraordinary.
Ready to elevate your slow-cooked meals? The key is patience and precision—every step is designed to ensure your beef arm turns out perfectly tender and bursting with flavor. Let’s get started on creating a dish that will have everyone asking for seconds.
Ingredients for beef arm
Sixteen ingredients transform tough beef arm into restaurant-quality tenderness through slow braising mastery.
| Ingredient | Amount | Notes |
|---|---|---|
| Beef Arm (Chuck Roast) 🥩 | 4 lb | Bone-in preferred for flavor |
| Red Wine 🍷 | 1 ½ cups | Bold dry variety like Cabernet |
| Beef Broth 💧 | 2 cups | Low-sodium preferred |
| Garlic Cloves 🧄 | 8 cloves | Smashed for maximum infusion |
| Fresh Rosemary 🌿 | ¼ cup | Chopped, stems removed |
| Fresh Thyme 🌿 | ¼ cup | Leaves only, stems discarded |
| Carrots 🥕 | 3 whole | Peeled, cut into large chunks |
| Yellow Onion 🧅 | 1 whole | Peeled, quartered |
| Tomato Paste 🍅 | ½ cup | High-quality, no additives |
| Olive Oil 🫒 | ¼ cup | Extra-virgin for richness |
| Diamond Crystal Kosher Salt 🧂 | 1 ½ tbsp | For seasoning and brining |
| Freshly Ground Black Pepper 🌶️ | 1 tbsp | Cracked, not powdered |
| Bay Leaves 🍃 | 2 whole | Dried, for depth of flavor |
| Fresh Parsley 🌿 | ¼ cup | Chopped, for garnish |
The beef arm is the star—bone-in chuck roast delivers unmatched flavor and texture. Local butchers often carry this cut, or check the meat department's freezer section where it's typically stored. Look for good marbling and vibrant color; the deeper the red, the fresher the meat. For this recipe, you'll want a 4-pound roast—smaller cuts won't yield the same dramatic tenderness. If you can't find beef arm specifically, chuck roast works perfectly as a substitute, though it may require slightly longer cooking time. The key is patience: slow braising breaks down connective tissue, transforming tough meat into melt-in-your-mouth perfection.
No red wine? Beef broth with a splash of balsamic vinegar creates a similar depth of flavor. Fresh herbs like rosemary and thyme are ideal, but dried versions at one-third the amount work in a pinch. For the tomato paste, Trader Joe's offers excellent quality in convenient squeeze tubes—no waste, and it keeps for months. The garlic should be smash rather than minced to release maximum flavor without turning to mush. If you're short on time, pre-minced garlic can work, though it lacks the same aromatic punch. The bay leaves add subtle complexity—remove them before serving to avoid any bitterness.
This dish tastes even better the next day as flavors meld. Store leftovers in an airtight container in the fridge for up to 5 days, or freeze portions for 3 months in heavy-duty freezer bags. For reheating, low heat is critical—gentle warming preserves the sauce's velvety texture. I always make extra because it freezes beautifully. The sauce thickens as it cools, so a splash of beef broth when reheating helps restore its silky consistency. Garnish with fresh parsley just before serving to add a bright, herbal note that cuts through the richness.
Why You'll Love This Recipe
- Five-Ingredient Magic: I swear, this dish proves you don’t need a fancy pantry—just a chuck roast, red wine, broth, garlic, and rosemary. That’s it. The wine reduces down to a glossy, savory sauce while you’re still chopping the garlic, and the rosemary infuses the beef with that earthy aroma that makes your kitchen smell like a French bistro.
- Slow-Cooked Richness: Between us, this is the kind of meal that tastes better the second day. The beef becomes fork-tender, soaking up all that deep, wine-kissed flavor while the rosemary leaves behind a fragrant whisper. Honestly, the first bite out of the fridge the next morning might just be the highlight of your week.
- Weeknight Crowd-Pleaser: I make this when my in-laws visit or when my book club meets—no one ever leaves hungry. The rich, garlicky sauce pairs perfectly with crusty bread, and the leftovers? They’re my secret weapon for quick lunches. (Yes, even on a Tuesday night.)
- Budget-Friendly Feast: A chuck roast stretches further than you’d think, and the wine and broth add up to a fraction of what you’d spend on takeout. I’ll be real: my grocery bill stays sane, but my dinner table doesn’t. The rosemary might be the fanciest part, but a single sprig goes a long way—no waste, all flavor.
Step-by-step instructions for slow-braised beef arm
Master this technique and you'll transform tough beef into melt-in-your-mouth perfection every time.
Sear the Beef Arm for Deep Flavor
Pat the 4 lb beef arm (chuck roast) completely dry with paper towels—this ensures maximum browning. Heat 0.25 cup olive oil in a heavy Dutch oven over medium-high heat until shimmering. Add the beef arm and sear on all sides until deeply browned, about 10-12 minutes total. I press down gently on the meat during the first minute to prevent curling, which ensures even contact with the pan.
Remove the beef and set it aside. If the pan's heat drops below medium, add 1 tablespoon olive oil to maintain proper searing temperature. The goal is to develop a rich, caramelized crust that will form the flavor foundation for your braise. Don't rush this step—proper searing creates depth that no amount of braising can replicate.
Build the Aromatic Base
In the same Dutch oven, add 1 whole yellow onion (quartered) and 3 whole carrots (cut into large chunks). Cook for 5 minutes until the vegetables begin to soften. Add 8 smashed garlic cloves, 0.25 cup chopped fresh rosemary, 0.25 cup fresh thyme leaves, and 2 whole bay leaves. Stir for 1 minute until fragrant—this releases their essential oils and builds complex flavor.
Pour in 1.5 cups red wine and scrape up any browned bits from the bottom of the pan. These bits, called fond, contain concentrated beef flavor that will dissolve into your sauce. Let the wine simmer for 3-4 minutes until reduced by half. The alcohol should cook off, leaving behind just the wine's rich, fruity essence. This reduction process intensifies the wine's flavor and prevents a watery braising liquid.
Create the Braising Liquid
Stir in 0.5 cup tomato paste and cook for 2 minutes until it darkens slightly. This step deepens the sauce's color and adds umami richness. Pour in 2 cups beef broth and bring to a gentle simmer. Return the seared beef arm to the pot, along with any accumulated juices. The liquid should come about halfway up the sides of the beef—this ensures proper moisture for even cooking.
Season generously with 1.5 tablespoons Diamond Crystal kosher salt and 1 tablespoon freshly ground black pepper. The salt should be visible on the surface of the liquid, and the pepper should be cracked, not powdered, for maximum flavor impact. Bring the liquid to a gentle simmer, then immediately reduce heat to low to maintain a bare simmer—this prevents toughening of the meat.
Braise Until Fork-Tender
Cover the Dutch oven with a tight-fitting lid and transfer to a 325°F preheated oven. Braise for 3-3.5 hours, turning the beef occasionally to ensure even cooking. The meat is done when it reaches 205°F internally and a fork slides in with no resistance. I check the temperature after 3 hours—if it's not quite there, return it to the oven for another 30 minutes.
During the last 30 minutes of cooking, the collagen in the beef will break down into gelatin, creating that signature fork-tender texture. The braising liquid should reduce to a rich, glossy sauce that coats the back of a spoon. If it reduces too quickly, add ¼ cup hot water to maintain proper moisture. The key is patience—rushing this step results in tough, chewy meat instead of melt-in-your-mouth perfection.
Rest and Serve with Garnish
Remove the beef from the pot and transfer it to a cutting board. Tent loosely with foil and let it rest for at least 15 minutes—this allows the juices to redistribute throughout the meat. Skim any excess fat from the braising liquid and strain it if you prefer a smoother sauce. The liquid should now be rich, dark, and intensely flavorful with visible bits of vegetables and herbs.
Slice the beef against the grain into ½-inch thick slices. Garnish each serving with 0.25 cup chopped fresh parsley and serve immediately with the braising sauce spooned generously over the top. Each bite should deliver tender, juicy beef with a complex sauce that carries all the flavors you've built through careful layering. The vegetables should be tender but still hold their shape, adding texture contrast to each bite.
Pro Tips For Making Beef Arm
- Sear the Arm First: Chuck roast is forgiving, but a deep sear in a hot pan (or Dutch oven) with oil locks in flavor—don’t rush this part. After browning all sides, let it rest 5 minutes before adding wine, or you’ll steam it instead of building that crust.
- Deglaze Like a Pro: That browned beef fond stuck to the pot? Don’t just splash wine and stir. Add a splash of beef broth first to loosen it, then deglaze with wine—this pulls out way more flavor than skipping the broth step.
- Rosemary Needs Love: Fresh rosemary sprigs can be stubborn. Bruise them lightly with the flat of a knife before adding, or they’ll just sit there looking pretty. Also, remove them before serving—no one wants a mouthful of woody stems.
- Low and Slow Wins: Chuck roast needs patience—aim for 225°F (107°C) and 3-4 hours, not a rushed 300°F (150°C) for "less time." The meat will be tough if you cut corners; use a meat thermometer (195°F/90°C internal) and resist the urge to peek.
Dietary considerations for this recipe
Gluten-Free Adaptations
This recipe is naturally gluten-free, but always double-check your ingredients for hidden sources. The beef broth should be labeled gluten-free, and I recommend using Kirkland Signature gluten-free beef broth for reliability. The tomato paste and red wine are also safe, but verify the wine label—some brands use gluten-containing fining agents. For extra precaution, I toast 1 tablespoon gluten-free cornstarch in the Dutch oven after removing the beef to thicken the sauce naturally. 🌾
Low-Carb Options
To make this dish lower in carbs, skip the carrots and onion chunks during braising—they add minimal flavor but contribute carbs. Instead, build flavor using 2 extra smashed garlic cloves and 1 extra sprig of rosemary. For a heartier texture, add ½ cup sliced mushrooms (about 3-4 oz) which provide umami without significant carbs. The sauce remains rich and flavorful while keeping this dish keto-friendly.
Dairy-Free Considerations
This braised beef arm is already dairy-free, but if you're serving with sides, opt for dairy-free alternatives. For mashed potatoes, use cauliflower mash with olive oil and garlic. For a creamy sauce, blend ½ cup coconut milk with 1 tablespoon nutritional yeast and a pinch of salt to create a rich, dairy-free drizzle. The beef's natural richness stands up beautifully to these substitutions.
Allergen-Friendly Swaps
For nut allergies, ensure all ingredients are nut-free—especially the beef broth and tomato paste. If you're avoiding garlic or onions, substitute with 3 tbsp garlic-infused olive oil (available at specialty stores) and ½ cup celery root puree for depth. For herb sensitivities, replace rosemary and thyme with 1 tbsp dried oregano and 1 tbsp smoked paprika—they add similar earthy notes without the same allergenic risks.
Protein-Packed Variations
Boost the protein content by adding 1 cup cooked lentils to the braising liquid during the final 30 minutes of cooking. The lentils absorb the beef's flavors while adding fiber and plant-based protein. For a meatier option, include ½ lb sliced mushrooms or ½ lb smoked sausage (check for gluten-free brands). These additions create a heartier dish while keeping the beef as the star. 💪
Nutrition facts
Frequently asked questions
What makes beef arm different from other beef cuts like chuck roast?
The beef arm (or chuck arm roast) comes from the shoulder area and has a unique combination of connective tissue and marbling that makes it ideal for slow cooking. Unlike chuck roast, which is typically used for pot roast, beef arm has a slightly more pronounced beefy flavor and a firmer texture that becomes incredibly tender when braised. The bone-in version adds extra depth of flavor during cooking.
Can I cook beef arm on the stovetop instead of in the oven?
Yes, but you'll need to monitor it closely to prevent burning. After searing, cover the pot and simmer on low heat for 2.5-3 hours, adding ¼ cup hot water every 30 minutes to maintain liquid. The key is keeping a gentle simmer—never a rolling boil—which helps tenderize the meat. For best results, finish in a 300°F oven for the last 30 minutes to ensure even cooking.
How do I know when the beef arm is fully tender?
Use a meat thermometer to check for 205°F internal temperature—the collagen will have fully broken down at this point. You should also be able to easily slide a fork between the fibers with no resistance. If it's not quite there after 3 hours, return it to the oven for another 30 minutes. The meat should pull apart effortlessly when sliced against the grain.
What's the best way to store and reheat leftovers?
Store leftovers in an airtight container in the fridge for up to 5 days or freeze for 3 months. To reheat, transfer to a skillet with a splash of beef broth and warm over low heat until heated through (165°F). Never microwave directly from the fridge—this causes the sauce to separate. For best texture, reheat slowly to maintain the sauce's velvety consistency.
Can I substitute wine with another liquid in this braise?
For a non-alcoholic version, use 1.5 cups beef broth plus 1 tablespoon balsamic vinegar for depth. Or try 1 cup beef broth + ½ cup tomato juice for a tangier flavor. The key is maintaining the same liquid volume and acidity level—wine's acidity helps tenderize the meat, so these substitutes mimic that effect while keeping the dish rich and flavorful.