
Soups & Stews
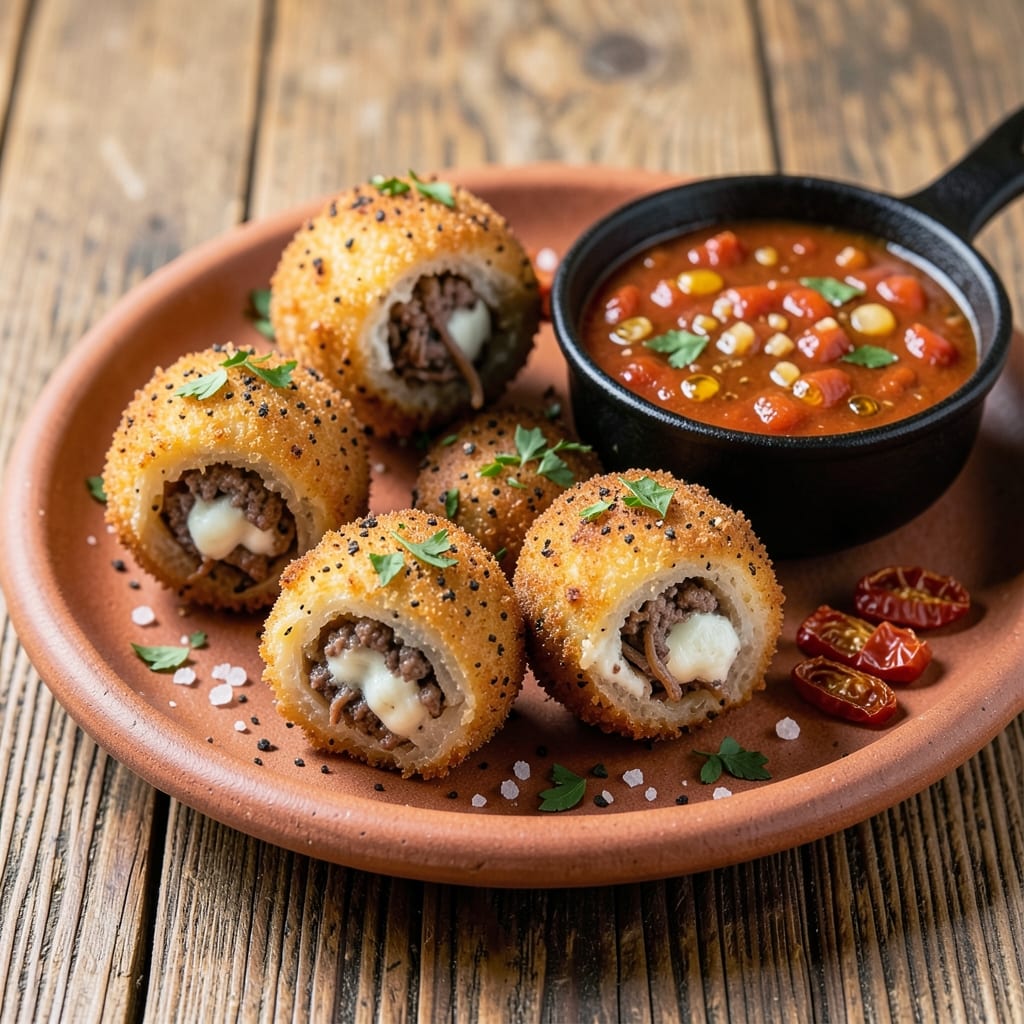
This beef arancini balls recipe delivers the perfect balance of crispy golden crust and melty, savory filling—every bite is a taste of Sicily without the fuss. The secret lies in perfectly cooked risotto that holds its shape when fried, wrapped in a breadcrumb crust that turns irresistibly crunchy, and a beef mixture that adds depth. After years of perfecting the technique, I’ve developed a method that ensures your arancini stay intact while achieving that signature restaurant-quality texture.
What sets these apart is the layering of flavors: tender beef simmered in rich tomato sauce, creamy mozzarella that melts into gooey perfection, and a crispy breadcrumb exterior that’s impossible to resist. The key steps—cooking the rice to al dente, shaping carefully, and frying at the right temperature—transform simple ingredients into a dish that’s both impressive and comforting. This recipe is designed to be adaptable, whether you’re serving them as an appetizer, a hearty snack, or even a main course with a side salad.
The result is golden, crispy arancini with a satisfying crunch that gives way to warm, cheesy beef risotto inside—each bite is a harmonious blend of textures and flavors. The breading stays crisp even after frying, and the filling remains cohesive, proving that homemade can rival the best Italian trattorias. Once you try these, you’ll never go back to store-bought versions.
Pair them with classic marinara sauce, tangy lemon aioli, or even a drizzle of balsamic glaze for a touch of sophistication. These arancini are perfect for game day, holiday appetizers, or a cozy night in with friends. Let’s get started on making them—your taste buds will thank you.
Ingredients for beef arancini balls
Golden crust meets melty beef risotto—here's what you need for restaurant-quality arancini at home.
| Ingredient | Amount | Notes |
|---|---|---|
| Ground Beef 🥩 | 1 lb | 80% lean, finely chopped |
| Arborio Rice 🍚 | 1 ½ cups | Uncooked, short-grain preferred |
| Yellow Onion 🧅 | 1 whole | Medium, finely diced |
| Garlic Cloves 🧄 | 4 cloves | Minced, fresh preferred |
| Canned Tomato Sauce 🍅 | 1 cup | San Marzano preferred |
| Beef Broth 💧 | 1 ½ cups | Low-sodium preferred |
| Mozzarella Cheese 🧀 | 1 cup | Fresh, shredded |
| Parmesan Cheese 🧀 | ½ cup | Freshly grated |
| All-Purpose Flour 🌾 | ½ cup | For dredging |
| Panko Breadcrumbs 🍞 | 1 ½ cups | Japanese-style preferred |
| Large Eggs 🥚 | 2 whole | Beaten for coating |
| Vegetable Oil 🫒 | 3 cups | For frying |
| Salt 🧂 | 1 tsp | Kosher or sea salt |
| Black Pepper 🌶️ | ½ tsp | Freshly ground |
| Dried Oregano 🍃 | ½ tsp | Italian preferred |
The beef is non-negotiable for that deep, savory flavor. Ground chuck with 80% lean works best—it stays juicy while frying. Grab it from the butcher section if you can, or the pre-ground package from Costco saves time. For the rice, Arborio is your golden ticket—it absorbs liquid perfectly and holds its shape. The mozzarella needs to be fresh, not shredded from a bag—that stuff gets rubbery. Buy a block and shred it yourself. Parmesan? Real Parmigiano-Reggiano makes all the difference—grate it fresh, don't use the pre-grated dust.
No Arborio rice? Carnaroli or Vialone Nano are great swaps. Short on mozzarella? Fontina or provolone add richness, though mozzarella is ideal. The tomato sauce can be homemade (San Marzano tomatoes + garlic + olive oil), but Rao's jarred sauce works in a pinch. For the breadcrumbs, Panko gives the best crunch, but regular breadcrumbs toasted in a dry pan work too. The egg wash? One whole egg plus 1 tbsp water gives a smoother coat than just beaten egg. And if you're frying, keep the oil at 350°F—any hotter and they'll burn before cooking through.
Make the filling ahead and refrigerate for up to 2 days—the flavors meld beautifully. Shape the arancini and freeze them on a tray before frying for 1 month storage. Once fried, they're best served immediately, but leftovers reheat in a 350°F oven for 10 minutes. Pro tip: Drain fried arancini on a wire rack to keep them crispy, not a paper towel. Pair with marinara for dipping—trust me, it's a game-changer.
Why You'll Love This Recipe
- One-Pot Magic: I swear by this—no chopping mountains of veggies or fussy steps. You brown the beef, toss in the onion and garlic, stir in the Arborio rice and tomato sauce, and let it cook. That’s it. The rice absorbs everything right in the pan, so you’re left with minimal cleanup and zero stress.
- Craving-Worthy Crunch: Between us, the crispy breaded exterior paired with the creamy, saucy beef-rice center is chef’s kiss. The Arborio rice soaks up all the tomato and garlic flavor, while the breading (if you use it) gives that satisfying crunch. It’s the kind of bite that makes you forget you’re eating something “simple.”
- Game for Any Gathering: I’ve served these as a snack at game nights, a side for dinner parties, and even packed them for lunch—no one cares if they’re fancy, they just care that they’re delicious. The balls hold together well, so they’re easy to transport, and the flavor stands up to crowds.
- Budget-Friendly Feast: Honestly, this recipe is my secret weapon for stretching a meal without breaking the bank. Ground beef and Arborio rice are affordable staples, and canned tomato sauce keeps costs low. Plus, leftovers reheat like a dream—just pop them in the oven until golden again. No waste, all satisfaction.
Step-by-step instructions for beef arancini balls
Here's how to make golden, crispy arancini with a melty beef and cheese center—every bite is pure comfort!
Cook the Perfect Risotto Base
Heat 2 tablespoons vegetable oil in a large skillet over medium heat. Add the 1 whole yellow onion and 4 cloves garlic cloves, cooking for 3-4 minutes until soft and fragrant. Add the 1 lb ground beef, breaking it apart as it cooks, and drain any excess fat after 5 minutes.
Stir in 1.5 cups arborio rice, coating each grain in the beef mixture. Pour in 1 cup canned tomato sauce and 1.5 cups beef broth, then add 1 tsp salt, 0.5 tsp black pepper, and 0.5 tsp dried oregano. Bring to a simmer, then reduce heat to low and cook for 15-18 minutes, stirring occasionally, until the rice is tender and the liquid is absorbed. Remove from heat and let cool completely before shaping.
Shape and Assemble the Arancini
Once the risotto mixture has cooled, spread it on a clean surface and gently fold in 1 cup mozzarella cheese and 0.5 cup parmesan cheese. Shape the mixture into 16 equal balls (about 1.5 inches in diameter), rolling them gently in your palms. Place them on a tray lined with parchment paper and refrigerate for 30 minutes to firm up.
This chilling step is crucial—it prevents the cheese from melting too soon and makes handling the balls easier. If the mixture feels too sticky, wet your hands slightly to prevent sticking.
Create the Crispy Coating
Set up three shallow bowls: one with 0.5 cup all-purpose flour, one with 2 beaten large eggs, and one with 1.5 cups panko breadcrumbs. Lightly coat each arancini ball first in the flour, then in the egg wash, and finally in the panko, pressing gently to ensure the crumbs stick evenly. Place the coated balls on a wire rack to dry for 10 minutes.
This layering technique creates the signature crispy exterior. Don’t rush the drying step—it ensures the coating stays intact during frying. If the panko clumps, break it up with your fingers before using.
Fry to Golden Perfection
Heat 3 cups vegetable oil in a deep skillet or Dutch oven to 350°F. Fry the arancini balls in batches of 4-5, turning occasionally, for 3-4 minutes until they turn a deep golden brown. Use a slotted spoon to remove them and drain on a wire rack or paper towels.
Watch the oil temperature carefully—it should stay around 350°F. If it gets too hot, the exterior will burn before the interior cooks through. Serve immediately while the cheese is still melty and the crust is crispy!
Pro Tips For Making Beef Arancini Balls
- Fry the Meat Low and Slow: I learned this the hard way—cooking ground beef at high heat for arancini makes it tough and greasy. Keep it at a steady medium-low (325°F/160°C) and stir often; you’ll end up with finer texture that blends better into the rice.
- Toast the Arborio First: Skip the soggy rice by toasting the Arborio in a dry pan for 2-3 minutes before adding liquid. The nutty aroma deepens, and the grains hold their shape—no mushy centers when you roll them later.
- Drain Rice Like a Pro: After cooking, spread the rice on a baking sheet and let it cool completely before shaping. Wet hands = sticky mess. Use a fork to fluff it while cooling, so it stays loose enough to roll into tight, compact balls.
- Mix in Tomato Sauce Early: Don’t save the sauce for the end. Stir in ¼ cup of the canned tomato sauce with the rice while it’s cooking—it adds moisture and flavor without turning the balls into soup. Save the rest for dipping.
Wine and beer pairings for these flavors
Classic Red Wine
A bold Chianti Classico or Sangiovese from Tuscany is my go-to pairing—its bright acidity and earthy notes cut through the richness of the fried crust while complementing the beef and tomato flavors inside. Look for a 100% Sangiovese with 12-14% alcohol for the perfect balance. Serve slightly chilled (55-60°F) to refresh your palate between bites. 🍷
Crisp White Wine
For a lighter option, a Vermentino from Sardinia or Pinot Grigio from Alto Adige brings crisp citrus and mineral notes that contrast beautifully with the fried exterior. These wines won’t overpower the dish but enhance its savory depth. Aim for a dry, unoaked style with 12.5% alcohol—avoid heavy oaks that would clash with the delicate flavors. 🍷
Italian Craft Beer
If wine isn’t your thing, try a Peroni or Birra del Borgo—both offer a clean, effervescent profile that cleanses the palate between bites. For something bolder, a Belgian witbier (like Hoegaarden) adds a coriander-citrus note that pairs surprisingly well with the beef and cheese. Serve slightly chilled (45-50°F) to highlight the beer’s crispness. 🍺
Bold Rosé Option
A dry, Italian rosé (like Mastroberardino Radici Rosato) bridges the gap between red and white, offering delicate berry notes and a refreshing acidity. Its versatility makes it a crowd-pleaser, especially for those who prefer something lighter than Chianti but still want depth. Serve at 50-55°F for the best experience. 🍷
Non-Alcoholic Pairings
For a non-alcoholic match, a sparkling blood orange soda (like San Pellegrino Aranciata Rossa) adds a citrusy brightness that cuts through the fried richness. Alternatively, a chilled hibiscus iced tea with a splash of lime offers a floral, tangy contrast that’s equally refreshing. Both work beautifully with the dish’s savory-sweet profile. 💧
Nutrition facts
Frequently asked questions
Can I make beef arancini ahead of time?
Shape the filled balls and refrigerate them on a tray for up to 2 days before coating. For longer storage, freeze them (uncoated) on a tray for 1 month. Thaw overnight in the fridge before breading and frying. The key is to keep them chilled until frying to prevent the cheese from melting prematurely.
Why did my arancini fall apart when frying?
This usually happens when the filling is too wet or the balls weren't chilled enough before coating. Make sure your risotto is fully cooked and cooled before adding cheese, and refrigerate the shaped balls for 30 minutes to firm up. Also, don't overfill them—keep portions to about 1.5 inches in diameter for stability.
Can I bake these instead of frying?
Yes! Preheat oven to 400°F and brush the coated arancini with oil. Bake for 15-20 minutes until golden, flipping halfway. For extra crispiness, broil for 1-2 minutes at the end. The texture will be lighter than fried, but still delicious. Try adding a sprinkle of parmesan before baking for extra flavor.
What's the best way to reheat leftover arancini?
For best results, reheat in a 350°F oven for 10-12 minutes on a wire rack (not paper towels) to maintain crispiness. Microwaving works in a pinch, but they'll lose their crunch. If reheating fried arancini, you can also air-fry at 375°F for 3-4 minutes to restore some crispiness.
Can I use ground turkey instead of beef?
You can substitute ground turkey (93% lean or leaner), but the flavor will be lighter. To compensate, add 1 tsp Italian seasoning and ½ tsp smoked paprika to the beef mixture. For texture, use a 50/50 blend of ground turkey and beef if possible. The cooking time remains the same, but watch for dryness—turkey can release more moisture.