
Soups & Stews
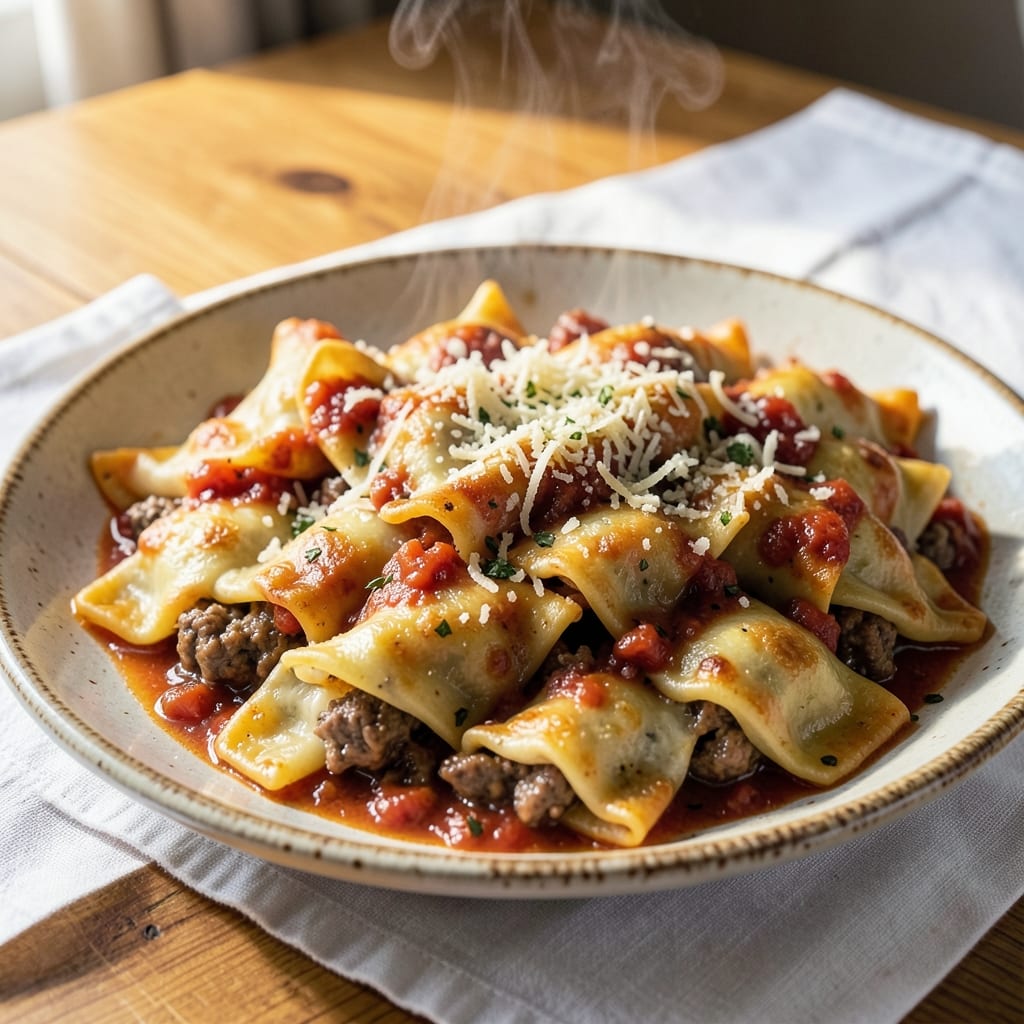
This beef and sausage manicotti recipe delivers restaurant-quality layers of cheesy pasta filled with rich, savory meat—perfect for feeding a crowd or satisfying Sunday supper cravings. The secret lies in balancing tender ground beef and seasoned sausage with melted mozzarella and ricotta, creating a filling that stays moist and flavorful even after baking. I've perfected this technique over years of testing, ensuring the shells remain tender while the filling stays perfectly gooey in the center.
What sets this recipe apart is the combination of classic Italian technique with modern shortcuts—you can use either homemade pasta shells or convenient store-bought ones without sacrificing quality. The marinara sauce provides the perfect tangy base, while a creamy béchamel topping adds that signature Italian richness. Each layer builds flavor, resulting in a dish that's hearty enough to stand alone but pairs beautifully with garlic bread or a crisp salad.
The process is straightforward once you master a few key steps: properly cooking the sausage and beef mixture, assembling the manicotti carefully to avoid leaks, and baking until the cheese is bubbly and golden. The result is a dish that looks impressive yet comes together with simple techniques—ideal for both beginner cooks and experienced home chefs looking to elevate their Italian repertoire.
Serve this manicotti with a side of garlic bread and a simple green salad for a complete meal that feels like a warm embrace. The combination of savory meat, creamy cheese, and tangy sauce creates a balance that's impossible to resist. Ready to bring Italian comfort food to your table? Let's get started.
Ingredients for beef and sausage manicotti
Six servings of cheesy, meat-packed manicotti—where tender shells meet rich filling and creamy sauce layers.
| Ingredient | Amount | Notes |
|---|---|---|
| Manicotti Pasta Shells 🍝 | 12 whole | Store-bought or homemade, dried |
| Ground Beef 🥩 | 1 ½ lb | 80% lean, finely chopped |
| Italian Sausage 🌭 | 1 lb | Sweet or spicy, casings removed |
| Ricotta Cheese 🧀 | 2 cups | Whole milk, room temperature |
| Mozzarella Cheese 🧀 | 2 cups | Fresh, shredded or sliced |
| Parmesan Cheese 🧀 | 1 cup | Freshly grated, fine |
| Large Eggs 🥚 | 2 whole | Beaten for binding |
| Marinara Sauce 🍅 | 3 cups | Homemade or quality jarred |
| Heavy Cream 🥛 | 1 cup | Full-fat for richness |
| All-Purpose Flour 🌾 | 2 tbsp | For thickening béchamel |
| Butter 🧈 | 3 tbsp | Unsalted, for béchamel |
| Garlic Cloves 🧄 | 4 cloves | Minced for béchamel |
| Salt 🧂 | 1 ½ tsp | Kosher or sea salt |
| Black Pepper 🌶️ | ½ tsp | Freshly ground |
| Dried Basil 🌿 | 1 tsp | For béchamel seasoning |
| Dried Oregano 🍃 | ½ tsp | Italian blend preferred |
The meat is where the magic happens. Ground beef and Italian sausage should be finely chopped for even cooking—no large chunks. I grab 80% lean beef from the butcher counter for better flavor, but pre-ground works fine. For sausage, sweet or spicy both work, but remove the casings completely. The ricotta matters too—whole milk is creamier than part-skim. If your store doesn't carry it, grab Whole Foods or Trader Joe's brands. Mozzarella should be fresh, not shredded from a bag—the pre-shredded kind gets rubbery when baked. For Parmesan, grate it yourself—pre-grated has anti-caking agents that make it taste off.
No ricotta? Cottage cheese blended smooth works in a pinch, though it's not identical. Short on mozzarella? Fontina or provolone melts beautifully too. The marinara can be store-bought (I won't judge), but if making your own, San Marzano tomatoes are worth the splurge. For the béchamel, heavy cream and butter create that signature richness—don't skimp on the full-fat versions. The garlic should be minced, not powdered, and toasted lightly in the butter first for deeper flavor. If you're using homemade pasta shells, they need about 2-3 minutes less baking time than store-bought ones.
Assemble this dish the night before and refrigerate—flavors meld beautifully. Bake straight from the fridge for even cooking. The manicotti keeps 3-4 days in the fridge, but reheats best at 350°F for 20 minutes. For freezing, assemble but don't bake—wrap tightly in foil and freeze for up to 3 months. Bake straight from frozen, adding 10-15 minutes to the cooking time. Leftovers? Portion into containers for easy lunches—double the recipe if you want to feed a crowd, just scale all ingredients proportionally.
Why You'll Love This Recipe
- No Boil Needed: I swear by the no-boil trick—just toast the shells, stuff ‘em, and bake. The ricotta and mozzarella soften perfectly without a single pot to wash.
- Meat Lovers’ Dream: That combo of ground beef and spicy Italian sausage? It’s like a little flavor bomb in every bite. Honestly, I’ve never met a manicotti that didn’t disappear fast.
- Leftovers That Shine: This bakes into a solid, hearty casserole that reheats like a dream. I’ve taken it to potlucks, packed it for lunches, and even froze half for lazy Mondays.
- Budget-Friendly Feast: You’re getting three proteins (beef, sausage, ricotta) and two cheeses for one killer dish. My grocery bill thanks me every time—plus, it stretches to feed four or six easily.
Step-by-step instructions for beef and sausage manicotti
Layering rich flavors and hearty textures creates the perfect manicotti dish.
Prepare the Meat Filling
In a large skillet, combine the 1.5 lb ground beef and 1 lb Italian sausage over medium-high heat. Break it apart with a wooden spoon as it cooks, ensuring even browning. You want the meat to reach 165°F internally, which typically takes about 8-10 minutes. This creates a deep, savory foundation.
Once fully cooked, drain excess fat if needed, leaving about 1-2 tablespoons for flavor. Stir in 1 tsp dried basil and 0.5 tsp dried oregano, letting the spices bloom for 30 seconds. Remove from heat and let cool slightly—this prevents the ricotta from curdling when mixed later. The filling should be warm but not hot to the touch.
Make the Cheese Filling and Béchamel Sauce
In a medium bowl, combine the 2 cups ricotta cheese, 1 cup Parmesan cheese, 2 whole large eggs, 1.5 tsp salt, and 0.5 tsp black pepper. Mix until smooth and fully incorporated, scraping the bowl to ensure no dry spots remain. This mixture should be thick but spreadable—like a rich, creamy paste. Add the cooled meat mixture and fold gently to distribute evenly.
For the béchamel sauce, melt 3 tbsp butter in a saucepan over medium heat. Add 2 tbsp all-purpose flour and whisk constantly for 1-2 minutes until smooth. Gradually pour in 1 cup heavy cream, whisking continuously to prevent lumps. Stir in 4 minced garlic cloves and cook for 3-4 minutes until thickened. Remove from heat and set aside.
Assemble the Manicotti
Preheat your oven to 375°F. Spread 1 cup marinara sauce in the bottom of a 9x13-inch baking dish. Dip each of the 12 whole manicotti pasta shells in warm water for 10-15 seconds to soften slightly, then fill each one with about 2 tablespoons of the cheese-meat mixture. Place them seam-side down in the baking dish, slightly overlapping if needed.
Pour the remaining 2 cups marinara sauce over the top, then spread the béchamel sauce evenly across the surface. Sprinkle 2 cups mozzarella cheese on top, pressing lightly to ensure it melts into the layers. This final layer creates the signature gooey, golden crust.
Bake to Perfection
Bake uncovered for 30 minutes, then tent loosely with foil and bake another 10-15 minutes until the cheese is bubbling and the edges are golden brown. The dish is done when the cheese is fully melted and the edges are slightly crispy. If the top browns too quickly, cover with foil to prevent burning.
Let the manicotti rest for 10 minutes before serving—this allows the layers to set and makes slicing easier. Garnish with fresh basil or extra Parmesan if desired. Each bite delivers a perfect balance of rich meat, creamy cheese, and tangy tomato sauce.
Pro Tips For Making Beef And Sausage Manicotti
- Boil Shells First: Manicotti shells dry out fast once baked, so boil them for 2 minutes in salted water before filling—just enough to soften the edges. This prevents them from cracking under the ricotta weight and keeps them pliable for rolling. (Yes, even if you’re impatient like me, don’t skip this.)
- Brown Sausage Separately: Cook the Italian sausage alone first—it releases fat that can make the beef mixture greasy. Once browned, drain it on paper towels and mix it into the beef later. This keeps the filling lighter and avoids a soggy, oil-heavy mess.
- Salt the Ricotta: Ricotta tastes bland straight from the tub, so mix in ½ teaspoon of salt per 8 ounces before combining with eggs and Parmesan. It balances the richness and makes the filling taste like it was made by someone who actually seasons their food.
- Bake Low and Slow: Skip the high-heat broil—it burns the cheese before the shells cook through. Cover the dish with foil for the first 20 minutes at 375°F, then uncover and bake another 10-15 minutes. This guarantees a creamy, melted cheese center without a crispy top that’s just sad.
Storing and reheating this dish
Fridge Storage Tips
Store your baked manicotti in an airtight container for up to 4 days in the refrigerator. Let it cool completely before covering to prevent condensation, which can make the pasta soggy. I like using glass Pyrex containers because they reheat evenly and keep flavors fresh longer. Always press plastic wrap directly on the surface before sealing the container to maintain moisture. 🧊
Freezing for Later
For long-term storage, assemble your manicotti but skip the final baking step. Wrap the baking dish tightly in heavy-duty aluminum foil and freeze for up to 3 months. When ready to eat, bake straight from frozen at 375°F for 50-55 minutes, tented with foil for the first 30 minutes to prevent over-browning. Add 5-10 minutes extra time if using homemade pasta shells. 🍳
Reheating Perfection
For the best texture, reheat manicotti in the oven at 350°F for 20-25 minutes, covered loosely with foil. This gentle heat prevents drying out while restoring the creamy cheese layer. If using the microwave, cover with a damp paper towel and heat in 1-minute intervals on 50% power, stirring between each interval until reaching 165°F internally. Add a splash of warm water or marinara sauce if it looks dry. 🔥
Make-Ahead Assembly
Assemble your manicotti the night before and refrigerate uncovered for 2-4 hours. This allows flavors to meld before baking. When ready to bake, add 5-10 extra minutes to the cooking time since it starts cold. I often do this when hosting dinner parties—it cuts down on last-minute stress while delivering restaurant-quality results. 💫
Portioning for Meals
Divide leftovers into single-serving portions in microwave-safe containers. Reheat each portion individually to maintain texture. For lunches, I like adding a small side of warm marinara sauce or garlic bread to recreate the full meal experience. Store portions in the freezer for up to 2 months—just thaw overnight in the fridge before reheating. ✨
Nutrition facts
Frequently asked questions
Can I use store-bought manicotti shells instead of homemade? Store-bought shells work perfectly and save time. Just
How do I prevent the filling from leaking out while baking?
Use the warm water dip trick—soak shells for just 10-15 seconds to soften slightly, then fill immediately. Pack the filling firmly but don't overstuff (about 2 tablespoons per shell). Chill assembled manicotti uncovered for 2-4 hours before baking—this helps the cheese set slightly and reduces leaks.
What's the best way to make the meat filling extra flavorful?
Brown the meat thoroughly until it reaches 165°F, then add a splash of red wine or broth to deglaze the pan. For extra depth, toast 1 tsp Italian seasoning in the pan before adding meat. Don't drain all the fat—leave 1-2 tablespoons for moisture. Finish with a pinch of red pepper flakes if you like a little heat.
Can I make this dish ahead of time for a party?
Yes! Assemble completely (unbaked) and refrigerate uncovered for 2-4 hours first. Then bake straight from the fridge, adding 10-15 extra minutes to the cooking time. For a crowd, double the recipe—just scale all ingredients proportionally. The flavors actually improve overnight as everything melds together.
What if my béchamel sauce gets lumpy?
Whisk continuously when adding the heavy cream to the butter-flour roux. If lumps form, immediately strain through a fine-mesh sieve or blend briefly with an immersion blender. For extra smoothness, temper the cream by whisking in small amounts while the roux is still hot. Never let the mixture boil.