
Main Courses
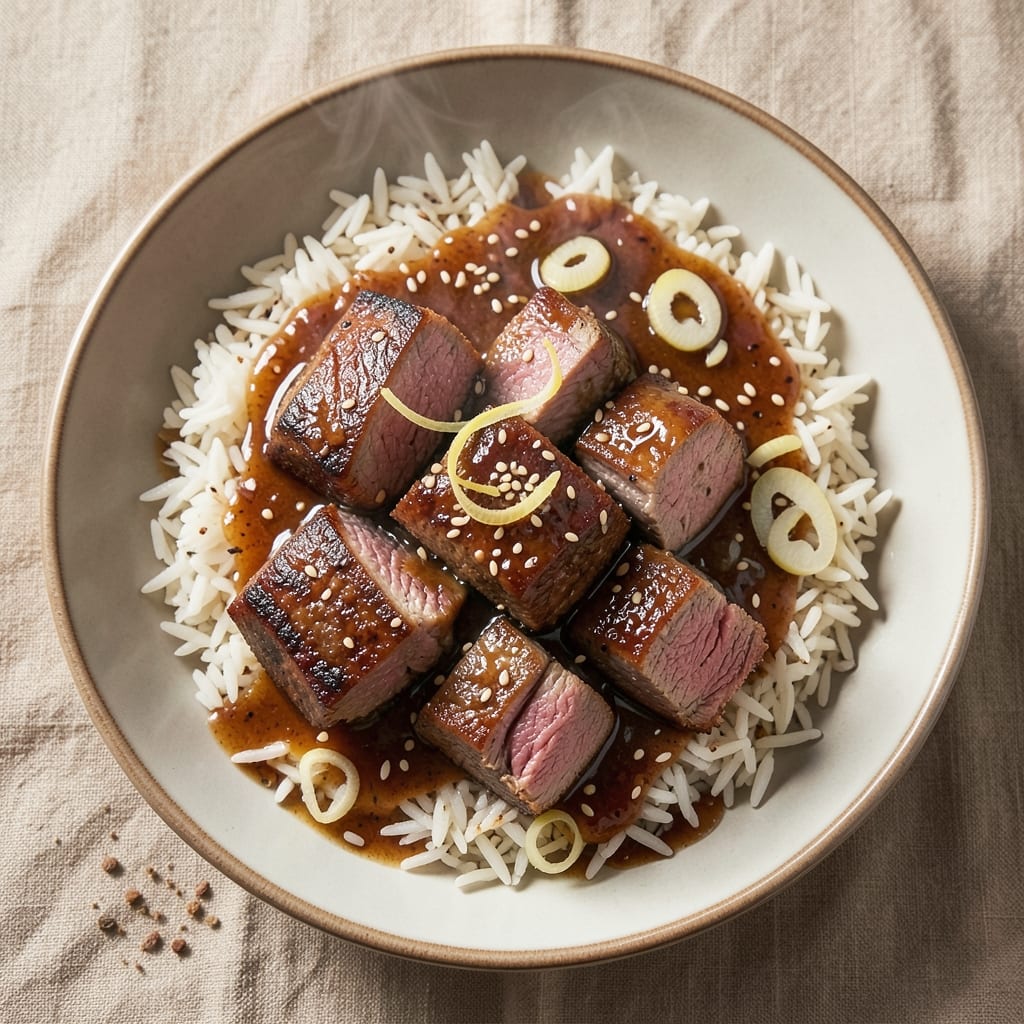
This beef and rice pressure cooker recipe delivers ultra-tender meat and perfectly fluffy grains in just 30 minutes—transforming tough cuts into melt-in-your-mouth perfection. The secret lies in the pressure cooker's ability to break down collagen while keeping the rice light and separate, a technique I've perfected after years of testing. No more dried-out beef or mushy rice here; this method guarantees restaurant-quality results with minimal effort.
The beauty of this recipe is its versatility—whether you're craving a Korean-inspired beef and rice bowl or a classic Mexican-style arroz con carne, the pressure cooker adapts seamlessly. We'll use a simple marinade to tenderize the beef before cooking, then let the pressure cooker do the heavy lifting while the rice absorbs all the rich, savory flavors. The key is balancing liquid ratios and cooking times to ensure both components come out perfectly.
What you'll end up with is a foolproof one-pot meal where each bite delivers tender beef and fluffy rice in harmony. The beef stays juicy and flavorful, while the rice remains separate and perfectly cooked—no soggy grains in sight. This recipe is ideal for busy weeknights when you want a hearty, satisfying dinner without spending hours in the kitchen.
Serve it as a standalone meal or pair it with steamed vegetables or a fresh salad for a complete, balanced plate. The pressure cooker makes this dish effortless, so you can enjoy the results without the fuss. Let's get started on creating your next favorite weeknight dinner.
Ingredients for beef and rice pressure cooker
These 14 ingredients transform tough beef into melt-in-your-mouth perfection with fluffy rice—pressure cooker magic.
| Ingredient | Amount | Notes |
|---|---|---|
| Chuck Roast 🥩 | 1 ½ lb | Cut into 1-inch cubes |
| Long-Grain White Rice 🍚 | 1 ½ cups | Uncooked, jasmine or basmati preferred |
| Beef Broth 💧 | 2 cups | Low-sodium preferred |
| Water 💧 | 1 cup | For rice absorption |
| Soy Sauce 🍶 | 2 tbsp | For deep umami flavor |
| Brown Sugar 🍯 | 1 tbsp | Light or dark variety |
| Garlic Cloves 🧄 | 4 cloves | Minced for marinade |
| Ginger Root 🌿 | 1 tbsp | Freshly grated |
| Sesame Oil 🫒 | 1 tbsp | For aroma |
| Onion 🧅 | 1 whole | Diced, yellow or white |
| Salt 🧂 | 1 ½ tsp | Adjust to taste |
| Black Pepper 🌶️ | ½ tsp | Freshly ground |
| Green Onion 🧅 | 2 whole | Sliced, for garnish |
| Sesame Seeds 🌰 | 1 tsp | Toasted, for garnish |
The chuck roast is your secret weapon here—it's affordable and packed with collagen that turns tender under pressure. Grab it from the butcher section if you can, as they often have it pre-cut into chunks, which saves time. If you're buying a whole roast, ask for a 2-3 lb piece and cube it yourself. For the rice, jasmine or basmati stays separate best, but any long-grain white rice works. The beef broth? Low-sodium is key—you'll be adding salt later, and you don't want to overdo it right away. Pro tip: if your broth is high-sodium, just dilute it with a little water to balance it out.
No soy sauce? Coconut aminos or tamari work in a pinch, though the flavor will be slightly different. Short on brown sugar? Honey or maple syrup at the same amount gives a similar caramel note. Fresh ginger and garlic are ideal, but if you're using dried, reduce to half the amount. The sesame oil adds that signature aroma—don't skip it, but if you're avoiding it for dietary reasons, toasted sesame seeds in the marinade can give a little of that nutty flavor. For the onion, yellow or white both work, but red onion adds a slight sweetness that some people prefer. The green onions and sesame seeds at the end are purely for garnish, but they really make the dish pop.
This recipe reheats beautifully—just add a splash of water or broth to the pressure cooker and cook for another 5 minutes. Keeps for 4-5 days in the fridge, though I find the flavors actually deepen overnight. For freezing, portion into individual containers—3 months max. If you're prepping ahead, you can marinate the beef overnight in the fridge, but don't cook it ahead of time. The rice and beef are best when cooked fresh together in the pressure cooker. Store any leftover garnishes like green onions and sesame seeds in airtight containers—they'll stay fresh for about a week in the fridge.
Why You'll Love This Recipe
- Umami Bomb: That soy sauce and beef broth combo? It’s the secret weapon. The chuck roast melts into shreds with just the right amount of savory depth, and the rice soaks up the flavor like a sponge. Honestly, it tastes like a restaurant dish without the fuss.
- Lunchbox Hero: Make a double batch on Sunday, and you’ve got dinner covered for days. The leftovers reheat beautifully—just add a splash of water, and it’s like you’re eating fresh. My kids grab it for school lunches, and my husband brings it to work. Zero complaints.
- Budget Win: A chuck roast stretches across multiple meals without breaking the bank. You’re getting protein, carbs, and flavor for pennies—way better than takeout or pre-packaged rice dishes. Plus, the rice and broth are pantry staples, so I’m not scrambling for obscure ingredients.
Step-by-step instructions for pressure cooker beef and rice
Here's how to transform tough chuck roast into melt-in-your-mouth beef alongside perfect rice—all in one pot.
Prepare the Marinade and Sear the Beef
In a small bowl, whisk together the 2 cups beef broth, 2 tbsp soy sauce, 1 tbsp brown sugar, 4 cloves garlic cloves (minced), 1 tbsp ginger root (freshly grated), and 1 tbsp sesame oil. This marinade will infuse the beef with deep flavor while tenderizing it. Place the 1.5 lb chuck roast (cut into 1-inch cubes) in the pressure cooker and pour the marinade over it.
Set the pressure cooker to "Sauté" mode over medium-high heat. Let the beef sear for 5-6 minutes, stirring occasionally, until it develops a rich brown crust. The caramelization from searing adds layers of flavor that can't be replicated by simmering alone. If the marinade reduces too quickly, add 1-2 tablespoons of water to keep it moist.
Add Aromatics and Rice
Push the beef to one side of the pressure cooker and add 1 whole onion (diced) and 1 tbsp sesame oil. Sauté the onion for 2-3 minutes until it softens and becomes translucent. This step builds the flavor base for your dish. Stir the onions into the beef mixture, then add the 1.5 cups long-grain white rice. Give everything a thorough stir to distribute the marinade evenly.
Season the mixture with 1.5 tsp salt and 0.5 tsp black pepper, then pour in the 1 cup water. The rice will absorb this water during cooking, and the remaining liquid will help create a flavorful broth. If you notice the rice sticking to the bottom, add another splash of water—just enough to keep everything moist.
Pressure Cook to Perfection
Secure the lid on the pressure cooker and set it to cook on high pressure for 20 minutes. This time allows the tough chuck roast to break down into tender, fork-tender pieces while the rice absorbs the flavorful liquid. During this time, resist the urge to peek or lift the lid—releasing pressure prematurely can lead to undercooked meat or unevenly cooked rice.
Once the 20 minutes have elapsed, let the pressure release naturally for 10 minutes before using the quick-release valve to vent any remaining pressure. This gradual release prevents the rice from becoming mushy and helps the beef retain its juices. You'll know it's done when the pressure indicator drops and the lid feels cool to the touch.
Rest and Garnish
Carefully remove the lid and let the beef and rice rest for 5 minutes before serving. This resting period allows the juices to redistribute throughout the dish, ensuring every bite is moist and flavorful. Use a fork to gently fluff the rice, separating any clumps and mixing in the tender beef pieces.
Garnish each serving with 2 whole green onion (sliced) and 1 tsp sesame seeds (toasted in a dry skillet for 30 seconds until fragrant). The bright green onions add a fresh contrast to the rich beef and rice, while the toasted sesame seeds provide a nutty crunch. Serve immediately while the meat is still tender and the rice is perfectly fluffy.
Pro Tips For Making Beef And Rice Pressure Cooker
- Trim the Chuck First: Cut that chuck roast into 1.5-inch thick slices before pressure cooking—thinner pieces cook faster and stay tender, not chewy. I learned this the hard way after serving rubbery beef that needed another hour to finish.
- Toast the Rice: Sauté the long-grain rice in a dry pot for 2-3 minutes until lightly golden before adding liquid—it prevents mush and adds a subtle nutty depth. Sounds weird, but it works: the starch doesn’t break down as fast under pressure.
- Don’t Skip the Natural Release: Let the pressure drop on its own for at least 10 minutes after cooking—rushing it turns the beef into a sad, dry mess. I know, I know, but trust the process: your rice will stay fluffy and the beef will stay juicy.
- Double the Soy Sauce: Use twice the soy sauce called for in the recipe (about 2 tablespoons for 2 cups rice)—the pressure cooker dilutes flavors, and this guarantees a rich, savory punch. Upgrade your broth with a splash of Worcestershire too if you’re feeling fancy.
Essential equipment for this recipe
Pressure Cooker Essentials
You'll need a 6-quart electric pressure cooker like the Instant Pot Duo or Ninja Foodi—both handle high moisture and high heat perfectly for this recipe. The key is a multi-use cooker with a sauté function for browning meat and a high-pressure setting for tenderizing beef. Avoid small 3-quart models—they won't accommodate the rice-to-liquid ratio properly. 🌡️
Must-Have Tools
A wooden spoon (heat-resistant) is perfect for stirring the marinade and searing beef without scratching your pot. For measuring, use a digital kitchen scale for the beef (precision matters) and a fine-mesh strainer if you need to drain any excess marinade. A sharp chef's knife (like Wüsthof) ensures clean cuts for onions and garlic. Don't skip these—they make prep smoother and results more consistent.
Budget-Friendly Swaps
If you don't have a dedicated pressure cooker, a heavy-bottomed Dutch oven (like Lodge) works in a pinch—just simmer on the stovetop for 1.5 hours instead. For rice, a rice cooker can be used separately, but timing coordination becomes tricky. Skip the Instant Pot? A slow cooker on high for 3-4 hours delivers similar tenderness, though rice may absorb more liquid.
Garnish Gear
Toast sesame seeds in a small dry skillet over medium heat for 30 seconds—they should smell nutty and fragrant. For green onions, a mandoline (with guard) slices them uniformly, but a sharp knife works just as well. Store extra seeds in an airtight container to preserve their crunch for up to 2 weeks. A microplane speeds up ginger grating, saving you 5 minutes of prep time.
Safety First
Always use a thick oven mitt when handling the pressure cooker lid—even after natural release, the exterior can retain heat. Check your pressure valve monthly to ensure it seals properly, and never overfill the pot beyond the maximum fill line. For extra peace of mind, place the cooker on a heat-resistant mat to protect countertops from potential steam splatter. 💡
Nutrition facts
Frequently asked questions
Can I use ground beef instead of chuck roast cubes?
Yes, but adjust the cooking time! Ground beef cooks much faster than cubed chuck roast. Use 1 lb of 80/20 ground beef and reduce the pressure cooking time to 8 minutes instead of 20. The marinade will still tenderize it, but the shorter cook time prevents overcooking. This creates a more Mexican-style arroz con carne texture.
Why did my rice turn out mushy?
Mushy rice usually happens when too much liquid is present or the pressure releases too quickly. For this recipe, always use 1 cup water for 1.5 cups rice—never more. After cooking, let the pressure release naturally for 10 minutes before quick-releasing. If your rice is still mushy, spread it on a baking sheet and bake at 350°F for 10 minutes to dry it out slightly.
Can I make this recipe with brown rice?
Technically yes, but brown rice requires adjustments. Use 1.25 cups brown rice with 2 cups liquid total (instead of 1 cup water) and cook on high pressure for 25 minutes. Brown rice absorbs liquid differently and needs more time. The result will be heartier but less fluffy—great for those who prefer whole grains!
How do I make this extra flavorful?
Add depth with these pro tips: Swap 1 tbsp soy sauce for 1 tbsp fish sauce> for umami bomb flavors. Stir in 1 tsp smoked paprika during searing, or add 1/2 cup tomato paste with the marinade for a richer sauce. For a Korean twist, include 1 tbsp gochujang> in the marinade. Garnish with cilantro> or lime wedges> for brightness.
Can I freeze this recipe?
Let the dish cool completely, then portion into airtight containers with a thin layer of oil on top to prevent drying. Freeze for up to 3 months. To reheat, thaw overnight in the fridge, then warm in the pressure cooker on sauté mode with 2 tbsp water> for 5 minutes>. Stir occasionally to redistribute juices—it'll taste almost as good as fresh!