
Soups & Stews
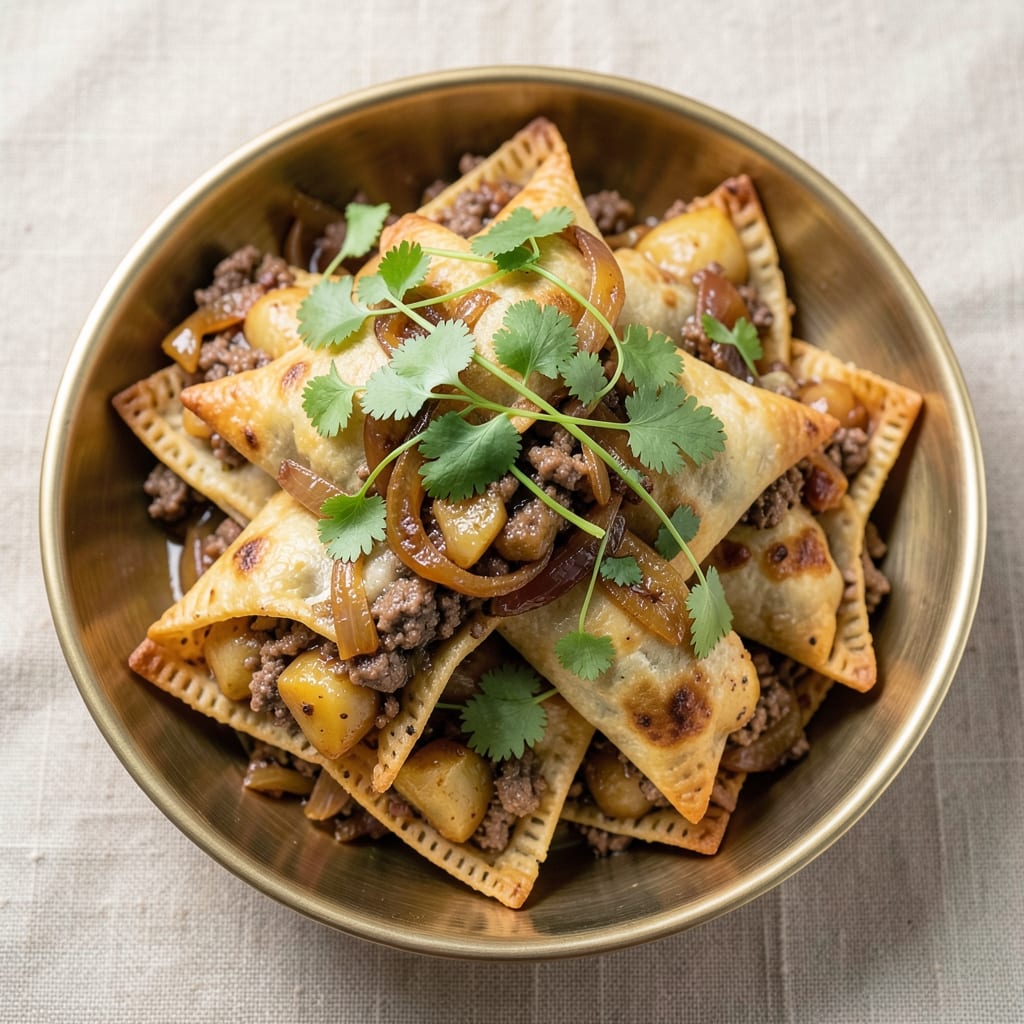
This beef and potato samosa recipe delivers crispy golden layers that shatter at every bite, encasing a fragrant spiced filling that balances tender beef and potatoes. The secret lies in a perfectly folded dough—light yet sturdy—and a filling so flavorful it transforms simple ingredients into something extraordinary. I've perfected the technique over years of testing, ensuring each samosa achieves that ideal balance of texture and taste.
What sets this recipe apart is the foolproof folding method that creates those iconic triangular shapes with razor-sharp edges. The dough starts with a simple flour-water mix, but the magic happens in the rolling and folding—each layer must be thin enough for crispiness yet thick enough to hold the filling. Meanwhile, the beef and potato filling simmers with warm spices until the flavors meld into a cohesive, aromatic blend.
By the time you take that first bite, you'll experience the perfect harmony of textures: the initial crunch of the crispy exterior gives way to the tender, spiced filling inside. The aroma alone—warm spices, caramelized onions, and tender beef—will transport you to bustling street food stalls. This is comfort food at its finest, where every element works together to create a dish that's both satisfying and impressive.
The best part? These samosas stay crispy even after cooling, making them perfect for meal prep or serving at gatherings. Serve with mint chutney or tamarind sauce for the full experience. Let's get started on creating these crispy, flavor-packed delights.
Ingredients for beef and potato samosa
Crispy layers and spiced filling transform simple ingredients into extraordinary samosas.
| Ingredient | Amount | Notes |
|---|---|---|
| All-Purpose Flour 🌾 | 2 cups | For crispy, sturdy dough layers |
| Unsalted Butter 🧈 | ½ cup | Cold, cubed for flaky layers |
| Yellow Onions 🧅 | 1 medium | Finely chopped for filling |
| Russet Potatoes 🥔 | 2 medium | Diced small for even cooking |
| Ground Beef 🥩 | 1 lb | 70% lean for rich flavor |
| Ginger Root 🌿 | 1 inch | Freshly grated for zing |
| Garlic Cloves 🧄 | 4 cloves | Minced for aromatic depth |
| Ground Cumin 🌿 | 1 tbsp | Toasted for deeper flavor |
| Ground Coriander 🌶️ | 1 tbsp | Freshly ground preferred |
| Turmeric Powder 🌶️ | ½ tsp | Brightens filling color |
| Red Chili Powder 🌶️ | 1 tsp | Adjust for heat preference |
| Garam Masala 🌿 | 1 tsp | Warm spice blend for aroma |
| Salt 🧂 | 1 tsp | Diamond Crystal preferred |
| Vegetable Oil 🫒 | ½ cup | For deep frying |
| Lemon Juice 🍋 | 1 tbsp | Freshly squeezed for brightness |
The flour and butter are non-negotiable for that signature crispiness. King Arthur flour gives the best texture, but any all-purpose works in a pinch. For the butter, Land O'Lakes unsalted is my go-to—it's consistently high-quality and stays cold longer during handling. The onions and potatoes should be uniformly diced (about 1/2-inch pieces) so they cook evenly. Russet potatoes hold up best to frying, but Yukon Golds add a touch of creaminess if you prefer. The beef matters too—70% lean ground chuck gives the perfect balance of flavor and moisture without making the filling too greasy.
No fresh ginger? Ground ginger at half the amount works, though it lacks that bright, zesty kick. Running short on garam masala? Mix cinnamon, cardamom, and cloves for a homemade version—just toast the spices first to wake up their flavors. The chili powder can be swapped for cayenne if you're feeling adventurous, but Madras or Kashmiri powder from Penzeys adds beautiful color too. For the oil, vegetable or canola are standard, but if you want extra crispiness, peanut oil has a higher smoke point. The lemon juice is what ties everything together—Meyer lemons add a subtle sweetness, but regular lemons work perfectly fine.
Store the dough between layers of parchment paper to prevent sticking—it keeps well in the fridge for 2 days or frozen for 3 months. The filling can be prepped ahead and stored separately for 3 days in the fridge. For frying, maintain the oil temperature at 350°F—too hot and they'll burn before crisping. These samosas stay crispy for 24 hours if stored in an airtight container, making them ideal for meal prep. Serve warm with mint chutney or tamarind sauce for the full experience.
Why You'll Love This Recipe
- No-Fuss Filling: The potatoes get boiled and mashed—no peeling required—while the beef cooks down with onions into a rich, spiced mix. Honestly, the hardest part is deciding whether to fold in extra chili powder or not.
- Crispy-Creamy Magic: That golden crust from the butter and flour? It’s the star. Inside, the beef stays juicy while the potatoes add a satisfying heartiness—like a hug in bite-sized form.
- Lunchbox Hero: Pack these for work or school—no reheating needed. They hold up perfectly, and between us, my kids actually ask for leftovers. (Yes, even on a Tuesday night.)
- Budget Stretch: Ground beef and potatoes make this a wallet-friendly powerhouse. One batch feeds four, and the dough uses basic flour and butter—no specialty ingredients, just pure flavor.
Step-by-step instructions for beef and potato samosa
Here's how to create those legendary crispy layers and aromatic spiced filling that make samosas irresistible.
Prepare the Perfect Spiced Filling
In a large skillet, heat the 0.5 cup vegetable oil over medium heat until shimmering. Add the 1 medium yellow onions and cook for 5-6 minutes until they turn golden brown and translucent. This slow cooking caramelizes the onions, creating deep flavor.
Push the onions to one side of the pan and add the 1 lb ground beef. Break it up with a wooden spoon and cook until it loses its raw color—about 5-7 minutes. Stir in the 1 inch ginger root and 4 cloves garlic cloves (minced), cooking for 1 minute until fragrant.
Add the 2 medium russet potatoes (diced small), 1 tbsp ground cumin, 1 tbsp ground coriander, 0.5 tsp turmeric powder, 1 tsp red chili powder, 1 tsp garam masala, and 1 tsp salt. Stir well to combine, then reduce heat to low and cover. Let it cook for 10-12 minutes, stirring occasionally, until the potatoes are tender and the filling has thickened. Finish with 1 tbsp lemon juice and set aside to cool completely—this prevents soggy dough later.
Make the Flaky Dough Layers
In a large bowl, combine the 2 cups all-purpose flour and 1 tsp salt. Cut in the 0.5 cup unsalted butter (cold and cubed) using a pastry cutter or your fingers until the mixture resembles coarse crumbs with pea-sized butter pieces. This texture is crucial for flaky layers.
Gradually add ice water, 1 tablespoon at a time, mixing gently with a fork until the dough just comes together. Knead lightly for 2-3 minutes until smooth. Wrap in plastic wrap and chill for 30 minutes—this resting period relaxes the gluten and makes rolling easier. Divide into 4 equal portions for your samosas.
Assemble and Seal the Samosas
Roll each dough portion into a 6-inch circle on a floured surface, keeping the thickness even—about ⅛ inch. Cut each circle into 2 triangles (like a cone shape). Spoon ¼ of the filling onto one side of each triangle, leaving a ½-inch border around the edges.
Fold the triangle over the filling, sealing the edges tightly with a fork or by pressing with your fingers. Crimp decoratively if desired—this not only looks pretty but also helps maintain the shape during frying. Place the assembled samosas on a plate and chill for 15 minutes before frying to prevent them from opening up in the hot oil.
Fry to Golden Perfection
Heat 0.5 cup vegetable oil in a deep skillet over medium-high heat until it reaches 350°F—test with a small piece of dough. Fry the samosas 2 at a time, turning occasionally, for 4-5 minutes until they turn a deep golden brown. They're done when they float and the dough is crispy all over.
Drain on a wire rack or paper towels to remove excess oil. Serve immediately while still hot and crispy, with a side of mint chutney or tamarind sauce for dipping. The contrast of the warm, spiced filling and the crispy, golden dough is what makes these samosas legendary!
Pro Tips For Making Beef And Potato Samosa
- Boil Potatoes Until Fork-Tender: Don’t stop at "soft"—aim for potatoes that collapse under a fork with just a little resistance left. Overcooking turns them to mush, but stopping too soon means they’ll stay raw and chewy. I learned this the hard way when my first batch had a weird texture that ruined the whole filling.
- Fry Onions Low and Slow: Onions should caramelize, not burn. Keep the heat at medium-low and stir often—this takes 15-20 minutes, but it’s worth it. Rushed onions taste bitter, and that flavor carries through the whole samosa. (Yes, even if you’re impatient like me.)
- Rest the Dough Before Rolling: Let your flour-butter dough sit, covered, for at least 30 minutes. This relaxes the gluten so it doesn’t tear when you roll it out. I skip this when I’m lazy, but the dough is noticeably easier to handle—and the crust stays crispier.
- Pre-Cook the Beef Filling: Brown the ground beef first, then drain almost all the fat. This keeps the filling from getting soggy when you fry the samosas. Leaving too much fat makes the pastry greasy, and nobody wants that. (Your future self will thank you.)
Storing and reheating your leftovers
Fridge Storage Tips
Store your samosas in an airtight container with parchment paper between layers to maintain crispiness. They'll stay fresh for up to 24 hours—perfect for meal prep! Place them in a single layer to prevent sticking, and avoid stacking too high to maintain that satisfying crunch. 💫
Freezer-Friendly Prep
For longer storage, freeze uncooked samosas on a tray lined with parchment paper before transferring to a ziplock bag. This prevents them from sticking together. When ready to enjoy, fry from frozen—just add 1-2 extra minutes to the cooking time. Thawing isn't necessary! ❄️
Reheating Without Ruin
Avoid microwaving—it turns samosas soggy! Instead, reheat in a skillet with 1 tbsp oil over medium heat for 2-3 minutes per side. The oil helps restore that crispy texture. For extra crunch, finish under a broiler for 30 seconds—just watch closely to avoid burning. 🔥
Oven Revival Hack
If you prefer dry heat, bake at 375°F for 8-10 minutes on a wire rack (not directly on the tray) to prevent steam from making them limp. Brush with a little melted butter after baking for extra shine and flavor. This works best for samosas stored for 1-2 days.
Filling Refresh
If the filling tastes dry after storage, sprinkle 1 tsp warm water and ½ tsp lemon juice over it before reheating. This revives moisture without making the dough soggy. For extra zing, add a pinch of garam masala or red chili powder while reheating. 🌶️
Serving Warm
Serve samosas straight from the reheating process—they're best enjoyed while still hot and crispy! Pair with mint chutney or tamarind sauce for that authentic street-food experience. If prepping ahead, store the chutney separately and mix just before serving to keep flavors vibrant. ✨
Nutrition facts
Frequently asked questions
Can I make samosa dough without butter?
Yes, but the texture will differ. Replace the butter with 0.5 cup vegetable shortening or 0.4 cup cold coconut oil for a lighter dough. For a vegan option, use 0.5 cup cold vegan butter—just chill the dough longer to compensate for the lack of fat. The key is keeping everything cold to prevent the dough from becoming too soft.
How do I fix soggy samosas?
If your samosas turn out soggy, it's usually from overfilling or undercooked dough. For immediate fixes, reheat in a skillet with 1 tbsp oil over medium heat for 2-3 minutes per side to restore crispiness. For prevention, ensure your filling is completely cooled before assembling, and press the edges tightly to seal in moisture.
Can I bake samosas instead of frying?
Brush the assembled samosas with 1 tbsp oil and bake at 400°F for 15-18 minutes until golden. For extra crispiness, bake on a wire rack and finish under the broiler for 2 minutes. The texture will be lighter than fried, but still delicious—just add a squeeze of lemon to compensate for the lack of deep-fried richness.
What's the best way to store leftover filling?
Store the filling in an airtight container in the fridge for up to 3 days or freeze for 3 months. To reheat, warm in a pan with 1 tsp oil over low heat for 3-4 minutes, stirring in 1 tsp water and ½ tsp lemon juice to refresh the moisture. Avoid microwaving—it makes the filling dry and grainy.
How do I make samosas spicier?
Boost the heat by adding ½ tsp cayenne pepper or 1 tsp Kashmiri red chili powder to the filling. For smoky depth, stir in ½ tsp smoked paprika or a pinch of chaat masala before serving. If you love fresh heat, sprinkle chopped green chilies or a dash of hot sauce on top when serving.