
Soups & Stews
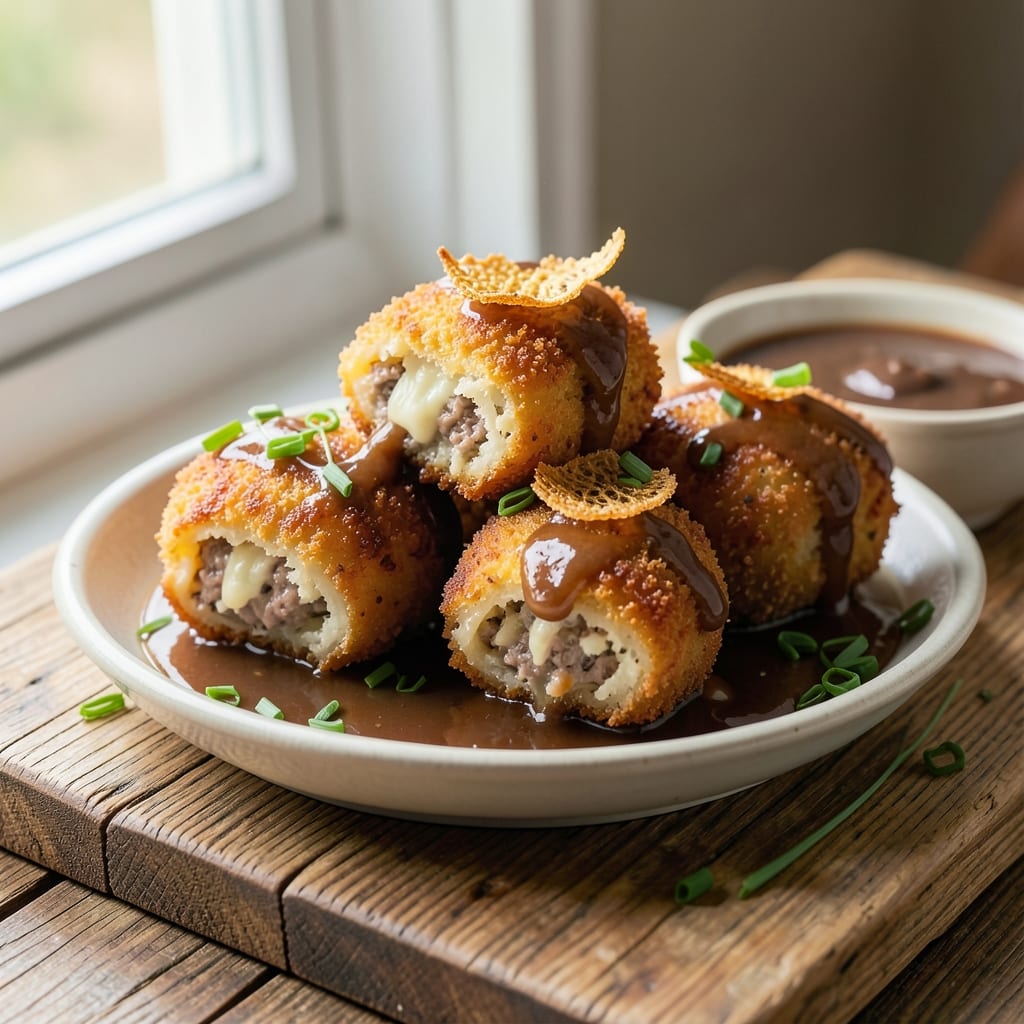
This beef and potato croquette recipe delivers crispy golden bites with creamy centers that melt in your mouth—every time. The secret lies in perfectly cooked filling, precise shaping, and a crispy panko breading that holds up to frying. I've perfected this technique after years of testing, ensuring the texture balance that makes these croquettes irresistible.
The filling starts with tender beef and potatoes slow-cooked until fork-tender, then blended into a smooth, flavorful base. This isn't your average mushy croquette—each bite combines crispy exterior with velvety interior, thanks to a foolproof breading method. The recipe uses simple pantry staples but delivers restaurant-quality results in under an hour.
What sets these apart is the double-frying technique: an initial gentle fry sets the shape, while the final crisping in hot oil creates that signature golden crust. Serve with a tangy dipping sauce or aioli for the ultimate appetizer that disappears faster than you can say "second round." The aroma alone will have everyone asking for the recipe.
Perfect for game day, holiday appetizers, or weeknight dinners, these croquettes scale easily for any occasion. The key is patience—don't rush the breading or frying—and you'll achieve that perfect crispy exterior with a creamy interior that makes every bite worth it. Let's get cooking!
Ingredients for beef and potato croquette
Pantry staples meet restaurant-quality technique for these golden, crispy croquettes with velvety centers.
| Ingredient | Amount | Notes |
|---|---|---|
| Ground Beef 🥩 | 1 lb | Lean ground beef, 85% lean |
| Russet Potatoes 🥔 | 2 lbs | Peeled and cubed, uniform size |
| Yellow Onion 🧅 | 1 whole | Medium size, finely chopped |
| Garlic Cloves 🧄 | 4 cloves | Peeled and minced |
| Beef Broth 💧 | 1 cup | Low-sodium preferred |
| Heavy Cream 🥛 | ½ cup | Full-fat for creaminess |
| All-Purpose Flour 🌾 | ½ cup | For breading mixture |
| Japanese Panko Breadcrumbs 🍞 | 1 ½ cups | For crispy exterior |
| Large Eggs 🥚 | 2 whole | Beaten for egg wash |
| Vegetable Oil 🫒 | 3 cups | For frying, high smoke point |
| Salt 🧂 | 1 ½ tsp | Kosher or sea salt |
| Ground Black Pepper 🌶️ | ½ tsp | Freshly ground preferred |
| Dried Parsley 🌿 | 1 tbsp | For garnish, finely chopped |
| Mayonnaise 🥫 | ½ cup | For optional dipping sauce |
| Lemon Juice 🍋 | 1 tbsp | For tangy dipping sauce |
The beef and potatoes are the foundation—ground chuck gives the best texture, while Russet potatoes stay firm during cooking. I always grab the organic Russets from Whole Foods for their consistent texture, but any Russet works. For the onion, yellow onions add sweetness that caramelizes beautifully during cooking. The garlic? Freshly minced makes all the difference—pre-minced garlic from jars loses its punch. If you're short on time, garlic powder at half the amount works in a pinch, but trust me on the fresh stuff for that aromatic depth.
No heavy cream? Full-fat coconut milk works beautifully—just reduce the broth slightly to balance the richness. Running out of panko? Crushed cornflakes or plain breadcrumbs work, though they won't be as crispy. The double-fry technique is non-negotiable for that signature texture—first fry at 325°F to set the shape, then final fry at 375°F for crispiness. For the dipping sauce, I like to mix mayo with a splash of lemon juice and Dijon mustard—it cuts through the richness perfectly. The secret to perfect croquettes? Don't overmix the filling—just pulse until smooth in a food processor.
Store any leftovers in an airtight container in the fridge for up to 3 days, but honestly, they won't last that long. These reheat beautifully—350°F for 10 minutes brings back that crispy exterior. For freezing, shape and bread the croquettes, then freeze on a tray before transferring to a bag. They'll keep for up to 3 months. Pro tip: Double the batch—they disappear at parties, and you'll want seconds anyway.
Why You'll Love This Recipe
- One-Pot Magic: I swear by this recipe because it lives in one bowl—no fancy gadgets, no extra pans. Just brown the beef with onion, boil the potatoes whole, mash them in, and mix. That’s it. The broth keeps everything juicy without extra effort.
- Crispy-Creamy Obsession: The secret’s in the crust—flour and egg-washed croquettes fried until golden, but the filling? Rich beef, buttery potatoes, and garlic that makes you want to eat them straight from the pan. (Yes, I’ve done it.)
- Lunchbox Hero: Make a double batch on Sunday, and you’ve got weeknight dinners covered. Cold or reheated, these hold up perfectly—pack them for lunches, serve at potlucks, or freeze half for when you’re too tired to cook.
- Budget Win: Ground beef and potatoes stretch further than you’d think, and the broth adds depth without costing extra. Honestly, it’s one of those meals where you feel like you’re feeding a crowd, but the grocery bill stays friendly.
Step-by-step instructions for beef and potato croquettes
Here's how to craft golden, crispy croquettes with velvety centers that'll impress everyone.
Cook the Potato Base Until Tender
Peel and cut the 2 lbs Russet Potatoes into ½-inch cubes for even cooking. Place them in a large pot and cover with cold water by 2 inches. Add 1 tsp salt and bring to a boil over medium-high heat. Once boiling, reduce heat to medium-low and simmer for 15-20 minutes until fork-tender.
Drain the potatoes thoroughly, then return them to the pot. Add the 1 cup Beef Broth and 0.5 cup Heavy Cream. Mash the potatoes slightly with a potato masher until they reach a rustic, chunky texture—you want some texture, not a puree. Let the mixture cool to room temperature before proceeding. This step ensures your filling stays moist and flavorful.
Brown the Beef and Aromatics
While the potatoes cool, heat 1 tablespoon vegetable oil in a large skillet over medium-high heat. Add the 1 lb Ground Beef, breaking it up with a wooden spoon, and cook until deeply browned (about 5-6 minutes). Drain the fat, leaving just 1 teaspoon in the pan.
Add the finely chopped Yellow Onion and minced Garlic Cloves. Sauté for 3-4 minutes until the onion softens and becomes translucent. Stir in the mashed potato mixture, 1.5 tsp Salt, and 0.5 tsp Ground Black Pepper. Cook for another 2-3 minutes until everything is well combined and heated through. Let the mixture cool completely before shaping.
Shape and Bread the Croquettes
Transfer the cooled beef-potato mixture to a clean surface and shape into 1-inch diameter balls (about 16 croquettes). Roll each ball in 0.5 cup All-Purpose Flour, tapping off excess, then dip into the beaten Large Eggs, and finally coat thoroughly in 1.5 cups Japanese Panko Breadcrumbs. Place on a parchment-lined tray and refrigerate for 30 minutes to firm up.
This breading sequence ensures a crispy exterior while keeping the interior creamy. Don't skip the chilling step—it prevents the croquettes from falling apart during frying. For extra flavor, sprinkle 1 tbsp Dried Parsley over the breaded croquettes before frying.
Fry to Golden Perfection
Heat 3 cups Vegetable Oil in a deep skillet or Dutch oven to 350°F (use a thermometer for accuracy). Fry the croquettes in batches (don't overcrowd) for 3-4 minutes until deep golden brown on all sides. Drain on a wire rack or paper towels to remove excess oil.
Here's the secret: Maintain oil temperature—if it drops below 325°F, the croquettes will absorb oil and become greasy. For a crispier finish, increase heat to 375°F for the last 30 seconds of frying. Serve immediately with the mayonnaise-lemon dipping sauce (mix 0.5 cup Mayonnaise and 1 tbsp Lemon Juice).
Pro Tips For Making Beef And Potato Croquette
- COOK THE POTATOES UNTIL SOFT: I learned this the hard way—undercooked potatoes turn to mush when mixed with beef, and overcooked ones dry out the filling. Aim for fork-tender but still holding shape, then mash them while hot (they’ll cool down fast once mixed).
- BROWN THE BEEF FIRST: Skip the pre-cooked ground beef—it’s bland. Cook it in a dry pan until deeply browned (5-7 minutes) before adding onions and garlic. That crust adds serious flavor, and it won’t turn greasy if you drain it well.
- REST THE FILLING: I used to roll croquettes right after mixing, but the filling oozes out when frying. Let it sit 10 minutes before shaping—it firms up enough to hold together without falling apart.
- USE BREADCRUMB MIX, NOT FLOUR: Flour makes the outside tough and soggy. A 50/50 mix of panko and all-purpose breadcrumbs gives a crispy, golden crust that stays light. Press it firmly on the croquettes before frying—no half-hearted coating.
Make-ahead tips for this dish
Prep Ahead
Shape and bread your croquettes up to 24 hours in advance and store them in an airtight container in the fridge. I always do this on Sunday nights so they're ready for game day—just fry when needed. For extra crispiness, let them sit at room temperature for 30 minutes before frying. 💫
Freezing Ready Croquettes
Freeze fully breaded croquettes on a tray first to prevent sticking, then transfer to a ziplock bag for up to 3 months. Thaw overnight in the fridge before frying—no need to worry about texture loss. I label my bags with the date so I never forget.
Double-Fry Shortcut
Skip the second fry for a quicker version: fry once at 375°F for 4-5 minutes until golden. While not as crispy, it still delivers great flavor. Perfect for busy weeknights when you need a fast appetizer. 🔥
Make the Sauce Early
Prepare the mayo-lemon dipping sauce the day before and store it in a small glass jar in the fridge. Stir well before serving—it keeps for 5 days without losing freshness. I often make extra to use on sandwiches later.
Cooking in Batches
For large gatherings, shape and bread all croquettes at once, then freeze half. Fry only what you need, keeping the rest frozen. This saves time and ensures crispy results every time. I've hosted 20+ people using this method—no one ever knows they're not fresh! ✨
Reheating Leftovers
Reheat croquettes in a 350°F oven for 10-12 minutes on a wire rack to restore crispiness. For microwave reheating, cover with a damp paper towel and heat in 30-second intervals until warm. They won't be as crispy but still delicious for quick snacks.
Nutrition facts
Frequently asked questions
Why do my croquettes turn out greasy instead of crispy?
Greasy croquettes usually happen when the oil temperature drops below 325°F during frying. Use a thermometer to monitor the oil—keep it steady at 350°F for the first fry and 375°F for crisping. Also, don't overcrowd the pan, as too many croquettes will lower the temperature. Fry in batches of 3-4 for best results.
Can I make these croquettes ahead of time?
Shape and bread croquettes up to 24 hours ahead and refrigerate in an airtight container. For freezing, bread them fully, then freeze on a tray before transferring to a bag. They'll keep for 3 months. Thaw in the fridge overnight before frying. This is how I prep for game day—always ready when guests arrive!
What's the best way to reheat leftover croquettes?
For crispy results, reheat in a 350°F oven for 10-12 minutes on a wire rack. If using a microwave, cover with a damp paper towel and heat in 30-second bursts—they won't be as crispy but still tasty. The oven method restores that golden crust perfectly.
Can I substitute ground turkey for the beef?
Yes, you can use ground turkey or even chicken, but the flavor and texture will differ slightly. For best results, use 93% lean ground turkey to mimic the beef's richness. You may also want to add 1 tsp Worcestershire sauce to the filling for extra depth. The croquettes will still be delicious—just with a lighter taste.
How do I fix croquettes that fall apart when frying?
This usually happens if the filling isn't cool enough before shaping or if the breading isn't adhered properly. Let the mixture cool completely before handling, and