
Main Courses
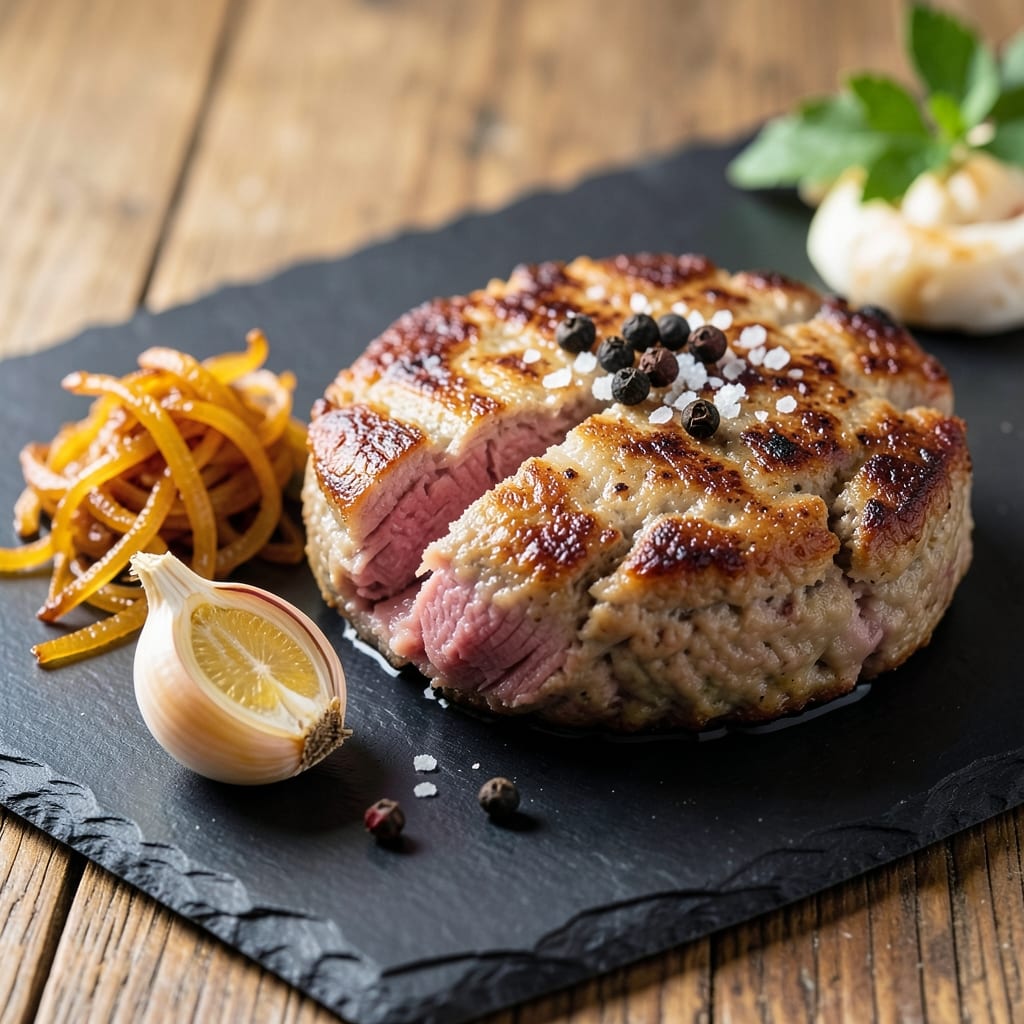
This beef and pork patty recipe delivers the best of both worlds—juicy, flavorful patties with a perfect blend of textures and savory depth. 🔥 The secret lies in the right meat ratio (70% beef, 30% pork) and a simple seasoning blend that enhances rather than overpowers. I developed this recipe during a particularly busy week at The Smoky Pig, where we needed hearty, fast-cooking options that still felt special.
The magic happens when you grind the meats together and let them rest for 30 minutes—this step ensures the patties stay tender and hold their shape. We’re talking foolproof technique here, with no fancy ingredients or complicated steps. The patties cook in just 20 minutes, making them ideal for weeknight dinners or weekend BBQs. What you’ll end up with is a perfectly seared exterior and juicy, flavorful meat that melts in your mouth.
Serve these patties on toasted buns with your favorite toppings, or pair them with a fresh garden salad and roasted vegetables for a complete meal. The versatility of these patties means they work just as well for breakfast hash as they do for a classic burger. Trust me, once you try this blend, you’ll never go back to single-meat patties.
This recipe isn’t just about the patties—it’s about the experience. Whether you’re feeding a crowd or treating yourself to a simple dinner, these patties deliver restaurant-quality results with minimal effort. Let’s get cooking!
Ingredients for beef and pork patty
The perfect mix of beef and pork for juicy, foolproof patties in just 20 minutes.
| Ingredient | Amount | Notes |
|---|---|---|
| Ground Beef (80% lean) 🥩 | 1 ½ lb | Chuck or round blend preferred |
| Ground Pork (80% lean) 🐖 | ½ lb | Freshly ground for best texture |
| Yellow Onion 🧅 | 1 whole | Medium size, finely chopped |
| Garlic Cloves 🧄 | 4 cloves | Fresh, minced for depth |
| Kosher Salt 🧂 | 1 ½ tsp | Diamond Crystal preferred |
| Freshly Ground Black Pepper 🌶️ | 1 tsp | Cracked peppercorns preferred |
| Worcestershire Sauce 🍶 | 1 tbsp | High-quality, anchovy-free |
| Extra-Virgin Olive Oil 🫒 | 1 tbsp | For moisture and richness |
| All-Purpose Flour 🌾 | 2 tbsp | For binding and texture |
| Fresh Parsley 🌿 | ¼ cup | Chopped, for garnish (optional) |
| Hamburger Buns 🍞 | 4 whole | Toasted for serving |
| Yellow Mustard 🟡 | 2 tbsp | For topping (optional) |
| American Cheese Slices 🧀 | 4 slices | For melting (optional) |
The meat ratio is everything here—70% beef, 30% pork gives you that perfect balance of tenderness and flavor. Grab ground chuck or round from the butcher section (not pre-formed patties)—it’s leaner and holds up better. I always buy mine from Whole Foods or Costco because they grind it fresh daily. For the pork, 80% lean is ideal—it adds juiciness without making the patties greasy. If you’re short on time, pre-ground blends from the grocery store work fine, but fresh is always better. Look for good marbling in both meats—that’s your fat, which equals flavor and juiciness.
No Worcestershire sauce? Substitute with 1 tbsp soy sauce plus 1/2 tsp smoked paprika—it’s not identical, but it works in a pinch. Fresh parsley is ideal, but dried parsley at one-third the amount gets you close. The all-purpose flour is just for binding—if you’re out, cornstarch works too. For the buns, toasted brioche or potato buns add extra flavor, but classic hamburger buns are perfect. The cheese is optional, but if you skip it, add another tbsp of mustard or a smear of garlic aioli for that classic burger vibe. And trust me, the olive oil is worth it—it keeps the patties moist and adds a subtle richness.
The patties keep best in the fridge for 3 days if wrapped tightly in plastic. For longer storage, freeze them raw on a tray first, then transfer to a bag for up to 3 months. Thaw in the fridge overnight before cooking. Pro tip: Portion the meat into four equal piles before shaping—this ensures perfectly sized patties every time. The buns can be toasted ahead and stored in a paper bag at room temp for up to 2 days. And if you make extras? They reheat beautifully in a skillet or air fryer for quick lunches.
Why You'll Love This Recipe
- Two-Meat Magic: I’ll be real—mixing beef and pork changes everything. The beef gives structure, while the pork adds juicy richness, and those two together? Pure satisfaction every time.
- No-Fuss Forming: Honestly, shaping these patties takes less effort than scrolling through my phone. Just combine the raw meats, a pinch of salt, and let your fingers do the work—no rolling pins or fancy techniques needed.
- Leftovers That Shine: These patties freeze like a dream. Toss extras in the fridge, reheat in a skillet, and they’re just as good as day one—perfect for lazy mornings or last-minute lunches.
- Budget Boost: Ground pork stretches the beef, cutting costs without sacrificing flavor. Plus, onions and garlic are cheap staples, so you’re basically getting gourmet for pennies. My wallet thanks me.
Step-by-step instructions for beef and pork patties
Here's how to make juicy, flavorful patties that combine the best of beef and pork.
👨🍳 Step 1: Combine and Season the Meat Mixture
In a large mixing bowl, gently combine the 1.5 lb ground beef (80% lean) and 0.5 lb ground pork (80% lean). I always use my hands for this—it helps distribute the fats evenly and prevents overworking the meat. Avoid squeezing too tightly or you'll end up with dense patties.
Add the finely chopped yellow onion and minced garlic cloves to the meat mixture. Sprinkle over the 1.5 tsp kosher salt and 1 tsp freshly ground black pepper, then pour in the 1 tbsp Worcestershire sauce. Mix everything together carefully, just until the ingredients come together—don't overmix or your patties will be tough.
🍳 Step 2: Form and Chill the Patties
Divide the meat mixture into 4 equal portions (about 5 ounces each for perfect-sized patties). Gently shape each portion into a ½-inch thick patty, being careful not to press too hard. I like to make them slightly larger than the buns since they'll shrink as they cook.
Place the formed patties on a plate and refrigerate for at least 20 minutes (up to 30 minutes). This chilling step is crucial—it helps the patties hold their shape better when cooking and prevents them from spreading too much in the pan. While they chill, prepare your cooking surface.
🔥 Step 3: Cook the Patties to Perfect Doneness
Heat a large skillet over medium-high heat and add the 1 tbsp extra-virgin olive oil. Once the oil is shimmering (about 1 minute), carefully place the chilled patties in the pan. Cook for 4-5 minutes per side until they reach an internal temperature of 160°F—you'll see golden brown crusts forming and the edges starting to crisp.
About 1 minute before the patties are done, sprinkle 2 tbsp all-purpose flour evenly over the top of each patty. This creates a delicious crust and helps absorb any juices. Watch them closely—they should be juicy inside with crispy edges when ready to serve.
🥘 Step 4: Assemble the Patties with Cheese and Mustard
Lightly toast the 4 whole hamburger buns if you prefer, then spread ½ tbsp yellow mustard on the bottom half of each bun. Place a cooked patty on each bottom bun, then top with 1 slice American cheese. Press down gently to melt the cheese slightly.
Top with the remaining bun halves and serve immediately. Garnish with chopped fresh parsley if using. The cheese should be warm and gooey, and the mustard adds that perfect tangy contrast to the rich meat mixture.
Pro Tips For Making Beef And Pork Patty
- Mix the Meat Now: Don’t wait until the last minute to combine beef and pork—let the fats redistribute for 10 minutes before shaping. I used to skip this, and my patties always felt dense and greasy; now they’re juicy and cohesive. Use your hands (warm them first) to gently fold the meat, not chop it.
- Salt the Onion First: Toss finely diced yellow onion with ½ teaspoon kosher salt before cooking—it softens faster and adds depth without overpowering. I learned this the hard way after burning raw onion chunks in my first batch. (Yes, it’s weird, but it works.)
- Press Patties Flat: Use your palm to press patties to ¾-inch thickness before cooking—even pressure = even cooking. I resisted this for years (it’s not pretty), but it guarantees a perfect medium doneness without drying out the edges. A ruler helps if you’re stubborn like me.
- Finish Under Foil: For the last 2 minutes of cooking, tent patties loosely with foil to carry over juices. I was skeptical until I tried it—now my patties stay moist while the crust stays crisp. Skip this, and you’ll end up with dry, sad meat.
Essential equipment for this recipe
Skillet Essentials
For perfect searing, I swear by a 10-inch cast iron skillet—it retains heat like a dream and gives you that classic crust. My go-to is a Lodge Pre-Seasoned Cast Iron Skillet because it’s pre-seasoned and ready to use right out of the box. If you don’t have cast iron, a stainless steel skillet like the All-Clad Stainless works too, but it won’t brown as beautifully. For high-volume cooking, a griddle (like the Cuisinart Chef’s Classic) is a game-changer—it gives you even heat distribution for multiple patties at once. 🔥
Meat Handling Tools
You’ll need a sharp meat mallet (I use the Victorinox 10-inch) to break up any large fat chunks in the meat if they’re present. A meat thermometer is non-negotiable—I recommend the Thermoworks Smoke for accuracy. For portioning, a food scale (like the OXO Good Grips) ensures your patties are uniform in size. And trust me, a pair of latex gloves makes handling raw meat much more hygienic, especially when you’re shaping multiple patties. 💪
Optional Upgrades
If you’re feeling fancy, a meat grinder (like the Weston Pro 20) lets you control the texture and fat distribution better than store-bought ground meat. For crispier patties, I sometimes use a wire cooling rack to drain excess fat after cooking. And if you’re grilling instead of pan-frying, a grill press (like the Weber Grill Press) flattens patties perfectly for even cooking. These aren’t must-haves, but they’re worth the investment if you’re making patties often. ✨
Prep and Storage Gear
Keep your patties fresh with a vacuum sealer (like the FoodSaver FM2000) for longer storage. For chilling, a large baking sheet lined with parchment paper works better than a plate—it prevents sticking. And if you’re prepping ahead, quart-sized freezer bags (like the Ziploc Freezer Gallon) are perfect for freezing raw patties. A microplane (like the OXO Good Grips) is also handy for quickly grating garlic and onions. 💫
Serving Essentials
For assembly, a small offset spatula helps slide patties onto buns without tearing them. Toast your buns in a toaster oven (like the Cuisinart TOA-60) for even browning. If you’re adding cheese, a butter knife works best for spreading mustard neatly. And for garnishing, a pair of kitchen shears makes quick work of chopping fresh parsley. These little tools make all the difference in presentation. 🍽️
Nutrition facts
Frequently asked questions
Why mix beef and pork in patties instead of using just one?
The pork adds natural juiciness and fat that keeps the patties tender, while the beef provides structure and classic beefy flavor. This 70/30 ratio creates a perfect balance—more beef than pork prevents greasiness, while the pork prevents dryness. It's a technique I picked up during my apprenticeship that works especially well for grill-friendly patties.
Can I make these patties ahead of time?
Form the patties and refrigerate them uncovered on a tray for up to 24 hours before cooking. This actually improves flavor as the seasonings penetrate. For longer storage, freeze raw patties on a tray first (to prevent sticking), then transfer to a bag for 3 months. Thaw overnight in the fridge before cooking. The key is never to refreeze thawed patties.
What's the best way to keep patties from sticking?
Use medium-high heat and a well-seasoned skillet—cast iron is ideal. Add 1 tbsp olive oil and let it get hot before adding patties. For extra insurance, chill patties for 20-30 minutes before cooking, and avoid pressing them while they cook. If they stick slightly, use a thin metal spatula to gently lift them. Never move them too soon—they need 4-5 minutes per side for that perfect crust.
Can I substitute ground turkey or chicken?
You can try, but the texture and flavor will differ significantly. Pork and beef have more fat and connective tissue that creates juiciness. If substituting, use 85% lean ground turkey or chicken and add 1 extra tbsp olive oil to compensate for lost fat. The patties will be leaner and may benefit from a 5-minute rest after cooking to redistribute juices.
How do I fix patties that spread too much?
This usually happens when patties aren't chilled enough or the meat is too warm. For next time, refrigerate shaped patties for 30 minutes before cooking. If it happens during cooking, use a small plate to gently press them back into shape while they cook. Also ensure you're using 5-ounce portions—smaller portions shrink less. The flour sprinkle at the end helps create a better crust that holds shape better.