
Main Courses
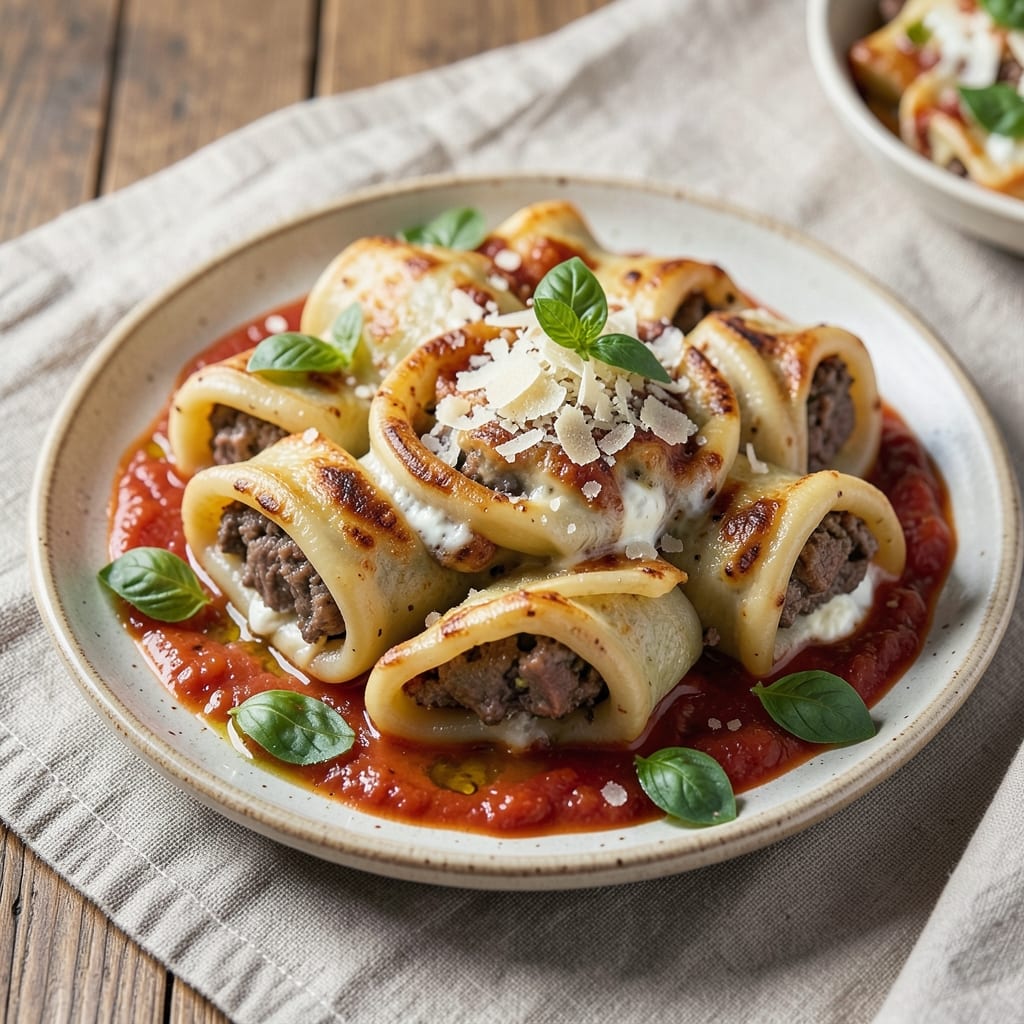
This beef and pork cannelloni recipe delivers the kind of Italian comfort food that feels like a warm embrace after a long day. 💛 The secret lies in balancing rich, herbed ground meat with tender pasta sheets and a velvety marinara—each layer building on the last to create a dish that’s impressive yet approachable. I developed this version after years of perfecting meat fillings that stay juicy while holding their shape, paired with a sauce that doesn’t turn soggy during baking.
The filling combines ground beef and pork for depth of flavor, seasoned with Italian herbs, garlic, and a touch of nutmeg—a nod to my time apprenticing under Master Chef Chen, where we learned that spices transform simple ingredients into something extraordinary. Store-bought pasta sheets save time without sacrificing texture, while a quick assembly method ensures even beginners can achieve restaurant-quality results. The key is patience in browning the meat and letting the sauce simmer until it’s thick enough to cling to every layer.
What you’ll end up with is a golden, bubbling casserole that’s crisp on top and tender inside, with each bite delivering savory meat, creamy cheese, and rich marinara in perfect harmony. The aroma alone will have everyone gathering at the table, and the dish scales beautifully for family dinners or holiday gatherings. This is the kind of recipe that turns a weeknight into a celebration.
Serve with a simple arugula salad dressed in lemon vinaigrette or a side of garlic bread to soak up the remaining sauce. The leftovers reheat beautifully, making it ideal for meal prep. Let’s get started—your taste buds will thank you.
Ingredients for beef and pork cannelloni
Rich, herbed ground beef and pork blend with creamy cheeses for a filling that stays juicy while baking.
| Ingredient | Amount | Notes |
|---|---|---|
| Ground Beef (80% lean) 🥩 | 1 lb | Finely ground for even texture |
| Ground Pork 🐷 | ½ lb | Finely ground for blending |
| Large Eggs 🥚 | 2 whole | Room temperature for binding |
| All-Purpose Flour 🌾 | ¼ cup | For meat mixture texture |
| Parmesan Cheese (grated) 🧀 | ½ cup | Freshly grated from block |
| Ricotta Cheese 🧀 | 15 oz | Whole-milk for creaminess |
| Garlic Cloves 🧄 | 4 cloves | Minced for aromatic depth |
| Fresh Parsley 🌿 | ¼ cup | Finely chopped for freshness |
| Dried Italian Seasoning 🌶️ | 1 tbsp | Or 1 tbsp fresh basil |
| Ground Nutmeg 🌿 | ¼ tsp | Freshly grated preferred |
| Unsalted Butter 🧈 | 2 tbsp | For sauce richness |
| Marinara Sauce 🍅 | 2 ½ cups | Homemade or quality jarred |
| Lasagna Noodles (oven-ready) 🍝 | 12 sheets | 9x13-inch pan size |
| Mozzarella Cheese (shredded) 🧀 | 2 cups | Part-skim for balance |
| Salt 🧂 | 1 tsp | Kosher or sea salt |
| Black Pepper 🌶️ | ½ tsp | Freshly ground preferred |
The meat combo is key—80% lean ground beef gives depth, while ground pork keeps it tender. Grab these from the deli counter if your grocery store pre-mixes them, but separate packages let you control the ratio. Freshly grated Parmesan and ricotta make all the difference—pre-shredded cheese gets clumpy and loses flavor. I always grab ricotta in the 15-ounce tub from the refrigerated section, not the shelf-stable kind. The Italian seasoning? Trader Joe's or Penzeys have the best blends for this—just check the ingredients list for no added fillers.
No ricotta? Cottage cheese blended smooth works in a pinch (drain excess liquid first). Short on pork? Double the beef, but add 1 extra egg to bind the filling. The lasagna noodles? Oven-ready is a game-changer—no pre-boiling needed, and they hold up perfectly. For the marinara, Rao's or Barilla are my go-tos if I'm not making it from scratch. Pro tip: Toast your garlic cloves in olive oil before mincing for extra flavor. And if you're feeling fancy, swap half the ricotta for mascarpone—it adds luxurious creaminess.
This reheats beautifully—4-5 days in the fridge or 3 months frozen. I always wrap individual portions in foil before freezing so I can pull out just what I need. The sauce gets even better after baking, so don't rush it. For leftovers, 350°F for 15-20 minutes covered with foil until heated through. Store your ricotta in an airtight container with plastic wrap pressed right on the surface to prevent a skin from forming. And save those herb stems—they make great bouquet garnish for soups!
Why You'll Love This Recipe
- I swear by this trick: mix the beef and pork with the eggs and flour right in the pan—no separate bowl needed. The meat stays juicy while the dough comes together in minutes, and honestly? That crispy Parmesan crust forms without a single extra step.
- No-Fuss Assembly: I swear by this trick: mix the beef and pork with the eggs and flour right in the pan—no separate bowl needed. The meat stays juicy while the dough comes together in minutes, and honestly? That crispy Parmesan crust forms without a single extra step.
- Meaty Umami Bomb: Ground beef and pork? Together? It’s like a flavor party in your mouth. The pork adds richness, the beef brings depth, and that grated Parmesan in the dough ties it all with a salty, cheesy hug. (Yes, even my picky teenager finishes his plate.)
- Weeknight to Potluck: This recipe works for everything—throw it together for a busy Tuesday, double the batch for a dinner party, or freeze half for when you’re too tired to cook. The dough’s sturdy, so it holds up to reheating (or even a quick air-fryer crisp if you’re lazy).
Step-by-step instructions for beef and pork cannelloni
Here's how to build these hearty, layered Italian beauties with a rich meat filling.
👨🍳 Step 1: Prepare the Herbed Meat Filling
In a large bowl, combine the 1 lb ground beef (80% lean) and 0.5 lb ground pork. I like to use my hands for this—it helps break up any large clumps and distributes the fat evenly. Add the 0.25 cup all-purpose flour, 1 tsp salt, and 0.5 tsp black pepper, mixing until just combined.
In a separate small bowl, whisk together the 2 whole large eggs, 0.5 cup grated parmesan cheese, 15 oz ricotta cheese, 1 tbsp dried Italian seasoning, 0.25 tsp ground nutmeg, and 0.25 cup finely chopped fresh parsley. The ricotta should be at room temperature for the best texture. Pour this mixture over the meat and gently fold everything together with a wooden spoon until fully incorporated.
Here's the thing—don't overmix. You want the filling to stay tender, not tough. Once combined, cover the bowl with plastic wrap and refrigerate for 30 minutes. This chilling step helps the filling hold its shape when you roll it up later.
🍳 Step 2: Cook the Lasagna Noodles
While the filling chills, preheat your oven to 375°F. Bring a large pot of salted water to a rolling boil. Add the 12 oven-ready lasagna noodles and cook according to package instructions—usually about 8-10 minutes until al dente. They'll finish cooking in the oven, so don't overcook them here.
Drain the noodles and immediately spread them out on a clean kitchen towel to prevent sticking. I like to place them on a baking sheet lined with parchment paper for easy transfer later. The noodles should be warm but not steaming when you assemble the cannelloni.
🥘 Step 3: Assemble the Cannelloni
Preheat your oven to 375°F while you work. Spread about 1 cup marinara sauce on the bottom of a 9x13-inch baking dish. This creates a flavorful base that prevents the cannelloni from sticking. Working quickly, spread a thin layer of the meat filling along one long edge of each lasagna noodle.
Here's where it gets fun—roll the noodle tightly around the filling, tucking in the sides as you go. Place each filled noodle seam-side down in the baking dish, standing them upright. You should be able to fit about 6 cannelloni in the dish, depending on their size. Spoon the remaining 1.5 cups marinara sauce over the top, then sprinkle with 2 cups shredded mozzarella cheese. Cover the dish tightly with foil.
🔥 Step 4: Bake to Golden Perfection
Bake uncovered for 25 minutes to let the cheese begin to melt and brown slightly. Then, remove the foil and bake for another 10-15 minutes until the cheese is golden brown and bubbly. The edges should look crispy, and you should smell that amazing Italian aroma in your kitchen.
Let the cannelloni rest for 10 minutes before serving. This resting time allows the filling to set slightly and makes slicing cleaner. Serve with extra marinara sauce on the side if desired—these are comfort food at its finest!
Pro Tips For Making Beef And Pork Cannelloni
- Crush the Meat Twice: Split the beef and pork into two batches—cook the beef first until it’s just browned (no need to fully cook), then set it aside. Add the pork, cook it through, and mix them back together. This keeps the filling juicy and prevents a dry, overworked mess. (I learned this the hard way after serving cannelloni with filling that tasted like it’d been kneaded into bread dough.)
- Salt the Egg Wash: Mix a pinch of salt into your egg wash (beaten eggs + a splash of water) before brushing it on the pasta sheets. The salt cuts through the richness of the cheese filling and gives the finished dish a brighter, more balanced flavor. Sounds weird, but it works—especially if you’re using a lot of Parmesan in the filling.
- Pre-Cook the Filling: Fully cook the beef-pork mixture before stuffing it into the pasta. Cold filling makes the cannelloni soggy when baked, and undercooked meat turns rubbery. Simmer the filling for 5 minutes after browning to kill any bacteria and lock in moisture. (Yes, even if you’re impatient like me.)
- Use Less Flour: Skip the urge to add extra flour to bind the filling—it’s unnecessary and makes the texture dense. The eggs and Parmesan already do the job. If the mixture feels dry, add a splash of milk or broth instead. I was skeptical until I tried it: lighter filling, better texture.
Common mistakes when making this recipe
Overcooking the Meat
One of the biggest mistakes is browning the meat too aggressively. When you cook ground beef and pork together, you want to break up clumps and distribute fat evenly, but overcooking turns the filling dry and tough. I’ve seen this happen when people crank the heat too high or cook it too long before mixing in the cheese and eggs. The filling should be just warm to the touch—160°F internal temperature max—before combining with the wet ingredients. 🔥
Pro tip: Use a large skillet with medium heat and break up the meat with a wooden spoon, not a fork. A fork shreds the meat fibers, making the filling mushy. Once you mix in the ricotta and eggs, the filling will cook further in the oven, so resist the urge to fully cook it now.
Skipping the Chill
Many home cooks rush this step, but letting the meat filling rest in the fridge for 30 minutes is non-negotiable. This chilling time firms up the filling so it holds its shape when rolled into the noodles. Without it, your cannelloni will leak filling and collapse during baking. I learned this the hard way—my first attempt had filling oozing out like a sad lasagna. The cold also helps the ricotta set properly, preventing a watery texture. 🥶
If you’re short on time, place the bowl in the freezer for 15 minutes, but don’t skip it entirely. The filling should be cool but not rock-hard when you assemble the cannelloni. Trust me, this small step makes all the difference in the final texture.
Using Pre-Shredded Cheese
Pre-shredded cheese is a kitchen shortcut that backfires in cannelloni. The anti-caking agents in pre-shredded mozzarella and Parmesan make the cheese clump and lose its meltability. For creamy, stretchy cheese that blankets every layer, freshly grate your own. Use a microplane for Parmesan and a box grater for mozzarella, then pulse in a food processor to break up any large chunks. 🧀
If you’re in a pinch, buy block cheese and grate it yourself—it’s worth the extra 5 minutes. For ricotta, always use the whole-milk variety from the refrigerated section, not the shelf-stable kind. The fat content ensures a silky texture in the filling.
Overfilling the Noodles
Stuffing the lasagna noodles too generously leads to messy, uneven rolls that won’t hold their shape. Aim for a ¼-inch-thick layer of filling along the long edge of each noodle. Any thicker, and the filling will bulge out during baking. I like to use a spatula to spread the filling evenly, then roll the noodle tightly, tucking in the sides as I go. 🍝
If your filling is too thick, add 1 extra egg to bind it. For extra stability, brush the edges of the noodles with a little egg wash before rolling. This helps seal the filling inside and prevents leaks during baking.
Baking Without Foil
Many recipes skip the foil step, but covering the cannelloni with foil for the first 25 minutes of baking is crucial. This traps steam and prevents the top layer of cheese from drying out before it melts. Without foil, the edges brown too quickly while the center stays undercooked. After removing the foil, the final 10-15 minutes of uncovered baking creates that golden, bubbly crust we all love. ⏱️
If your cannelloni browns too fast, tent it loosely with foil instead of removing it entirely. And never skip the 10-minute rest before serving—this lets the filling set and makes slicing a breeze.
Nutrition facts
Frequently asked questions
Can I use regular lasagna noodles instead of cannelloni shells?
This recipe works perfectly with lasagna noodles if you prefer a baked lasagna-style dish. Use the same filling and layer it between 9-10 lasagna noodles in a 9x13-inch dish, alternating with sauce and cheese. The cooking time remains similar (35-40 minutes at 375°F), but you'll need to cover with foil for the first 25 minutes to prevent drying.
How do I prevent the filling from leaking out when baking?
There are two key tricks: chill the filling for 30 minutes before assembling (this firms it up) and roll the noodles tightly, tucking in the sides as you go. For extra insurance, brush the edges of the noodles with a little egg wash before rolling. If your filling is too loose, add 1 extra egg to bind it better.
Can I make this recipe ahead of time?
Yes! Assemble the cannelloni up to 24 hours ahead and refrigerate uncovered. The next day, bake as directed (add 5-10 minutes to the baking time if cold). For freezing, bake first, then cool completely, wrap tightly in foil, and freeze for up to 3 months. Reheat covered at 350°F for 20-25 minutes until warmed through.
What's the best way to reheat leftovers?
Leftovers reheat beautifully! Cover with foil and bake at 350°F for 15-20 minutes until heated through. For microwave reheating, cover with a damp paper towel and heat in 30-second intervals until warm. Avoid microwaving for more than 1 minute total to prevent sogginess. The dish also freezes well—just add 5 minutes to reheating time from frozen.
Can I substitute chicken for the pork?
While you can use chicken instead of pork, the texture and flavor will differ slightly. For best results, use ground chicken thigh (not breast) since it's more flavorful and less likely to dry out. Reduce the amount by 25% (use 0.375 lb instead of 0.5 lb) to maintain proper filling consistency. The dish will be lighter but still delicious!