
Soups & Stews
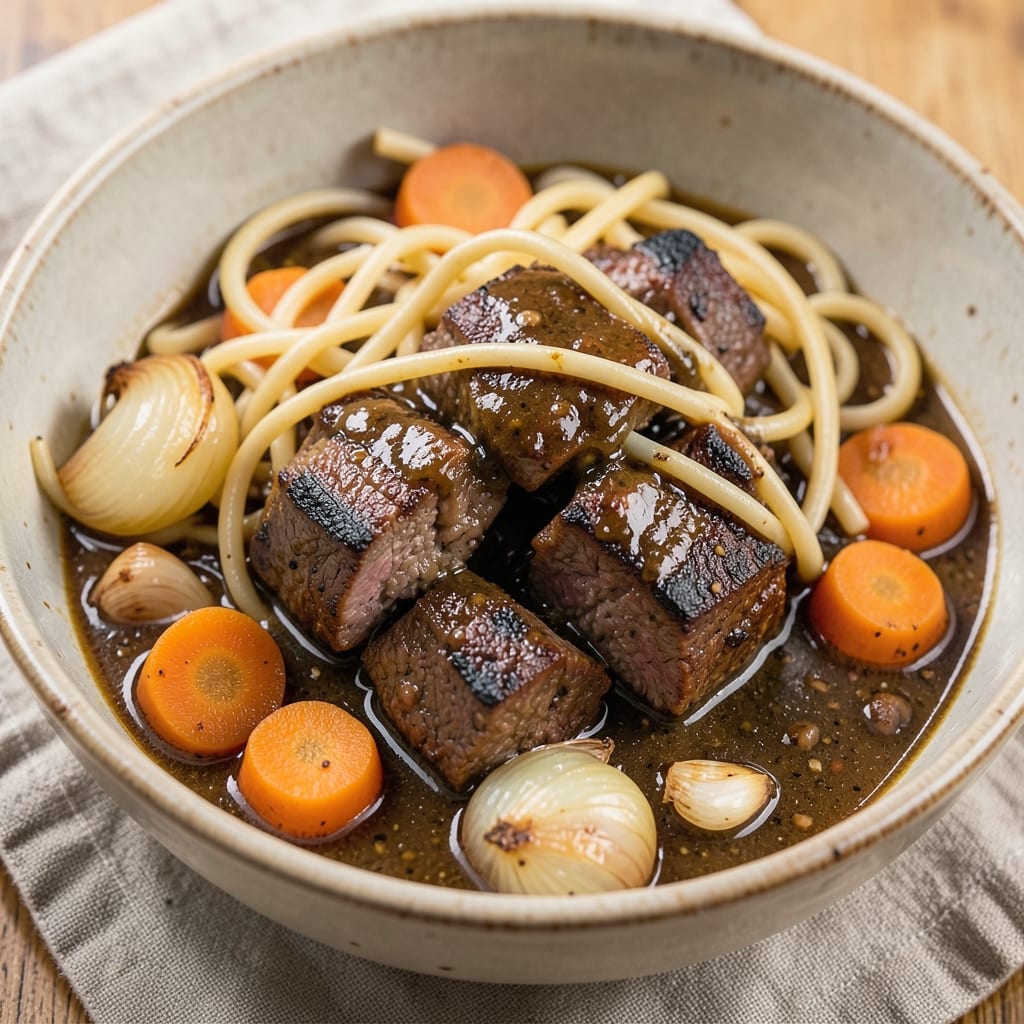
This beef and noodles brown gravy recipe transforms tough cuts into melt-in-your-mouth perfection through slow braising—a technique that builds rich, caramelized depth in every bite. The key lies in properly browning the beef and reducing the gravy until it reaches that velvety, cling-worthy consistency that makes this dish a comfort food staple. I’ve perfected this method over years of testing, ensuring the beef stays tender while the gravy achieves that signature silky thickness that coats noodles beautifully.
What sets this recipe apart is the balance of technique and simplicity. You’ll start with a high-heat sear to develop deep flavor in the beef, then slow-cook it until fork-tender. The brown gravy isn’t just a sauce—it’s the heart of the dish, made by deglazing the pan with beef broth and reducing it until it thickens to a luxurious, almost glossy finish. This isn’t just a meal; it’s a flavor experience that turns a simple pot of noodles into something restaurant-worthy.
The result is a dish where every spoonful delivers layers of savory richness: tender beef that falls apart at the touch of a fork, perfectly al dente noodles, and gravy so velvety it clings to each strand. The aroma alone—smoky, meaty, and deeply comforting—will have your kitchen (and dinner guests) buzzing with anticipation. This is the kind of recipe that becomes a weekly tradition once you master it.
Ready in about 2 hours (with minimal hands-on time), this dish is ideal for chilly evenings when you crave something hearty yet satisfying. The slow cooking process means you can prep ahead and let the flavors develop while you attend to other tasks. Serve with crusty bread to soak up every last drop of that rich gravy—because in this dish, nothing goes to waste.
Ingredients for beef and noodles brown gravy
Pantry staples meet slow-cooked magic for this beef and noodles masterpiece.
| Ingredient | Amount | Notes |
|---|---|---|
| Chuck Roast Beef 🥩 | 2 lb | Cubed into 1-inch pieces |
| Egg Noodles 🍜 | 12 oz | Medium egg noodles, uncooked |
| Yellow Onion 🧅 | 1 whole | Large, sliced into half-moons |
| Carrots 🥕 | 3 whole | Medium, cut into chunks |
| Garlic Cloves 🧄 | 6 cloves | Minced, for depth |
| Beef Broth 💧 | 4 cups | Low-sodium preferred |
| Tomato Paste 🍅 | 2 tbsp | For richness, not sweetness |
| All-Purpose Flour 🌾 | 2 tbsp | For thickening gravy |
| Dry Red Wine 🍷 | 1 cup | Bold, like Cabernet |
| Worcestershire Sauce 🧂 | 1 tbsp | For umami punch |
| Bay Leaves 🍃 | 2 whole | For aromatic depth |
| Black Peppercorns 🌶️ | 1 tsp | Coarsely cracked |
| Salt 🧂 | 1 ½ tsp | Kosher or sea salt |
| Olive Oil 🫒 | 2 tbsp | For searing beef |
| Fresh Thyme 🌿 | 2 sprigs | Stems removed |
The beef is everything here—chuck roast is your best bet for that melt-in-your-mouth texture. Costco or local butchers usually have it pre-cubed, which saves time, but if you're buying a whole roast, ask for the chuck section. Look for pieces with good marbling—the fat renders down and keeps the meat juicy. I always grab extra because it's a crowd-pleaser. For the noodles, barley or egg noodles work best—they hold up to the gravy without getting mushy. If you can't find egg noodles, regular pasta in a pinch, but it won't be the same.
No red wine? Substitute with beef broth and a splash of balsamic vinegar—it adds that same tangy depth. Fresh thyme is ideal, but dried works at one-third the amount. The tomato paste can be skipped if you're avoiding sweetness, but trust me, it rounds out the flavors beautifully. For the flour, all-purpose is fine, but if you've got cornstarch, use half flour and half cornstarch for a glossier gravy. The Worcestershire sauce is non-negotiable—it's the secret to that restaurant-quality umami. If you're out, soy sauce or fish sauce can substitute, but it won't be identical.
This dish tastes even better the next day—honestly, the flavors meld into something magical. Store leftovers in the fridge for 4-5 days or freeze for 3 months. I always make a double batch because it reheats so well. For the gravy, if it gets too thick when reheating, just add a splash of beef broth. The noodles? Cook them fresh when serving—none of that sad, soggy reheated pasta. If you're prepping ahead, cook the noodles separately and add them to the beef and gravy just before serving.
Why You'll Love This Recipe
- One-Pot Magic: I swear by this recipe when I’m too tired to scrub a million dishes—just brown the chuck roast, toss in onions and carrots, let it simmer, then dump in the noodles. The gravy thickens right in the pot, so you’re left with one pan, one spatula, and zero guilt.
- Deep Umami Bomb: That slow-cooked chuck roast? It turns tender and rich, while the onions caramelize into sweet, melty pockets. The garlic cloves sizzle just enough to add a punch without overpowering—every bite is savory, hearty, and ridiculously satisfying.
- Leftovers That Beg for More: Between us, this dish only gets better the next day. The noodles soak up the gravy like a sponge, and the beef stays juicy even after reheating. I make a double batch on Sundays because it’s the only meal my picky teens won’t argue about.
- Budget Beef Stretch: A pound of chuck roast feeds four (or five if you’re hungry), and the carrots and onions bulk it up without breaking the bank. Honestly, it’s my go-to when I need a filling, cheap meal that doesn’t taste like I’m pinching pennies—just pure, comforting flavor.
Step-by-step instructions for beef and noodles brown gravy
Here's how to build rich, deep flavor from slow-braised beef and aromatic vegetables.
Sear the Beef for Maximum Flavor
Heat the 2 tablespoons olive oil in a large Dutch oven over medium-high heat until shimmering. Add the 2 lb chuck roast beef in batches, letting each piece sear undisturbed for 2-3 minutes until deeply browned on all sides. This step creates the flavor foundation - don't rush it, even if it takes 10-15 minutes total. The beef will release its juices and form a rich brown crust called the fond.
As each batch sears, remove the beef and set aside. You'll want to work in batches to avoid crowding the pan, which would steam the beef instead of searing it. I like to press down gently on the beef pieces during the first minute - this prevents them from curling and ensures even contact with the pan.
Build the Aromatic Base
Once all beef is browned, reduce heat to medium and add the 1 whole yellow onion and 3 whole carrots cut into chunks. Cook for 5-6 minutes, stirring occasionally, until the vegetables begin to soften and caramelize slightly. You'll notice the onions turn translucent and the carrots release their sweet juices.
Add the 6 cloves minced garlic, 2 sprigs fresh thyme, 2 whole bay leaves, and 1 teaspoon coarsely cracked black peppercorns. Stir for 30 seconds until fragrant - that garlic should smell amazing, not burnt. Here's where it gets fun: add the 2 tablespoons tomato paste and stir for another 1 minute to cook off the raw taste.
Deglaze and Simmer the Beef
Pour in the 1 cup dry red wine, scraping up all those browned bits from the bottom of the pan with a wooden spoon. Let it simmer for 3-4 minutes until reduced by half. You'll see the alcohol cook off and the wine concentrate into a rich, syrupy liquid. This is where the magic happens - those browned bits contain concentrated beef flavor.
Add the 4 cups beef broth and 1 tablespoon Worcestershire sauce, then return the beef to the pot. Bring to a gentle simmer, then reduce heat to low. Cover partially and let it cook for 1 hour 30 minutes or until the beef is fork-tender. The beef should be falling apart easily when pierced with a fork, and the liquid should have thickened noticeably.
Thicken the Gravy and Finish
Remove the beef from the pot and set aside. Skim off any excess fat from the surface of the liquid, leaving about 2 tablespoons for flavor. Sprinkle the 2 tablespoons all-purpose flour over the liquid and whisk vigorously to combine. Cook for 2-3 minutes until the flour is fully incorporated and the gravy begins to thicken.
Return the beef to the pot and stir to coat everything in the rich gravy. Season with 1.5 teaspoons salt, then taste and adjust if needed. The gravy should be thick enough to coat the back of a spoon but still flow freely. If it's too thick, whisk in 1-2 tablespoons of beef broth to reach your desired consistency.
Cook the Noodles and Assemble
In a separate pot, cook the 12 oz egg noodles according to package instructions until al dente - about 2 minutes less than the suggested time. Drain and set aside. The noodles should be tender but still have a slight bite to them.
To serve, divide the cooked noodles among bowls. Ladle the beef and gravy mixture over the top, making sure each serving gets plenty of that rich brown sauce. Garnish with additional fresh thyme if desired. The result should be tender beef swimming in a velvety brown gravy, perfectly coating each strand of egg noodle.
Pro Tips For Making Beef And Noodles Brown Gravy
- SEAR THE BEEF LONG ENOUGH: The chuck roast won’t brown properly if you rush it—aim for 5-7 minutes per side until deep golden crust forms. I used to flip too soon, ending up with pale, mushy beef that soaked up broth instead of adding rich flavor to the gravy.
- CHOP ONIONS AND CARROTS SMALL: Uniform ½-inch dice means even cooking and a smoother gravy texture. Larger chunks turn to mush and make the dish look uneven—no one wants to see a "surprise carrot" in their noodles.
- DEGLAZE WITH BROTH AND A SPLASH OF WINE: After browning the beef, don’t just splash water—use 1 cup beef broth plus 2 tablespoons red wine (or vinegar in a pinch). The acid cuts through the fond, pulling out layers of flavor that plain water misses.
- COOK NOODLES AL DENTE, THEN TOSS IN LATER: Boil noodles until just firm (1 minute less than package says), then drain and set aside. Adding them at the end keeps them from turning to mush in the simmering gravy—trust me, soggy noodles ruin the whole dish.
Serving suggestions for beef and noodles brown gravy
Classic Bowls
Serve this dish in deep, wide bowls to showcase the rich gravy and tender beef. I like using stoneware or ceramic bowls—they keep the food warm and elevate the presentation. Start by layering al dente egg noodles at the bottom, then add the beef and gravy mixture on top. The gravy should cascade over the noodles, creating a dramatic visual effect that makes the dish look restaurant-worthy. 🥣
Crusty Bread
No beef and noodles meal is complete without a side of crusty bread to soak up every last drop of that velvety gravy. I recommend a baguette or sourdough loaf, sliced and lightly toasted. The bread's texture contrasts beautifully with the tender beef and rich sauce, while its crust adds a satisfying crunch. Serve it on the side or tear pieces into the bowls for easy dipping. 🍞
Fresh Greens
To balance the richness, add a simple side of fresh greens like arugula or baby spinach. Toss them with a light lemon vinaigrette (just 1 tablespoon olive oil, 1 teaspoon lemon juice, and a pinch of salt) to cut through the heaviness of the dish. The bright acidity and crisp texture provide a refreshing contrast to the hearty beef and noodles. 🥗
Cheese Board
For a more interactive serving experience, set out a small cheese board with options like aged cheddar, gouda, or a sharp parmesan. These cheeses complement the beef's savory notes and add another layer of texture. Pair them with cured meats like prosciutto or salami for a well-rounded spread that keeps guests reaching for seconds. 🧀
Wine Pairings
A bold red wine like Cabernet Sauvignon or Malbec enhances the dish’s deep, meaty flavors. The tannins in these wines cut through the richness of the gravy, cleansing your palate between bites. For a lighter option, a Pinot Noir offers a smoother, fruitier contrast that still complements the beef beautifully. 🍷
Make-Ahead Tips
This dish tastes even better the next day, so prepare it ahead of time for a stress-free meal. Store the beef and gravy in an airtight container in the fridge for up to 4 days or freeze for 3 months. When ready to serve, simply reheat the beef and gravy on the stovetop, then cook the noodles fresh to keep them al dente. The flavors meld together overnight, creating a deeper, more complex dish. ⏳
Nutrition facts
Frequently asked questions
Why does the beef need to be seared before slow cooking?
The searing step creates a flavorful brown crust called the fond, which dissolves into the sauce during cooking. This adds deep, caramelized richness that you can't get from just simmering raw beef. The high heat also helps seal in juices, keeping the meat tender.
Can I use a different cut of beef instead of chuck roast?
For best results, stick with chuck roast or brisket—they're well-marbled cuts that stay tender during slow cooking. If you must substitute, try short ribs (trim excess fat) or even stew meat, but avoid lean cuts like sirloin as they'll dry out.
How do I fix gravy that's too thin or too thick?
For thin gravy, whisk in 1 tablespoon flour mixed with 1 tablespoon cold water (slurry) and simmer for 2 minutes. If it's too thick, thin with 1-2 tablespoons beef broth while stirring constantly. Remember, gravy should coat a spoon but still flow freely.
Can I make this dish in an Instant Pot or slow cooker?
Yes! For the Instant Pot, brown the beef first, then cook on high pressure for 30 minutes with all other ingredients. For a slow cooker, follow the same steps but cook on low for 6-8 hours. The cooking times adjust to account for pressure/slow heat, but the flavor principles stay the same.
What's the secret to perfectly al dente noodles?
Cook noodles 2 minutes less than package instructions, then drain immediately. The residual starch on the noodles helps them absorb the gravy better. For extra flavor, reserve 1/2 cup pasta water before draining and add it to the gravy if needed.