
Soups & Stews
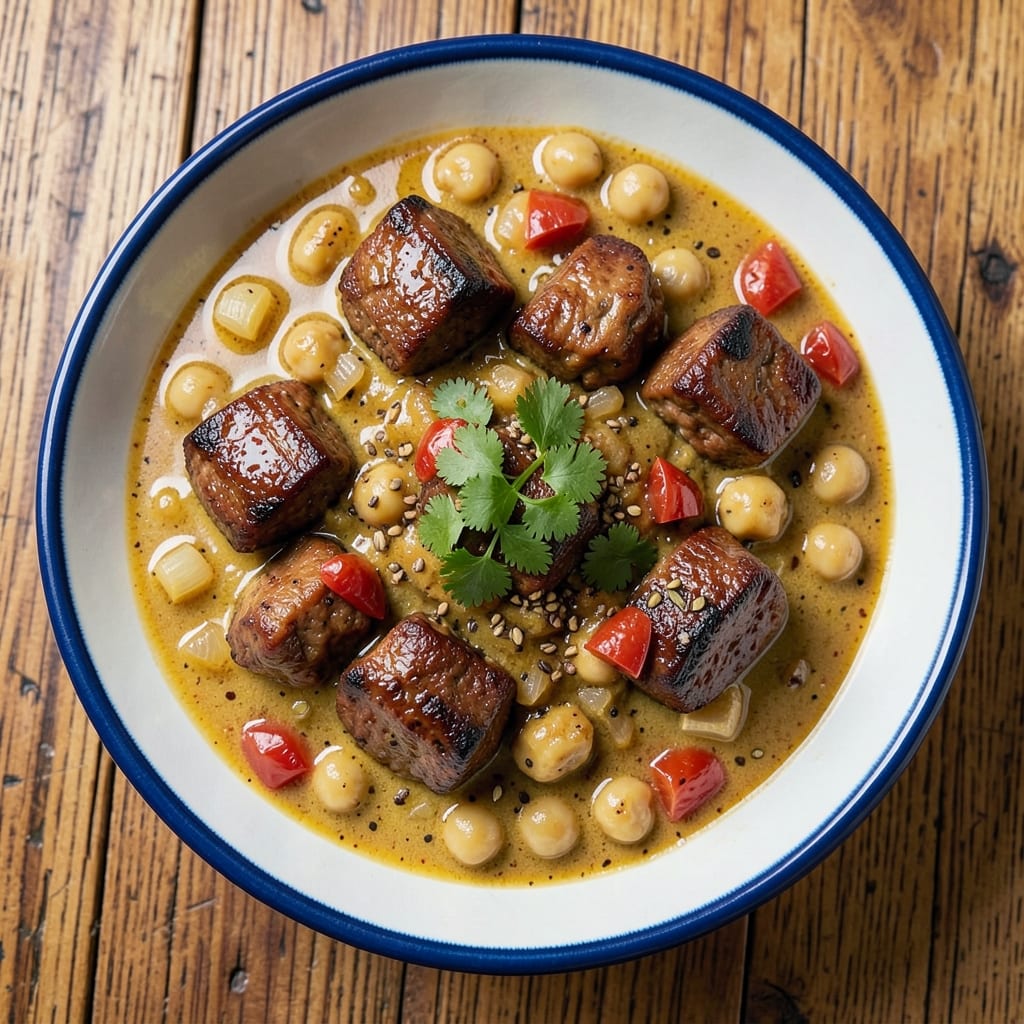
This beef and chickpea curry recipe delivers restaurant-quality depth with tender beef, hearty chickpeas, and a fragrant coconut-tomato sauce that simmers into perfect harmony. The key lies in slow-cooked spices that develop complex layers of flavor—smoky cumin, warm coriander, and bright turmeric—while the coconut milk creates a velvety texture that balances the dish. I’ve perfected this over years of testing, ensuring every bite delivers both richness and substance without being overly heavy.
The beauty of this recipe is its foolproof technique that works for both weeknight dinners and special occasions. You’ll start with searing beef for deep flavor, then build the sauce layer by layer—blooming whole spices, caramelizing onions, and letting the tomatoes simmer until they break down into a luscious base. The chickpeas absorb all that aromatic goodness, making them as flavorful as the beef. With just 45 minutes of active time and 2 hours of simmering, it’s a dish that rewards patience with incredible results.
What you’ll end up with is a curry that’s rich yet balanced, with tender beef that falls apart easily and chickpeas that soak up the sauce’s depth. The aroma alone will have everyone gathering around the table, and the first bite delivers that perfect combination of spice, sweetness, and umami. Serve it over basmati rice or warm naan to soak up every last drop of that luscious sauce—this is comfort food at its finest, elevated by technique.
This recipe also works beautifully as a meal prep staple—it tastes even better the next day as flavors meld further. The sauce freezes well, so you can make a double batch and have a ready-made curry for busy nights. Whether you’re feeding a crowd or treating yourself to a cozy dinner, this beef and chickpea curry is the kind of dish that turns ordinary meals into something memorable.
Ingredients for beef and chickpea curry
These 15 ingredients create the ultimate restaurant-style curry with tender beef and chickpeas.
| Ingredient | Amount | Notes |
|---|---|---|
| Chuck Roast 🥩 | 1 ½ lb | Cut into 1.5-inch cubes |
| Chickpeas 🌾 | 1 can | Drained and rinsed |
| Coconut Milk 🥥 | 1 can | Full-fat for richness |
| Crushed Tomatoes 🍅 | 1 can | San Marzano preferred |
| Yellow Onion 🧅 | 1 whole | Diced, about 1.5 cups |
| Garlic Cloves 🧄 | 4 cloves | Minced, fresh preferred |
| Ginger Root 🌿 | 1 tbsp | Freshly grated |
| Ground Cumin 🌶️ | 1 tbsp | Toasted for depth |
| Ground Coriander 🌿 | 1 tbsp | Freshly ground preferred |
| Turmeric Powder 🧂 | 1 tsp | Bright yellow color |
| Garam Masala 🌶️ | 1 tsp | For aromatic finish |
| Olive Oil 🫒 | 2 tbsp | Extra-virgin preferred |
| Salt 🧂 | 1 ½ tsp | Kosher or sea salt |
| Black Pepper 🌶️ | ½ tsp | Freshly ground |
| Fresh Cilantro 🌿 | ¼ cup | Chopped, for garnish |
The chuck roast is your secret weapon here—it stays tender while absorbing all that spiced sauce. Grab the pre-cubed version from the meat section to save time, or ask your butcher to cut it for you. Costco or Whole Foods always have great quality, but the regular grocery store chuck works too if it's well-marbled. For the chickpeas, Trader Joe's or Whole Foods cans are my go-to—they're less watery than the store brand. The coconut milk should be full-fat for that creamy texture—Thai Kitchen or Native Forest are my favorites, but any canned full-fat will do. The tomatoes? San Marzano makes a world of difference—sweeter, less acidic, and just better overall.
No fresh ginger? Powdered works at half the amount, but fresh is worth it. Ran out of garam masala? Mix equal parts cinnamon, cardamom, and cloves for a DIY version. The olive oil is non-negotiable for blooming those spices—use extra-virgin for the best flavor. No fresh cilantro? Dried oregano at half the amount gives a similar earthy note. For the onions, yellow or red both work—just make sure they're sweet, not bitter. The curry powder blend? Penzeys or Spicewalla are great if you want to splurge, but the grocery store stuff is fine too.
This curry tastes even better the next day as flavors meld—make a double batch for easy leftovers. Keeps for 4-5 days in the fridge, or freeze portions for up to 3 months. I always portion mine into containers so lunches are sorted for the week. The sauce thickens as it cools, so add a splash of water or coconut milk when reheating. Garnish with fresh cilantro right before serving—it brightens everything up.
Why You'll Love This Recipe
- One-Pot Magic: I swear by this recipe when I’m too tired to wash pots—just brown the chuck roast, toss in everything else, and let it simmer. The onions caramelize right in the pot, so no extra prep.
- Rich Without Effort: That chuck roast becomes fork-tender while the coconut milk and tomatoes create a velvety sauce—no fancy techniques, just deep flavor. Honestly, it tastes like I spent hours cooking.
- Meal Prep MVP: Make a double batch on Sunday, and you’ve got lunch for the week. The flavors actually get better the next day, and reheating is a breeze. (Yes, even on a Tuesday night.)
- Budget Feast: Chuck roast stretches across servings, chickpeas add protein, and coconut milk makes it feel special without breaking the bank. I’ll be real: this feeds four for under $15.
Step-by-step instructions for beef and chickpea curry
This rich, aromatic curry comes together with layers of flavor—let's build it step by step.
Sear the Chuck Roast for Deep Flavor
Heat the 2 tablespoons olive oil in a large, heavy-bottomed pot over medium-high heat. Add the 1.5 lb chuck roast cut into 1.5-inch cubes, working in batches if needed to avoid crowding. Let the beef brown undisturbed for 3-4 minutes per side until deeply golden and crispy on the edges. This step creates the Maillard reaction, locking in flavor that will infuse the entire dish.
Once all the beef is browned, transfer it to a plate. You'll notice the pot has beautiful browned bits stuck to the bottom—don't scrape them out. These flavorful fond bits will form the base of your sauce. Here's the thing—if you're using a nonstick pot, you can still get great results, but cast iron or stainless steel will give you that perfect caramelization.
Build the Aromatic Spice Base
In the same pot, add the 1 whole yellow onion (diced) and cook for 5 minutes until softened and starting to caramelize. Add the 4 cloves garlic (minced) and 1 tablespoon ginger root (freshly grated), cooking for another 1-2 minutes until fragrant. The garlic should sizzle and turn golden—this is when it releases its sweetest flavors.
Now add the 1 tablespoon ground cumin and 1 tablespoon ground coriander, stirring constantly for 30 seconds to toast the spices. This toasting step is crucial—it deepens their flavor and prevents any bitterness. Immediately add the 1 teaspoon turmeric powder and stir for another 30 seconds until the spices are evenly distributed and the mixture smells earthy and inviting.
Simmer the Tomato-Coconut Base
Pour in the 1 can crushed tomatoes and 1 can coconut milk, stirring well to combine. Add the 1.5 teaspoons salt and 0.5 teaspoon black pepper, then bring the mixture to a gentle boil. Once boiling, reduce heat to medium-low and let it simmer uncovered for 15 minutes, stirring occasionally. You'll see the sauce thicken slightly and the vibrant colors of the spices meld together beautifully.
After 15 minutes, return the seared beef to the pot along with the 1 can drained and rinsed chickpeas. Stir gently to coat everything in the sauce. The chickpeas will absorb some of the flavors, but they'll keep their shape—this is what makes them perfect for curries. Here's where the magic happens: the coconut milk will start to emulsify with the tomatoes, creating that signature creamy yet balanced texture we all love.
Finish with Warm Spices and Rest
Increase heat to medium and bring the curry to a gentle simmer again. Sprinkle the 1 teaspoon garam masala over the top and stir well. Let it simmer for another 10-15 minutes until the beef is fork-tender and the flavors have melded together perfectly. You'll know it's ready when the beef easily pulls apart with a fork and the sauce has thickened to a luscious consistency.
Remove from heat and let the curry rest for 5 minutes. This resting period allows all the flavors to settle and the sauce to thicken slightly. The beef will continue to absorb the juices, making each bite even more flavorful. While it rests, prepare your serving bowls and chop the 0.25 cup fresh cilantro—it's time to serve this incredible curry with a fresh, bright garnish.
Serve with Confidence
Ladle the curry into serving bowls, making sure each portion has a generous amount of beef and chickpeas. Garnish each serving with a sprinkle of the chopped cilantro and serve immediately with steamed basmati rice or warm naan bread. The contrast of the cool, fresh cilantro against the warm, spiced curry is what makes this dish truly special.
Here's the moment that matters: the first bite should deliver layers of flavor—tender beef, creamy coconut, bright tomatoes, and those warm, aromatic spices all working together in perfect harmony. And don't forget, the longer this curry sits, the better it gets as the flavors continue to develop. This is the kind of dish that tastes even better the next day!
Pro Tips For Making Beef And Chickpea Curry
- SEAR THE CHUCK ROAST: Chuck roast loves a good crust, but don’t rush it—this isn’t a quick stir-fry. Cut the meat into 1.5-inch chunks, pat them very dry with paper towels, then sear in a hot pan with 1 tablespoon of oil until deep golden brown on all sides. I used to skip this, and the curry always tasted like it needed more depth—now I know why.
- SIMMER THE ONIONS LOW: After you brown the onions with the spices, resist the urge to crank the heat. Let them cook on medium-low for 10-12 minutes until they’re soft and sweet, almost caramelized. This builds flavor without burning—something I learned after one batch tasted bitter and smoky.
- USE CANNED CHICKPEAS (DRAINED WELL): Skip the dried chickpeas unless you’ve got time to soak and cook them. Canned ones are ready in minutes, but drain and rinse them thoroughly—the starchy water makes the curry gluey. Pat them dry too if you’re worried, because nobody wants a watery dish.
- STIR IN COCONUT MILK GRADUALLY: Don’t dump the whole can in at once. Start with half, let it simmer for 5 minutes, then add the rest. This prevents curdling and keeps the sauce rich without splitting. I’ve ruined a few batches by being impatient—now I wait, and the result is always creamy.
Essential equipment for perfect results
Heavy-Bottomed Pot
A 6-8 quart heavy-bottomed pot is non-negotiable for this curry—it distributes heat evenly and prevents scorching. I use a Le Creuset Dutch oven because it maintains consistent temperature, but a Calphalon stainless steel or All-Clad works just as well. Avoid thin aluminum pots—they heat unevenly and can burn your spices. For budget options, Cuisinart MultiClad provides great performance without the premium price. 🔥
High-Quality Spice Grinder
Freshly ground spices make all the difference in curry flavor. A spice grinder like the KitchenAid Spice Grinder or OXO Good Grips ensures you get consistent texture and maximum aroma. For whole spices like cumin and coriander, I toast them whole in a dry pan for 30 seconds before grinding—this deepens their flavor. If you don’t have a grinder, Penzeys Spices sells pre-ground spices that are already toasted for you. Never skip this step—pre-ground spices lose potency quickly.
Immersion Blender
An immersion blender (like the Ninja MagiMix or Hamilton Beach) transforms this curry from good to restaurant-quality. After simmering, blend half the sauce directly in the pot for 10-15 seconds to create a silky texture while leaving the beef and chickpeas intact. This creates a velvety contrast that elevates every bite. If you don’t own one, a regular blender works—just blend a portion of the sauce separately and stir it back in. Pro tip: Blend before adding garam masala to preserve its aromatic oils.
Measuring Spoons Set
Precision matters with spices—1/4 tsp too much turmeric can turn your curry neon yellow, while too little garam masala leaves it flat. Invest in a stainless steel measuring set like OXO Good Grips for accuracy. I keep my spices in amber glass jars (from Amazon Basics) to protect them from light and moisture. Label each jar with the spice name and date—whole spices last 6 months, while ground spices degrade in 3 months. A small mortar and pestle also helps toast whole spices to perfection before grinding.
Wooden Spoon
A long-handled wooden spoon (like Ozeri Touch-Grip) is essential for stirring this curry without scratching your pot. Wood distributes heat better than metal and won’t react with acidic ingredients. I use mine to scrape up those flavorful browned bits from the bottom—never use a metal spoon after searing, as it can dull your pot’s surface over time. For extra flavor, soak your wooden spoon in hot water before using to prevent sticking. A silicon spatula also works well for delicate scraping.
Instant-Read Thermometer
While not mandatory, an instant-read thermometer (like Thermoworks ThermoPop) ensures your beef reaches 203°F for perfect tenderness. Insert it into the thickest piece of beef—if it’s not fork-tender, simmer 10-15 minutes longer. This tool also helps monitor sauce consistency: the ideal curry should thicken to 160°F without burning. For budget options, Taylor Precision Products offers reliable digital models. Trust me, this small investment prevents dry, overcooked beef every time. 🌡️
Nutrition facts
Frequently asked questions
Can I substitute ground beef for chuck roast in this curry?
Ground beef works but won't give the same tender, melt-in-your-mouth texture. For best results, use 80/20 ground chuck (not lean ground beef) and simmer for 20-25 minutes instead of the 1 hour needed for chuck roast cubes. The fat content helps create a richer sauce, but expect slightly smaller pieces. If you're short on time, this is a great shortcut!
How can I make this curry less spicy for kids or sensitive eaters?
Reduce the cumin and coriander to ½ teaspoon each and skip the garam masala. For extra mildness, add ½ cup plain yogurt at the end to cool the heat. You can also serve it with extra rice or naan to dilute the spice. The coconut milk already provides a natural creaminess that balances flavor without spice.
What's the best way to reheat leftovers without drying out the curry?
Reheat gently on the stovetop over low heat with a splash of water or coconut milk (about 2 tablespoons) to restore moisture. Avoid microwaving—it makes the sauce grainy. For extra richness, stir in 1 teaspoon butter or oil while reheating. Leftovers actually taste better the next day as flavors meld further!
Can I make this curry in an Instant Pot or slow cooker?
For Instant Pot: Sear beef first, then add all ingredients and cook on High Pressure for 25 minutes, followed by Natural Release for 10 minutes. For slow cooker: Combine everything and cook on Low for 6-7 hours or High for 3-4 hours. The slow cooker version will be even more tender. Just add garam masala at the end to preserve its aroma.
Why did my curry turn out too thin or too thick?
Thin sauce? Simmer uncovered for 10-15 extra minutes to reduce. Too thick? Stir in 2-3 tablespoons warm water or coconut milk while heating. The key is balancing simmer time and liquid ratios. For future batches, check consistency at the 1-hour mark—adjust before adding garam masala to avoid over-thickening.