
Main Courses
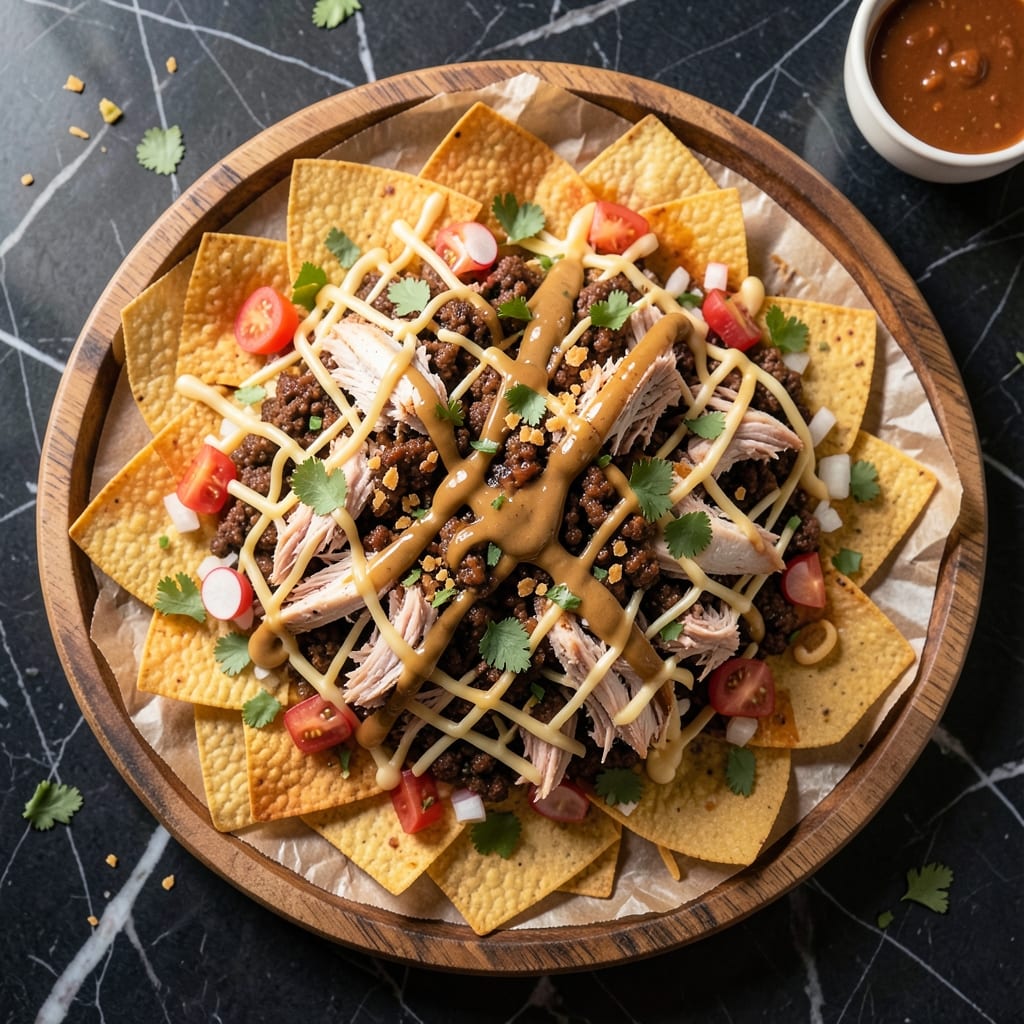
This beef and chicken nachos recipe delivers crispy tortilla stacks loaded with savory proteins and melty cheese layers that pull perfectly every time. The secret lies in layering ingredients strategically—starting with seasoned ground beef and shredded chicken, then building up with tortilla chips, cheese, and toppings that create texture contrast at every bite. What sets this apart is the technique for achieving that signature "cheese pull" without turning the chips soggy.
The foundation begins with properly seasoned proteins—juicy shredded chicken and flavorful ground beef—that form the heart of each nacho stack. Tortilla chips go in first, lightly salted to prevent sogginess, followed by a three-layer cheese blend that melts into a golden, stretchy blanket. The key is baking just until the cheese is bubbly but still firm enough to hold toppings, ensuring every chip stays crispy at the edges while the cheese pulls dramatically when you lift the tray.
By the time you're done, you'll have nachos that look as impressive as they taste—crispy tortilla edges, tender proteins, and that irresistible cheese pull that makes every bite satisfying. The balance of textures (crunchy chips, tender meat, creamy cheese) and flavors (smoky beef, herby chicken, tangy toppings) creates a dish that's perfect for game day or a casual Friday night. This isn't just nachos; it's a crowd-pleasing centerpiece that transforms a simple snack into a showstopper.
For presentation, focus on even protein distribution and strategic topping placement—jalapeños for heat, cilantro for freshness, and sour cream for cooling contrast. The result is a dish that looks as good as it tastes, with every bite offering the perfect combination of textures and flavors. Let's get cooking—your taste buds will thank you.
Ingredients for beef and chicken nachos
Sixteen ingredients for nachos that'll have everyone begging for seconds.
| Ingredient | Amount | Notes |
|---|---|---|
| Tortilla Chips 🍟 | 12 oz | Blue corn or regular, lightly salted |
| Ground Beef (80% lean) 🥩 | 1 lb | Finely chopped for even cooking |
| Boneless Chicken Breast 🍗 | 1 ½ lb | Shredded after cooking |
| Shredded Monterey Jack Cheese 🧀 | 2 cups | Freshly shredded for best melt |
| Shredded Cheddar Cheese 🧀 | 1 ½ cups | Medium sharp for balance |
| Taco Seasoning 🌶️ | 2 tbsp | Homemade or store-bought blend |
| Sour Cream 🥛 | ½ cup | Full-fat for creamy texture |
| Sliced Jalapeños 🌶️ | ¼ cup | Pickled or fresh for heat |
| Fresh Cilantro 🌿 | ¼ cup | Chopped for freshness |
| Lime Wedges 🍋 | 2 whole | For serving |
| Olive Oil 🫒 | 1 tbsp | For cooking chicken |
| Salt 🧂 | 1 tsp | Adjust to taste |
| Black Pepper 🌶️ | ½ tsp | Freshly ground preferred |
| Garlic Powder 🧄 | 1 tsp | For beef seasoning |
| Onion Powder 🧅 | 1 tsp | For beef seasoning |
The beef is where the flavor starts. Grab 80% lean ground beef—it's juicier than leaner cuts. Walmart's Great Value or Kroger's store brand are solid budget picks, but if you're splurging, ButcherBox has consistently good quality. For the chicken, boneless breasts are easiest—just shred them after cooking. I always grab extra chicken because it disappears fast. The tortilla chips? Blue corn or regular—your call, but avoid the pre-salted kind if you're adding extra toppings later.
No taco seasoning packet? Mix 1 tbsp chili powder, 1 tsp cumin, 1 tsp paprika, 1/2 tsp garlic powder, 1/2 tsp onion powder, and 1/4 tsp cayenne—it's way better. For cheese, pre-shredded works but fresh is better—it melts smoother. Short on jalapeños? Pickled red onions add tang without heat. The cilantro can be dried if you're in a pinch, but fresh is brighter. And if you're feeling fancy, swap regular sour cream for Mexican crema—it's tangier and richer.
Keep the chips in an airtight container so they stay crispy. The cooked beef and chicken reheat well—store them separately for up to 3 days in the fridge. Cheese freezes surprisingly well too, so make extra if you're hosting. For serving, I like to portion the toppings in small bowls so people can customize. These nachos taste even better the next day—just bake again to crisp up the chips.
Why You'll Love This Recipe
- No Meat Left Behind: I swear by this combo—ground beef for that rich, savory bite and shredded chicken for tender flakes. It’s the best of both worlds, and honestly? My picky eaters don’t even notice the mix.
- One-Pan Magic: Seriously, this is my lazy night secret. Brown the beef and chicken in the same pan, dump it straight onto the chips, and boom—minimal cleanup. The only thing I scrub is my conscience for not cooking more often.
- Budget-Friendly Feast: Ground beef and chicken breast stretch further than you’d think, especially when paired with melty cheddar and jack. I feed my whole family (plus leftovers for lunch) for less than $15—no fancy ingredients, just solid flavor.
- Game for Any Gathering: Need a crowd-pleaser for game day, movie night, or just because? This recipe scales effortlessly. Double the chips, triple the cheese, and watch it disappear faster than my willpower to eat healthy.
Step-by-step instructions for crispy beef and chicken nachos
Let's build these loaded nachos with perfectly crispy tortillas and melty cheese layers.
Cook the Ground Beef Until Fully Browned
Heat a large skillet over medium-high heat and add the 1 lb ground beef (80% lean). Break it apart with a wooden spoon as it cooks, stirring occasionally. You want the beef to brown evenly rather than steam - this gives it that rich, meaty flavor.
Once the beef is fully browned (about 5-6 minutes), drain any excess fat from the pan. Stir in the 2 tbsp taco seasoning, 1 tsp garlic powder, 1 tsp onion powder, 1 tsp salt, and 0.5 tsp black pepper. Cook for another 1-2 minutes until everything is well combined and fragrant. This seasoned beef will form the flavor base for your nachos.
Shred the Chicken Breast Perfectly
While the beef cooks, heat a separate skillet over medium heat and add the 1 tbsp olive oil. Add the 1.5 lb boneless chicken breast and cook for 6-8 minutes per side until the internal temperature reaches 165°F and the chicken is no longer pink in the center.
Transfer the chicken to a cutting board and let it rest for 5 minutes. Then shred it using two forks, pulling the meat apart against the grain. You want the chicken to be in small, bite-sized pieces that will distribute evenly on your nachos. The rested chicken will be more tender and easier to shred.
Assemble the Nacho Layers for Maximum Crispiness
Preheat your oven to 375°F. Spread half of the 12 oz tortilla chips on a large baking sheet, slightly overlapping them. This creates a sturdy base that won't get soggy when you add the toppings.
Sprinkle half of the 2 cups shredded Monterey Jack cheese and half of the 1.5 cups shredded cheddar cheese evenly over the chips. Then add half of the seasoned beef and half of the shredded chicken. Repeat the layering process with the remaining chips, cheese, beef, and chicken. The key to crispy nachos is building layers - this ensures every bite has that perfect crunch.
Bake Until Cheese is Fully Melted and Bubbly
Bake the nachos for 8-10 minutes until the cheese is completely melted and bubbly, and the edges are starting to get crispy again. Watch closely during the last 2 minutes - you want the cheese to be fully melted but not browned.
Remove the baking sheet from the oven and let the nachos rest for 2-3 minutes. This resting time helps the cheese set slightly and prevents it from sliding off when you serve. The tortilla chips should still have that satisfying crunch while the cheese maintains its creamy texture.
Top and Serve with Fresh Garnishes
Once the nachos have rested, top them with the 0.5 cup sour cream, 0.25 cup sliced jalapeños, and 0.25 cup fresh cilantro. The sour cream adds a cool contrast to the warm, cheesy nachos, while the jalapeños and cilantro bring freshness and heat.
Serve immediately with the 2 lime wedges on the side. The acidity from the lime cuts through the richness of the cheese and beef, balancing each bite. These nachos are best enjoyed right away when the chips are still crispy and the cheese is at its meltiest.
Pro Tips For Making Beef And Chicken Nachos
- CRISP THE CHICKEN FIRST: I learned this the hard way—cooking chicken after the beef means soggy chips by the time the meat’s done. Shred the chicken first, then brown it in a separate pan while the beef cooks. It’ll be ready to layer just as the nachos hit the table.
- SALT THE GROUND BEEF TWICE: Most recipes say "season well," but with 80% lean beef, you need more. Sprinkle half the salt before browning, then finish with the rest after draining excess fat—this locks in flavor without drying it out. (Yes, even if you’re impatient like me.)
- LAYER CHEESE LAST: I used to pile cheese on early, only to watch it slide off when the chips got soggy. Wait until the very end—dump the cheese on top, then blast it under the broiler for 2-3 minutes. The chips stay crisp, and the cheese gets that perfect golden bubble.
- USE TWO PANS FOR MEAT: Trying to cook both beef and chicken in one skillet? Bad idea. The chicken will steam and turn rubbery while the beef burns. Brown the beef first in a dry pan, then move it to a plate and use the same pan for the chicken—it’ll save you scrubbing and keep both proteins perfect.
Make-ahead tips for this recipe
Prep Ahead Protein
Cook the beef and chicken up to 2 days in advance and store them separately in airtight containers. The beef stays flavorful when refrigerated, while the chicken remains juicy if not over-shredded. Reheat both proteins in a skillet with a splash of water or broth to restore moisture—5 minutes on medium heat works perfectly. 🔥
Cheese Prep Shortcut
Shred your cheese fresh for the best melt, but if you're prepping ahead, store shredded cheese in a sealed bag for up to 3 days. For extra convenience, freeze cheese in portions—just thaw overnight in the fridge before assembling. I like to mix the cheddar and Monterey Jack in a bowl ahead of time to save layering steps later.
Layering for Later
Assemble the nachos without baking up to 2 hours ahead—just skip the toppings. Cover tightly with foil and refrigerate. When ready to serve, bake at 375°F for 8-10 minutes until bubbly. This method keeps chips crispy and cheese ready to melt. Add toppings fresh for maximum crunch and flavor.
Freezer-Friendly Nachos
For a true make-ahead meal, assemble fully (including cheese) and freeze on a baking sheet for 1 hour to solidify. Then transfer to a freezer bag for up to 1 month. Thaw overnight in the fridge, then bake at 400°F for 12-15 minutes—add extra cheese if needed to compensate for moisture loss. ❄️
Topping Prep
Chop all toppings (jalapeños, cilantro) and store in small containers. Keep sour cream and lime wedges separate until serving. For extra heat, make a quick pickled jalapeño mix with vinegar, sugar, and salt—it adds tangy brightness that holds up well when prepped ahead. Store in the fridge for up to 1 week.
Reheating Leftovers
Nachos reheat best in the oven at 350°F for 5-7 minutes to restore crispiness. For microwave reheating, cover with a damp paper towel and heat in 30-second bursts, stirring between each. Add a sprinkle of cheese on top to refresh the melty texture. Leftovers keep well for 3 days in the fridge or 1 month in the freezer. 💫
Nutrition facts
Frequently asked questions
Can I use pre-cooked rotisserie chicken instead of fresh?
Pre-cooked rotisserie chicken works perfectly—just shred 1.5 cups of meat (about 1/3 of a whole chicken) and season it lightly with 1/2 tsp taco seasoning and 1/4 tsp garlic powder to match the recipe's flavors. The key is to remove excess skin and fat to keep the nachos from getting greasy.
How do I keep the tortilla chips extra crispy?
Start by spreading chips in a single layer on the baking sheet before adding toppings. Use 12 oz of chips total (about 4-5 cups) and bake them for 2-3 minutes at 375°F before adding cheese to reactivate their crispiness. Another trick: Lightly salt the chips before baking to draw out moisture.
What's the best cheese blend for maximum melt?
The recipe's Monterey Jack and cheddar combo melts beautifully, but for extra gooeyness, add 1/2 cup pepper jack or 1/4 cup cream cheese to the mix. Avoid pre-shredded cheese (it has anti-caking agents that prevent proper melting)—always shred your own. For a smoky flavor, swap 1/2 cup cheddar for smoked Gouda.
Can I make these nachos ahead and reheat?
Yes! Assemble without toppings and refrigerate for up to 2 hours, then bake at 375°F for 8-10 minutes before adding fresh toppings. For leftovers, reheat in the oven at 350°F for 5-7 minutes—microwaving makes chips soggy. Pro tip: Sprinkle extra cheese on top when reheating to restore that melty texture.
How do I make these gluten-free?
Swap tortilla chips for corn-based chips (like Mission or Tostitos corn chips) and use gluten-free taco seasoning. For protein, ensure your ground beef and chicken are certified gluten-free. Substitute cheese with dairy-free alternatives like Daiya or Violife shreds—they melt surprisingly well when combined with a little cornstarch.