
Soups & Stews
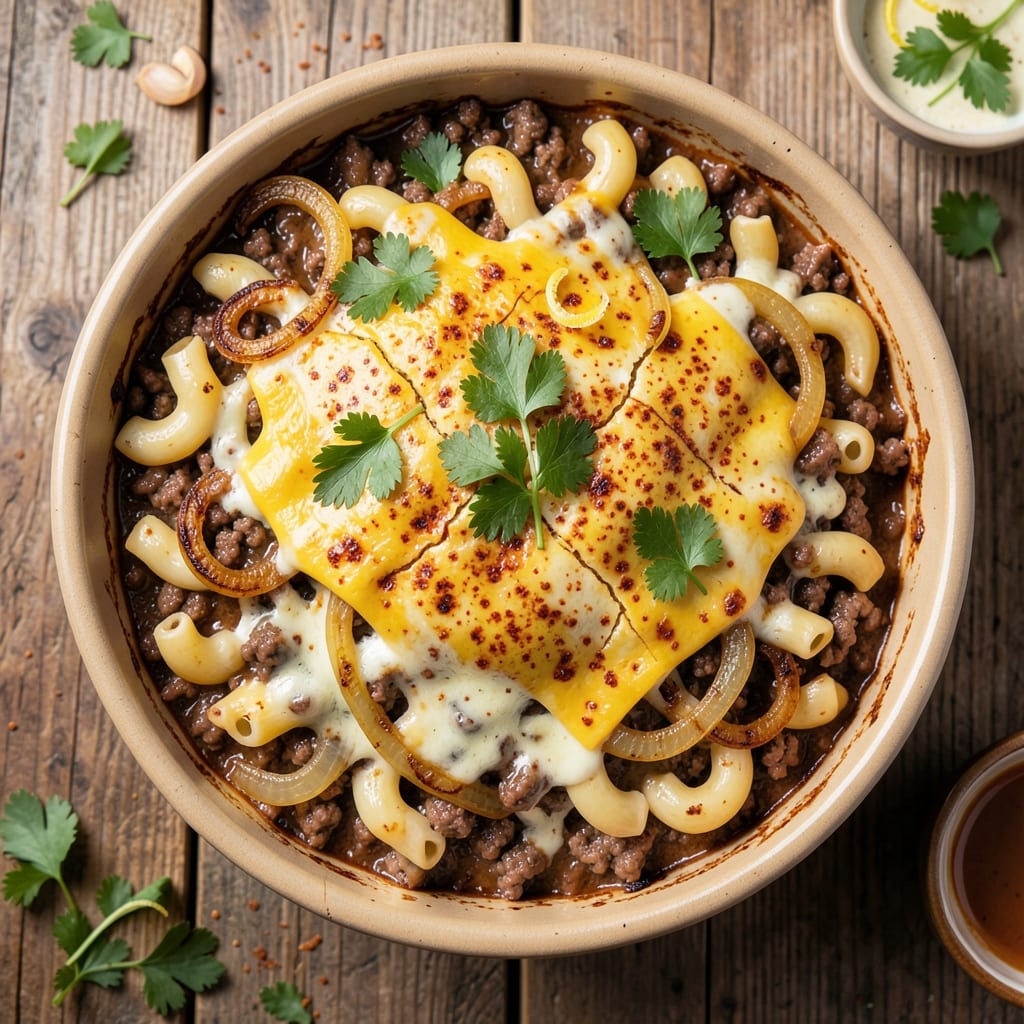
This beef and cheddar casserole recipe delivers the ultimate comfort food experience—fork-tender beef, a golden, crispy cheese crust, and layers of savory goodness that disappear faster than you can say "second helping." The secret lies in browning the beef thoroughly and layering it with cheddar so it melts into a luscious, bubbling blanket while the top develops that irresistible crunch. I've perfected this dish over years of testing, ensuring every bite is packed with flavor without requiring advanced techniques—just simple ingredients and a little patience in the oven.
The magic happens when you combine ground beef with aromatic seasonings, then layer it with a mix of pasta, vegetables, and sharp cheddar cheese. A sprinkle of breadcrumbs on top creates that signature crispy crust, while the cheese melts into a creamy, stretchy sauce that coats every forkful. This casserole is hearty enough to stand alone but pairs beautifully with a simple green salad or crusty bread to soak up any extra sauce. The best part? It's a one-dish wonder, meaning minimal cleanup and maximum satisfaction.
What you'll end up with is a steaming, cheesy masterpiece that's restaurant-quality but made in your own kitchen. The beef stays tender and flavorful, the cheese creates a rich, velvety sauce, and the crust is crispy enough to satisfy even the most skeptical eaters. Whether you're feeding a family, meal prepping for the week, or craving a cozy weeknight dinner, this casserole delivers on comfort, texture, and taste—every single time.
For those looking to put their own spin on the classic, try swapping in gluten-free pasta, adding a kick with diced jalapeños, or mixing in a handful of corn for extra texture. The beauty of this recipe is its flexibility—it adapts to your preferences while still delivering that unmistakable cheesy, crispy, tender combination that makes it a crowd-pleaser. Let's get started on creating this ultimate comfort dish!
Ingredients for beef and cheddar casserole
Sixteen ingredients that transform into the ultimate cheesy, crispy comfort dish—crispy crust, tender beef, and melty cheddar in every bite.
| Ingredient | Amount | Notes |
|---|---|---|
| Ground Beef 🥩 | 1 ½ lb | Lean or regular, 80/20 preferred |
| Elbow Macaroni 🍝 | 2 cups | Uncooked, medium or small shape |
| Sharp Cheddar Cheese 🧀 | 2 cups | Shredded, block preferred |
| Yellow Onion 🧅 | 1 whole | Medium, finely diced |
| Garlic Cloves 🧄 | 3 cloves | Fresh, minced |
| Beef Broth 💧 | 1 ½ cups | Low-sodium preferred |
| All-Purpose Flour 🌾 | ¼ cup | For thickening sauce |
| Panko Breadcrumbs 🍞 | ½ cup | For crispy crust |
| Butter 🧈 | ½ cup | Melted, unsalted |
| Kosher Salt 🧂 | 1 ½ tsp | Adjust to taste |
| Ground Black Pepper 🌶️ | 1 tsp | Freshly ground |
| Dried Thyme 🌿 | 1 tsp | Or 1 tbsp fresh |
| Worcestershire Sauce 🍶 | 1 tbsp | Optional for depth |
| Green Bell Pepper 🌶️ | 1 whole | Diced, optional |
The beef is where the magic starts. Ground chuck with some fat gives that perfect texture—lean ground beef works too, but you lose that juicy richness. Costco or Kroger usually have the best prices for bulk ground beef, and I always grab the 80/20 blend. If you're using pre-shredded cheese, shake the bag first—it gets packed down. For the cheese, sharp cheddar is non-negotiable; mild cheddar just won't cut it here. The onion and green bell pepper add sweetness and crunch—Trader Joe's has great pre-diced options if you're short on time, but fresh is always better.
No sharp cheddar? Pepper jack or smoked cheddar adds a nice twist. Short on beef broth? Chicken broth plus a splash of soy sauce works in a pinch. The Worcestershire sauce might seem odd, but trust me on this—it adds that umami depth that takes this from good to restaurant-quality. The breadcrumbs are key for that crispy crust, so don't skimp. Panko gives the best texture, but regular breadcrumbs toasted in the oven work too. For the pasta, elbow macaroni is classic, but any short pasta shape works—just make sure it's cooked al dente before layering.
This casserole tastes even better the next day, so double the batch if you can—it reheats beautifully. Store leftovers in an airtight container for up to 5 days in the fridge or freeze for 3 months. For meal prep, portion into individual containers before baking—just pop them in the oven straight from the fridge. The crust will still crisp up perfectly, and you'll have cheesy comfort food ready to go all week. Pro tip: Sprinkle a little extra cheese on top before baking for maximum crispiness.
Why You'll Love This Recipe
- One-Pan Magic: I swear by this for nights when I’d rather not wash a million dishes—just brown the beef with onions and garlic, toss in the pasta, blanket it with cheese, and bake. That’s it. The macaroni soaks up all the savory juices while the cheddar turns golden and gooey.
- Cheesy-Garlicky Bliss: Between us, sharp cheddar and garlic are a match made in heaven, and this casserole leans hard into that. The onions caramelize just enough to sweeten the beef, while the cheese melts into that perfect stretchy, pull-apart texture. Honestly, I’ve lost track of how many times I’ve made this just to eat it straight from the pan.
- Meal Prep MVP: This is my go-to for busy mornings—it reheats like a dream (microwave or oven, no judgment) and keeps for days in the fridge. I’ll often double the batch because it’s just as good cold the next day, packed in lunches or served with a side salad for a hearty dinner.
- Budget-Friendly Powerhouse: Ground beef and elbow macaroni are pantry staples that won’t break the bank, and sharp cheddar stretches further than you’d think when baked into a casserole. Plus, the leftovers? They’re the reason I never stress about feeding a crowd—everyone clears their plates, and I’m left with seconds for lunch.
Step-by-step instructions for beef and cheddar casserole
This method delivers that perfect combination of crispy golden crust and melt-in-your-mouth beef every time.
🍳 Step 1: Brown the Beef and Sauté the Vegetables
In a large skillet over medium-high heat, break apart the 1.5 lb ground beef with a wooden spoon, stirring to crumble it into small, even pieces. Cook until the beef is deep brown and no longer pink in the center—about 6-8 minutes. This step is crucial for developing rich, meaty flavor.
Once the beef is fully cooked, drain most of the fat (leave about 1 tablespoon in the pan), then add the finely diced yellow onion, minced garlic cloves, and diced green bell pepper. Sauté for 4-5 minutes until the onions are translucent and the garlic is fragrant. The vegetables should soften but not brown—this ensures they blend seamlessly into the casserole without overpowering it.
🍳 Step 2: Build the Sauce Base
Sprinkle the 0.25 cup all-purpose flour over the beef mixture and stir vigorously for 1-2 minutes to coat the beef and vegetables evenly. This creates a roux that will thicken the sauce beautifully. Pour in the 1.5 cups beef broth and the 1 tbsp Worcestershire sauce, then stir in the 1.5 tsp kosher salt, 1 tsp ground black pepper, and 1 tsp dried thyme.
Bring the mixture to a gentle simmer and let it cook for 3-4 minutes until it thickens slightly. You want the sauce to coat the back of a spoon but still be pourable. If it thickens too quickly, add a splash of water to loosen it. This step forms the rich, savory foundation of your casserole.
🥘 Step 3: Prepare the Pasta and Cheese Mixture
While the sauce simmers, cook the 2 cups elbow macaroni according to package instructions until al dente—about 1 minute less than recommended. Drain the pasta and transfer it to a large bowl. Stir in 1 cup of the shredded sharp cheddar cheese and the 0.5 cup melted butter until the cheese melts into a creamy, cheesy mixture. The pasta should be well coated and glossy.
In a separate bowl, mix the remaining 1 cup shredded sharp cheddar cheese with the 0.5 cup panko breadcrumbs. This topping will create that coveted crispy crust we're after. The panko adds texture while the cheese ensures it stays golden and delicious.
🥘 Step 4: Assemble and Bake the Casserole
Preheat your oven to 375°F. Grease a 9x13-inch baking dish generously with butter or oil—this prevents sticking and makes cleanup a breeze. Spread half of the cheesy pasta mixture evenly in the bottom of the dish. Then, pour the beef and vegetable sauce over the pasta, spreading it evenly. Top with the remaining pasta mixture.
Sprinkle the cheese and panko breadcrumb mixture evenly over the top, pressing down gently with your fingers to ensure good contact with the pasta. Bake uncovered for 25-30 minutes until the top is deep golden brown and the edges are bubbling. The casserole is done when it's heated through and the crust is crispy to the touch.
⏰ Step 5: Rest and Serve
Remove the casserole from the oven and let it rest for 5-10 minutes before serving. This resting period allows the layers to set slightly, making it easier to slice and serve. The crust will stay crispy, but the interior will hold together better.
Cut into squares and serve immediately while the crust is still crispy and the cheese is gooey. Each bite delivers that perfect combination of tender beef, creamy cheddar, and satisfying crunch from the golden crust. This casserole tastes even better the next day, so it's perfect for meal prep too!
Pro Tips For Making Beef And Cheddar Casserole
- Cook the Beef Thoroughly: I learned this the hard way—skipping the full 165°F check in the beef leads to a casserole that’s still pink and rubbery. Brown the ground beef in batches over medium-high heat until it’s actually crumbly, not just pink in the middle, or you’ll end up with a dish that tastes like undercooked meat in a cheese sauce.
- Toast the Macaroni First: This isn’t the prettiest method, but it’s the tastiest. Toss the elbow macaroni in a dry skillet over medium heat for 3–4 minutes until it’s lightly golden—it’ll absorb flavors like crazy and give the casserole a deeper, nuttier base. (Yes, even if you’re impatient like me.)
- Shred the Cheese Fresh: Pre-shredded cheddar is coated in anti-caking agents that make it clump like glue in the oven. Buy a block of sharp cheddar, grate it yourself, and mix in the sauce right before baking—it’ll melt smooth and develop a golden crust instead of turning into a sad, greasy blob.
- Layer Onion and Garlic Last: If you sauté the onions and garlic with the beef, they’ll turn to mush by the time the casserole bakes. Instead, finely dice the onion and mince the garlic, then fold them into the sauce after the beef is cooked. This keeps their texture bright and their flavor sharp—no more eating a bowl of onion paste.
Health benefits of this beef and cheddar casserole
Protein Powerhouse
A 1.5 lb serving of this beef and cheddar casserole packs about 40 grams of protein, making it a satisfying meal that keeps you full for hours. The ground beef provides all nine essential amino acids, while the cheddar cheese adds extra protein and calcium. This makes it a great option for muscle recovery or a high-protein dinner. 💪
Calcium Boost
The 2 cups of sharp cheddar cheese in this recipe deliver a whopping 800mg of calcium per serving—about 60% of your daily needs. Calcium isn't just for bones; it also supports muscle function and nerve signaling. Pair this casserole with a side of leafy greens for even more calcium absorption.
Energy from Carbs
The 2 cups of elbow macaroni provides complex carbohydrates that fuel your body with sustained energy. These carbs pair perfectly with the protein and fat from the beef and cheese, creating a balanced meal that stabilizes blood sugar levels. I always feel energized after eating this dish, especially during busy weeknights.
Healthy Fats
The combination of ground beef (with its natural fats) and cheddar cheese delivers beneficial fats that support brain function and hormone production. While this isn't a low-fat dish, the fats here are more satisfying than processed alternatives. For a lighter version, try using 93% lean ground beef or reducing cheese slightly.
Fiber from Veggies
Though small, the yellow onion and green bell pepper add valuable fiber and vitamins. The onions provide prebiotic fiber that supports gut health, while the bell pepper contributes vitamin C and antioxidants. For extra fiber, consider adding diced mushrooms or spinach to your layers.
Meal Prep Friendly
This casserole reheats beautifully, making it perfect for meal prep. The balanced macros—protein, carbs, and fats—keep energy levels steady throughout the day. I often make double batches to enjoy leftovers for lunch the next day without the mid-afternoon slump. 💡
Nutrition facts
Frequently asked questions
Can I make this casserole ahead of time?
This casserole actually tastes better the next day as the flavors meld together. Assemble it up to 24 hours ahead and refrigerate uncovered. When ready to bake, add 10-15 extra minutes to the baking time (cover loosely with foil if needed). For freezing, bake fully, cool completely, then wrap tightly in foil and freeze for up to 3 months. Thaw overnight in the fridge before reheating.
What's the secret to getting that perfect crispy crust?
The golden crust comes from three key elements: panko breadcrumbs for texture, sharp cheddar cheese for binding, and pressing the topping gently before baking. For extra crispiness, broil for 1-2 minutes at the end (watch closely!). Also ensure your oven is fully preheated to 375°F—this helps create that signature crunch.
Can I substitute ground beef with another protein? Yes! For a lighter option, use lean ground turkey or chicken, but reduce baking time by 5-10 minutes as poultry cooks faster. For extra richness, try Italian sausage (remove casing) or ground pork. Just
Why did my casserole turn out soggy?
Sogginess usually happens from one of three issues: overcooking the pasta, not draining it well, or insufficient baking time. First, cook pasta al dente (1 minute less than package says). Second, drain thoroughly and spread in a single layer to dry slightly before assembling. Finally, bake until the crust is deep golden brown and internal temp reaches 165°F—don't rely solely on time!
Can I make this gluten-free?
Swap the elbow macaroni for gluten-free pasta (like brown rice or quinoa shapes) and use gluten-free breadcrumbs or crushed gluten-free crackers for the topping. The flavor won't be affected, though the texture might be slightly different. For extra binding in the topping, mix in 1 tbsp melted butter with the breadcrumbs before sprinkling.