
Soups & Stews
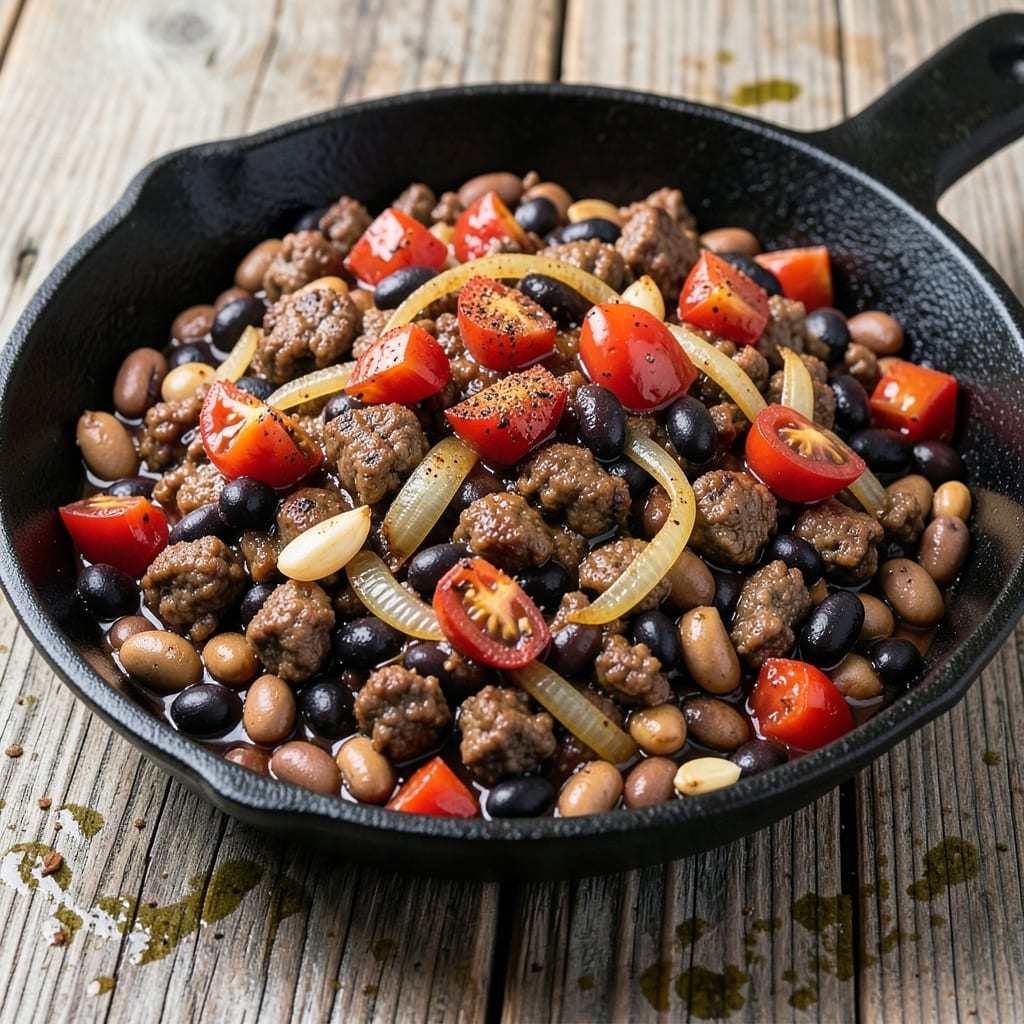
This beef and bean taco filling recipe delivers restaurant-quality flavor in just 20 minutes—perfect for tacos, bowls, or stuffing into peppers. The secret lies in browning the beef first, which unlocks deep, smoky cumin notes that transform simple ingredients into something extraordinary. I developed this recipe after years of testing, and it’s now my go-to for weeknight dinners that feel like a fiesta.
The magic happens with a two-step cooking process: first, searing ground beef until it’s rich and caramelized, then simmering it with beans, tomatoes, and a blend of warm spices. This method ensures tender beef and beans that hold their shape, while the spices infuse every bite with earthy, slightly sweet depth. No fancy techniques—just precise timing and the right balance of seasonings.
What you’ll end up with is a filling that’s bold, smoky, and packed with texture—ideal for tacos, burrito bowls, or even as a hearty stuffing. The beans stay intact, soaking up all the savory juices, while the beef remains tender but firm enough to hold its own. This isn’t just filling; it’s a flavor explosion that turns simple meals into something memorable.
Best of all, it’s versatile and freezer-friendly, so you can prep a batch ahead and have it ready for quick meals all week. Let’s get cooking—your taste buds will thank you.
Ingredients for beef and bean taco filling
Bold flavors start with these 13 ingredients—simple but packed with smoky, spicy goodness.
| Ingredient | Amount | Notes |
|---|---|---|
| Ground Beef 🥩 | 1 ½ lb | 80% lean, finely ground |
| Black Beans 🫘 | 15 oz | Canned, drained and rinsed |
| Pinto Beans 🫘 | 15 oz | Canned, drained and rinsed |
| Fire-Roasted Diced Tomatoes 🍅 | 15 oz | Canned, undrained for sauce |
| Yellow Onion 🧅 | 1 whole | Medium, finely diced |
| Garlic Cloves 🧄 | 4 cloves | Minced, fresh preferred |
| Ground Cumin 🌿 | 2 tsp | Toasted for deeper flavor |
| Chili Powder 🌶️ | 1 ½ tsp | Medium heat preferred |
| Smoked Paprika 🌶️ | 1 tsp | For authentic smoky depth |
| Salt 🧂 | 1 tsp | Kosher or sea salt |
| Black Pepper 🌶️ | ½ tsp | Freshly ground preferred |
| Olive Oil 🫒 | 1 tbsp | For searing beef |
| Lime Juice 🍋 | 1 tbsp | Freshly squeezed |
The beef is non-negotiable here—80% lean ground beef gives you that perfect balance of flavor and texture. Costco or Walmart usually have it pre-ground, which saves time. Look for cans of beans labeled 'no salt added' at Trader Joe's or your local grocery store—Goya or Bush's are solid choices. Fire-roasted tomatoes add natural depth, so don't skip the canned variety. For the onion, yellow onions work best—they're sweeter and caramelize beautifully. If you're short on time, pre-diced onions from the salad bar section are a lifesaver.
No ground cumin? Regular cumin seeds toasted in a dry pan work just as well—just grind them fresh. Short on smoked paprika? Regular paprika plus a pinch of liquid smoke gets you close. The beans can be any mix—kidney beans add extra heartiness if you want variety. For the tomatoes, if you can't find fire-roasted, regular diced tomatoes with a pinch of smoked salt works. The lime juice is key for brightness, so fresh is best—no powdered lime juice here. If you're making this ahead, add the lime juice just before serving to keep it fresh.
This filling keeps beautifully—5 days in the fridge or 3 months in the freezer. Portion it into containers with a splash of water to prevent drying out. For tacos, reheat with a little water or broth to keep it moist. The flavors actually improve after a day or two as everything melds together. Double the batch and freeze half—you'll thank yourself later when it's game day or a busy weeknight.
Why You'll Love This Recipe
- One-Pan Magic: I swear by this recipe—just brown the beef, toss in the onions and beans, and let the fire-roasted tomatoes melt into that rich, smoky base. No extra pots, no extra mess, and honestly? The cleanup is just wiping one pan.
- Deep, Smoky Richness: The combo of black and pinto beans gives this filling a hearty texture, while the fire-roasted tomatoes add that charred sweetness that makes it taste like a restaurant dish. Between us, I’ve never met a taco filling that balances savory and earthy like this one does.
- Meal Prep MVP: I make a double batch every Sunday because this stuff keeps perfectly in the fridge for four days. Toss it into wraps for lunch, stuff it into burritos for dinner, or just eat it straight from the pot—it’s my go-to for lazy days.
- Budget-Friendly Powerhouse: Ground beef stretches far when mixed with beans, and a can of each costs less than takeout. Plus, using pantry staples like onions and canned tomatoes means I’m not breaking the bank for a filling that still feels like a treat. (Yes, even on a Tuesday night.)
Step-by-step instructions for beef and bean taco filling
Here's how to create a bold, smoky taco filling that's packed with flavor and ready in under 20 minutes.
Sear the Ground Beef for Maximum Flavor
Heat a large skillet over medium-high heat and add the 1 tablespoon olive oil. Once the oil shimmers, add the 1.5 lb ground beef and break it apart with a wooden spoon. Cook for 5-6 minutes, stirring occasionally, until the beef loses its raw color and begins to brown deeply.
Here's the thing—don't drain the fat after browning. That rendered beef fat carries incredible flavor and helps create a rich sauce later. You'll know it's ready when the beef is fully browned and any pink traces have disappeared. Break it into small, even pieces as it cooks for better distribution in your tacos.
Sauté Aromatics Until Fragrant
Add the finely diced yellow onion and minced garlic cloves to the skillet with the cooked beef. Stir everything together and cook for 3-4 minutes until the onions become translucent and the garlic releases its signature aroma. The onions should soften but not brown—you're just building flavor here, not caramelizing.
This is where the magic happens. The onions and garlic should smell deeply aromatic, almost making your kitchen smell like a Mexican street market. If you notice the garlic starting to brown too quickly, reduce the heat slightly to medium to prevent burning. Burnt garlic will make your filling taste bitter, and we're going for bold, not bitter.
Add Spices and Toast for Depth
Stir in the 2 teaspoons ground cumin, 1.5 teaspoons chili powder, 1 teaspoon smoked paprika, 1 teaspoon salt, and 0.5 teaspoon black pepper. Cook everything together for 1-2 minutes, stirring constantly, until the spices become fragrant and the mixture looks slightly darker. This toasting step deepens the flavor profile and removes any raw taste from the spices.
I like to press the spices into the beef mixture gently with the back of my spoon—this helps them distribute evenly and prevents any pockets of unseasoned filling. You'll notice the mixture darkening slightly and the aroma becoming more complex. This is your signal that the spices are properly toasted and ready to mingle with the other ingredients.
Combine with Beans and Tomatoes
Add the 15 ounces drained black beans, 15 ounces drained pinto beans, and 15 ounces fire-roasted diced tomatoes (with their juices) to the skillet. Stir everything together and let it simmer for 5-6 minutes over medium heat until everything is heated through and the flavors meld together beautifully.
The tomatoes will release their juices, creating a rich sauce that coats all the ingredients. You'll see the mixture become more cohesive and the flavors start to come together. If the mixture seems too thick, you can add 1-2 tablespoons of water to help it loosen up slightly. The beans will soften slightly from the heat, making them easier to work with in your tacos.
Finish with Lime Juice and Adjust Seasoning
Remove the skillet from heat and stir in the 1 tablespoon lime juice. Taste the mixture and adjust the seasoning if needed—you might want to add a pinch more salt or a dash of chili powder to suit your taste. Let the filling rest for 2-3 minutes to allow the lime juice to brighten all the flavors.
This final step is crucial. The lime juice cuts through the richness of the beef and beans, adding a bright, fresh contrast that makes the whole dish sing. The filling should be well-seasoned, with a perfect balance of smoky, spicy, and tangy flavors. Now it's ready to be served in warm tortillas with all your favorite taco toppings—avocado, shredded lettuce, cheese, and sour cream.
Pro Tips For Making Beef And Bean Taco Filling
- CRISP THE ONION FIRST: Slice that yellow onion thin and cook it in the same pan as the beef—just until the edges turn translucent, not brown. I used to skip this, and the raw onion flavor would sneak into every bite like an unwelcome guest. Two minutes on medium heat makes all the difference.
- BREAK UP BEANS ROUGHLY: Drain and rinse the black and pinto beans, then smash about half of them with the flat side of your knife or a fork. No food processor—just rough texture. This keeps some whole beans for bite while letting the mashed ones thicken the filling. (Yes, even if you’re impatient like me.)
- SIMMER TOMATOES LONG ENOUGH: Don’t just dump those fire-roasted tomatoes in at the end—they need 5 minutes of simmering with the beef to soften and release their smoky depth. I learned this the hard way when my filling tasted like a sad, watery nacho topping. Low heat, uncovered, until they’re just breaking down.
- SALT THE BEANS FIRST: Toss the drained beans with ½ teaspoon salt and a splash of water before mixing them in. This rehydrates them slightly and balances their canned saltiness. I was skeptical until I tried it—now I can’t imagine skipping it. (Your future self will notice.)
Common mistakes when making great beef and bean taco filling
Overcooking the Beef
One of the biggest mistakes is letting the beef get too crispy or dry. Ground beef should be cooked until it's fully browned but still tender—about 5-6 minutes over medium-high heat. If you overcook it, the filling will turn tough and lose its juicy texture. I’ve learned to set a timer and keep stirring to ensure even cooking without burning. 🌡️
Skipping the Sear
Some people rush the browning step, but searing the beef first is non-negotiable for flavor. That caramelized crust releases deep, savory notes that infuse the entire filling. If you skip it, your tacos will taste flat and one-dimensional. Take the extra 5 minutes—it’s worth it.
Underseasoning or Overcrowding
Don’t be shy with the spices, but don’t overcrowd the pan. Adding all the aromatics at once can steam them instead of sautéing, which dulls their flavor. Cook the onions and garlic first until fragrant, then add the spices. Taste as you go—adjust salt and chili powder gradually to hit that perfect balance.
Ignoring the Lime Juice
The lime juice isn’t just for flavor—it brightens the dish and balances the richness. Adding it at the end ensures it doesn’t cook off, leaving your filling flat. Always finish with 1 tablespoon lime juice, even if it seems like a small detail. Trust me, it makes all the difference. ✨
Using Pre-Cooked Beans
If you’re using canned beans, always drain and rinse them first to remove excess sodium. Skipping this step can make your filling taste overly salty. For extra flavor, I like to add a pinch of smoked salt to the beans before mixing them in—it adds another layer of depth without overpowering.
Not Resting the Filling
Letting the filling rest for 2-3 minutes after cooking allows the flavors to meld and the lime juice to distribute evenly. Skipping this step can leave your tacos tasting uneven or overly acidic. It’s a small pause that makes a big difference in the final result. 💫
Nutrition facts
Frequently asked questions about beef and bean taco filling
Can I use ground turkey or chicken instead of beef?
Ground turkey or chicken works well, but you'll need to adjust cooking times slightly. Use 1 lb of poultry instead of 1.5 lb of beef since it's leaner, and cook it for 4-5 minutes until fully browned. For extra moisture, consider adding 1 tablespoon broth when simmering with beans. The flavor profile will be lighter but still delicious.
How can I make this filling spicier?
Add ½ teaspoon cayenne pepper or 1 teaspoon chipotle powder when toasting the spices. For heat lovers, stir in 1-2 diced jalapeños with the tomatoes. Always taste as you go—you can adjust to your preferred spice level. Remember, lime juice helps balance heat, so add it at the end.
What's the best way to reheat leftover filling?
Reheat in a skillet over medium heat with 1-2 tablespoons water or broth to prevent drying. Stir frequently for 3-4 minutes until warmed through. For microwave reheating, use 30-second intervals on medium power, stirring between each. Never reheat to a boil—this makes the filling tough.
Can I make this filling in a slow cooker or Instant Pot?
Yes! For slow cooker: Brown beef first, then combine all ingredients (except lime juice) and cook on low for 2 hours. For Instant Pot: Sauté beef and aromatics first, then add remaining ingredients and cook on high pressure for 5 minutes. Finish with lime juice. Both methods work well for meal prep.
What's the best way to store this filling?
Store in an airtight container in the fridge for 5 days or freeze for 3 months. For freezing, portion into containers with a splash of water to prevent drying. Thaw overnight in the fridge before reheating. The flavors actually improve after a day or two of resting in the fridge.