
Soups & Stews
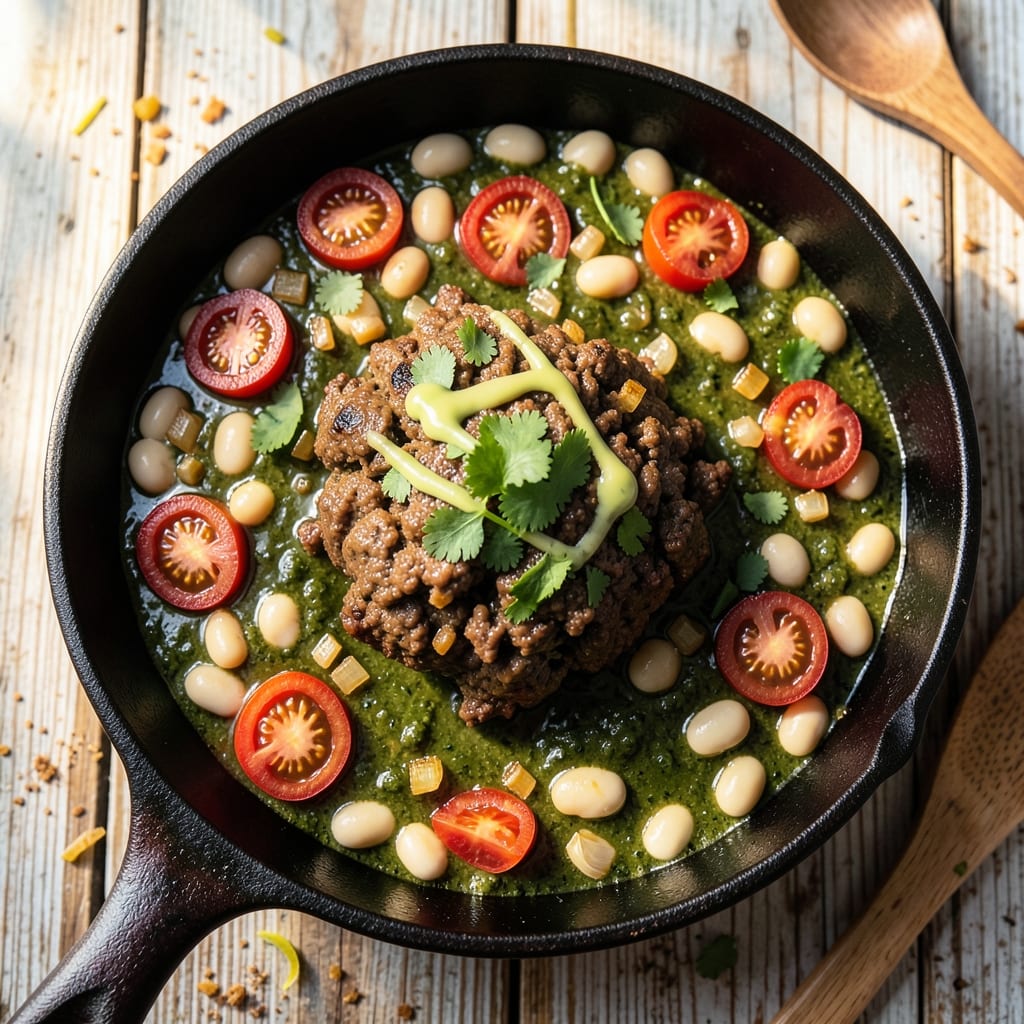
This beef and bean chili verde recipe delivers the perfect balance of smoky, tangy flavors and hearty texture that turns weeknight dinners into a Southwestern feast. The secret lies in slow-cooked green chiles and tomatoes that develop deep, caramelized richness while the beef stays tender and the beans hold their shape. I've perfected this version to ensure every spoonful delivers that ideal mix of smoky heat and comforting heartiness.
The recipe begins with a simple yet flavorful base of ground beef and kidney beans simmered with green chiles and tomatoes until the flavors meld together beautifully. What sets this chili apart is the crispy tortilla bites on top—lightly fried until golden and crunchy, adding a satisfying textural contrast to the creamy, smoky chili below. The combination of slow-cooked ingredients and quick-crisped toppings creates a dish that's both comforting and exciting.
By the time you're ready to serve, you'll have a steaming bowl of chili verde with perfectly tender beef, flavorful beans, and a vibrant green chile-tomato sauce that's rich and aromatic. The crispy tortilla bites on top add an element of fun and crunch, making this more than just a simple stew—it's a complete dining experience. Each bite offers a mix of textures and flavors that keep you coming back for more.
This recipe is designed to be both approachable and impressive, perfect for feeding a crowd or meal prepping for the week. The slow-cooked method allows flavors to develop fully, while the crispy tortilla bites add a restaurant-quality touch that elevates the dish. Ready to create a chili that's as satisfying as it is delicious? Let's get started.
Ingredients for beef and bean chili verde
Sixteen ingredients for a chili that's rich, smoky, and perfectly textured with crispy tortilla bites.
| Ingredient | Amount | Notes |
|---|---|---|
| Ground Beef (80/20) 🥩 | 2 lb | Lean but with enough fat for flavor |
| Kidney Beans 🌱 | 2 cups | Canned, drained and rinsed |
| Canned Green Chiles 🌶️ | 1 can | Roasted, 4 oz can |
| Roma Tomatoes 🍅 | 2 cups | Diced, fresh or canned |
| Onion 🧅 | 1 whole | Yellow or red, diced |
| Garlic Cloves 🧄 | 4 cloves | Fresh, minced |
| Chicken Broth 💧 | 2 cups | Low-sodium preferred |
| Tomato Paste 🍅 | 2 tbsp | For depth of flavor |
| Cumin 🌿 | 1 tsp | Ground, toasted |
| Chili Powder 🌶️ | 1 tbsp | Smoked variety preferred |
| Oregano 🍃 | 1 tsp | Dried, Mexican if available |
| Salt 🧂 | 1 tsp | Kosher or sea salt |
| Black Pepper 🌶️ | ½ tsp | Freshly ground |
| Corn Tortillas 🌽 | 6 whole | Small, for crispy bites |
| Vegetable Oil 🫒 | ½ cup | For frying tortillas |
The ground beef is where the smoky depth starts—80/20 fat ratio ensures juiciness and flavor development. Look for packages labeled 'chuck' or 'ground beef' at Costco or your local butcher for the best quality. If you're using pre-ground beef, check the sell-by date—it should be within 2-3 days of purchase for optimal texture. The kidney beans can be canned (drained and rinsed) or cooked from dry—just soak overnight for best results. For the green chiles, Hatch brand is ideal, but any roasted canned chiles will work in a pinch.
No fresh tomatoes? Canned crushed tomatoes work perfectly—they're pre-cooked and save time. The tomato paste is non-negotiable for that concentrated umami punch, but if you're out, extra tomato sauce at double the amount gets you close. Mexican oregano adds a different depth than regular oregano—find it in the Latin aisle if you can. For the tortillas, Mission brand is my go-to, but any small corn tortillas will crisp up nicely. If you're frying them, keep the oil temperature around 350°F for that perfect golden crunch without burning.
The chili keeps beautifully in the fridge for 4-5 days, with flavors actually improving as it sits. Portion it into containers with the crispy tortilla bites on top—they stay crunchy for about 24 hours if stored separately. Freeze the chili (without the tortillas) for up to 3 months. For meal prep, I double the batch and freeze half—just thaw and reheat with fresh tortilla bites for a quick weeknight dinner. The crispy topping is best added right before serving, though, to maintain that satisfying crunch.
Why You'll Love This Recipe
- One-Pot Magic: I swear by this recipe because it’s actually one-pot—no extra bowls, no extra cleanup. Just brown the beef with onions, dump in the canned green chiles and tomatoes, and let it simmer. The beans soften right in the pot, so you’re not left with a sink full of dishes that scream, "Why did you make this?"
- Green Chile Kick: That jar of green chiles? It’s the star. The heat lingers just enough to wake up your taste buds without overpowering, and the smoky depth from the canned tomatoes ties everything together. Honestly, I’ve tried store-bought verde sauce, but this homemade version—with the onions caramelizing just a little—is ridiculously better.
- Weeknight Workhorse: This chili is my go-to when I’m too tired to plan but still need something hearty. It’s great for game day (yes, even on a Tuesday night), doubles easily for leftovers, and my roommates always ask for seconds—no matter how much they pretend to hate beans. The 80/20 beef adds richness without fuss, so it never feels like a chore.
- Budget-Friendly Powerhouse: Ground beef and canned beans stretch this recipe into a full week’s worth of lunches, and the green chiles add restaurant-quality flavor for pennies. I’ll be real: it’s not the fanciest dish, but it’s the kind of meal that makes me feel like I’m feeding a crowd without breaking the bank. Plus, the leftovers taste just as good reheated—no sad, dry chili here.
Step-by-step instructions for beef and bean chili verde
Here's how to craft a hearty, smoky chili verde with perfectly crispy tortilla bites on top.
🍳 Step 1: Brown the Ground Beef
Heat a large Dutch oven over medium-high heat and add the 2 lb ground beef (80/20). Break it apart with a wooden spoon, letting the pieces brown in batches to avoid overcrowding. This step is crucial—it develops deep, meaty flavor that infuses the entire chili. Cook for 6-8 minutes until the beef loses its raw color and any pink disappears. Drain excess fat, leaving about 1 tablespoon in the pot for flavor.
I press down gently on the beef with the spoon during the first minute—this prevents it from curling and ensures even contact with the pan. If the fat rises too high, tilt the pan to let it pool in one corner and spoon it out. Don't walk away; ground beef can go from perfect to burnt in seconds.
🍳 Step 2: Sauté Aromatics and Build the Base
Add the diced onion and minced garlic cloves to the Dutch oven, stirring to coat in the remaining beef fat. Cook for 3-4 minutes until the onion softens and becomes translucent. The garlic should sizzle gently without browning—this prevents bitterness. Next, stir in the 2 tbsp tomato paste, spreading it evenly to create a rich, flavorful base.
Here's where it gets good: add the 1 can green chiles (chopped if not pre-chopped), 2 cups diced Roma tomatoes, 1 tsp cumin, 1 tbsp chili powder, 1 tsp oregano, 1 tsp salt, and 0.5 tsp black pepper. Stir everything together and let it cook for 2 minutes until the spices bloom and the mixture becomes fragrant. This step unlocks the full depth of flavor in the chili.
🍳 Step 3: Simmer the Chili
Pour in the 2 cups chicken broth and the 2 cups kidney beans, stirring to combine. Bring the mixture to a gentle boil, then reduce heat to low and let it simmer uncovered for 30-40 minutes. Stir occasionally to prevent sticking, and taste after 20 minutes—this is when you can adjust seasoning if needed. The chili should thicken gradually, with the flavors melding together beautifully.
Real talk: if the chili looks too thick, add a splash of water or broth. If it's too thin, let it simmer uncovered for another 5-10 minutes. You want a consistency that coats the back of a spoon but isn't gluey. The longer it simmers, the more complex the flavors become.
🔥 Step 4: Fry the Tortilla Bites
While the chili simmers, prepare the tortilla bites for topping. Cut each of the 6 corn tortillas into 4 wedges (about 1-inch wide each). Heat 0.5 cup vegetable oil in a skillet over medium-high heat until it shimmers. Fry the tortilla wedges in batches for 1-2 minutes per side until they're golden brown and crispy. Drain on paper towels and sprinkle lightly with salt.
This step is the secret to the perfect textural contrast—the crispy tortilla bites add crunch to every spoonful of chili. Don't overcrowd the pan or the oil temperature will drop, resulting in soggy tortillas. Fry in small batches and keep them warm in a 200°F oven while you finish the chili.
🥘 Step 5: Assemble and Serve
Once the chili has reached your desired consistency and flavor, transfer it to a serving bowl. Ladle the chili into individual bowls, then top each serving with the crispy tortilla bites. The contrast of warm, smoky chili with cool, crispy tortillas is what makes this dish truly special. Serve immediately while the tortilla bites are still crispy and the chili is steaming hot.
For an extra touch, garnish with fresh cilantro or a dollop of sour cream if you like. The chili verde should have a rich, smoky depth from the green chiles and tomato paste, with a perfect balance of heat and earthiness. Each bite should deliver tender beef, hearty beans, and that satisfying crunch from the tortilla bites.
Pro Tips For Making Beef And Bean Chili Verde
- Sear the Beef Hard: I learned this the hard way—skipping a proper sear means you’ll end up with bland, greasy beef instead of deep, caramelized flavor. Use a heavy pan (cast iron if you have it) and cook the 80/20 ground beef over medium-high heat until it’s deep brown in spots, breaking it up with a spoon. This isn’t just about browning; it’s about building layers of taste that no amount of spices can replace.
- Drain and Rinse Those Beans: Canned kidney beans are convenient, but they’re also packed with sodium and can make your chili verde taste flat. Drain them, then rinse under cold water—this cuts the salt and washes away some of the metallic tang. Pat them dry with a paper towel if you’re feeling fancy (yes, it’s extra work, but the texture improves).
- Char the Tomatoes First: Skip the blender for the tomatoes—charred skin adds smoky depth that blended tomatoes can’t match. Halve the Roma tomatoes, brush them with oil, and sear them cut-side down in a dry pan until blackened in spots. Then chop them up and toss them into the chili. It’s a little extra effort, but it turns a basic ingredient into the star of the dish.
- Simmer Low and Long: After everything’s in the pot, resist the urge to crank the heat and walk away. Instead, bring it to a gentle simmer (small bubbles, occasional stir) and let it cook uncovered for at least 45 minutes. This lets the flavors meld and the beans soften properly—rushing it leads to a watery, underdeveloped chili. Patience here makes all the difference.
Troubleshooting your beef and bean chili verde
Chili Too Thin?
If your chili verde ends up watery, don't panic—this is easily fixed. After the initial simmer, uncover the pot and cook on medium-low heat for an extra 10-15 minutes to reduce the liquid naturally. For faster results, mix 1 tablespoon cornstarch with 2 tablespoons water, stir into the chili, and simmer for 3-5 minutes until thickened. I've found that Hatch green chiles add natural thickening power, so using them generously helps too. 🌶️
Tortillas Turning Soggy?
Crispy tortilla bites are the star of this dish, so soggy ones are a dealbreaker. To prevent this, fry them in 350°F oil using a thermometer to monitor temperature—dropping below 325°F will make them greasy. Fry in single layers and drain on a wire rack (not paper towels) to maintain crispness. Keep them warm in a 200°F oven while finishing the chili. Pro tip: Spritz with 1 tsp lime juice after frying for extra crunch.
Beef Too Tough?
Overcooked beef ruins even the best chili. For perfect texture, brown the beef in 6-8 minutes over medium-high heat, then remove it from the pot and set aside. Add the aromatics and spices to the pot first, then return the beef to finish cooking during the simmer phase. This two-stage method keeps the meat tender. I also recommend using 80/20 ground chuck—the fat content prevents drying out. 🥩
Flavor Too Mild?
If your chili lacks depth, boost the umami with 1 tbsp soy sauce or ½ tsp smoked paprika. For heat, add ½ tsp cayenne or a pinch of chipotle powder. I often finish with 1 tbsp balsamic vinegar during the last 5 minutes of simmering—it adds a tangy brightness that cuts through the richness. Taste as you go and adjust gradually rather than dumping spices all at once.
Beans Too Mushy?
Overcooked beans turn to mush, ruining the texture. If using canned beans, drain and rinse them thoroughly before adding. For dry beans, soak overnight and cook separately until just tender (about 80% done), then add to the chili during the final 10 minutes of cooking. I prefer light red kidney beans—they hold their shape better than dark varieties. For extra firmness, add ½ tsp baking soda to the beans during the last 5 minutes of cooking. 🌱
Tortilla Bites Not Crispy?
Oil temperature is everything here. Use a deep-fry thermometer to maintain 350°F—any lower and they'll absorb oil. Cut tortillas into 1-inch wedges (smaller pieces crisp faster). For extra crunch, double-fry: fry once for 1 minute, drain, then fry again for 30 seconds. Keep them warm in a 200°F oven on a wire rack (not a plate) to prevent steam from making them soggy.
Nutrition facts
Frequently asked questions
Can I make this chili verde in a slow cooker?
Brown the beef first in a skillet, then transfer everything (except tortilla bites) to your slow cooker. Cook on low for 6-7 hours or high for 3-4 hours. The slow cooking enhances the smoky flavors even more. Just add the tortilla bites right before serving to keep them crispy.
What makes this chili verde different from regular chili?
This recipe uses roasted green chiles instead of red chiles or chili powder, giving it a brighter, slightly tangy flavor. The tomato paste and fresh tomatoes create a rich, slightly sweet sauce that contrasts with the smoky spices. Plus, the crispy tortilla bites add a Southwestern twist that regular chili lacks.
Can I substitute ground turkey or chicken for the beef?
Yes, but the texture will be different. Ground turkey (especially lean) works best—just add 1 extra tablespoon oil to prevent drying out. Chicken will be much lighter in flavor, so boost the spices by 25%. For best results, use 80/20 ground chuck as called for in the recipe.
How can I make this chili verde spicier? Add ½ tsp cayenne pepper or 1 chopped jalapeño with the green chiles. For smoky heat, stir in ½ tsp chipotle powder during the final 5 minutes of cooking.
What's the best way to reheat leftovers?
Reheat in a pot over medium-low heat with a splash of broth or water to prevent drying. For crispy tortilla bites, warm them separately in a 350°F oven for 3-5 minutes or fry again briefly. Never microwave the tortillas—they'll turn soggy instantly.