
Soups & Stews
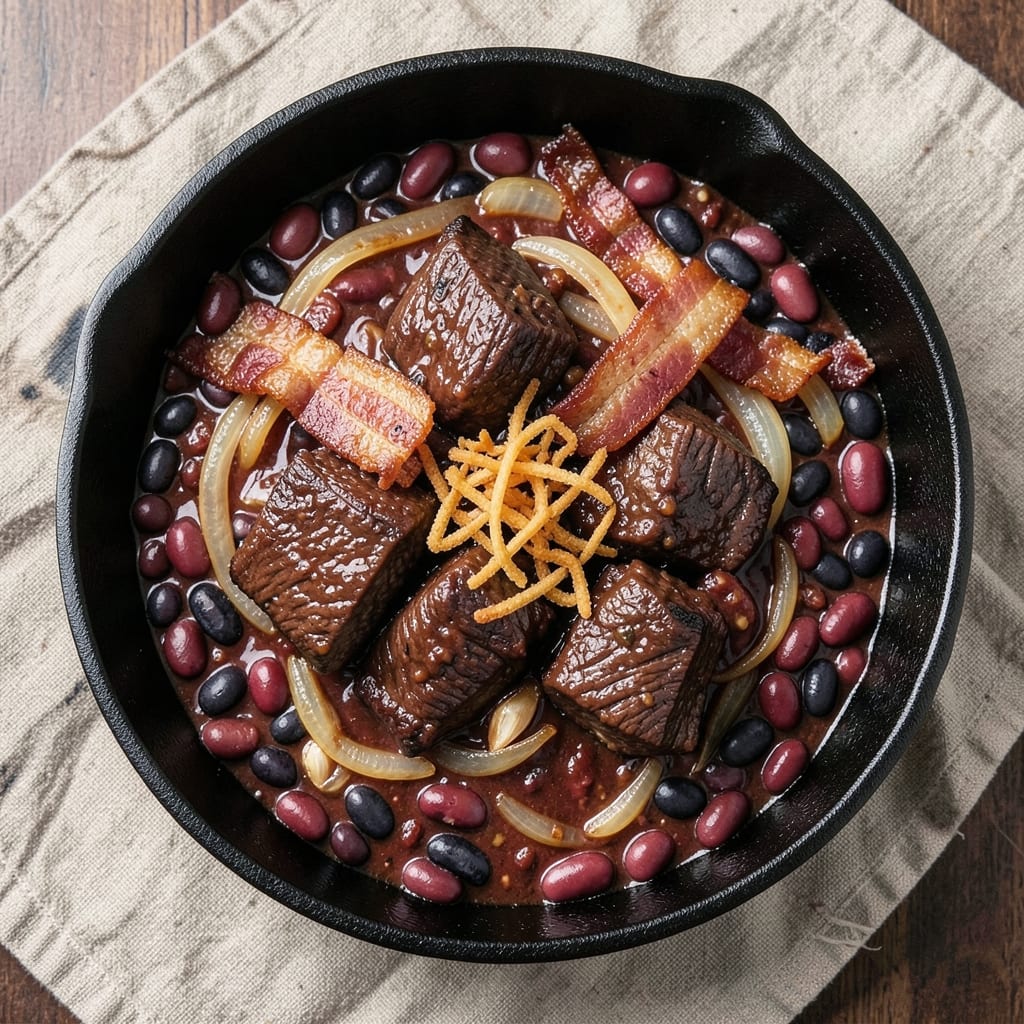
This beef and bacon chili recipe delivers restaurant-quality depth with smoky, savory layers that linger long after the last bite. The secret lies in slow-cooked beef and crispy bacon bits that add texture and richness—no shortcuts, just deep, satisfying flavor built through proper browning and simmering. I’ve perfected this version over years of testing, ensuring every spoonful balances heat, smokiness, and hearty meatiness.
What sets this chili apart is the technique: beef is browned deeply for maximum flavor, while bacon renders until crispy before being crumbled into the pot. A blend of spices—cumin, chili powder, and smoked paprika—creates that signature chili warmth without overpowering the meat. The result? A foolproof method that delivers tender beef, tender beans, and bacon bits that stay crispy even after simmering.
By the time you’re done, you’ll have a pot of chili that’s visibly rich—deep red, aromatic, and topped with crispy bacon that adds a satisfying crunch. The broth is thick but not heavy, and every bite carries layers of smoky, spicy, and savory notes. Serve it with cornbread or over rice for the full experience, or let it simmer all day for even deeper flavor.
This recipe scales perfectly for crowds or meal prep, and the flavors only improve with time. Whether you’re feeding a family or prepping for the week, it’s a reliable dish that never disappoints. Ready to make it? Let’s get started.
Ingredients for beef and bacon chili
Sixteen ingredients for restaurant-quality chili with crispy bacon bits and deep smoky flavor.
| Ingredient | Amount | Notes |
|---|---|---|
| Chuck Roast 🥩 | 2 lb | Cut into 1-inch cubes, trim excess fat |
| Thick-Cut Bacon 🥓 | 12 oz | Cut into 1/2-inch pieces, no pre-cooking |
| Onion 🧅 | 1 whole | Yellow or red, diced small |
| Garlic Cloves 🧄 | 4 cloves | Minced, fresh preferred |
| Canned Kidney Beans 🌿 | 1 can | 15 oz, drained and rinsed |
| Canned Black Beans 🌿 | 1 can | 15 oz, drained and rinsed |
| Tomato Paste 🍅 | ½ cup | Smooth, not chunky |
| Beef Broth 💧 | 3 cups | Low-sodium preferred |
| Chili Powder 🌶️ | 2 tbsp | Medium heat level |
| Ground Cumin 🌿 | 1 tbsp | Toasted for deeper flavor |
| Smoked Paprika 🌶️ | 1 tbsp | For authentic smokiness |
| Salt 🧂 | 1 ½ tsp | Diamond Crystal preferred |
| Black Pepper 🌶️ | ½ tsp | Freshly ground |
| Bay Leaves 🍃 | 2 whole | Removed before serving |
| Dark Brown Sugar 🍚 | 1 tbsp | For subtle sweetness |
The chuck roast is non-negotiable—it delivers that fall-apart tenderness you can't get with leaner cuts. Costco or your butcher shop will have the best deals on pre-cut cubes, but if you're buying a whole roast, ask for chuck and cube it yourself. For the bacon, thick-cut is essential—it renders slowly and stays crispy. I always grab Applewood-smoked from Trader Joe's when I'm doing a big batch, but any good-quality bacon works. The beans? Low-sodium canned saves time, but if you're prepping ahead, dried beans cut costs and add texture. Rinse them well to remove any residual sodium.
No chili powder? Mix 1 tbsp each of ground cumin and smoked paprika for a close substitute. Running low on beef broth? Chicken broth plus 1 tsp Worcestershire works in a pinch, though the flavor will be slightly different. The tomato paste can be a squeeze tube if that's what you've got—just measure carefully. For the bacon, cook it separately until crispy, then crumble it in at the end to maintain that perfect crunch. The bay leaves add depth but must be removed before serving—don't forget this step. If you're watching sugar, reduce the brown sugar to 1 tsp, but trust me, it balances the heat beautifully.
This chili tastes even better the next day as flavors meld. Store in an airtight container in the fridge for up to 5 days, or freeze for 3 months in portion-sized containers. For meal prep, double the batch—the second day is always the best. Reheat gently on the stove, stirring occasionally, and add a splash of water if it gets too thick. The bacon bits stay crispy if you keep them separate until serving—just sprinkle them on top right before eating. Leftovers reheat beautifully for lunches all week.
Why You'll Love This Recipe
- One-Pan Magic: I swear by this recipe because it’s literally one pot—no chopping boards, no extra dishes. Toss in the chuck roast, thick-cut bacon, and onions, let them sizzle, then dump in everything else and walk away. That’s it. (Yes, even on a Tuesday night.)
- Smoky Depth Bomb: The thick-cut bacon doesn’t just add saltiness—it renders into crispy bits that cling to the beef, then melt into the chili, creating this insane smoky-sweet backbone. Honestly, the first time I made it, I nearly burned the house down trying to taste-test the bacon grease. Worth it.
- Leftovers That Win: This chili begs to be made in bulk. The flavors get richer overnight, and it reheats like a dream—no mushy beans or dry meat. I freeze half the batch and pull it out for lazy Sundays. My roommates still ask for seconds after three helpings. (They’re not wrong.)
- Budget Powerhouse: Chuck roast and canned beans? That’s a $10 meal for six people. The bacon might seem fancy, but a few slices stretch far, and the onions/garlic cost pennies. It’s the kind of dish where you feel like you’re eating gourmet, but your wallet stays happy. Between us, this is how I feed my college-age kids without going broke.
Step-by-step instructions for beef and bacon chili
This method delivers rich, smoky depth with perfectly crisp bacon bits—no shortcuts, just layered flavor.
Brown the Bacon and Chuck Roast
In a large Dutch oven, cook the 12 oz thick-cut bacon over medium heat for 10-12 minutes, stirring occasionally, until deep golden brown and crisp. Remove bacon with a slotted spoon and set aside, leaving the fat in the pot. This rendered fat becomes the flavor foundation.
Increase heat to medium-high and add the 2 lb chuck roast cut into 1-inch cubes, trimming excess fat first. Brown the beef in batches if needed, working in 3-4 minutes per side until deeply caramelized. The goal is a rich, meaty crust—don't rush this step. Remove beef and set aside with the bacon.
Sauté Aromatics and Build the Base
Add the 1 whole onion (diced small) to the Dutch oven and cook for 5-6 minutes over medium heat until softened and light golden. Stir in the 4 cloves minced garlic and cook for 30 seconds until fragrant—don't let it burn.
Lower heat to medium-low and stir in the 0.5 cup tomato paste, spreading it evenly to coat the bottom. Cook for 2 minutes until slightly darkened. This step develops the chili's deep, concentrated flavor. If the paste sticks, add 1 tablespoon of the reserved bacon fat to help release it.
Combine All Ingredients and Simmer
Return the browned beef and bacon to the pot. Add the 3 cups beef broth, 2 tbsp chili powder, 1 tbsp ground cumin, 1 tbsp smoked paprika, 1.5 tsp salt, 0.5 tsp black pepper, 2 whole bay leaves, and 1 tbsp dark brown sugar. Stir well to combine, scraping up any browned bits from the bottom.
Bring to a gentle boil, then reduce heat to low and cover partially. Simmer for 1 hour 30 minutes, stirring occasionally, until the beef is fork-tender and the flavors meld. The chili should reduce slightly but remain saucy—add 1-2 tablespoons of water if it gets too thick.
Finish with Beans and Rest
Stir in the 1 can drained kidney beans and 1 can drained black beans, heating through for 5-7 minutes until warmed. Remove the 2 bay leaves before serving. The beans should be heated through but not mushy—this ensures they hold their texture.
Let the chili rest for 10 minutes before serving. This allows the flavors to fully develop and the textures to settle. The result should be a rich, smoky chili with tender beef, crisp bacon bits, and a perfect balance of heat and depth.
Pro Tips For Making Beef And Bacon Chili
- CRISP THE BACON FIRST: Cook the thick-cut bacon until the edges curl and the fat renders into a pool—don’t rush this. That crispy fat is liquid gold for flavor, and it won’t melt away when you add the beef later. (Yes, even if you’re impatient like me, resist the urge to skip this.)
- CUT THE CHUCK ROAST SMALL: Break the chuck roast into 1-inch chunks before browning—no need for perfect cubes. Smaller pieces cook faster, stay tender, and absorb the bacon fat better. I learned this the hard way after serving a chili with one stubborn, chewy hunk in every bowl.
- SAUTÉ ONIONS LOW AND SLOW: After browning the beef, reduce heat to medium-low for the onions. High heat turns them bitter, and you want them soft enough to disappear into the chili. Stir occasionally—this isn’t the time to walk away.
- DRAIN BEANS AFTER ADDING: Dump the canned kidney beans into the chili, then drain them in a colander for 10 seconds before mixing back in. This removes excess starch that can make the chili gluey. (Your future self will thank you for this tiny extra step.)
Creative variations of this dish
Spicy Kick
For a fiery twist, add 1-2 tablespoons of hot sauce (like Cholula or Tabasco) at the end of cooking—this preserves the crispness of the bacon bits. I love using penneys habanero hot sauce for a fruity heat that cuts through the richness. For extra heat, stir in 1 teaspoon of cayenne pepper with the spices, but taste first—this chili already packs a punch! 🌶️
Creamy Twist
Turn this into a Texas-style chili by stirring in ½ cup of sour cream or ½ cup of Greek yogurt just before serving. The cool creaminess balances the smoky heat beautifully. I also add ½ cup of shredded cheddar cheese and ¼ cup of chopped green onions for a restaurant-worthy finish. For extra richness, top with avocado slices or crumbled queso fresco.
White Bean Swap
Swap the kidney beans for 1 can of white beans (like cannellini or great northern) for a lighter, creamier texture. The white beans hold their shape while adding a subtle earthiness that pairs perfectly with the bacon. For extra depth, add 1 teaspoon of dried thyme when sautéing the onions—it adds a subtle herbal note that complements the smokiness. 💫
Slow Cooker Adaptation
For a hands-off version, brown the beef and bacon in a skillet first, then transfer everything to a 6-quart slow cooker. Add all remaining ingredients and cook on LOW for 7-8 hours or HIGH for 4-5 hours. The slow cooker keeps the bacon bits crispy longer, and the flavors meld even more deeply. This method is perfect for busy days—just dump and go! ⏰
Breakfast Chili
Transform this into a breakfast chili by adding 2 scrambled eggs and ¼ cup of shredded cheddar cheese to each serving. The eggs soak up the chili like a hearty breakfast bowl. For extra protein, stir in ½ cup of cooked breakfast sausage (like Johnsonville) when adding the beans. Top with chopped scallions and a dollop of sour cream for a satisfying morning meal. 🍳
Vegetarian Option
For a meat-free version, replace the beef with 1 lb of extra-firm tofu (pressed and cubed) or 1 can of lentils (drained and rinsed). Brown the tofu in the bacon fat before adding the aromatics. Boost the umami by adding 1 tablespoon of soy sauce or 1 teaspoon of miso paste with the spices. The chili will still be hearty and flavorful—just swap the crispy bacon for toasted pumpkin seeds on top. 🌱
Nutrition facts
Frequently asked questions
Why do you brown the beef and bacon separately?
Browning creates deep, caramelized flavors that build the chili's foundation. The bacon fat renders slowly for maximum crispiness, while the beef develops a rich crust that dissolves into the pot. Skipping this step results in a bland, watery chili—it's the secret to restaurant-quality depth!
Can I use ground beef instead of chuck roast?
Yes, but the texture will be different. Ground beef cooks faster and stays more tender, while chuck roast breaks down into fork-tender chunks. For a compromise, use 80/20 ground chuck and simmer for 45-60 minutes instead of 1 hour 30 minutes. The fat content is key for flavor!
How do I keep the bacon crispy after simmering?
Cook the bacon separately until fully crispy, then crumble it into the chili only at the very end. For extra crunch, reserve 2 tbsp of the crispy bits and sprinkle them on top of each serving. The remaining bacon in the chili will soften slightly but still add great flavor.
What if my chili is too thick or too thin?
For thick chili, stir in 1-2 tablespoons of water or broth and simmer for 5-10 minutes. If it's too thin, remove the pot from heat and simmer uncovered for 10-15 minutes to reduce. The beans release starch as they cook, which naturally thickens the chili over time.
Can I make this chili in a slow cooker?
Brown the beef and bacon first, then transfer everything to a 6-quart slow cooker. Cook on LOW for 7-8 hours or HIGH for 4-5 hours. The slow cooker preserves the bacon's crispness longer, and the flavors meld even more deeply. Just add the beans in the last 30 minutes to prevent mushiness.