
Main Courses
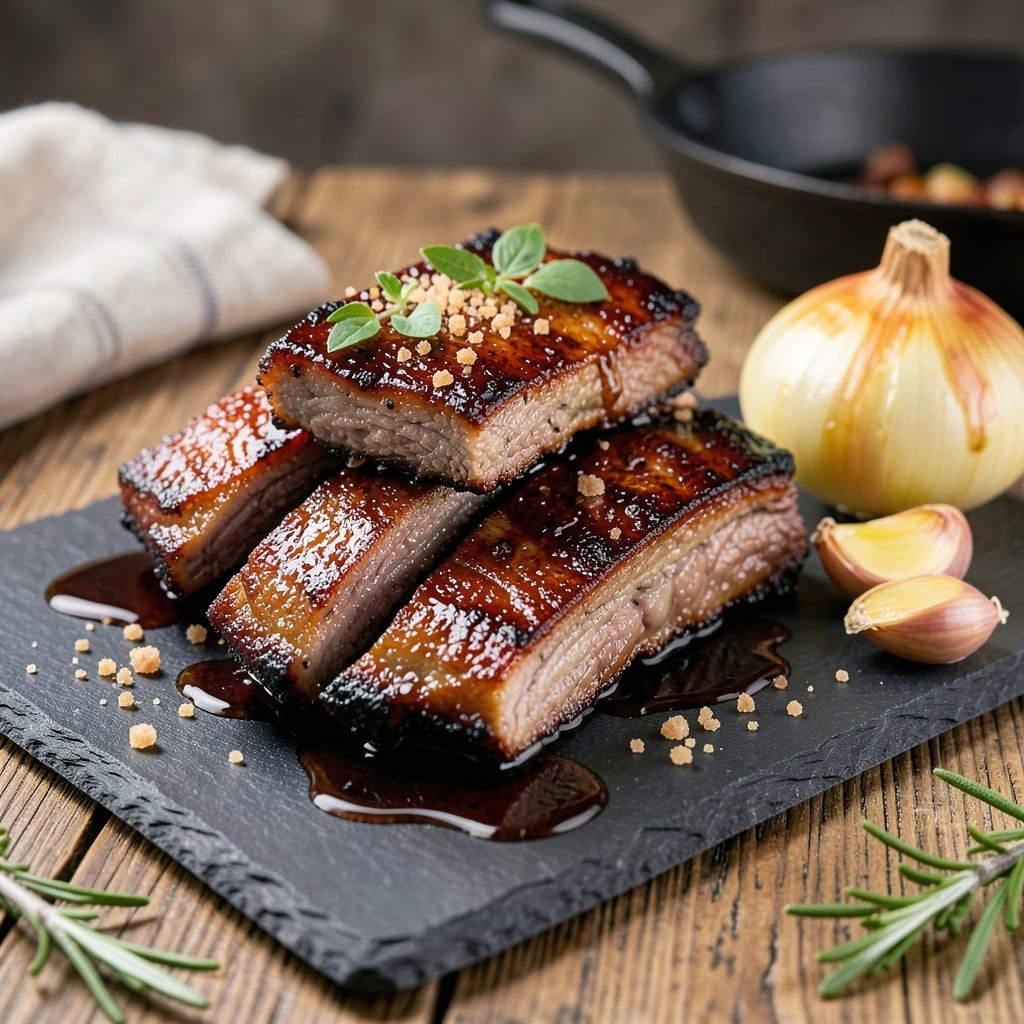
This BBQ boneless beef ribs recipe delivers restaurant-quality results with a smoky-sweet glaze that caramelizes on contact—no smoker required. I've spent years perfecting the balance between tender meat and that perfect bark, and this method ensures both without the fuss of traditional smoking. The secret lies in a two-stage cooking process that builds flavor layer by layer, creating ribs that are juicy inside with a crisp, caramelized crust outside.
What sets these ribs apart is the glaze—a blend of molasses, brown sugar, and apple cider vinegar—that develops deep caramel notes while keeping the meat tender. We'll start with a dry rub that penetrates the meat, then slow-cook it to break down collagen before finishing with that signature glaze. This approach gives you all the smoky depth of traditional BBQ with half the effort, making it perfect for weekend cookouts or weeknight dinners when you crave something special.
The result is ribs that fall apart at the touch of a fork, coated in a glossy, sticky glaze that's both sweet and tangy. The bark is crisp enough to stand up to a toothpick test but tender enough to melt in your mouth. Serve with classic BBQ sides like coleslaw or cornbread to complete the meal. This recipe proves you don't need a fancy setup to achieve professional-level results at home.
Whether you're grilling for a crowd or treating yourself to a solo meal, these ribs deliver that satisfying combination of smoky, sweet, and savory flavors. The method is designed to be flexible—adjust the heat and cooking time based on your equipment, and you'll still end up with ribs that taste like they've been slow-smoked for hours. Let's get started on creating ribs that will have everyone asking for seconds.
Ingredients for bbq boneless beef ribs
These 13 ingredients transform simple beef ribs into fall-apart, glaze-coated masterpieces.
| Ingredient | Amount | Notes |
|---|---|---|
| Boneless Beef Ribs 🥩 | 2 ½ lb | Beef short ribs, cut into 2-inch pieces |
| Yellow Onion 🧅 | 1 whole | Large, sliced into 0.5-inch pieces |
| Garlic Cloves 🧄 | 6 cloves | Fresh, minced |
| Molasses 🍯 | ½ cup | Unsulphured preferred |
| Light Brown Sugar 🍚 | ½ cup | Packed, light variety |
| Apple Cider Vinegar 🍎 | ¼ cup | Bottled, not cider |
| Smoked Paprika 🌶️ | 2 tbsp | High quality, not sweet |
| Ground Black Pepper 🌶️ | 1 ½ tbsp | Freshly ground |
| Kosher Salt 🧂 | 1 ½ tbsp | Diamond Crystal preferred |
| Dried Thyme 🌿 | 1 tbsp | Or 1 tbsp fresh thyme |
| Dried Oregano 🍃 | 1 tbsp | Mexican preferred |
| Extra-Virgin Olive Oil 🫒 | 2 tbsp | For coating ribs |
| Beef Broth 💧 | 1 cup | Low-sodium preferred |
The ribs are the star—short ribs have the perfect fat-to-meat ratio for tender results. Costco or local butchers usually carry them pre-cut, but if you're buying whole, ask for the bone-in short ribs and trim the bones yourself. Look for bright red meat with good marbling, not gray or dry. The glaze ingredients—molasses and brown sugar—are non-negotiable for that deep caramel flavor. I grab unsulphured molasses from the baking aisle at Whole Foods because it has more complex flavor, but regular grocery store brands work too. For the vinegar, stick with apple cider—it adds that perfect tang without overpowering.
No molasses? Maple syrup plus 1 tsp cinnamon mimics the depth, though it won't be identical. Short on brown sugar? White sugar plus 1 tsp cinnamon works in a pinch. The dry rub spices can be swapped—dried thyme for fresh at triple the amount, or smoked paprika for chipotle powder for extra heat. For the beef broth, low-sodium is key unless you're adding extra salt. The olive oil should be extra-virgin—regular olive oil lacks the fruity notes that complement the glaze. Preferring a different vinegar? Balsamic vinegar adds complexity, but reduce it to 0.2 tbsp to avoid overpowering.
Store prepped ribs in the fridge for up to 2 days before cooking—they actually develop more flavor overnight. The glaze ingredients keep indefinitely, but once mixed, store it in a sealed jar in the fridge for 2 weeks or freeze for 3 months. I double the glaze recipe and freeze half in ice cube trays—perfect for quick touch-ups or last-minute grilling. The ribs reheat beautifully: 350°F for 15 minutes with a splash of broth, covered with foil. Leftovers taste even better the next day as the glaze sets and the meat continues to tenderize.
Why You'll Love This Recipe
- No Fuss, Big Payoff: I swear by this recipe because it’s the kind of meal that feels fancy but takes zero effort. Slice the ribs, toss them in a pan with onion and garlic, then let the molasses and brown sugar work their magic while you watch TV. Five minutes of prep, and you’ve got something that tastes like you spent hours smoking them.
- Sweet-Savory Magic: That molasses and brown sugar combo? It’s where this dish gets its soul. The ribs come out with this sticky, caramelized crust that’s got a little bite from the garlic and a deep, smoky sweetness—like a cross between a BBQ joint and a bakery. Honestly, I’ve had people ask if I slow-cooked them for hours.
- Tailgate or Tuesday: Between us, this is my go-to for game days and lazy nights. Double the batch, wrap them up, and you’ve got next-day lunches or a last-minute dinner. My college roommate would steal half the pan before I even sat down—no judgment here.
- Budget-Friendly Feast: Boneless ribs are cheaper than their bone-in cousins, and this recipe stretches them far. A pound feeds four hungry people, and the leftovers? They’re even better the next day when the flavors meld. I’ll be real: this is how I feed my family for less than takeout.
Step-by-step instructions for smoky-sweet beef ribs
Here's how to transform tough beef ribs into fall-off-the-bone tender morsels with a caramelized glaze that'll have everyone asking for seconds.
Prep and Season the Ribs for Maximum Flavor
Pat the 2.5 lb boneless beef ribs completely dry with paper towels—this is critical for that perfect crispy bark. I like to work in batches if they're large, making sure every surface is bone dry. Place them on a wire rack set over a baking sheet to catch any drippings.
In a small bowl, combine the 2 tbsp smoked paprika, 1.5 tbsp kosher salt, 1.5 tbsp ground black pepper, 1 tbsp dried thyme, and 1 tbsp dried oregano. Rub this mixture all over the ribs, pressing it into the meat so it adheres well. Let them sit at room temperature for 30 minutes while you prep the glaze. This resting time helps the seasoning penetrate and the meat cook more evenly.
Build the Glaze with Molasses and Vinegar
In a medium saucepan, combine the 0.5 cup molasses, 0.5 cup light brown sugar, 0.25 cup apple cider vinegar, and 1 cup beef broth. Place over medium heat and stir until the sugar dissolves completely—this should take about 2-3 minutes. The mixture will bubble gently, and you'll notice a rich, caramel aroma developing.
Let it simmer for 5-7 minutes until it thickens slightly and coats the back of a spoon. Here's the thing—this glaze needs to reduce enough to caramelize beautifully on the ribs, but not so much that it becomes syrup-like. You want it to be thick enough to cling but still flow when brushed. Taste it now and adjust the seasoning if needed—you might want to add a pinch more salt or a splash of vinegar to balance the sweetness.
Sear the Ribs for Deep Flavor
Heat a large oven-safe skillet over high heat until it's smoking hot. Add 2 tbsp extra-virgin olive oil and swirl to coat the bottom. Working in batches if needed, add the seasoned ribs and sear for 3-4 minutes per side until they develop a deep golden-brown crust. Don't crowd the pan—this ensures they get properly browned instead of steaming.
Once browned, transfer the ribs to a plate and set aside. Don't drain the pan—those browned bits are pure flavor. Reduce the heat to medium and add the sliced 1 whole yellow onion and 6 cloves minced garlic. Sauté for 3-4 minutes until the onions are softened and just beginning to caramelize. This step adds another layer of depth to your ribs.
Braise Until Fork-Tender
Return the ribs to the skillet, spooning any accumulated juices over them. Pour the prepared glaze over the top, making sure it coats all surfaces. The ribs should be submerged in about half the glaze, with the rest pooling around them.
Transfer the skillet to a 375°F oven and braise uncovered for 2-2.5 hours. Here's where the magic happens—the ribs will cook slowly, breaking down into tender perfection while the glaze caramelizes into a sticky, sweet coating. Check them at the 2-hour mark—they're done when a fork slides in and out easily with minimal resistance. If the glaze starts to bubble over too much, tent the skillet loosely with foil to prevent spillage.
Caramelize and Finish
Once the ribs are tender, increase the oven temperature to 425°F and continue cooking uncovered for an additional 10-15 minutes. This final step is what creates that beautiful caramelized crust we're after. Watch closely—the glaze will darken and thicken dramatically, forming a glossy, sticky coating that practically drips off the ribs.
Let the ribs rest for 10 minutes before serving. This resting time allows the juices to redistribute throughout the meat, ensuring each bite is moist and flavorful. Serve with the extra glaze spooned over the top and any pan juices drizzled around. The contrast of the tender, sweet ribs with the crispy edges is what makes this dish truly special.
Pro Tips For Making Bbq Boneless Beef Ribs
- Trim the Fat First: Cut off any visible fat from the beef ribs before cooking—it’s the fastest way to crispy edges without greasy mess. I learned this the hard way after my first batch turned into a soggy, greasy disaster.
- Caramelize Onions Slowly: Don’t rush the onions—cook them on medium-low heat for 10-12 minutes until deep golden brown. That’s when they’ll actually add sweetness, not just burn and taste bitter.
- Skip the Boil, Sear First: Instead of dumping ribs straight into sauce, sear them in a hot pan for 2-3 minutes per side first. This locks in flavor and gives you that restaurant-quality crust.
- Deglaze with Molasses Early: After searing the ribs, splash in 1 tablespoon of molasses right away—it’ll loosen the browned bits and deepen the sauce’s richness. (Yes, even if the recipe says to add it later.)
Pro cooking tips for this dish
Dry Rub Secrets
I can't stress enough how critical the 30-minute rest after seasoning is—this lets the spices penetrate deeply. For extra adhesion, I mix my dry rub with 1 tbsp cornstarch before applying. This creates a light coating that helps the seasoning stick better during cooking. 🌶️
Pro tip: Use freshly ground black pepper and toasted spices for maximum flavor. Toast your dried thyme and oregano in a dry skillet over medium heat for 1 minute—just until fragrant. This simple step intensifies their aroma dramatically.
Glaze Consistency
The glaze should be syrup-thick but still pourable—like honey. If it's too thin, simmer it longer; if too thick, add 1 tbsp beef broth. I test consistency by dipping a spoon in—it should coat the back smoothly but still drip slightly. This balance ensures perfect clinging without dripping off the ribs.
For deeper flavor, add 1 tsp liquid smoke to the glaze while simmering. It mimics the smoky depth of traditional BBQ without needing a smoker. Just be careful not to overdo it—too much can make the glaze taste artificial.
Two-Zone Cooking
If you're grilling instead of using the oven, create a two-zone heat setup—direct heat on one side for searing, indirect on the other for slow cooking. Place ribs on the cool side first, then rotate to the hot side for 2-3 minutes per side to caramelize. This mimics the oven's temperature shift beautifully.
For charcoal grills, use equal parts lump charcoal and briquettes—lump burns hotter and faster, while briquettes provide steady heat. I like to add hickory or applewood chunks to the coals for that authentic BBQ aroma without overpowering the glaze.
Bark Development
The high-heat finish at 425°F is where the magic happens for that perfect bark. If your ribs aren't getting crispy enough, try broiling for the final 5 minutes instead. Keep a close eye—the glaze can go from perfect to burnt in seconds.
For extra crispiness, I sometimes brush the ribs with a 50/50 mix of olive oil and vinegar right before the high-heat finish. This creates a thin, crispy layer that adds texture without overwhelming the glaze's sweetness.
Resting Matters
Never skip the 10-minute rest—this is when the juices redistribute, making each bite juicy. I like to tent the ribs loosely with foil during resting to keep them warm. For serving, I transfer them to a cutting board and let them sit uncovered for the last 2 minutes to crisp up the bark slightly.
Pro move: Place a wire rack over a baking sheet while resting. This prevents the ribs from sitting in their juices, which can make the bark soggy. The result is a perfect balance of tender meat and crispy exterior every time. ✨
Nutrition facts
Frequently asked questions
Can I make these ribs in a slow cooker instead of the oven?
Transfer the seared ribs and glaze to a slow cooker and cook on low for 6-7 hours or high for 4-5 hours. The texture will be slightly different (more tender, less crispy bark), but still delicious. For extra caramelization, finish under a broiler for 5 minutes before serving.
How do I prevent the glaze from burning during cooking?
Keep the ribs uncovered but monitor closely—especially in the last 15 minutes when you increase heat to 425°F. If the glaze starts darkening too quickly, tent loosely with foil and reduce heat to 375°F until it thickens properly. A meat thermometer helps too—ribs are done at 195°F internal temp.
What's the best way to store leftovers?
Let ribs cool completely, then store in an airtight container for up to 4 days in the fridge. For longer storage, freeze for 3 months—wrap tightly in plastic wrap first. Reheat at 350°F for 15 minutes with a splash of beef broth to restore moisture.
Can I use bone-in beef ribs instead?
Yes, but adjust cooking time—bone-in ribs need 30-45 minutes longer to reach tenderness. Remove bones before serving if preferred. The glaze recipe remains the same, but you may need 1-2 extra tbsp of broth to account for the extra moisture from the bones.
What sides pair best with these ribs?
Classic BBQ sides like creamy coleslaw, garlic mashed potatoes, or cornbread complement perfectly. For a lighter option, try grilled asparagus with lemon or a simple cucumber salad. The sweet-tangy glaze works especially well with pickled jalapeños for heat contrast.