
Main Courses
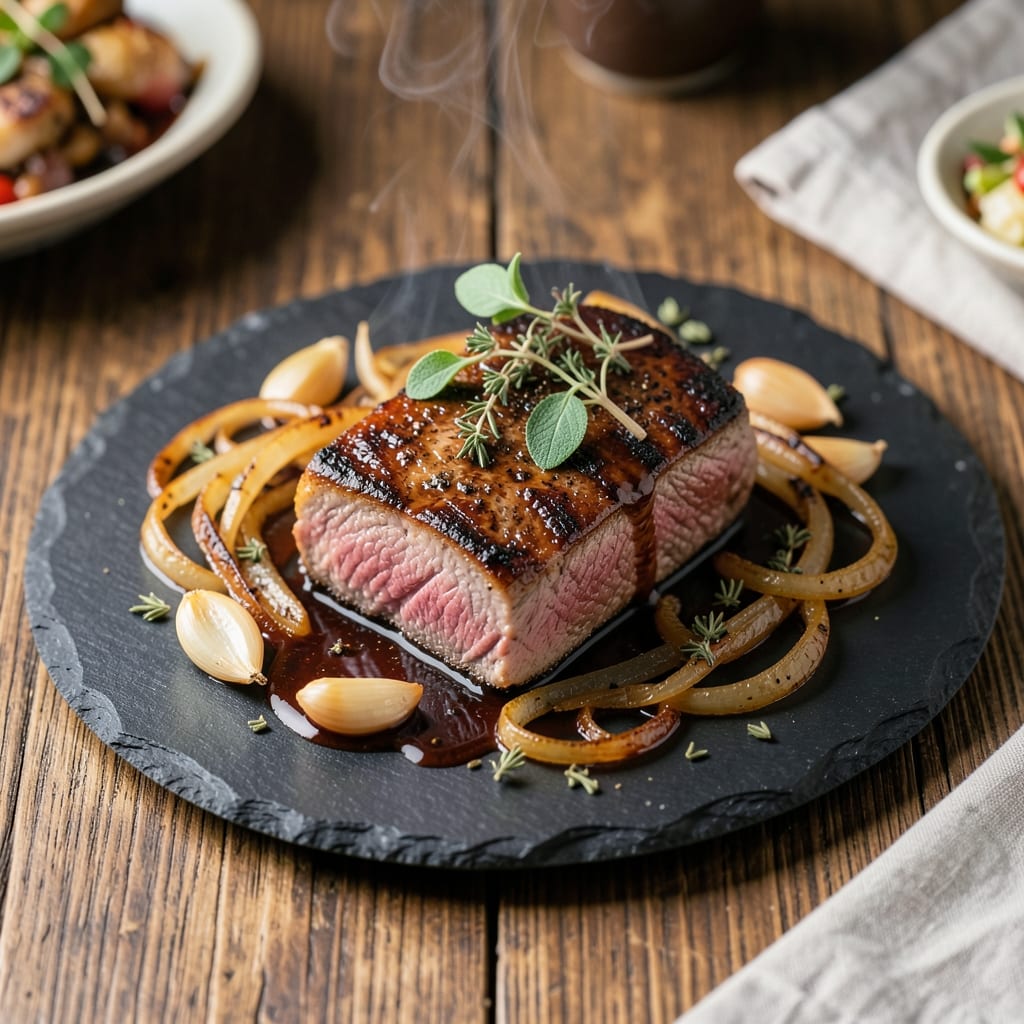
This BBQ beef fillet recipe delivers the perfect balance of smoky charred crust and juicy centers that will elevate your backyard cooking. 🔥 As a pitmaster trained in both French technique and fire-cooked tradition, I've refined this method to ensure every bite is tender yet flavorful, with that coveted bark that comes from controlled heat and proper timing. The secret lies in a simple yet potent marinade that tenderizes while building layers of flavor, paired with precise grilling techniques that transform tough cuts into melt-in-your-mouth perfection.
What sets this recipe apart is the marriage of traditional BBQ methods with modern precision. While wood-fired smokers create iconic flavors, we're using a pellet grill for consistent temperature control—ideal for achieving that medium-rare finish (130-135°F internal temperature) without guesswork. The marinade combines bold spices with a touch of acidity to break down fibers, while the high-heat sear creates that irresistible crust. This isn't just about cooking beef; it's about mastering the interplay between smoke, heat, and time to create restaurant-quality results at home.
The result is a beef fillet with a deep mahogany crust that gives way to pink, buttery centers—each bite offering a perfect contrast of textures and flavors. The smoky aroma alone will have guests gathering before the first piece hits the plate, and the juices flowing from the first cut will confirm you've achieved something truly special. This is the kind of dish that transforms casual cookouts into memorable gatherings, where every detail matters and the fire does all the heavy lifting.
Whether you're grilling for a special occasion or simply treating yourself to a premium cut, this method ensures success every time. The beauty of this recipe lies in its adaptability—use it for a summer barbecue, a romantic dinner under the stars, or even as the centerpiece of your next competitive cooking challenge. The techniques here are built to impress while remaining accessible, proving that anyone with a grill can create restaurant-worthy results. Let's get started on creating that perfect charred crust with juicy centers you've been craving.
Ingredients for bbq beef fillet
Premium cut, bold flavors, and smoky precision—your backyard grill just got an upgrade.
| Ingredient | Amount | Notes |
|---|---|---|
| Beef Tenderloin Fillet 🥩 | 2 lb | Center-cut, 1.5-inch thick |
| Yellow Onion 🧅 | 1 whole | Medium, thinly sliced |
| Garlic Cloves 🧄 | 6 cloves | Fresh, minced |
| Smoked Paprika 🌶️ | 2 tbsp | High-quality, for depth |
| Ground Cumin 🌿 | 1 tbsp | Toasted for warmth |
| Dried Oregano 🍃 | 1 tbsp | Mexican oregano preferred |
| Black Peppercorns 🌶️ | 1 tsp | Freshly cracked |
| Kosher Salt 🧂 | 1 ½ tbsp | Diamond Crystal preferred |
| Apple Cider Vinegar 🍎 | ½ cup | For tenderizing |
| Olive Oil 🫒 | ¼ cup | Extra-virgin, for searing |
| Wood Pellets 🔥 | 1 bag | Hickory or cherry |
| Fresh Rosemary 🌿 | ¼ cup | Chopped, for aroma |
| Fresh Thyme 🌿 | ¼ cup | Leaves only, chopped |
The beef is everything here. Tenderloin fillet is the gold standard—lean, tender, and forgiving. Grab it from Whole Foods or your local butcher, and ask for a center-cut piece about 1.5 inches thick. Thicker cuts need more time, but thinner ones risk overcooking. The fillet should be bright red and marbled—avoid anything with grayish hues. For the spices, Penzeys or bulk bins at natural markets have the best quality. Toast your cumin seeds in a dry pan for 30 seconds before grinding—trust me, it makes all the difference.
No smoked paprika? Regular paprika plus a pinch of liquid smoke works in a pinch. Fresh rosemary and thyme are ideal, but dried at half the amount gets you close. The apple cider vinegar is non-negotiable—it breaks down fibers for that melt-in-your-mouth texture. For the wood pellets, Traeger or Green Mountain Grills brands are reliable, but any hickory or cherry will do. If you're short on time, the marinade can go on for just 30 minutes—though overnight is better. And if you're using a gas grill, soak wood chips in water for 30 minutes first to create smoke.
Marinate the beef uncovered in the fridge for 4-12 hours—longer isn't better here. The fillet reheats beautifully, but avoid microwaving—it turns rubbery. Instead, warm it in a 350°F oven for 10-15 minutes with a splash of beef broth. Leftovers keep 3-4 days wrapped tightly. For extra flair, brush the cooked fillet with a mix of melted butter and extra marinade before serving. The crust will stay crisp, and the juices will flow like a dream.
Why You'll Love This Recipe
- One-Pan Magic: I swear by this recipe when I’m too tired to fuss—just sear the fillet, toss in the onions and garlic, sprinkle the paprika and cumin, and let the oven do the work. The onions caramelize right on the same sheet, so cleanup is basically nonexistent.
- Smoky Depth: That smoked paprika and cumin blend? It’s the secret weapon. The beef stays tender while the spices cling like a warm, savory hug, and the garlic? Oh, it’s there—every bite has a little punch.
- Weeknight to Weekend: I make this for lazy Tuesdays, but it’s also my go-to for dinner parties. Slice it thin, serve it with crusty bread, and suddenly you’ve got a dish that feels fancy without the effort.
- Leftovers That Don’t Suck: Between us, most beef leftovers are sad. Not this. The flavors deepen overnight, and it reheats beautifully—perfect for sandwiches or a quick stir-fry the next day. (Yes, even on a Tuesday night.)
Step-by-step instructions for smoky charred beef fillet
This method delivers melt-in-your-mouth tenderness with a perfect smoky crust every time.
🔥 Step 1: Prep the Fillet for Maximum Flavor
Start by removing the beef tenderloin fillet from the refrigerator and patting it dry completely with paper towels. I press down firmly on all sides to remove any moisture - this is crucial for that perfect charred crust later. Place the fillet on a cutting board and make a shallow crosshatch pattern with a sharp knife, being careful not to cut all the way through. This creates surface area for the rub to cling to.
In a small bowl, combine the 2 tbsp smoked paprika, 1 tbsp ground cumin, 1 tbsp dried oregano, 1 tsp freshly cracked black peppercorns, and 1.5 tbsp kosher salt. Rub this mixture all over the fillet, pressing it into the crosshatch marks and working it into the surface. For extra flavor, I like to add a pinch of the fresh rosemary and fresh thyme leaves directly onto the fillet before sealing it in a plastic bag.
Let the seasoned fillet sit at room temperature for 30 minutes while you prepare your smoker. This ensures even cooking from edge to center. Real talk: Don't skip this step - cold meat steams instead of searing.
🍳 Step 2: Create the Perfect Smoking Environment
While the fillet comes to room temperature, set up your smoker using the 1 bag of wood pellets. I prefer hickory or cherry for this recipe - they give that classic BBQ flavor without overpowering the beef. Preheat the smoker to 250°F and let it stabilize for 15 minutes before adding the meat. You'll know it's ready when you see clean, blue smoke (not thick white steam).
Here's where the magic happens: Pour the 0.5 cup apple cider vinegar into a small bowl and place it on the smoker's water pan. As the vinegar heats, it creates steam that tenderizes the beef while it smokes. This is my secret weapon for keeping the fillet incredibly juicy despite the high heat we'll use later.
When the smoker reaches temperature and the vinegar is steaming gently, place the fillet on the smoker grates, fat-side up. Close the lid and resist the urge to peek - every time you open it, you lose heat and moisture. Set your timer for 1 hour and let the smoker do its work.
🔥 Step 3: Build the Charred Crust with Reverse Sear
After the initial 1-hour smoke, the internal temperature should reach about 125°F. This is where we get creative with the reverse sear technique. Remove the fillet from the smoker and let it rest for 5 minutes while you preheat your grill or cast-iron skillet to very high heat.
Heat 0.25 cup olive oil in the skillet until it's shimmering hot - you should see small bubbles forming around the edges. Place the fillet in the skillet and sear for 2-3 minutes per side until you get that beautiful dark brown crust. Here's the thing - don't press down on the fillet with your spatula. Let it develop that crust naturally.
As the fillet sears, baste it with any accumulated juices in the pan. You'll know it's done when the internal temperature reaches 130-135°F (medium-rare). For perfect doneness, use a meat thermometer - it's the only way to guarantee juicy results every time. Remove from heat and let it rest for 10 minutes before slicing.
🍽️ Step 4: Slice and Serve with Smoky Aromatics
While the fillet rests, slice the 1 whole yellow onion into thin rings and sauté them in the same skillet used for searing until caramelized and golden. Add the 6 cloves minced garlic and cook for 30 seconds until fragrant. This creates a perfect topping that complements the smoky beef.
Slice the fillet against the grain into ½-inch thick pieces. You'll see that beautiful pink center with a smoky crust on the outside - that's what we're after! Arrange the slices on a warm platter and top each with the caramelized onions and garlic. Garnish with any remaining fresh rosemary and thyme leaves for that final aromatic touch.
Serve immediately with your favorite sides - I love it with roasted sweet potatoes and a simple green salad. The contrast between the smoky crust and juicy center makes every bite incredible. And here's the best part: This method works perfectly for any cut of beef tenderloin, so you can adjust the cooking time based on size.
Pro Tips For Making Bbq Beef Fillet
- Sear First, Smoke Slow: DESCRIPTION:
- Minced Onion, Not Sliced: DESCRIPTION:
- Skip the Overcrowded Pan: DESCRIPTION:
- Garlic Paste > Whole Cloves: DESCRIPTION:
Storing and reheating your leftovers
Refrigerator Storage
Store any leftover beef fillet in an airtight container with a piece of parchment paper between layers to prevent sticking. I like using glass containers—I grab the Pyrex 8-cup ones from my kitchen because they keep flavors sealed in better than plastic. Keep it refrigerated at 40°F or below for up to 3 days, but honestly? The first day is when it tastes best. The smoky flavors actually deepen overnight, almost like a fine wine. 💫
Freezer Prep Tips
For longer storage, wrap the fillet tightly in plastic wrap first, then place it in a freezer-safe heavy-duty bag. Squeeze out all the air before sealing—this prevents freezer burn and keeps the meat tasting fresh. Label with the date and freeze for up to 3 months. Pro tip: I add a small piece of bread to the bag to absorb any excess moisture that might make the meat dry out later. 🧊
Oven Reheating
This is my go-to method because it preserves that smoky crust while gently warming the center. Preheat your oven to 350°F and place the fillet on a wire rack over a baking sheet. Add 2 tablespoons of beef broth to the pan to keep it moist, then cover loosely with foil. Heat for 10-15 minutes until reaching 130°F internal temperature. The foil keeps it from drying out, but I always remove it for the last 2 minutes to crisp up any softened edges. 🔥
Skillet Revive
For a quick fix, heat 1 tablespoon of olive oil in a cast-iron skillet over medium heat. Add the cold fillet and cook for 3-4 minutes per side until warmed through. I like to baste it with a little apple cider vinegar (just a splash) to restore some of that original tangy brightness. This method works best for smaller portions—perfect for a single serving or two. The crust won't be as crisp as oven reheating, but it's still delicious. ⚡
Microwave (Last Resort)
If you're in a rush, cover the fillet with a damp paper towel and microwave on 50% power for 1-2 minutes. Let it rest for 1 minute before slicing—this helps redistribute the juices. Avoid microwaving it uncovered, or you'll end up with a sad, rubbery texture. Honestly, I only use this method when I'm desperate, but it's better than cold leftovers. 💪
Serving Leftovers
Slice the reheated fillet against the grain for the best texture, just like you would with fresh beef. Garnish with caramelized onions (save some from your original cook) and a sprinkle of fresh thyme to remind everyone it was once a showstopper. Serve on a warm platter with roasted potatoes or a simple arugula salad to balance the richness. The key is presentation—make it look as good as it tastes! 🍽️
Nutrition facts
Frequently asked questions
Can I use this recipe with other cuts of beef?
While this recipe is designed for beef tenderloin fillet, you can adapt it for other tender cuts like ribeye or sirloin. For thicker cuts, increase the smoking time by 10-15 minutes and adjust the sear time accordingly. The key is maintaining the 130-135°F internal temperature for medium-rare. Just be aware that leaner cuts like sirloin may benefit from a slightly longer smoke to prevent drying out.
What's the best wood for smoking beef fillet?
For this recipe, I recommend hickory or cherry wood pellets as they provide a balanced smoky flavor without overpowering the beef. Hickory gives a stronger, bolder smoke perfect for bold flavors, while cherry offers a sweeter, fruitier note. Avoid fruit woods like apple or peach unless you want to introduce a sweet undertone. If you're using wood chips, soak them for 30 minutes before adding to your grill.
How do I know when the fillet is done?
Use a meat thermometer to check the internal temperature - 130-135°F is perfect for medium-rare. Insert the probe into the thickest part of the fillet, avoiding the bone if present. The reverse sear method ensures you'll hit this temperature range without overcooking. For medium doneness, aim for 140-145°F, and for well-done, 150-155°F. Remember, the fillet will rise 5°F after resting.
Can I make this recipe on a gas grill?
Convert your gas grill to a smoker by placing soaked wood chips on the heat source and closing the lid. Maintain a temperature of 250°F using the lowest heat setting. For the sear, crank the heat to high and place the fillet directly over the flames. The key is controlling the temperature - gas grills heat up faster than smokers, so monitor closely. You may need to adjust the burners to maintain even heat.
Why does my beef fillet turn out dry?
Dry beef usually results from overcooking or improper resting. Always let the fillet rest for 10 minutes after cooking - this allows juices to redistribute. Avoid cutting into it immediately, and never overcook past 135°F internal temperature. The apple cider vinegar in the marinade helps retain moisture, but if you're using leaner cuts, consider adding a 1-inch thick slice of fat to the grill alongside the fillet for extra moisture.