
Main Courses
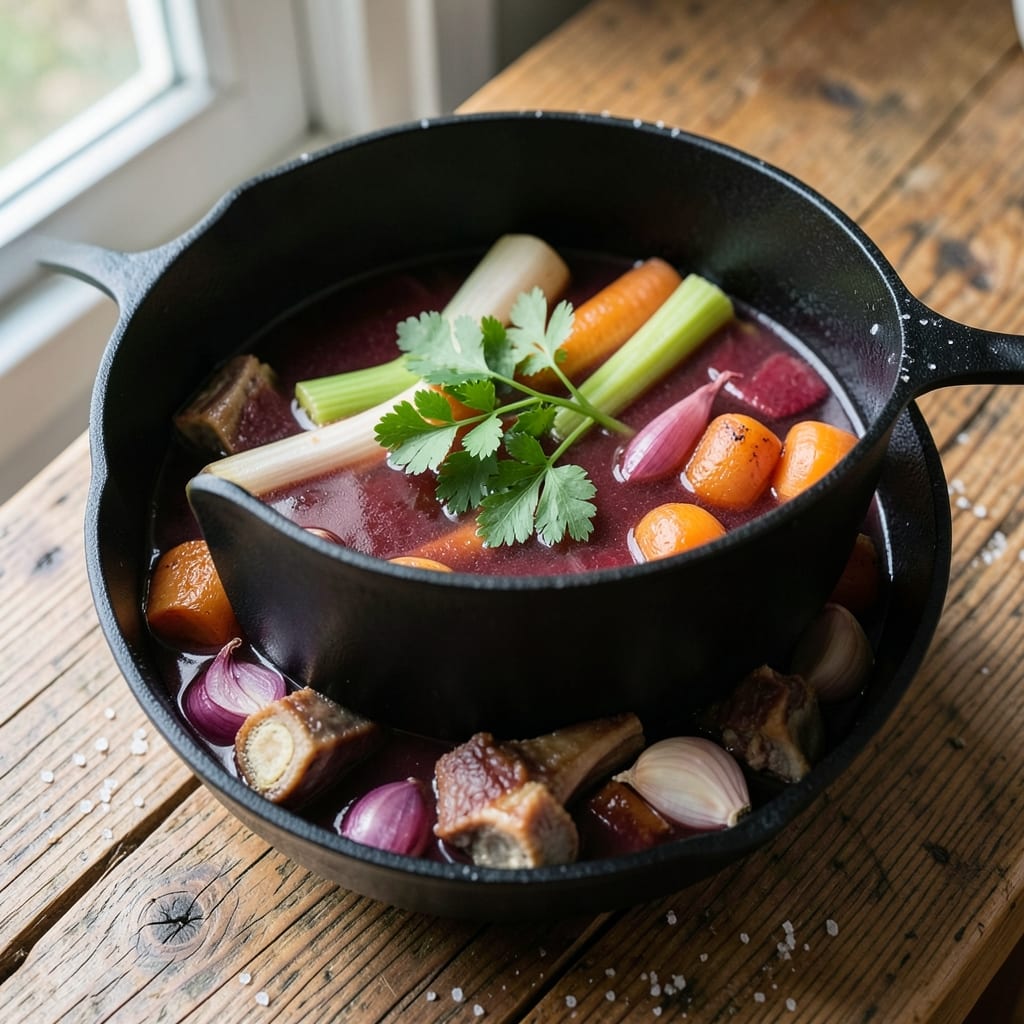
The Barefoot Contessa beef stock recipe transforms humble bones into a rich, aromatic foundation that elevates any dish. This isn’t just stock—it’s the secret weapon behind restaurant-quality soups, stews, and sauces, all starting with a simple simmer. I’ve perfected a method that balances depth and simplicity, ensuring every sip delivers that unmistakable umami richness.
What sets this apart is the careful blend of herbs, vegetables, and bones—each playing a crucial role in developing layers of flavor over hours of gentle simmering. The result? A stock so robust it can stand alone as a sipping broth or serve as the backbone of your next masterpiece. No fancy techniques, just time and patience paying off in the most delicious way.
By the end, you’ll have a stock so deeply flavorful it turns ordinary meals into extraordinary ones—think velvety braises, hearty soups, or glossy sauces that cling to every bite. The beauty of this recipe lies in its versatility: use it immediately or freeze for later, knowing you’ve created something truly special.
Pair it with crusty bread for dipping, or let it shine in a classic beef bourguignon. The possibilities are endless, and the process is foolproof. Let’s get started on building your flavor foundation.
Ingredients for barefoot contessa beef stock
Here’s what you’ll need to craft the rich, umami-packed foundation of restaurant-quality beef stock.
| Ingredient | Amount | Notes |
|---|---|---|
| Beef Bones 🦴 | 4 lb | Raw, marrow and knuckle preferred |
| Yellow Onions 🧅 | 2 whole | Quartered, skin on for color |
| Carrots 🥕 | 4 whole | Scrubbed, cut into large chunks |
| Celery Stalks 🌿 | 4 whole | Trimmed, cut into 2-inch pieces |
| Garlic Cloves 🧄 | 8 cloves | Smashed, skin on for aroma |
| Fresh Parsley 🌿 | ½ cup | Stems included, roughly chopped |
| Fresh Thyme 🌿 | ¼ cup | Stems tied with twine |
| Fresh Bay Leaves 🌿 | 2 whole | Lightly crushed |
| Fresh Rosemary 🌿 | 1 whole | Sprig, woody stems removed |
| Salt 🧂 | 2 tsp | Kosher or sea salt |
| Black Peppercorns 🌶️ | 1 tbsp | Crushed lightly |
| Apple Cider Vinegar 🍎 | 2 tbsp | For initial flavor boost |
| Cold Water 💧 | 12 cups | Enough to cover bones |
The bones are everything—marrow and knuckle bones unlock that deep, gelatinous richness. Most butchers will save them for you if you ask, or check the freezer section of stores like Whole Foods or Costco where they often sell bone bundles. Look for bones that are fresh (not dried out) and have good marbling. If you can’t find marrow bones, pork femurs work too—they’re cheaper and pack serious flavor. For the herbs, fresh is non-negotiable—dried will work in a pinch, but the aroma difference is night and day. Tie thyme and rosemary in cheesecloth or secure with kitchen twine so you can easily remove them later.
No fresh herbs? Dried thyme at one-third the amount and dried rosemary at half will get you close, but you’ll miss that bright herbal note. Running low on bones? Pork trotter or chicken feet add extra collagen for thickness (use half the quantity). The vinegar might seem odd, but it’s a flavor catalyst—skip it if you’re avoiding acid, but trust me, it’s worth it. For the veggies, no need to peel—the skins add color and depth. Baby carrots or pre-cut celery from Trader Joe’s save time without sacrificing flavor. And if you’re making a big batch, double the herbs—they’ll mellow out as they simmer, but you can’t overdo it.
This stock tastes even better the next day as flavors meld, so plan ahead. Store in the fridge for up to 5 days or freeze in ice cube trays for easy portions. Label containers with the date—frozen stock keeps for 6 months without losing quality. For extra richness, skim off fat before freezing, but save it for cooking (it’s pure flavor gold). Leftovers? Use them in braises, risottos, or even a simple pasta sauce—this stock turns everything it touches into something special.
Why You'll Love This Recipe
- No Chopping Struggle: I swear by the "mirepoix" shortcut here—just roughly chop onions, carrots, and celery into big chunks. No knife skills required, and the stock still tastes like it simmered for hours.
- Deep Umami Magic: That beef bone marrow and garlic? Pure flavor gold. The slow simmer pulls out rich, savory notes that turn simple soups or risottos into something restaurant-worthy.
- Stockpile for Days: Between us, I freeze this in ice cube trays. A few cubes tossed into pasta, braised meat, or even scrambled eggs—it’s my secret weapon for effortless depth.
- Budget-Friendly Luxury: Cheap bones stretch into gallons of stock. Honestly, it’s the most cost-effective way to make meals taste like I spent hours cooking when I didn’t.
Step-by-step instructions for deep umami beef stock
Here's how to build rich, aromatic stock that forms the foundation for countless recipes.
Prepare the Bones and Aromatics
Rinse the 4 lb beef bones thoroughly under cold water to remove any impurities. Pat them completely dry with paper towels—this helps prevent cloudiness in your finished stock. Place the bones in a large stockpot and set aside.
In a separate bowl, combine the 2 whole yellow onions (quartered), 4 whole carrots (cut into large chunks), 4 whole celery stalks (trimmed and cut into 2-inch pieces), and 8 cloves garlic (smashed with skin on). This classic mirepoix combination provides sweetness, earthiness, and depth of flavor. Add the 0.5 cup fresh parsley (stems included), 0.25 cup fresh thyme (stems tied with twine), 2 whole fresh bay leaves (lightly crushed), and 1 whole fresh rosemary (sprig with woody stems removed). These herbs will infuse your stock with complex, aromatic notes.
Build the Flavor Base
Add the prepared aromatics to the stockpot with the bones. Sprinkle the 2 tsp salt and 1 tbsp black peppercorns (lightly crushed) over everything. Pour in the 2 tbsp apple cider vinegar—this helps draw out collagen and meaty flavors from the bones. The vinegar will evaporate during cooking, but it's essential for that deep umami foundation.
Pour in the 12 cups cold water, making sure the bones and aromatics are fully submerged. If needed, add a bit more water to cover everything. Bring the mixture to a boil over medium-high heat, then immediately reduce the heat to low and skim off any foam or scum that rises to the surface. This ensures a clear, clean stock.
Simmer Gently for Maximum Flavor
Cover the pot and let the stock simmer gently for 3 hours. The key here is patience—low and slow is what transforms tough bones into rich, gelatinous goodness. Every 30 minutes, check the water level and add hot water as needed to keep the bones submerged. This prevents them from drying out and burning.
After 3 hours, remove the lid and continue simmering uncovered for another 2 to 3 hours. You'll notice the stock darkening slightly and developing a deep, meaty aroma. This is when the collagen breaks down into gelatin, giving your stock that signature richness. The bones should be falling apart easily at this point.
Strain and Finish the Stock
Once the bones are fully broken down and the stock has a rich, deep color, it's time to strain. Line a fine-mesh strainer with cheesecloth or a coffee filter to catch any fine particles. Pour the stock through the strainer into a clean pot or bowl, pressing gently on the solids to extract every last bit of flavor. Discard the bones and aromatics.
Return the strained stock to the pot and bring it to a gentle simmer. Taste and adjust the seasoning with additional salt if needed—remember, stock should be flavorful but not overly salty. For a smoother texture, you can optionally pass the stock through a fine-mesh sieve one more time. Let it cool slightly before storing, or use it immediately in soups, stews, or braises.
Pro Tips For Making Barefoot Contessa Beef Stock
- BLISTER NOT BURN THE BONES: Start with a screaming-hot pot—literally. I used to simmer gently from the get-go, but roasting the bones uncovered for 20 minutes at 450°F (yes, even if they’re raw) caramelizes the marrow and deepens the flavor. After that, drop the heat to low and let it bubble, not boil—this keeps the stock from turning cloudy.
- CHOP ONIONS COARSELY: I learned this the hard way—tiny onion pieces dissolve into mush and make the stock bitter. For this recipe, cut onions into 1-inch chunks (peel first, or they’ll stain your board). Same goes for carrots and celery: leave them in 2-inch pieces so they release flavor without turning the broth into soup.
- SKIP THE GARLIC PEELING: Peeling garlic cloves mid-stock can turn your kitchen into a crime scene. Instead, smash the whole cloves with the flat side of your knife (leave the skin on) and drop them in unpeeled. The skin will soften and release flavor without clogging your strainer—just fish them out with tongs before straining.
- USE COLD WATER: I used to add hot water to speed things up, but cold water is non-negotiable here. It prevents the stock from immediately turning murky and gives the bones time to render their collagen properly. Fill the pot just enough to cover the ingredients, then top off with more cold water as needed—never hot. Patience pays off.
Dietary considerations for this dish
Gluten-Free Clarity
This beef stock recipe is naturally gluten-free—no wheat, barley, or rye is involved. The bones, vegetables, and herbs used are all gluten-free ingredients, so you can enjoy this rich, umami-packed base without worry. Always double-check your beef bones packaging, though, as some brands may process bones in facilities that handle gluten-containing products. For extra peace of mind, opt for organic or grass-fed bones, which are less likely to have cross-contamination risks. 🌾
Dairy-Free and Egg-Free
Perfect for those avoiding dairy or eggs, this stock is completely free of both. The richness comes entirely from the bones, vegetables, and herbs—not cream, butter, or egg-based thickeners. This makes it ideal for soups, stews, and sauces that need a deep, meaty flavor without any dairy traces. If you're using this stock in a dish that calls for dairy (like a creamy risotto), you can easily add milk or cream afterward without compromising the stock's purity. 🥛
Low-Sodium Adaptations
If you're watching your sodium intake, this recipe is easily adaptable. Start by using just 1 teaspoon of salt instead of the full 2 teaspoons, or omit it entirely and season your finished dishes with herbs and spices instead. The natural umami from the bones and vinegar will still shine through. For extra flavor without salt, add a pinch of smoked paprika or a splash of soy sauce (just 1 teaspoon) to the simmering stock. Taste as you go—you’ll be surprised how rich it can be without excess salt. ⚡
Vegetarian and Vegan Options
While this recipe is meat-based, you can create a vegetarian or vegan version by swapping the beef bones for mushrooms, seaweed, or soy sauce. For a hearty stock, simmer 1 lb dried shiitake mushrooms or 2 tbsp soy sauce, 1 tbsp miso paste, and 2 tbsp apple cider vinegar with the same aromatics for 4-5 hours. The result won’t have the same gelatinous richness, but it’ll deliver deep, savory flavor perfect for plant-based dishes. 🌱
Allergen-Friendly Notes
This recipe avoids common allergens like nuts, shellfish, and soy (unless you add soy sauce for flavor). If you or someone you’re cooking for has a shellfish allergy, stick to beef bones—never substitute with fish or shellfish-based stocks. For nut allergies, ensure all herbs and spices are processed in nut-free facilities. When storing, keep the stock in a dedicated container to avoid cross-contamination if you’re also prepping other meals with allergens. Always label your stock clearly for safety. 🛡️
Nutrition facts
Frequently asked questions
Can I use leftover roasted bones for this stock? Yes! Roasted bones add incredible depth of flavor to your stock. Simply use the same quantity of bones (about 4 lb) and add them directly to the pot with the aromatics. The roasted bones will infuse the stock with a rich, caramelized taste. Just
How do I know when the stock is done?
The stock is ready when the bones are completely broken down and the liquid has a deep, rich color with a gelatinous consistency. This usually takes 5-6 hours of total simmering. You’ll also notice the aroma becomes intensely meaty and aromatic—this is your cue that all the flavors have melded together perfectly.
Can I make this stock in a slow cooker?
A slow cooker is perfect for this recipe. Add all ingredients to the pot, cover, and cook on low for 8-10 hours or high for 5-6 hours. The slow cooker maintains a gentle simmer, which is ideal for extracting maximum flavor from the bones. Just be sure to skim off any foam that rises to the surface during cooking.
What if my stock tastes too salty?
If your stock tastes too salty, you can dilute it by adding 1 cup of hot water per 4 cups of stock and simmering for another 15-20 minutes to blend the flavors. For a more dramatic fix, you can also use a reverse osmosis method: freeze the stock in a shallow container, then scrape off the top layer of ice (which contains most of the salt) before melting the remaining ice.
How should I store leftover stock?
Store your stock in the refrigerator for up to 5 days in an airtight container. For longer storage, freeze it in ice cube trays or ziplock bags (lay flat to save space). Label with the date—it’ll keep for 6 months in the freezer. When ready to use, thaw in the fridge overnight or use frozen cubes directly in recipes like soups or sauces.