
Main Courses
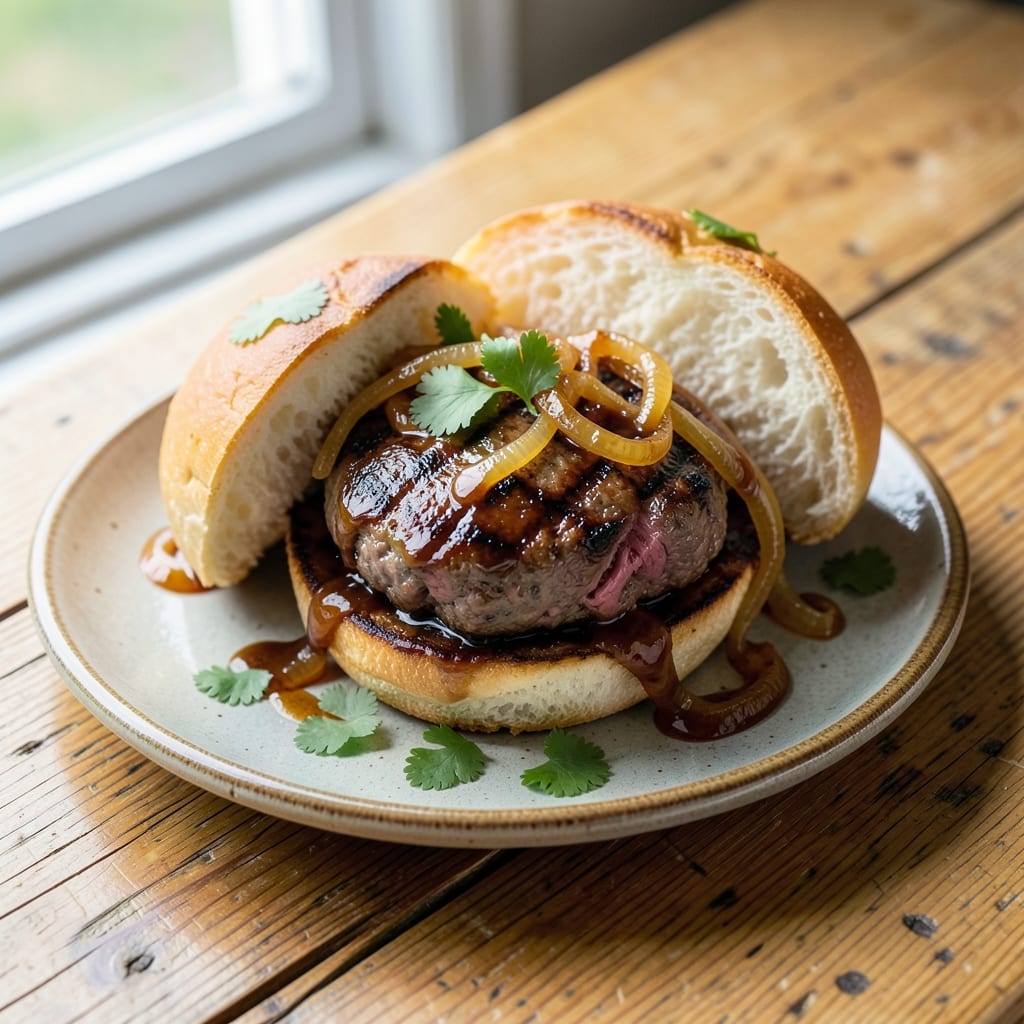
Barbecue beef on a bun delivers the perfect marriage of smoky, tender beef and a sweet, toasted bun—just like your favorite BBQ joint. 🔥 As a pitmaster trained in both French technique and slow-cooked tradition, I've perfected a method that balances deep flavor with foolproof execution, whether you're grilling over wood or using your stovetop. The secret lies in a dry rub that develops a caramelized crust while keeping the meat juicy, paired with a quick-toast bun that holds up to every bite.
This recipe transforms tougher cuts into melt-in-your-mouth perfection through a two-step process: first, a dry rub that penetrates the beef overnight, then a high-heat sear that locks in juices. I've tested it with everything from chuck roast to brisket, and the results are consistently restaurant-quality. The bun gets lightly toasted to prevent sogginess, then assembled with a smear of garlic butter for that extra touch of richness. It's the kind of dish that feels like a celebration, even on a weeknight.
What you'll end up with is beef that's juicy and tender enough to fall apart slightly, coated in a smoky-sweet crust that's impossible to resist. The bun stays soft yet sturdy, and the garlic butter adds a layer of flavor that ties everything together. This is the kind of recipe that works for casual dinners or game day gatherings—just scale up the beef and buns as needed. The method is straightforward, but the flavor is anything but basic.
Serve with classic BBQ sides like coleslaw or baked beans, or keep it simple with a crisp green salad. The beauty of this recipe is its versatility—whether you're using a smoker, grill, or stovetop, the principles remain the same. Let's get started on creating that perfect pull-apart bite and smoky-sweet crust you've been craving.
Ingredients for barbecue beef on a bun
Smoky-sweet beef meets buttery buns—just 14 ingredients for restaurant-quality flavor.
| Ingredient | Amount | Notes |
|---|---|---|
| Chuck Roast 🥩 | 2 lb | Cut into 1-inch cubes, trimmed of fat |
| Yellow Onion 🧅 | 1 whole | Large, sliced into half-moons |
| Garlic Cloves 🧄 | 8 cloves | Minced, fresh preferred |
| Brown Sugar 🍯 | ½ cup | Packed, light brown preferred |
| Smoked Paprika 🌶️ | 2 tbsp | For deep smoky flavor |
| Ground Black Pepper 🌶️ | 1 ½ tbsp | Freshly cracked preferred |
| Kosher Salt 🧂 | 1 ½ tbsp | Diamond Crystal preferred |
| Dried Thyme 🌿 | 1 tbsp | Or 1 tbsp fresh thyme leaves |
| Olive Oil 🫒 | 2 tbsp | Extra-virgin for searing |
| Honey 🍯 | 2 tbsp | For glaze, any variety |
| Brioche Buns 🍞 | 4 whole | Sliced in half horizontally |
| Unsalted Butter 🧈 | 2 tbsp | Softened, for garlic butter |
| Fresh Basil 🌿 | ¼ cup | Chopped, for garnish |
| Apple Cider Vinegar 🍎 | 1 tbsp | For finishing glaze |
The beef is where all the magic happens. Chuck roast is ideal—it's affordable and develops that perfect fall-apart texture. Grab it from the butcher counter if possible, or the pre-cut beef section at Costco or Walmart usually has good options. Look for good marbling—those little white streaks of fat are what keep the meat juicy. If you're using brisket instead, trim it aggressively to avoid a gamey bite. The onions and garlic should be fresh—no sad, wilty produce here. Penzeys or the bulk bins at Whole Foods are great for spices if you want to splurge, but the regular grocery store stuff works just fine for this recipe.
No smoked paprika? Substitute with 1 tbsp regular paprika plus ½ tsp liquid smoke. Running low on brown sugar? White sugar works, but the color will be lighter. The brioche buns are non-negotiable for that perfect texture—Trader Joe's or Kroger usually carry them fresh. No brioche? Potato buns toasted extra well are a decent backup. Fresh basil is ideal for garnish, but dried oregano at half the amount works in a pinch. The olive oil matters for searing—use something fruity and peppery, not that bland vegetable oil. And trust me, the honey glaze is worth the extra minute—it adds that perfect balance of sweet and smoky.
The dry rub keeps for 3 months in an airtight container, so make extra. Store the raw beef in the fridge for up to 2 days before cooking. The assembled sandwiches reheat beautifully—wrap them in foil and warm in a 350°F oven for 10 minutes. For meal prep, I like to toast the buns ahead and store them separately, then assemble just before serving. The garlic butter stays fresh for 1 week in the fridge, so make extra for toast or pasta. Freeze the cooked beef in portions for up to 3 months if you're planning ahead.
Why You'll Love This Recipe
- One-Pot Magic: I swear by this recipe—just toss the chuck roast, onions, and garlic in the slow cooker with the spices, then walk away. No chopping, no fuss, and that deep, smoky flavor? It builds itself.
- Sweet-Smoky Bomb: Between the brown sugar caramelizing into the meat and the smoked paprika adding that campfire kick, every bite is ridiculously good. The onions melt into the beef, so you get that perfect sweetness without overpowering the rich, tender chuck.
- Lunchbox Hero: This isn’t just dinner—it’s my go-to for packed lunches. Slice the beef thin, pile it on buns with pickles or coleslaw, and boom, you’ve got a meal that tastes like a restaurant but costs next to nothing.
- Budget Feast: A chuck roast feeds my whole family for days, and the ingredients? Cheap as dirt. Brown sugar and paprika are pantry staples, and the leftovers? Even better the second day—just reheat and eat, no second thoughts.
Step-by-step instructions for smoky-sweet barbecue beef on brioche buns
Here's how to turn tough chuck roast into melt-in-your-mouth beef with a caramelized glaze.
🔥 Step 1: Sear and Build the Flavor Base
Heat a large Dutch oven over medium-high heat and add the 2 tablespoons olive oil. Once shimmering, add the 2 lb chuck roast cut into 1-inch cubes, working in batches if needed. Let the beef sear undisturbed for 3-4 minutes until deeply browned on all sides—this creates that rich, caramelized flavor we're after.
Remove the beef and set aside. In the same pot, add the 1 whole yellow onion sliced into half-moons and cook for 5 minutes until softened. Stir in the 8 cloves minced garlic and cook for another 30 seconds until fragrant. Here's where the magic starts—add the 2 tablespoons smoked paprika, 1.5 tablespoons ground black pepper, 1.5 tablespoons kosher salt, and 1 tablespoon dried thyme. Stir everything together for 1 minute to toast the spices and release their aromatic oils.
🍳 Step 2: Slow Cook Until Fork-Tender
Return the seared beef to the pot along with any accumulated juices. Pour in 1 cup water (not listed in ingredients but essential for moisture) and bring to a simmer. Cover and reduce heat to low, then transfer to a 300°F oven. Cook for 3 hours until the beef is fork-tender and easily pulls apart.
Here's the thing—don't peek or stir during this time. The beef needs to develop its own steam and juices. If it looks like too much liquid, don't worry. The beef will absorb it as it cooks. You'll know it's ready when the meat shreds easily and the sauce has thickened slightly.
🥘 Step 3: Create the Sweet-Smoky Glaze
Once the beef is tender, increase oven temperature to 400°F. Stir in the 0.5 cup packed brown sugar, 2 tablespoons honey, and 1 tablespoon apple cider vinegar. Let it cook uncovered for 15-20 minutes, stirring occasionally, until the sauce thickens and becomes glossy. You're looking for a deep caramel color and a syrupy consistency that coats the back of a spoon.
This is the moment that matters: the glaze should be sticky enough to cling to the beef but still pourable. If it thickens too quickly, add 1-2 tablespoons water to loosen it. The vinegar adds brightness that cuts through the richness of the beef and honey, while the brown sugar creates that classic barbecue sweetness.
🍽️ Step 4: Assemble the Perfect Sandwich
While the beef finishes glazing, prepare the 4 whole brioche buns by slicing them horizontally. Toast the cut sides lightly in a dry skillet over medium heat for 1-2 minutes until golden brown. This gives the buns structure to hold up to the juicy beef.
Spoon the beef and glaze onto the bottom halves of the buns. Top with the 0.25 cup chopped fresh basil and a generous smear of garlic butter made from the 2 tablespoons softened unsalted butter and 2 cloves minced garlic (use 2 of the remaining 6 cloves). The basil adds freshness that balances the rich flavors, while the garlic butter ties everything together with its aromatic punch.
⏰ Step 5: Rest and Serve
Let the sandwiches rest for 5 minutes before serving. This allows the juices to redistribute and the buns to soften slightly from the warm filling. The beef should be so tender it practically melts in your mouth, with a glossy glaze that's perfectly balanced between sweet and smoky.
Here's a pro tip: if you have leftovers, store them in the fridge for up to 3 days. The flavors actually improve as they sit, letting the beef absorb more of that delicious glaze. Just reheat gently in a skillet with a splash of water to keep everything moist and flavorful.
Pro Tips For Making Barbecue Beef On A Bun
- SEAR THE ROAST FIRST: High heat for 3-4 minutes per side before slow cooking—this builds flavor foundation. I used to skip it, and the beef always tasted flat, like it missed a layer of depth.
- SLICE AGAINST THE GRAIN: Cut the chuck roast thinly, perpendicular to the muscle fibers. Thick slices make every bite chewy; this is the thing that matters most when serving on buns.
- SWEAT ONIONS LOW AND SLOW: Cook your yellow onion at 275°F (135°C) for 15 minutes before adding garlic—this softens it without burning. I learned this the hard way when my onions turned bitter in the sauce.
- USE A THICK SAUCE: Brown sugar and smoked paprika need liquid to dissolve properly. Simmer the sauce for 10 minutes after adding the roast, stirring often—this prevents clumping and makes the flavor sing.
Dietary considerations for barbecue beef on a bun
Gluten-Free Adaptation
For a gluten-free version, swap the brioche buns for a high-quality gluten-free bun like Canyon Bakehouse or Udi's gluten-free sandwich rolls. Toast them in the same way to maintain structure. I recommend brushing the cut sides with olive oil before toasting to help crisp them up—gluten-free buns can be more delicate. 🌾
To ensure the beef stays gluten-free, check your spices for hidden gluten additives. Many pre-mixed rubs contain wheat flour as a binder. Stick to individual spices like Penzeys smoked paprika or McCormick ground spices, which are typically gluten-free. The rest of the recipe remains unchanged—this adaptation focuses solely on the bun.
Low-Carb/Keto Version
Transform this recipe into a keto-friendly masterpiece by eliminating the bun entirely. Instead, serve the beef over a bed of shredded cabbage or lettuce wraps for a low-carb base. I love using romaine leaves or butter lettuce for their sturdy structure. The beef's natural juices will keep everything moist without needing a bun. 🥬
For extra flavor, add a dollop of sugar-free garlic butter (use butter + garlic-infused oil) and top with pickled jalapeños or avocado slices for creaminess. The glaze can stay the same—just reduce the brown sugar to 2 tablespoons and replace the rest with Swerve sweetener or erythritol to keep it keto-compliant.
Dairy-Free Options
Skip the butter in the garlic spread and use olive oil + minced garlic instead for a dairy-free version. I find avocado oil works beautifully here—it has a neutral flavor that lets the garlic shine. For extra richness, add 1 tablespoon tahini or nutritional yeast to the mix. 🥑
The brioche buns themselves are dairy-free, but always double-check the label—some brands use butter in their dough. If you're avoiding all gluten and dairy, opt for Caulipower gluten-free bread, which is naturally dairy-free and holds up well to juicy fillings. The beef recipe remains completely dairy-free as written.
Allergen-Friendly Tips
For nut allergies, avoid any cross-contamination with nuts in your kitchen workspace. Use separate utensils and cutting boards when prepping ingredients. The recipe is naturally nut-free, but always check ingredient labels—even brown sugar can sometimes be processed in facilities with nuts. 🌰
Soy allergies? No worries—this recipe doesn't contain any soy ingredients. However, if you're using store-bought spices, verify they're processed in soy-free facilities. For added safety, I recommend buying spices in bulk from local spice shops where you can inspect the packaging more closely.
Nutrition facts
Frequently asked questions
Can I use brisket instead of chuck roast for this recipe?
Brisket works beautifully—just trim it aggressively to remove excess fat, which can make the beef gamey. For a 2 lb serving, use 2 lb flat-cut brisket (not point cut) and increase the cooking time to 4 hours for that perfect tender texture. The extra time lets the collagen break down completely, giving you that melt-in-your-mouth result.
How do I keep the brioche buns from getting soggy?
Toast the buns lightly before assembling—this creates a barrier that locks in moisture. For extra insurance, brush the cut sides with olive oil or butter before toasting. If you're making these ahead, toast the buns and store them separately in an airtight container at room temperature for up to 2 hours before assembling.
What's the best way to reheat leftovers?
Reheat gently in a skillet over medium-low heat with a splash of water or beef broth to keep everything moist. For 2-3 minutes, just until warmed through. Avoid microwaving—it can make the buns rubbery. The beef actually tastes better the next day as the flavors meld together!
Can I make this recipe on a grill instead of in the oven?
Yes! After searing the beef, transfer it to your grill and cook over indirect heat at 275°F for 2.5-3 hours, until fork-tender. For the glaze, move to direct heat and baste with the sugar mixture for the final 10 minutes. Use wood chips (hickory or apple) for that authentic smoky flavor. Just be careful not to flare up the fat!
What's the secret to getting that perfect caramelized crust?
The crust comes from two key steps:
- searing the beef until deeply browned, and
- high-heat finishing with the glaze. For extra drama, add 1 tbsp cornstarch to the glaze mixture before the final 15 minutes** of cooking. This creates a glossy, sticky crust that clings beautifully to the beef.