
Main Courses
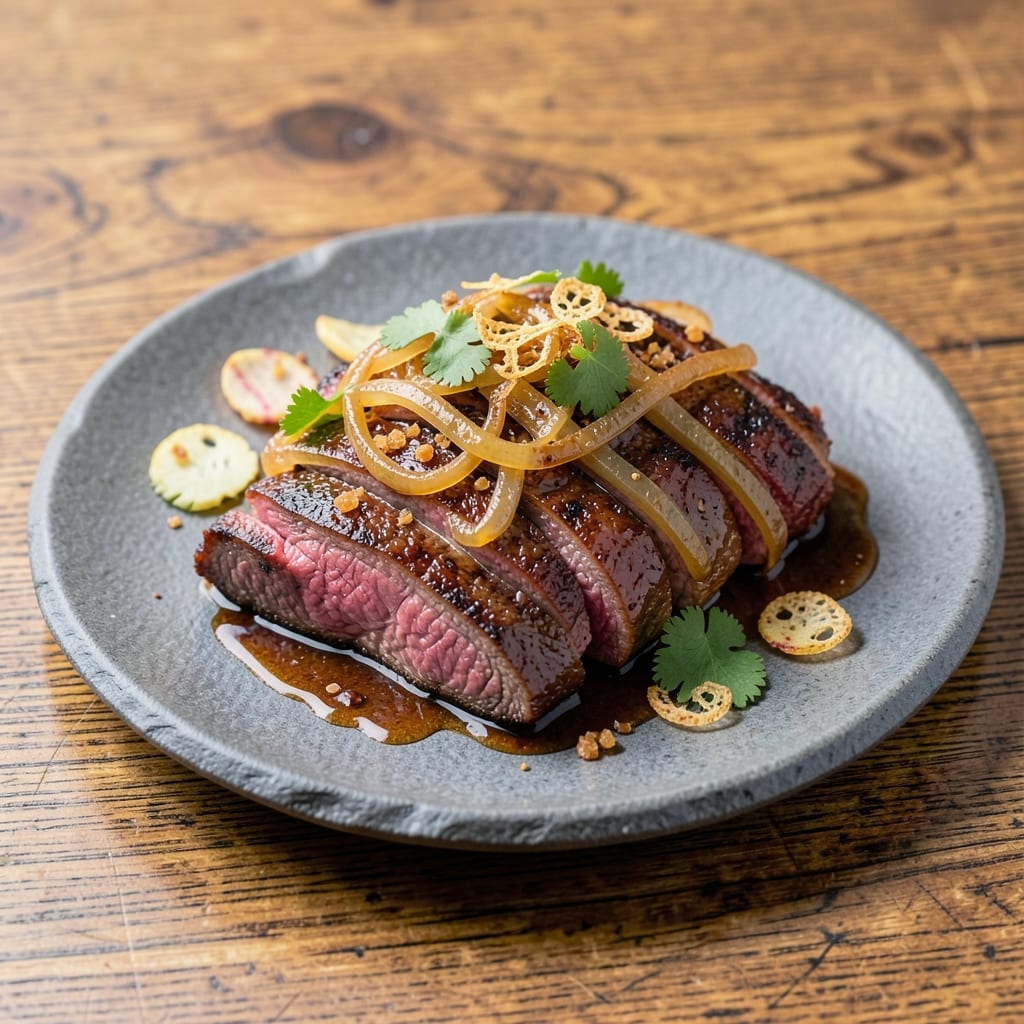
This baked beef strips recipe delivers crispy-crusted edges and juicy-core bites that make every meal feel special. The secret lies in a simple marinade that tenderizes while a high-heat oven finish creates that perfect texture contrast. I've perfected this method after years of testing—no deep-frying required, just foolproof baking techniques that guarantee restaurant-quality results at home.
The process starts with thinly sliced beef strips marinated in a blend of soy sauce, garlic, and olive oil—just 30 minutes of prep time transforms tough cuts into tender, flavorful bites. The real magic happens in the oven where precise timing and temperature control create that irresistible crispy exterior while keeping the inside succulent. This method works beautifully with flank steak, sirloin, or even chicken thighs.
What you'll end up with is a plate of golden, caramelized beef strips that stay tender and juicy on the inside, perfect for serving over rice, in salads, or as a standalone appetizer. The marinade's savory depth pairs exceptionally well with fresh vegetables or a cool dipping sauce. Each bite delivers that satisfying contrast of textures and flavors that makes this dish a crowd-pleaser.
Whether you're meal prepping for the week or hosting a dinner party, this recipe scales perfectly and delivers consistent results. The best part? You can prepare the marinade ahead of time and cook the beef strips in just 20 minutes when you're ready to serve. Let's get started on creating these irresistible beef bites that will have everyone asking for seconds.
Ingredients for baked beef strips
Simple marinade plus a crispy oven finish equals restaurant-quality beef bites—no frying required.
| Ingredient | Amount | Notes |
|---|---|---|
| Flank Steak 🥩 | 1 lb | Thinly sliced against grain |
| Extra-Virgin Olive Oil 🫒 | ¼ cup | High-quality, fruity variety |
| Low-Sodium Soy Sauce 🍶 | ⅓ cup | Kikkoman preferred |
| Garlic Cloves 🧄 | 6 cloves | Minced, fresh preferred |
| Fresh Ginger 🌿 | 1 tbsp | Finely grated, peeled |
| Brown Sugar 🍯 | 1 tbsp | Light or dark variety |
| Sesame Oil 🫒 | 1 tbsp | Toasted sesame flavor |
| Diamond Crystal Kosher Salt 🧂 | 1 tsp | Fine grain preferred |
| Freshly Ground Black Pepper 🌶️ | ½ tsp | Coarsely ground |
| Cornstarch 🌾 | 2 tbsp | For crispy coating |
| Sesame Seeds 🌰 | 1 tbsp | Toasted for garnish |
| Lemon Wedges 🍋 | 2 whole | For serving |
The beef is everything here. Flank steak delivers that perfect balance of tenderness and texture, but sirloin or top round work too. Slice it thinly against the grain for maximum tenderness—about 1/4-inch thick strips. I grab mine from Whole Foods or the butcher counter at Trader Joe's—they always have it pre-cut for convenience. Look for bright red meat with good marbling; that's your flavor indicator. If you're using a whole cut, freeze it for 20 minutes before slicing for cleaner cuts.
No soy sauce? Coconut aminos works in a pinch, though it's sweeter. Fresh ginger is ideal, but ground ginger at half the amount gets you close. The cornstarch is non-negotiable for that crispy crust—arrowroot powder works too if you're avoiding gluten. Sesame seeds? Toast them in a dry pan for 30 seconds until golden—worth the extra minute. For extra depth, add a 1/2 teaspoon of smoked paprika to the marinade. And trust me, the high-heat oven finish (475°F) is what creates that perfect crispy texture without frying.
Marinate the beef for at least 30 minutes—overnight works best. Store any unused marinade in the fridge for up to 3 days or freeze for 3 months. The cooked strips reheat beautifully—just 5 minutes at 350°F on a wire rack. I portion mine into single-serving containers for easy meal prep. These keep 4 days in the fridge or 2 months frozen. Garnish with fresh herbs or extra sesame seeds right before serving—that's when they taste freshest.
Why You'll Love This Recipe
- One-Pan Magic: I swear by this recipe when I’m too tired to scrub pots. Just toss the sliced flank steak on a sheet pan with olive oil, soy sauce, and minced garlic—no bowls, no mess. The oven does all the work while I drink my coffee.
- Umami Bomb: That low-sodium soy sauce and fresh ginger? It’s like a flavor explosion without the salt overload. The strips caramelize just enough to get this perfect chewy-crisp texture that disappears faster than my willpower.
- Lunchbox Hero: Between us, these strips are my secret weapon for packed lunches. They stay tender for days, and I’ll admit—I’ve been known to sneak a few cold ones straight from the fridge. (Don’t tell my dietitian.)
- Budget Flex: Flank steak stretches further than you’d think, and a little olive oil goes a long way. Honestly, I’ve made this recipe feed four for under $15, and the leftovers? They’re the reason I don’t order takeout.
Step-by-step instructions for crispy-crusted, juicy-core beef strips
Here's how to transform simple flank steak into irresistible, restaurant-quality bites with that perfect crispy crust and tender interior.
Prep the Flank Steak for Maximum Tenderness
Slice the 1 lb flank steak against the grain into ¼-inch thick strips. This is absolutely critical—cutting against the grain shortens the muscle fibers, making each bite more tender. I like to use a sharp boning knife for clean cuts, working carefully to keep the strips uniform in size.
Transfer the sliced beef to a large bowl and add the 0.33 cup low-sodium soy sauce, 1 tbsp brown sugar, and 1 tbsp sesame oil. Toss everything together with your hands, making sure each strip gets coated in the marinade. The sugar will help caramelize during baking, while the soy sauce adds depth of flavor. Let this marinate for at least 15 minutes at room temperature—this ensures even cooking and maximum flavor penetration.
Create the Crispy Cornstarch Coating
In a separate shallow dish, combine the 2 tbsp cornstarch, 1 tsp diamond crystal kosher salt, and 0.5 tsp freshly ground black pepper. The cornstarch is key here—it creates that irresistible crispy crust while keeping the interior juicy. Add the marinated beef strips to the dish and toss gently to coat evenly on all sides.
I like to press the strips lightly into the cornstarch mixture to ensure complete coverage. This step is what gives these beef strips their signature texture—crispy on the outside, perfectly tender on the inside. Don't skip this coating, as it makes all the difference in the final result.
Build the Flavor-Packed Marinade
While the beef rests, prepare the marinade by combining the 0.25 cup extra-virgin olive oil, 6 cloves minced garlic, 1 tbsp finely grated fresh ginger, and 1 tbsp sesame oil in a small bowl. Whisk everything together until fully emulsified. The olive oil provides richness while the garlic and ginger add aromatic depth that will infuse the beef during baking.
This marinade is what transforms simple beef strips into something extraordinary. The combination of fresh ginger and garlic creates a bright, complex flavor profile that pairs perfectly with the soy-based marinade. Let this mixture sit for a moment to allow the aromatics to meld together before using.
Bake to Crispy Perfection
Preheat your oven to 425°F and line a baking sheet with parchment paper. Arrange the cornstarch-coated beef strips in a single layer on the prepared sheet, leaving about ½ inch between each piece. This spacing ensures even browning and crisping.
Drizzle the prepared marinade evenly over the beef strips, then bake for 15-18 minutes until the edges are deep golden brown and the internal temperature reaches 145°F (measured with an instant-read thermometer). The strips should be crispy on the outside with a juicy, pink center. I recommend checking at the 15-minute mark—every oven runs slightly differently, so this gives you a good starting point.
Finish and Serve with Zesty Garnishes
Remove the beef strips from the oven and immediately sprinkle with 1 tbsp toasted sesame seeds. The toasted sesame adds a nutty crunch that complements the crispy crust beautifully. Let the strips rest for 2-3 minutes before serving—this brief rest allows any residual juices to redistribute, ensuring each bite is as moist as possible.
Serve the crispy beef strips with the 2 whole lemon wedges on the side. The bright acidity of the lemon cuts through the richness of the beef and adds a refreshing contrast. These bites are perfect for appetizers, tacos, or even as a main course with a simple side salad. The combination of textures—crispy, tender, and nutty—makes them absolutely irresistible!
Pro Tips For Making Baked Beef Strips
- Slice Against the Grain: Flank steak’s muscle fibers run diagonally—cutting perpendicular to them gives you tender strips every time. Grab a sharp knife and angle those slices at 45 degrees; you’ll feel the resistance, and that’s when you know you’re doing it right.
- Marinate Overnight (No Excuses): I used to rush this, thinking 30 minutes would do. Wrong. Flank steak needs at least 8 hours in the fridge with soy sauce, olive oil, and minced ginger/garlic to break down those tough fibers. Trust me, the difference is night and day—especially if you’re using a cheaper cut.
- Don’t Overcrowd the Pan: If you’re searing strips in batches, resist the urge to pile them high. A crowded pan steams the meat instead of browning it, and you’ll end up with soggy edges. Work in single layers, and if needed, make two trips to the stove—your strips will thank you with crispy edges.
- Use a Meat Thermometer: Flank steak’s safe zone is 130–135°F for medium-rare, but guessing leads to dryness or undercooked bites. Stick that probe in the thickest strip—when it hits temp, pull it out immediately. The residual heat will carry it to perfect doneness while you plate. (Yes, even if you’re impatient like me.)
Make-ahead tips for this recipe
Marinade Prep Ahead
Prep the marinade up to 3 days in advance and store it in an airtight container in the fridge. I like to keep it in a small mason jar for easy pouring later. The flavors actually deepen overnight, so your beef strips will taste even more complex. Just
Beef Prep Timeline
Slice the beef strips and marinate them 1-2 hours ahead of time for maximum flavor infusion. Store them in a sealed container with the marinade in the fridge. When ready to cook, let them sit at room temperature for 15-20 minutes before baking. This ensures even cooking and that perfect crispy crust. I often prep everything the night before so I can enjoy these delicious strips with minimal morning effort. ⏰
Freezer-Friendly Strips
Cook the beef strips ahead and store them in the freezer for up to 2 months. Portion them into single-serving containers with a sprinkle of sesame seeds to maintain freshness. When reheating, spread them on a wire rack and bake at 350°F for 5-7 minutes to restore that crispy texture. The cornstarch coating helps maintain crispiness even after freezing. Perfect for busy weeknights! ❄️
Batch Cooking Tips
Double the recipe and bake everything at once for efficient meal prep. Store the cooked strips in airtight containers with parchment paper between layers to prevent sticking. These reheat beautifully—just pop them in the oven at 350°F for 10 minutes with a splash of water or broth to refresh the crispiness. I make two batches every Sunday for easy lunches all week. 💪
Garnish Storage
Toast the sesame seeds ahead of time and store them in a small jar at room temperature. Fresh lemon wedges keep in the fridge for 3-4 days—just squeeze them right before serving to maintain brightness. I also like to chop fresh cilantro or green onions ahead for quick garnishing. Keeping garnishes prepped makes serving these beef strips a breeze. 🍋
Reheating for Maximum Crisp
For the crispiest reheated strips, use a wire rack on a baking sheet instead of a plate. Bake at 400°F for 5-7 minutes until golden again. A quick spray with olive oil before reheating helps restore that perfect texture. Avoid microwaving—it turns the strips soggy. I find this method works best for maintaining that restaurant-quality crunch. 🔥
Nutrition facts
Frequently asked questions
Can I use different cuts of beef for this recipe?
While flank steak is ideal, you can also use sirloin, top round, or even chicken thighs for a similar texture. The key is slicing against the grain into ¼-inch thick strips. For leaner cuts like top round, marinate for 30-60 minutes to ensure tenderness. Avoid using pre-sliced deli beef—it's too thin and won't hold up during baking.
Why are my beef strips tough instead of tender?
This usually happens when you slice with the grain instead of against it, or if the strips are too thick (over ¼-inch). Always slice against the grain to shorten muscle fibers, and use a sharp knife for clean cuts. Also, don't overcook—remove them when the internal temp hits 145°F (they'll carryover cook to 150°F).
Can I make this recipe in an air fryer?
Yes! Preheat the air fryer to 400°F and cook the cornstarch-coated strips for 8-10 minutes, shaking the basket halfway. The air fryer gives an even crispier texture than the oven. Just reduce the marinade time to 10 minutes since air fryers cook faster. Spray with olive oil before air frying for extra browning.
What's the best way to store leftovers?
Store cooked strips in an airtight container with parchment paper between layers to maintain crispiness. They keep for 4 days in the fridge. For longer storage, freeze for up to 2 months. To reheat, place on a wire rack and bake at 350°F for 5-7 minutes—this restores the crispy texture better than microwaving.
Can I make this gluten-free?
Yes! Simply replace the cornstarch with arrowroot powder or tapioca starch for the crispy coating. Also check your soy sauce—opt for tamari or a certified gluten-free brand. The rest of the recipe remains the same, and you'll still get that perfect crispy texture while keeping it gluten-free.