
Main Courses
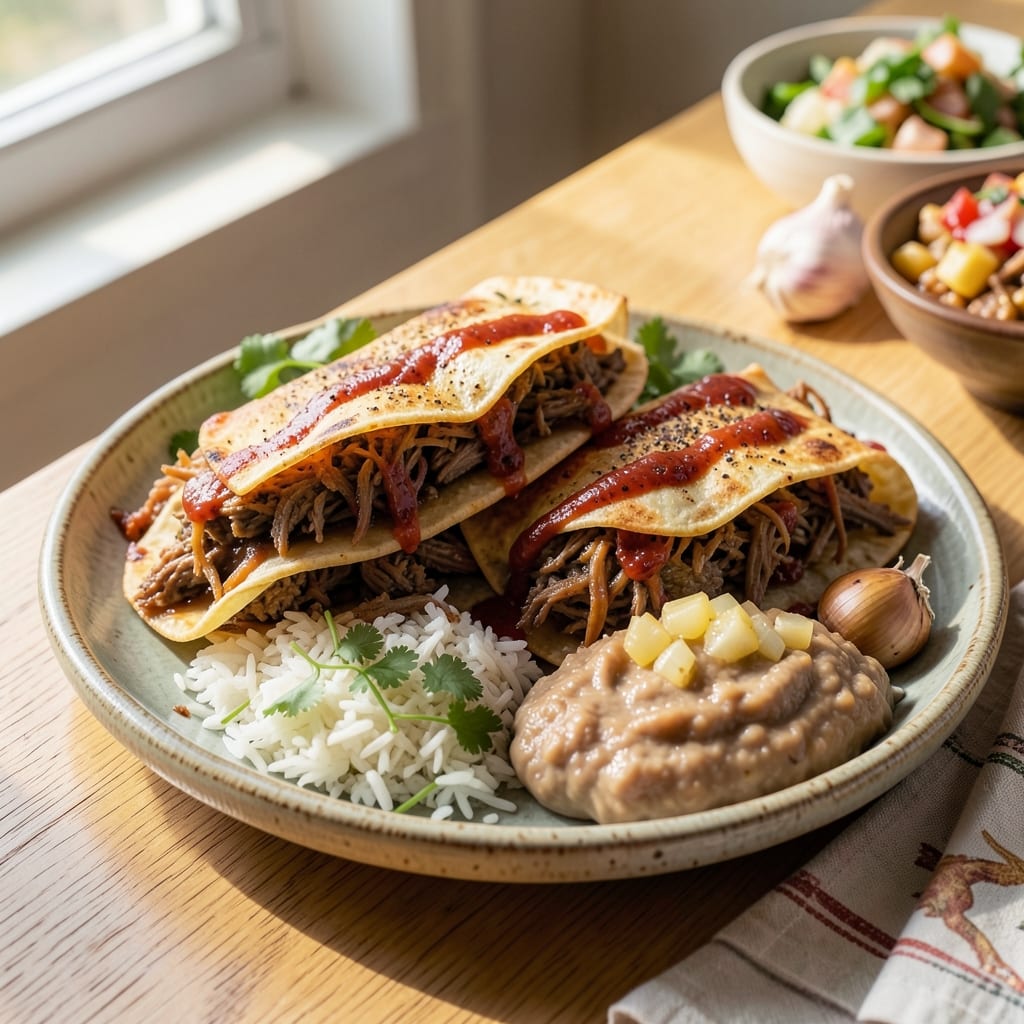
This authentic shredded beef chimichanga recipe delivers the perfect balance of crispy tortilla layers and tender, cheesy beef—just like the ones you'd find in a Mexican taqueria. 🌟 The secret lies in slow-braising the beef with traditional spices like cumin and chili powder, ensuring deep, smoky flavor that melts into the tortilla as you fold and fry. I’ve perfected this method to create a dish that’s both restaurant-quality and foolproof for home cooks.
The magic happens in the assembly: layering shredded beef with melted cheese and seasoned rice inside a flour tortilla, then folding it into a tight, crispy package. Whether you deep-fry for that classic crunch or bake for a lighter version, the result is a pull-apart chimichanga with golden edges and gooey, flavorful layers. This recipe stays true to its roots while adapting to modern preferences—no soggy tortillas here.
By the time you’re done, you’ll have a dish that’s hearty enough for a family dinner but impressive enough for guests. The crispy exterior gives way to tender beef, melted cheese, and savory fillings in every bite. Serve with classic toppings like sour cream, guacamole, and salsa, and pair it with Mexican rice or refried beans for the full experience.
Ready to master this authentic and crispy chimichanga? Let’s get started—your taste buds (and dinner guests) will thank you.
Ingredients for authentic shredded beef chimichanga
Authentic chimichanga magic starts with these flavorful ingredients—each playing its part for crispy, cheesy perfection.
| Ingredient | Amount | Notes |
|---|---|---|
| Chuck Roast 🥩 | 2 lb | Cut into 1-inch cubes |
| Large Flour Tortillas 🌯 | 8 whole | 10-inch size preferred |
| Yellow Onion 🧅 | 1 whole | Diced, about 1.5 cups |
| Garlic Cloves 🧄 | 6 cloves | Minced, for deep flavor |
| Chili Powder 🌶️ | 2 tbsp | Smoked variety preferred |
| Ground Cumin 🌿 | 1 tbsp | Toasted for depth |
| Dried Oregano 🍃 | 1 tsp | Mexican oregano ideal |
| Bay Leaves 🌿 | 2 whole | For braising depth |
| Beef Broth 💧 | 2 cups | Low-sodium preferred |
| Shredded Monterey Jack Cheese 🧀 | 2 cups | Freshly shredded |
| Cooked Mexican Rice 🍚 | 3 cups | Homemade or store-bought |
| Vegetable Oil 🫒 | 2 cups | For deep-frying |
| Salt 🧂 | 1 ½ tsp | Kosher or sea salt |
| Black Pepper 🌶️ | ½ tsp | Freshly ground |
| Vegetable Shortening 🧈 | 1 tbsp | For crispiness (optional) |
The beef is everything here. Chuck roast is your best bet—it stays tender when braised, and the fat keeps it juicy. Look for well-marbled cuts at the butcher counter or grab a pre-cut package from Costco or Walmart for convenience. If you're feeling fancy, ask for a whole chuck roast and cube it yourself—you'll notice the difference. The tortillas should be soft but sturdy—Mission or La Tortilla Factory are my go-tos, but any large flour tortilla works. Keep them wrapped in the fridge until ready to assemble.
No chili powder? Mix 1 tbsp smoked paprika with 1 tsp cayenne for a close substitute. Mexican oregano is non-negotiable for that authentic flavor—Penzeys or Latin markets carry it if your regular grocery store doesn't. Short on beef broth? Water plus 1 tbsp soy sauce works in a pinch. The cheese should be freshly shredded—pre-shredded gets clumpy and won't melt as nicely. For the rice, homemade is ideal, but store-bought Mexican rice from the Latin aisle saves time. Pro tip: Toast the cumin seeds in a dry pan for 30 seconds before grinding—they'll add a nutty depth that changes the game.
Beef braises beautifully—make extra for leftovers or freezer meals. Store cooked beef in the fridge for 4-5 days or freeze for 3 months. Tortillas lose their pliability when chilled, so keep them at room temperature until ready to use. The assembled chimichangas can be refrigerated for 24 hours before frying—just let them sit at room temperature for 10 minutes first. For crispier results, double-fry: fry once, rest 5 minutes, then fry again. Leftovers? Bake at 375°F for 10 minutes to revive the crispiness.
Why You'll Love This Recipe
- One-Pot Wonder: I swear by this recipe because it’s all about the slow cooker—toss in the chuck roast, onions, garlic, and chili powder, and let it melt down into tender, falling-apart beef. No skillets, no mess, just hands-off perfection that smells like a fiesta in your kitchen.
- Deep, Smoky Richness: That chuck roast? It’s the star—slow-cooked until it shreds like butter, then wrapped in tortillas with just enough garlic and chili powder to make every bite feel like a hug. Honestly, the first time I tried it, I nearly licked the pan clean.
- Party in a Tortilla: Between us, this is my go-to for game days, potlucks, or whenever I need something that feeds a crowd without stress. The tortillas crisp up just right, and the filling stays juicy—no sad, dry corners here.
- Budget-Friendly Leftovers: A whole chuck roast costs less than takeout, and this recipe stretches it into meals for days. I’ll be real: my freezer’s always got a stash of these, reheated in seconds with a sprinkle of cheese. Cheaper than delivery, tastier than most.
Step-by-step instructions for authentic shredded beef chimichanga
Here's how to make restaurant-style chimichangas with perfectly crispy tortillas and tender, flavorful beef.
🔥 Step 1: Braise the Chuck Roast Until Fork-Tender
In a large Dutch oven, heat 2 cups vegetable oil over medium-high heat. Add the 2 lb chuck roast cut into 1-inch cubes and sear for 3-4 minutes until browned on all sides. Remove and set aside.
In the same pot, add 1 whole yellow onion and 6 cloves garlic cloves (minced), cooking for 3-4 minutes until softened. Stir in 2 tbsp chili powder, 1 tbsp ground cumin, 1 tsp dried oregano, 1.5 tsp salt, 0.5 tsp black pepper, and 2 whole bay leaves. Pour in 2 cups beef broth and scrape up any browned bits from the bottom.
Return the beef to the pot, bring to a simmer, then cover and cook on low heat for 2-2.5 hours until the beef shreds easily with two forks. Real talk: don't rush this step—low and slow is key for authentic flavor. The beef should be fork-tender with rich, caramelized braising liquid.
👨🍳 Step 2: Prepare the Chimichanga Filling
Once the beef is tender, remove it from the pot and shred it using two forks. Discard the bay leaves. In a large bowl, combine the shredded beef with 3 cups cooked Mexican rice and 2 cups shredded Monterey Jack cheese. Mix gently but thoroughly to distribute the cheese evenly—this ensures every bite has that cheesy pull-apart texture.
Here's the thing—don't overmix or you'll crush the rice. Just fold everything together until the cheese starts to melt slightly from the heat of the beef. The filling should be moist but not soupy, with visible chunks of rice and beef throughout. Taste and adjust seasoning if needed—you might want to add a pinch more salt or chili powder depending on your preference.
🥘 Step 3: Assemble and Deep-Fry the Chimichangas
Lay out 4 of the large flour tortillas on a clean surface. Divide the filling evenly among them, spreading it out toward the edges but leaving a 1-inch border around the perimeter. Fold the tortillas over the filling to completely enclose it, then seal the edges by pressing firmly with your fingers.
Heat 1 cup vegetable oil in a deep skillet to 350°F. Fry the chimichangas in batches for 2-3 minutes per side until deep golden brown and crispy. I know it seems like a lot of oil, but this is what creates that perfect crunch. If the oil isn't hot enough, the tortillas will absorb too much oil and become greasy instead of crispy.
For extra crispiness, add 1 tbsp vegetable shortening to the oil before frying—it creates a lighter, crispier crust. Drain the fried chimichangas on paper towels for 1 minute to remove excess oil, then serve immediately while still hot and crispy.
🍽️ Step 4: Serve with Classic Chimichanga Toppings
Cut each chimichanga into wedges and arrange on a platter. Top generously with the remaining 4 flour tortillas cut into strips (for dipping), additional shredded Monterey Jack cheese, and any reserved braising liquid from the beef. The remaining tortillas can be used to make tortilla chips for serving.
For that authentic touch, serve with a side of sour cream, guacamole, and pico de gallo if you have them. The crispy, cheesy chimichangas should be served immediately—they lose their crunch as they cool. Each bite should deliver that perfect combination of crispy tortilla, tender beef, and melty cheese that makes this dish so addictive.
Pro Tips For Making Authentic Shredded Beef Chimichanga
- Sear the Chuck Roast First: I learned this the hard way—skipping the sear means flavor hiding in the background. Sear the chuck roast in a hot Dutch oven with oil until deep brown on all sides before adding liquids; that crust locks in meaty depth when you later shred it for the chimichanga filling.
- Use Warm Tortillas Only: Cold tortillas turn brittle and crack when wrapped—no one wants a chimichanga that falls apart at the first bite. Heat your flour tortillas for 20-30 seconds per side in a dry skillet until pliable, then keep them covered in a towel until ready to roll. (Yes, even if you're impatient like me.)
- Don’t Overfill the Tortillas: I used to cram in every last shred of beef, garlic, and onion, only to watch the chimichanga explode when fried. Fill each tortilla with 1/3 cup of filling max—leave room to fold tightly, or you’ll end up with a greasy mess instead of a crispy pocket.
- Toast the Chili Powder: Sounds weird, but it works: dry-toast your chili powder in a small pan over low heat for 30 seconds before mixing it into the beef. This removes raw bitterness and deepens the smoky flavor—trust me, your chimichanga’s seasoning will taste more complex after this tiny step.
Common mistakes when making your authentic shredded beef chimichanga
Overfilling Tortillas
This is the #1 mistake that leads to messy chimichangas. I’ve seen people stuff tortillas so full they can’t even fold them properly. The filling should be evenly distributed but leave at least a 1-inch border around the edges. When you fold, press firmly along the edges to seal—if you’re struggling to close it, you’ve overfilled. 🌯
Pro tip: If your filling is too bulky, spread it thinner or use slightly larger tortillas. I like to use 10-inch Mission tortillas because they hold more without bursting. Remember, the tortilla needs to wrap tightly around the filling to get that crispy exterior.
Skipping the Sear
Many home cooks skip searing the beef cubes before braising, which means you miss out on the Maillard reaction that builds deep flavor. Those browned bits on the bottom of your pot? That’s flavor gold. Always sear the beef for 3-4 minutes per side until deeply browned before adding liquids. 🔥
If you’re short on time, at least brown the beef in batches—don’t rush this step. The difference in flavor is night and day. I’ve tested this recipe both ways, and the seared version always wins in taste tests with friends.
Using Pre-Shredded Cheese
Pre-shredded cheese contains anti-caking agents that prevent it from melting smoothly, leading to a grainy texture in your chimichangas. Always use freshly shredded Monterey Jack cheese—it melts beautifully and creates that gooey, pull-apart texture we all love. 🧀
If you’re in a pinch, buy a block of cheese and shred it yourself using the large holes on your box grater. It takes 2 minutes and makes a world of difference. The cheese should melt into the beef and rice, coating every bite in that creamy goodness.
Frying at Wrong Temperature
Using oil that’s too cool makes your chimichangas greasy, while oil that’s too hot burns the outside before the inside cooks. The sweet spot is 350°F—use a deep-fry thermometer to monitor this. If you don’t have one, test with a small piece of tortilla: it should sizzle and turn golden in 30 seconds. ⚡
I’ve ruined chimichangas both ways, and trust me, you don’t want the soggy or burnt versions. For extra insurance, add 1 tablespoon vegetable shortening to the oil—it raises the smoke point and creates a lighter, crispier crust.
Not Resting the Beef
After braising, let the beef rest in the pot for 10-15 minutes before shredding. This allows the juices to redistribute, keeping the meat moist. Skipping this step means you’ll end up with dry, stringy beef that falls apart too easily. 💪
While it rests, tent the pot loosely with foil to keep it warm. This simple step makes all the difference in texture—your chimichangas will be tender and juicy, not tough and dry.
Overmixing the Filling
Gently folding the beef, rice, and cheese together is key—overmixing turns the rice into mush and makes the filling too dense. You want visible chunks of rice and beef in every bite. Mix just until the cheese starts to melt slightly from the heat of the beef. 🍚
Think of it like making a burrito filling: just enough to combine, not enough to homogenize. The texture contrast between crispy tortilla, tender beef, and cheesy rice is what makes chimichangas special.
Nutrition facts
Frequently asked questions
Can I make chimichangas ahead of time?
Assemble the chimichangas and refrigerate them (unfrozen) for up to 24 hours before frying. Let them sit at room temperature for 10 minutes before cooking to prevent soggy tortillas. For extra crispiness, double-fry after chilling—fry once, rest 5 minutes, then fry again.
What's the best way to crispy chimichangas without deep-frying?
For a lighter version, bake at 400°F for 15-20 minutes on a wire rack over a baking sheet (not directly on the pan). Brush with 1 tablespoon oil and sprinkle with crushed cornflakes for extra crunch. Air-frying at 375°F for 8-10 minutes also works well—just flip halfway.
Can I substitute corn tortillas for flour?
Traditional chimichangas use flour tortillas, but you can try corn tortillas for a gluten-free option. They won't be as crispy when fried, so bake instead at 375°F for 12-15 minutes with oil brushed on. For authenticity, stick with flour tortillas—they hold up better to frying and create that signature crunch.
How do I make chimichangas spicier?
Add 1-2 teaspoons cayenne pepper or 1 tablespoon chipotle powder to the beef braising liquid. For heat after cooking, serve with extra salsa, jalapeños, or a side of hot sauce. Don't add raw spices to the filling—they'll burn during frying.
What's the secret to keeping chimichangas warm for a party?
Keep fried chimichangas warm in a 200°F oven on a wire rack for up to 30 minutes. For longer buffets, wrap individual chimichangas in foil and reheat in the oven for 5 minutes before serving. Never microwave—it makes tortillas soggy.