
Main Courses
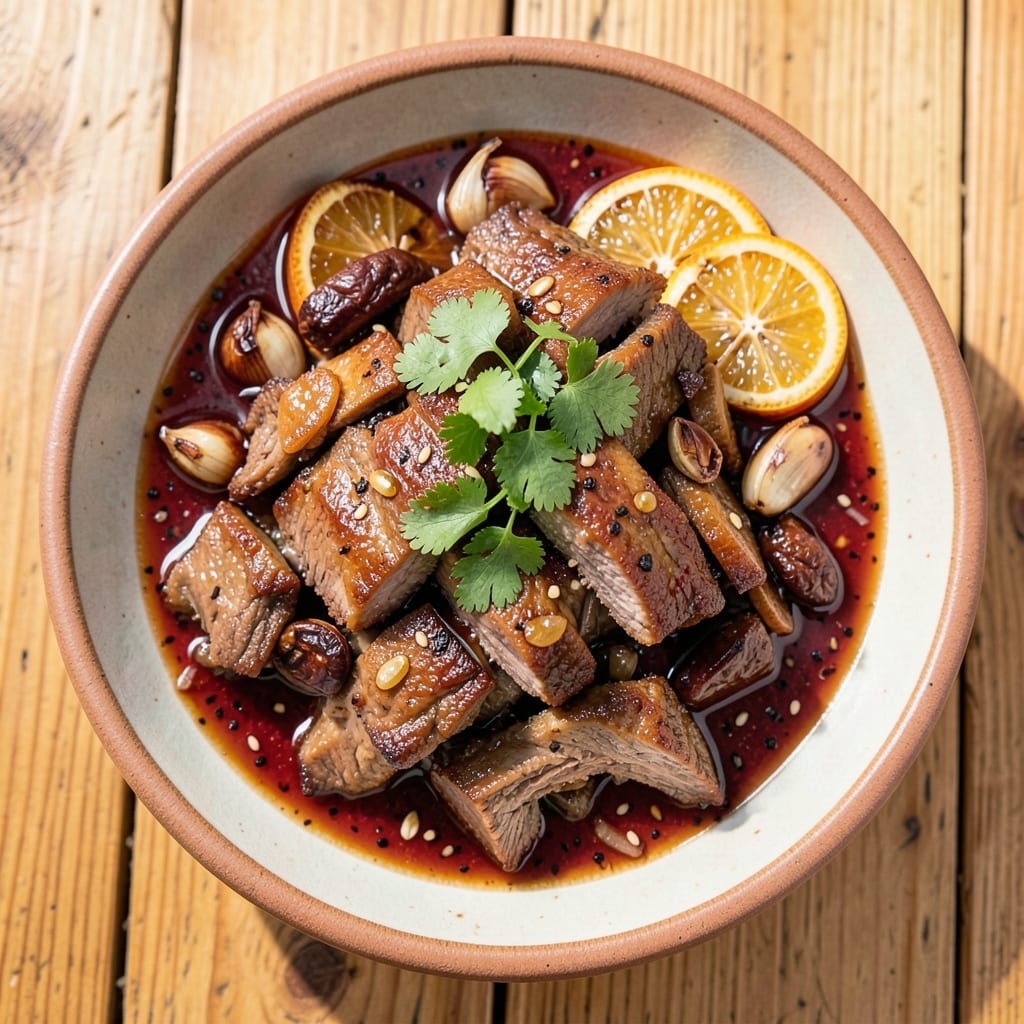
This authentic Mexican beef carnitas recipe transforms tough chuck roast into melt-in-your-mouth, crispy-edged bites with just the right citrus tang. The secret lies in slow-braising the meat until tender, then finishing it on high heat for that signature crunch—exactly like the carnitas you’d find at a taqueria in Oaxaca. I’ve perfected this technique over years of testing, and the results are worth every minute of hands-off cooking time.
What sets these carnitas apart is the balance of flavors: smoky chipotle, bright orange juice, and aromatic spices that penetrate the meat during the long cook. The slow braising breaks down collagen for fork-tender texture, while the final crisping in a hot skillet creates those irresistible golden edges. This isn’t just another pulled pork substitute—it’s a dish that captures the soul of Mexican street food.
By the time you’re done, you’ll have perfectly shredded beef that’s juicy inside and crispy outside, ready to be piled high on tacos, burritos, or served with warm tortillas for dipping. The citrus-marinated meat stays flavorful even after reheating, making this an ideal make-ahead recipe for game day or family gatherings. Trust me, once you taste the difference between this and store-bought, you’ll never go back.
Serve with classic sides like cilantro-lime rice, charro beans, and pickled onions to complete the experience. The crispy carnitas will have everyone reaching for seconds—guaranteed. Let’s get started on making these restaurant-quality bites at home.
Ingredients for authentic mexican beef carnitas
Authentic Mexican flavors start with these simple yet powerful ingredients for carnitas that taste like Oaxaca.
| Ingredient | Amount | Notes |
|---|---|---|
| Chuck Roast 🥩 | 3 lb | Well-marbled, cut into 2-inch chunks |
| Orange Juice 🍊 | 1 cup | Freshly squeezed, no pulp |
| Chipotle Peppers in Adobo 🌶️ | 2 tbsp | Minced, plus 1 tbsp sauce |
| Guajillo Chiles 🌶️ | 2 whole | Stems/seeds removed, toasted |
| Garlic Cloves 🧄 | 6 cloves | Peeled, roughly chopped |
| White Onion 🧅 | 1 whole | Quartered, skin on |
| Bay Leaves 🌿 | 2 whole | Dried, standard size |
| Ground Cumin 🌿 | 1 tbsp | Freshly toasted preferred |
| Oregano 🍃 | 1 tbsp | Mexican oregano if possible |
| Salt 🧂 | 2 tsp | Kosher or sea salt |
| Black Peppercorns 🌶️ | ½ tsp | Freshly cracked |
| Vegetable Oil 🫒 | 2 tbsp | High smoke point |
| Fresh Cilantro 🌿 | ¼ cup | Chopped, for garnish |
| Lime 🍋 | 1 whole | Juiced, for serving |
The chuck roast is non-negotiable—its fat marbling keeps the meat juicy during the long braise. Look for cuts labeled 'chuck roast' at your butcher or the meat department; avoid anything labeled 'round' or 'sirloin'. For the chipotle peppers, Penzeys or Mexican markets carry the best quality, but any canned adobo sauce works in a pinch. Toasting the guajillo chiles brings out their depth—just hold them over an open flame for 20 seconds per side until fragrant. The orange juice should be freshly squeezed; store-bought isn't the same. Save the pulp for garnish if you're feeling fancy.
No chipotle peppers in adobo? Substitute 1 tbsp smoked paprika plus 1/2 tsp cayenne for heat, though you'll lose that smoky depth. Running short on guajillo chiles? Ancho chiles work too, but reduce to 1 chile and add 1/2 tsp sugar to balance. The Mexican oregano is worth hunting down—Latin markets or specialty stores usually carry it. Regular oregano will work, but it's not the same. For the garlic, roast it first (wrap in foil, bake at 400°F for 10 minutes) to mellow its sharpness. The vegetable oil is just for crisping—any neutral oil works, but avocado oil has a higher smoke point if you're worried about burning.
This recipe makes enough for leftovers—double the batch if you're feeding a crowd. Store cooked carnitas in the fridge for 4 days or freeze for 3 months. Reheat in a skillet with a splash of water or broth to revive that crispy texture. The citrus marinade keeps well in the fridge for 3 days, so make it ahead. For serving, warm tortillas in a dry skillet for 20 seconds per side—cold tortillas make everyone sad.
Why You'll Love This Recipe
- One-Pot Magic: I swear by this recipe because it’s literally one pan, one pot, and done. Chuck roast goes in raw, comes out tender and crispy—no flipping, no fussing, just that smoky-orange tang from the chipotle and guajillo simmering together.
- Flavor Bomb: Between us, this isn’t your average beef dish. The orange juice cuts through the richness of the chuck, while the adobo and guajillo give it that real Mexican cantina taste—deep, smoky, and just a little sweet. It’s the kind of flavor that makes you close your eyes and sigh.
- Meal Prep MVP: I make a double batch every Sunday because it’s that good cold. Toss it into tacos, burrito bowls, or even over rice the next day—no reheating tricks needed. Honestly, my lunchbox thanks me.
- Budget Stretch: Chuck roast is cheap, and this recipe feeds everyone. I’ve served it to 10 people for under $15, and no one ever guesses it’s not a fancy restaurant dish. That’s the power of slow-cooked, spiced beef—it’s humble but ridiculously satisfying.
Step-by-step instructions for authentic Mexican beef carnitas
Here's how to make restaurant-quality carnitas with tender, juicy beef and crispy edges.
Prepare the Chili Paste and Aromatics
Toast the 2 whole Guajillo chiles in a dry skillet over medium heat for 30 seconds per side until fragrant. Immediately transfer to a bowl and cover with the 1 cup orange juice to soften. Let them soak for 15 minutes while you prepare the rest.
In a blender, combine the softened chiles (with their soaking liquid), 2 tbsp chipotle peppers in adobo (including 1 tbsp of the sauce), 6 cloves garlic, 1 tbsp ground cumin, 1 tbsp oregano, 2 tsp salt, and 0.5 tsp cracked black peppercorns. Blend until smooth, adding a splash of orange juice if needed to help emulsify. This paste is the flavor foundation of your carnitas.
Brown the Beef and Build the Braising Liquid
Heat 2 tbsp vegetable oil in a Dutch oven over medium-high heat. Working in batches if needed, sear the 3 lb chuck roast (cut into 2-inch chunks) until deeply browned on all sides, about 5-7 minutes total. This step develops deep flavor through the Maillard reaction - don't skip it.
Remove the beef and set aside. In the same pot, add the quartered white onion (skin on) and cook for 5 minutes until golden. Pour in the blended chili paste and scrape up any browned bits from the bottom. Add 2 whole bay leaves and enough water to just cover the beef, about 2 cups. Return the beef to the pot.
Braise the Beef Low and Slow
Bring the liquid to a gentle simmer, then reduce heat to maintain a bare bubble at the surface. Cover and cook for 2.5 hours, turning the beef occasionally. The meat should become fork-tender with the probe sliding in easily. If the liquid reduces too much, add small amounts of water to keep the beef submerged.
Here's the thing - patience is key. The slow cook transforms tough chuck roast into melt-in-your-mouth carnitas. You'll know it's ready when the meat easily pulls apart with two forks. Let it cool slightly in the liquid before proceeding.
Create the Crispy Exterior
Transfer the beef to a baking sheet lined with parchment paper, discarding the braising liquid. Pat the beef dry with paper towels - this step is crucial for crispiness. Spread the pieces out in a single layer, leaving space between them.
Broil on high for 8-10 minutes, turning once, until the edges are deeply browned and crispy. Watch carefully - you want that perfect contrast of tender inside and crispy outside. The beef should be hot when you serve it, so keep it close to the heat source.
Serve with Fresh Garnishes
Transfer the crispy carnitas to a serving platter and sprinkle with 0.25 cup chopped fresh cilantro. Serve immediately with lime wedges for squeezing fresh juice. The carnitas should be fork-tender with crispy edges that shatter when bitten into.
For the full experience, serve with warm corn tortillas, diced white onion, and a side of salsa verde. The citrus notes from the orange juice and lime will brighten each bite, making this carnitas truly authentic and memorable.
Pro Tips For Making Authentic Mexican Beef Carnitas
- Trim the Fat First: Chuck roast has stubborn fat layers that don’t render like brisket—slice through them with a sharp knife before braising. I learned this the hard way when my first batch turned greasy instead of crispy; now I trim just the thickest layers, leaving enough fat to self-baste the meat.
- Toast Chiles in Batches: Guajillo and chipotle peppers burn faster than you think—work in small piles over medium heat until fragrant and darkened. My grandmother swore by this, and she was right: charring them in the adobo sauce (not dry) keeps the sauce from turning bitter when rehydrating.
- Braise Low and Slow: After searing the meat, drop the heat to 275°F (135°C) and cover the pot tightly—this isn’t a race. I used to crank it up, and the meat turned tough; now I let it cook for 3–4 hours until it shreds with a fork, then crisp it later.
- Deglaze with Orange Juice Last: Save the fresh orange juice for the final 30 minutes—adding it too early dilutes the adobo’s smoky depth. Pour it in hot, then reduce until syrupy; this balances acidity and caramelizes the edges for that restaurant-style shine. (Yes, even if you’re impatient like me.)
Make-ahead tips for this recipe
Marinade Prep Ahead
Make the citrus-chipotle marinade 3 days ahead and store it in an airtight container in the fridge. The flavors meld beautifully, and you can use it for other dishes like grilled chicken or fish. Just whisk it again before using to re-emulsify. I love making extra because it keeps well for 5 days—perfect for batch cooking. 🍊
Partial Cooking Shortcut
Save time by browning the beef and building the braising liquid 1 day ahead. After searing, transfer everything to a slow cooker and cook on low for 8 hours instead of braising on the stove. The meat will be fork-tender and ready for crisping later. This is my go-to method for busy weekends. 💪
Freezer-Friendly Carnitas
Cooked carnitas freeze beautifully for 3 months if stored properly. Let them cool completely, then pack in a single layer on a tray before transferring to freezer bags. When ready to use, thaw overnight in the fridge and crisp in a skillet with 1 tbsp oil over high heat for 3-4 minutes per side. The texture stays crispy when reheated this way. ✨
Tortilla Prep Trick
Warm your tortillas in advance by wrapping them in a damp towel and microwaving for 20 seconds. This keeps them pliable and prevents cracking when loaded with carnitas. I like to set out a small basket of warm tortillas at the table so everyone can build their own tacos. Trust me, this small step makes a big difference. 🌯
Flavor Boost Hack
Add 1 tbsp lime juice and 1 tsp honey to the carnitas just before serving for an extra brightness. This works especially well if you're using leftovers. The acidity cuts through the richness while the honey adds subtle sweetness. I discovered this trick when I had leftover carnitas that needed a flavor lift. 💫
Serving Timeline
Plan to crisp the carnitas 30 minutes before serving so they stay hot and crispy. Keep them warm in a 200°F oven while you assemble tacos or prepare sides. This ensures the perfect texture when your guests are ready to eat. The last thing you want is soggy carnitas at the table! ⏰
Nutrition facts
Frequently asked questions
Can I use pork instead of beef for carnitas?
Traditional Mexican carnitas are made with pork, and you can absolutely swap beef for pork shoulder or pork butt! The cooking time will be slightly shorter (about 2 hours braising time), but the crisping method remains the same. Just be sure to use well-marbled pork for maximum juiciness.
Why does my carnitas turn out soggy instead of crispy?
Soggy carnitas usually happen when the meat isn't properly dried before crisping or if it's reheated incorrectly. Always pat the beef dry with paper towels and spread it in a single layer on the baking sheet. For reheating leftovers, use a hot skillet with 1 tbsp oil and cook for 3-4 minutes per side until crispy again.
What's the best way to store leftover carnitas?
Store cooked carnitas in an airtight container in the fridge for up to 4 days. For longer storage, freeze them for 3 months. To maintain crispiness, pack them in a single layer on a tray before transferring to freezer bags. When reheating, crisp them in a skillet over high heat with a splash of water or broth.
Can I make carnitas in a slow cooker? Yes! After browning the beef and building the braising liquid, transfer everything to a slow cooker and cook on low for 8 hours. The meat will be tender and ready for crisping later. This method is perfect for hands-off cooking on busy days. Just
How do I know when the beef is fully cooked?
The beef is done when it easily pulls apart with two forks and the internal temperature reaches 203°F. The slow braising process breaks down the collagen, making it fork-tender. If you're unsure, check the temperature with a meat thermometer for perfect results every time.